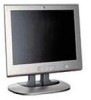
D5063H User Guide - HP Pavilion F50 15 LCD Monitor
D5063H User Guide
Related Manual Pages


Similar Questions

Hp W2207h User Guide How To Change Monitor Screen To Landscape
(Posted by nicLpo 9 years ago)

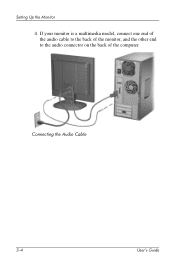
Audio Cable Connection
Please show me how to connect audio cable on HP536A
Please show me how to connect audio cable on HP536A
(Posted by sugathan33 10 years ago)

Related Terms
The following terms were also used when searching for D5063H User Guide - HP Pavilion F50 15 LCD Monitor:- d5063 driver
- d5063 drivers
- hp d5063 monitor
- d5063 monitor
- d5063h power cord
- hp d5063h monitor
- d5063h monitor
- hp d5063h driver
- d5063h dc adapter
- d5063h parts
- d5063h ac adapter
- d5063h power supply
- hp d5063h vga cable
- hp d5063h dc adapter
- 15 inch lcd color monitor d5063h
- hp d5063h manual
- power cord for d5063h
- hp d5063h parts
- hp d5063h power cord
- hp d5063h power supply
- hp d5063h specifications
- hp d5063h specs
- hp d5063h support
- hp d5063h user guide
- power adapter for d5063h
- hp f50 d5063h
- power cord for hp d5063h
- hp model d5063h
- hp monitor d5063h
- hp monitor model d5063h
- hp pavilion d5063h
- hp pavilion f50 d5063h
- lcd d5063h power cord
- model d5063h
- pavilion f50 d5063h
- d5063h power cords
- d5063 hp driver
- d5063 monitor driver
- d5063h aba
- d5063h adapter
- d5063h cord
- d5063h cords
- d5063h driver
- d5063h drivers
- d5063h hp monitor
- d5063h hp power pin
- d5063h manual
- d5063h power adapter
- hp d5063h ac adapter
- d5063h specifications
- d5063h specs
- d5063h support
- d5063h user guide
- d5063h vga cable
- hewlett packard monitor d5063h
- hp 15 inch monitor d5063h
- hp d5063 driver
- hp d5063 drivers
- hp d5063 monitor driver
- hp d5063h