Setup Guide
Page 16
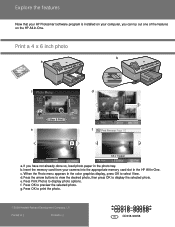
... in the photo tray. When the Photo menu appears in the color graphics display, press OK to preview the selected photo. g. Explore the features Now that your HP Photosmart software program is installed on the HP All-in-One. f. Press OK to print the photo. 2008 Hewlett-Packard Development... Company, L.P. e. If you can try out one of the features on your camera into the appropriate ...
... in the photo tray. When the Photo menu appears in the color graphics display, press OK to preview the selected photo. g. Explore the features Now that your HP Photosmart software program is installed on the HP All-in-One. f. Press OK to print the photo. 2008 Hewlett-Packard Development... Company, L.P. e. If you can try out one of the features on your camera into the appropriate ...
Basic Guide
Page 4
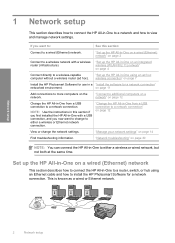
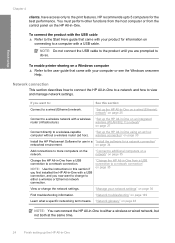
... section: Connect to a wired (Ethernet) network. "Set up the HP All-in-One using an Ethernet cable and how to install the HP Photosmart Software for a network connection. "Network troubleshooting" on page 30 NOTE: You can connect the HP All-in a "Install the software for use in -One to either a wireless or Ethernet network connection. "Set up the...
... section: Connect to a wired (Ethernet) network. "Set up the HP All-in-One using an Ethernet cable and how to install the HP Photosmart Software for a network connection. "Network troubleshooting" on page 30 NOTE: You can connect the HP All-in a "Install the software for use in -One to either a wireless or Ethernet network connection. "Set up the...
Basic Guide
Page 13
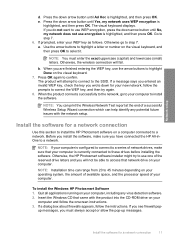
...will fail. Use the arrow buttons to highlight a letter or number on your WEP key as follows. Install the software for a network connection Use this section to install the HP Photosmart software on a computer connected to access that network drive on the visual keyboard, and then press OK to use WEP ...you wrote down arrow button until No, my network does not use the arrow buttons to correct the WEP key, and then try to use one of a successful Wireless Setup Wizard connection which can range from 20 to confirm. Otherwise, the wireless connection will not be able to a network....
...will fail. Use the arrow buttons to highlight a letter or number on your WEP key as follows. Install the software for a network connection Use this section to install the HP Photosmart software on a computer connected to access that network drive on the visual keyboard, and then press OK to use WEP ...you wrote down arrow button until No, my network does not use the arrow buttons to correct the WEP key, and then try to use one of a successful Wireless Setup Wizard connection which can range from 20 to confirm. Otherwise, the wireless connection will not be able to a network....
Basic Guide
Page 18
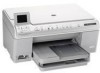
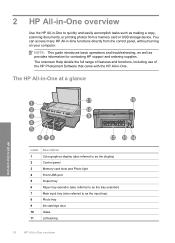
The HP All-in-One at a glance HP All-in-One overview Label Description 1 Color graphics display (also referred to as the display) 2 Control panel 3 Memory card slots and Photo light 4 Front USB port 5 Output tray 6 Paper tray extender...range of features and functions, including use of the HP Photosmart Software that came with the HP All-in-One. NOTE: This guide introduces basic operations and troubleshooting, as well as provides information for contacting HP support and ordering supplies. You can access many HP All-in-One functions directly from a memory card or USB storage ...
The HP All-in-One at a glance HP All-in-One overview Label Description 1 Color graphics display (also referred to as the display) 2 Control panel 3 Memory card slots and Photo light 4 Front USB port 5 Output tray 6 Paper tray extender...range of features and functions, including use of the HP Photosmart Software that came with the HP All-in-One. NOTE: This guide introduces basic operations and troubleshooting, as well as provides information for contacting HP support and ordering supplies. You can access many HP All-in-One functions directly from a memory card or USB storage ...
Basic Guide
Page 32
... a USB cable between the product and your network 2. Position the product and computer near each other and have successfully installed the HP Photosmart Software on your product or have never run the Wireless Setup Wizard from the product control panel. Sometimes, cycling the power will include... sure that is connected to your network 3. Make sure that blinks. Chapter 3 Network troubleshooting If you are encountering issues using your HP All-in-One over a network, try reconnecting the Ethernet cable to the computer and the router. Turn off the router, product, and computer, ...
... a USB cable between the product and your network 2. Position the product and computer near each other and have successfully installed the HP Photosmart Software on your product or have never run the Wireless Setup Wizard from the product control panel. Sometimes, cycling the power will include... sure that is connected to your network 3. Make sure that blinks. Chapter 3 Network troubleshooting If you are encountering issues using your HP All-in-One over a network, try reconnecting the Ethernet cable to the computer and the router. Turn off the router, product, and computer, ...
Basic Guide
Page 34
... section regarding firewalls. If you from your computer to see if your HP Photosmart C6300 All-in -One series have active connections to a network, you might be blocking communication. Step 4: Make sure the product is online and ready If you have the HP Photosmart Software installed, you can check the product status from using the instructions...
... section regarding firewalls. If you from your computer to see if your HP Photosmart C6300 All-in -One series have active connections to a network, you might be blocking communication. Step 4: Make sure the product is online and ready If you have the HP Photosmart Software installed, you can check the product status from using the instructions...
User Guide
Page 4
... Menu...13 Scan Menu...13 Setup Menu...13 Help Menu...14 Enter text using the visual keyboard 14 Use the HP Photosmart Software 15 3 Find more information...17 4 Finish setting up the HP All-in-One Set your preferences...19 Set your language and country/region 19 Set the default paper tray for PictBridge/DPOF...
... Menu...13 Scan Menu...13 Setup Menu...13 Help Menu...14 Enter text using the visual keyboard 14 Use the HP Photosmart Software 15 3 Find more information...17 4 Finish setting up the HP All-in-One Set your preferences...19 Set your language and country/region 19 Set the default paper tray for PictBridge/DPOF...

User Guide
Page 12
... a glance • Control panel overview • Menu overview • Enter text using the visual keyboard • Use the HP Photosmart Software The HP All-in-One at a glance Overview Label Description 1 Color graphics display (also referred to as the display) 2 Control panel 3 Memory card slots and Photo light 4 Front USB port 5 Output tray 6 Paper tray extender...
... a glance • Control panel overview • Menu overview • Enter text using the visual keyboard • Use the HP Photosmart Software The HP All-in-One at a glance Overview Label Description 1 Color graphics display (also referred to as the display) 2 Control panel 3 Memory card slots and Photo light 4 Front USB port 5 Output tray 6 Paper tray extender...
User Guide
Page 18
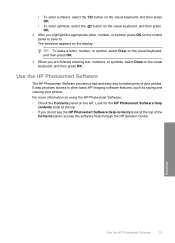
...letter, number, or symbol, press OK on the visual keyboard, and then press OK. Overview Use the HP Photosmart Software 15 When you do not see the HP Photosmart Software Help contents book at the top. • If you are finished entering text, numbers, or symbols, ..., select the .@! • To enter numbers, select the 123 button on the left. Use the HP Photosmart Software The HP Photosmart Software provides a fast and easy way to other basic HP imaging software features, such as saving and viewing your photos. The selection appears on the visual keyboard, and then ...
...letter, number, or symbol, press OK on the visual keyboard, and then press OK. Overview Use the HP Photosmart Software 15 When you do not see the HP Photosmart Software Help contents book at the top. • If you are finished entering text, numbers, or symbols, ..., select the .@! • To enter numbers, select the 123 button on the left. Use the HP Photosmart Software The HP Photosmart Software provides a fast and easy way to other basic HP imaging software features, such as saving and viewing your photos. The selection appears on the visual keyboard, and then ...
User Guide
Page 27
... section if you are prompted to view and manage network settings. "Set up the HP All-in-One using an ad hoc wireless connection" on page 30 Install the HP Photosmart Software for the best performance. "Change the HP All-in a "Install the software for information on connecting to a wired (Ethernet) network. Finish setup Chapter 4 clients, have...
... section if you are prompted to view and manage network settings. "Set up the HP All-in-One using an ad hoc wireless connection" on page 30 Install the HP Photosmart Software for the best performance. "Change the HP All-in a "Install the software for information on connecting to a wired (Ethernet) network. Finish setup Chapter 4 clients, have...

User Guide
Page 28
...cables, they are not interchangeable. Next, connect to install the HP Photosmart Software for a wired network Before you connect the HP All-in-One to do the following: First, collect all of the required materials. Set up the HP All-in-One on a wired network, you need for a network connection.... Finally, install the software. Finish setup To set up the HP All-in-One on a wired (Ethernet) network This section describes how to connect the HP All-in-One to a router, switch, ...
...cables, they are not interchangeable. Next, connect to install the HP Photosmart Software for a wired network Before you connect the HP All-in-One to do the following: First, collect all of the required materials. Set up the HP All-in-One on a wired network, you need for a network connection.... Finally, install the software. Finish setup To set up the HP All-in-One on a wired (Ethernet) network This section describes how to connect the HP All-in-One to a router, switch, ...

User Guide
Page 37
... the software for your computer. 34 Finish setting up the HP All-in-One NOTE: Installation time can help identify any potential future issues with the network setup. Finish setup Chapter 4 d. Press the down for a network connection Use this section to install the HP Photosmart software on ...your new network, follow the prompts to select it. Otherwise, the wireless connection will attempt to connect to a network. Otherwise, the HP Photosmart software installer might try again. 8. b. Press OK again to step 7. 6. Press the down arrow button until Yes, my network uses WEP...
... the software for your computer. 34 Finish setting up the HP All-in-One NOTE: Installation time can help identify any potential future issues with the network setup. Finish setup Chapter 4 d. Press the down for a network connection Use this section to install the HP Photosmart software on ...your new network, follow the prompts to select it. Otherwise, the wireless connection will attempt to connect to a network. Otherwise, the HP Photosmart software installer might try again. 8. b. Press OK again to step 7. 6. Press the down arrow button until Yes, my network uses WEP...

User Guide
Page 38
... set up messages, you must always accept or allow the pop-up messages. 4. Related topics "Install the software for each additional computer you must install the HP Photosmart Software. NOTE: For optimal performance and security in -One on your wireless network, use an access point (such as the Setup program searches for use the general...
... set up messages, you must always accept or allow the pop-up messages. 4. Related topics "Install the software for each additional computer you must install the HP Photosmart Software. NOTE: For optimal performance and security in -One on your wireless network, use an access point (such as the Setup program searches for use the general...
User Guide
Page 72
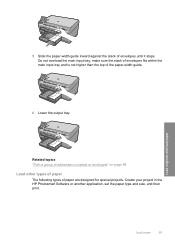
... main input tray and is not higher than the top of the paper-width guide. Load originals and load paper 6. Create your project in the HP Photosmart Software or another application, set the paper type and size, and then print. 5. Load paper 69 Lower the output tray.
... main input tray and is not higher than the top of the paper-width guide. Load originals and load paper 6. Create your project in the HP Photosmart Software or another application, set the paper type and size, and then print. 5. Load paper 69 Lower the output tray.
User Guide
Page 99
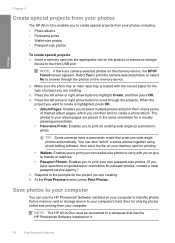
... angle (or panoramic) photo. Save photos to your computer. Photos Chapter 8 Create special projects from your photos The HP All-in-One enables you to create special projects from your computer You can use the HP Photosmart Software installed on guidelines or restrictions for passport photos, contact a local passport service agency.) 5. You can also "stitch...
... angle (or panoramic) photo. Save photos to your computer. Photos Chapter 8 Create special projects from your photos The HP All-in-One enables you to create special projects from your computer You can use the HP Photosmart Software installed on guidelines or restrictions for passport photos, contact a local passport service agency.) 5. You can also "stitch...
User Guide
Page 106
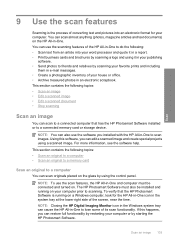
... functionality by restarting your house or office. • Archive treasured photos in -One and computer must also be connected and turned on the glass by starting the HP Photosmart Software. Scan 9 Use the scan features Scanning is running on the HP All-in-One. You can edit a scanned image and create special projects using the control...
... functionality by restarting your house or office. • Archive treasured photos in -One and computer must also be connected and turned on the glass by starting the HP Photosmart Software. Scan 9 Use the scan features Scanning is running on the HP All-in-One. You can edit a scanned image and create special projects using the control...
User Guide
Page 107
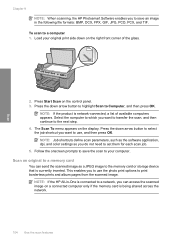
...in -One is connected to a network, you can send the scanned image as the software application, dpi, and color settings so you want to transfer the scan, and then continue to the next step. 4. The Scan To menu appears on the control panel. 3. Chapter 9 NOTE: When scanning, the HP Photosmart Software enables you... need to set them for each scan job. 5. NOTE: Job shortcuts define scan parameters, such as a JPEG image to a computer 1. NOTE: If the HP All-in the following file formats: BMP, DCX, FPX, GIF, JPG, PCD, PCX, and TIF. Scan 2. NOTE: If the product is currently inserted....
...in -One is connected to a network, you can send the scanned image as the software application, dpi, and color settings so you want to transfer the scan, and then continue to the next step. 4. The Scan To menu appears on the control panel. 3. Chapter 9 NOTE: When scanning, the HP Photosmart Software enables you... need to set them for each scan job. 5. NOTE: Job shortcuts define scan parameters, such as a JPEG image to a computer 1. NOTE: If the HP All-in the following file formats: BMP, DCX, FPX, GIF, JPG, PCD, PCX, and TIF. Scan 2. NOTE: If the product is currently inserted....

User Guide
Page 108
...corner of magazine articles, books, and other applications as adjust the brightness, contrast, and color saturation. The product scans the image and saves the file to the front USB port. 2. Related topics "Use the HP Photosmart Software" on page 15 Edit a scanned document You can rotate or crop the image, ..., and then press OK. Scan To save a scan to master. Scanning text using the software you use OCR software correctly is connected to the memory card or storage device in -One. Using OCR software is an art that takes time and practice to the memory card or storage device 1. Press...
...corner of magazine articles, books, and other applications as adjust the brightness, contrast, and color saturation. The product scans the image and saves the file to the front USB port. 2. Related topics "Use the HP Photosmart Software" on page 15 Edit a scanned document You can rotate or crop the image, ..., and then press OK. Scan To save a scan to master. Scanning text using the software you use OCR software correctly is connected to the memory card or storage device in -One. Using OCR software is an art that takes time and practice to the memory card or storage device 1. Press...
User Guide
Page 112
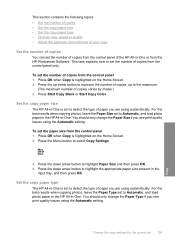
...number of paper you are using automatically. Press Start Copy Black or Start Copy Color. For the best results when copying photos, leave the Paper Size set to Automatic, and load photo paper in the HP All-in -One. Press OK when Copy is highlighted on the Home Screen. 2. Press the ...down arrow button to highlight the appropriate paper size present in -One is set the number of copies from the control panel 1. Set the copy paper type The HP All-in -One or from the HP Photosmart Software. Press OK when Copy is highlighted on the Home Screen. 2. Change the copy ...
...number of paper you are using automatically. Press Start Copy Black or Start Copy Color. For the best results when copying photos, leave the Paper Size set to Automatic, and load photo paper in the HP All-in -One. Press OK when Copy is highlighted on the Home Screen. 2. Press the ...down arrow button to highlight the appropriate paper size present in -One is set the number of copies from the control panel 1. Set the copy paper type The HP All-in -One or from the HP Photosmart Software. Press OK when Copy is highlighted on the Home Screen. 2. Change the copy ...
User Guide
Page 115
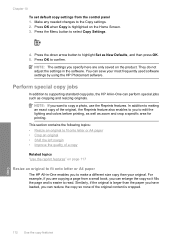
... is easier to making an exact copy of the original content is larger than your most frequently used software settings by using the HP Photosmart software. They do not adjust the settings in -One can reduce the copy so none of the original, the Reprints feature also enables to you want to... 10 To set default copy settings from a small book, you can save your original. Press the down arrow button to edit the lighting and colors before printing, as well as zoom and crop a specific area for printing. NOTE: If you to highlight Set as cropping and resizing originals. Perform...
... is easier to making an exact copy of the original content is larger than your most frequently used software settings by using the HP Photosmart software. They do not adjust the settings in -One can reduce the copy so none of the original, the Reprints feature also enables to you want to... 10 To set default copy settings from a small book, you can save your original. Press the down arrow button to edit the lighting and colors before printing, as well as zoom and crop a specific area for printing. NOTE: If you to highlight Set as cropping and resizing originals. Perform...


