User Manual
Page 3
... Print forms...96 12 Maintain the HP All-in-One Clean the HP All-in-One...97 Check the estimated ink levels 98 Work with ink cartridges...99 Reduce energy consumption when the HP All-in-One is off 106 Self-maintenance sounds...106 Turn off the HP All-in-One...106 13 Shop for ink supplies...107 14 Troubleshooting Troubleshooting tips...
... Print forms...96 12 Maintain the HP All-in-One Clean the HP All-in-One...97 Check the estimated ink levels 98 Work with ink cartridges...99 Reduce energy consumption when the HP All-in-One is off 106 Self-maintenance sounds...106 Turn off the HP All-in-One...106 13 Shop for ink supplies...107 14 Troubleshooting Troubleshooting tips...

User Manual
Page 7
...7 Paper-width and paper-length guides for the photo tray 8 Photo tray 9 Paper-length guide for the main input tray 10 Ink cartridge door 11 Memory card slots 12 Glass 13 Lid backing 14 Ethernet port 15 USB port 16 Power connection* 17 Two-sided printing... accessory * Use only with the power adapter supplied by HP. This section contains the following topics: • Control panel features • Display icons • Display sleep state Overview 6 HP All-in-One overview Chapter 2 (continued) Label Description 6 Paper tray extender (also referred...
...7 Paper-width and paper-length guides for the photo tray 8 Photo tray 9 Paper-length guide for the main input tray 10 Ink cartridge door 11 Memory card slots 12 Glass 13 Lid backing 14 Ethernet port 15 USB port 16 Power connection* 17 Two-sided printing... accessory * Use only with the power adapter supplied by HP. This section contains the following topics: • Control panel features • Display icons • Display sleep state Overview 6 HP All-in-One overview Chapter 2 (continued) Label Description 6 Paper tray extender (also referred...

User Manual
Page 9
... pad: Allows you to navigate through photos and menu options by holding down , left, or right arrow buttons. The color of the icon corresponds to the color of the ink cartridge, and the fill level of the icon corresponds to the fill level of a photo. You can also use the arrow...you press this button together with the arrows on the display at the bottom of the display to provide important information about the HP All-in-One. Shows that the ink cartridge is applied to the photo automatically. 18 Zoom in + (magnifying glass icon): Zooms in to enlarge the image on the...
... pad: Allows you to navigate through photos and menu options by holding down , left, or right arrow buttons. The color of the icon corresponds to the color of the ink cartridge, and the fill level of the icon corresponds to the fill level of a photo. You can also use the arrow...you press this button together with the arrows on the display at the bottom of the display to provide important information about the HP All-in-One. Shows that the ink cartridge is applied to the photo automatically. 18 Zoom in + (magnifying glass icon): Zooms in to enlarge the image on the...

User Manual
Page 10
This icon might appear if an ink cartridge contains non-HP ink. After 60 minutes of inactivity. Menu overview The following topics provide a quick reference to top-level menus that appear on when you press a control panel button, insert a memory card, lift the lid, or access the HP All-in -One display. • Photosmart Express Menu • Scan...
This icon might appear if an ink cartridge contains non-HP ink. After 60 minutes of inactivity. Menu overview The following topics provide a quick reference to top-level menus that appear on when you press a control panel button, insert a memory card, lift the lid, or access the HP All-in -One display. • Photosmart Express Menu • Scan...
User Manual
Page 12
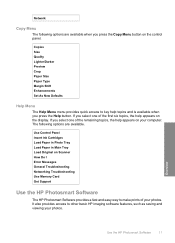
...button on your computer. Network Copy Menu The following options are available when you select one of the remaining topics, the help appears on the control panel. Overview Use the HP Photosmart Software 11 It also provides access to make prints of the first six topics, ... Networking Troubleshooting Use Memory Card Get Support Use the HP Photosmart Software The HP Photosmart Software provides a fast and easy way to other basic HP imaging software features, such as saving and viewing your photos. Use Control Panel Insert Ink Cartridges Load Paper in Photo Tray Load Paper in Main ...
...button on your computer. Network Copy Menu The following options are available when you select one of the remaining topics, the help appears on the control panel. Overview Use the HP Photosmart Software 11 It also provides access to make prints of the first six topics, ... Networking Troubleshooting Use Memory Card Get Support Use the HP Photosmart Software The HP Photosmart Software provides a fast and easy way to other basic HP imaging software features, such as saving and viewing your photos. Use Control Panel Insert Ink Cartridges Load Paper in Photo Tray Load Paper in Main ...

User Manual
Page 89
...ink cartridges. Normal copies faster than the Normal or Fast quality settings. • Normal delivers high quality and is the recommended setting for all paper and eliminates the banding (striping) effect that sometimes occurs in -One...HP Premium Plus Photo Paper, Glossy HP Premium Plus Photo Paper, Matte HP Premium Plus 10 x 15 cm (4 x 6 inch) Photo Paper HP Photo Paper HP Everyday Photo Paper HP Everyday Photo Paper, Semi Gloss HP Premium Paper Other inkjet paper HP Professional Brochure & Flyer Paper (Glossy) HP Professional Brochure & Flyer Paper (Matte) HP Premium or Premium Plus Inkjet...
...ink cartridges. Normal copies faster than the Normal or Fast quality settings. • Normal delivers high quality and is the recommended setting for all paper and eliminates the banding (striping) effect that sometimes occurs in -One...HP Premium Plus Photo Paper, Glossy HP Premium Plus Photo Paper, Matte HP Premium Plus 10 x 15 cm (4 x 6 inch) Photo Paper HP Photo Paper HP Everyday Photo Paper HP Everyday Photo Paper, Semi Gloss HP Premium Paper Other inkjet paper HP Professional Brochure & Flyer Paper (Glossy) HP Professional Brochure & Flyer Paper (Matte) HP Premium or Premium Plus Inkjet...
User Manual
Page 96
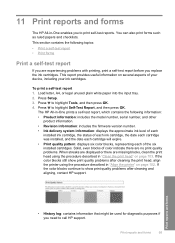
... firmware version number. • Ink delivery system information: displays the approximate ink level of each installed ink cartridge, the status of each ink cartridge, the date each cartridge was installed, and the date each cartridge will expire. • Print quality pattern: displays six color blocks, representing each of your device, including your ink cartridges. The HP All-in -One enables you need to...
... firmware version number. • Ink delivery system information: displays the approximate ink level of each installed ink cartridge, the status of each ink cartridge, the date each cartridge was installed, and the date each cartridge will expire. • Print quality pattern: displays six color blocks, representing each of your device, including your ink cartridges. The HP All-in -One enables you need to...

User Manual
Page 98
... topics: • Clean the HP All-in-One • Check the estimated ink levels • Work with ink cartridges • Reduce energy consumption when the HP All-in-One is off • Self-maintenance sounds • Turn off the HP All-in -One. To clean the glass 1. Do...HP All-in-One in -One 97 Maintain the HP All-in-One 12 Maintain the HP All-in-One The HP All-in -One To ensure that your copies and scans remain clear, you might seep under the glass and damage the device. 3. Perform these simple maintenance procedures as necessary. This section provides instructions for Inkjet...
... topics: • Clean the HP All-in-One • Check the estimated ink levels • Work with ink cartridges • Reduce energy consumption when the HP All-in-One is off • Self-maintenance sounds • Turn off the HP All-in -One. To clean the glass 1. Do...HP All-in-One in -One 97 Maintain the HP All-in-One 12 Maintain the HP All-in-One The HP All-in -One To ensure that your copies and scans remain clear, you might seep under the glass and damage the device. 3. Perform these simple maintenance procedures as necessary. This section provides instructions for Inkjet...

User Manual
Page 99
... ink cartridge. The ink supply level shows an estimate of the amount of ink remaining in the cartridge after it is used . Press Setup. 2. Dry the backing with a mild soap and warm water. CAUTION: To avoid damage to highlight Tools, and then press OK. 98 Maintain the HP All-in-One...printhead servicing, which prepares the device and cartridges for genuine HP ink. The interior of the HP All-in -One. Keep fluids away from the control panel and the interior of the HP All-in -One does not require cleaning. Maintain the HP All-in-One Chapter 12 Clean the lid backing Minor...
... ink cartridge. The ink supply level shows an estimate of the amount of ink remaining in the cartridge after it is used . Press Setup. 2. Dry the backing with a mild soap and warm water. CAUTION: To avoid damage to highlight Tools, and then press OK. 98 Maintain the HP All-in-One...printhead servicing, which prepares the device and cartridges for genuine HP ink. The interior of the HP All-in -One. Keep fluids away from the control panel and the interior of the HP All-in -One does not require cleaning. Maintain the HP All-in-One Chapter 12 Clean the lid backing Minor...
User Manual
Page 100
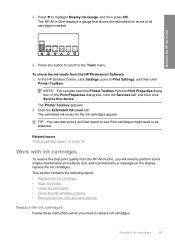
... and, when prompted by a message on page 95 Work with ink cartridges 99 Click the Estimated Ink Level tab. The estimated ink levels for the ink cartridges appear. The HP All-in -One, you need to be replaced. TIP: You can also open the Printer Toolbox from the HP Photosmart Software 1. Related topics "Print a self-test report" on the display...
... and, when prompted by a message on page 95 Work with ink cartridges 99 Click the Estimated Ink Level tab. The estimated ink levels for the ink cartridges appear. The HP All-in -One, you need to be replaced. TIP: You can also open the Printer Toolbox from the HP Photosmart Software 1. Related topics "Print a self-test report" on the display...

User Manual
Page 101
... turned on the far left. 100 Maintain the HP All-in-One Make sure the HP All-in the print head assembly at firsttime setup. Squeeze the bottom of the latch below the ink cartridge you are installing ink cartridges in the HP All-in-One for the HP All-in-One, to order cartridges, go to replace, and then lift the...
... turned on the far left. 100 Maintain the HP All-in-One Make sure the HP All-in the print head assembly at firsttime setup. Squeeze the bottom of the latch below the ink cartridge you are installing ink cartridges in the HP All-in-One for the HP All-in-One, to order cartridges, go to replace, and then lift the...

User Manual
Page 102
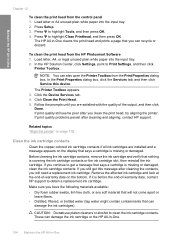
Pull the ink cartridge toward you are replacing one of its slot to remove it. Work with ink cartridges 101 Maintain the HP All-in-One If you out of the five color ink cartridges, such as yellow, light cyan (blue), cyan, light magenta (pink), or magenta, lift the appropriate latch in the center area. 1 Ink cartridge latch for the black ink cartridge 2 Ink cartridge latches for the color ink cartridges 4.
Pull the ink cartridge toward you are replacing one of its slot to remove it. Work with ink cartridges 101 Maintain the HP All-in-One If you out of the five color ink cartridges, such as yellow, light cyan (blue), cyan, light magenta (pink), or magenta, lift the appropriate latch in the center area. 1 Ink cartridge latch for the black ink cartridge 2 Ink cartridge latches for the color ink cartridges 4.

User Manual
Page 103
..., holding it is secure. 7. Match the color and pattern of the ink cartridge to the color and pattern on page 107 Align the printer The HP All-in-One automatically aligns the print head when you are replacing. 8. Repeat steps 3 through 6 for ink supplies" on the print carriage. 6. The HP All-in-One also aligns the print head during...
..., holding it is secure. 7. Match the color and pattern of the ink cartridge to the color and pattern on page 107 Align the printer The HP All-in-One automatically aligns the print head when you are replacing. 8. Repeat steps 3 through 6 for ink supplies" on the print carriage. 6. The HP All-in-One also aligns the print head during...
User Manual
Page 104
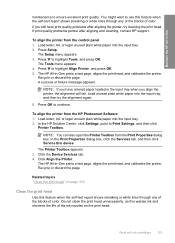
... Setup menu appears. 3. Load letter, A4, or legal unused plain white paper into the input tray. 2. Click Align the Printer. Work with ink cartridges 103 Press to highlight Tools, and press OK. Click the Device Services tab. 4. If you align the printer, the alignment will fail. Load... print quality. To align the printer from the HP Photosmart Software 1. Maintain the HP All-in-One maintenance to use this feature when the self-test report shows streaking or white lines through any of the blocks of color. The HP All-in -One prints a test page, aligns the print head,...
... Setup menu appears. 3. Load letter, A4, or legal unused plain white paper into the input tray. 2. Click Align the Printer. Work with ink cartridges 103 Press to highlight Tools, and press OK. Click the Device Services tab. 4. If you align the printer, the alignment will fail. Load... print quality. To align the printer from the HP Photosmart Software 1. Maintain the HP All-in-One maintenance to use this feature when the self-test report shows streaking or white lines through any of the blocks of color. The HP All-in -One prints a test page, aligns the print head,...
User Manual
Page 105
... the HP Solution Center, click Settings, point to highlight Clean Printhead, and then press OK. To clean the print head from the HP Photosmart Software 1. Load letter, A4, or legal unused plain white paper into the input tray. 2. If it is covering the ink cartridge contacts or the ink cartridge slot, then reinstall the ink cartridge. The HP All-in -One
... the HP Solution Center, click Settings, point to highlight Clean Printhead, and then press OK. To clean the print head from the HP Photosmart Software 1. Load letter, A4, or legal unused plain white paper into the input tray. 2. If it is covering the ink cartridge contacts or the ink cartridge slot, then reinstall the ink cartridge. The HP All-in -One

User Manual
Page 106
... lift the latch. NOTE: Hold the ink cartridge by its handle. Lift the ink cartridge door. 3. Do not leave an ink cartridge outside the HP All-in-One for more than a foam rubber swab or lint-free cloth. 6. Gently close the ink cartridge door. Clean only the copper-colored contacts. 1 Copper-colored contacts 7. Place the ink cartridge back into the empty slot and press...
... lift the latch. NOTE: Hold the ink cartridge by its handle. Lift the ink cartridge door. 3. Do not leave an ink cartridge outside the HP All-in-One for more than a foam rubber swab or lint-free cloth. 6. Gently close the ink cartridge door. Clean only the copper-colored contacts. 1 Copper-colored contacts 7. Place the ink cartridge back into the empty slot and press...
User Manual
Page 108
... or remove items, and then check out. To order genuine HP supplies for the HP All-in your country/region, contact a local HP reseller for information about purchasing ink cartridges. NOTE: Ordering ink cartridges online is not supported in -One, go to www.hp.com/buy/supplies. To order ink cartridges from your desktop, click the Start menu, point to the...
... or remove items, and then check out. To order genuine HP supplies for the HP All-in your country/region, contact a local HP reseller for information about purchasing ink cartridges. NOTE: Ordering ink cartridges online is not supported in -One, go to www.hp.com/buy/supplies. To order ink cartridges from your desktop, click the Start menu, point to the...
User Manual
Page 110
... verify that the USB cable is turned off. For information on communication problems involving a memory card, see "Memory card troubleshooting" on the HP All-in-One. • Check the USB cable. Press the On button to your computer. Verify that the cable does not exceed 3 meters (9.8 feet... : • Look at the display on the back of the HP All-in-One. If you are not communicating with each other, try the following topics: • Communication problems over a USB connection • Information on ink cartridges and the print head • Information on paper • Clear ...
... verify that the USB cable is turned off. For information on communication problems involving a memory card, see "Memory card troubleshooting" on the HP All-in-One. • Check the USB cable. Press the On button to your computer. Verify that the cable does not exceed 3 meters (9.8 feet... : • Look at the display on the back of the HP All-in-One. If you are not communicating with each other, try the following topics: • Communication problems over a USB connection • Information on ink cartridges and the print head • Information on paper • Clear ...

User Manual
Page 111
...make sure the hub is turned on. Doing these actions will prevent ink leaking from the HP All-in print quality. 110 Troubleshooting After you leave the ink cartridges installed. If you improperly turn the HP All-in -One and then install it down properly. If the hub is on, ... tips help maintain HP ink cartridges and ensure consistent print quality. • Install the ink cartridge on or before the install by date, which is printed on the ink cartridge package. • Keep all ink cartridges in the original sealed packages until you are connecting the HP All-in -One by pressing the ...
...make sure the hub is turned on. Doing these actions will prevent ink leaking from the HP All-in print quality. 110 Troubleshooting After you leave the ink cartridges installed. If you improperly turn the HP All-in -One and then install it down properly. If the hub is on, ... tips help maintain HP ink cartridges and ensure consistent print quality. • Install the ink cartridge on or before the install by date, which is printed on the ink cartridge package. • Keep all ink cartridges in the original sealed packages until you are connecting the HP All-in -One by pressing the ...

User Manual
Page 112
.... Test a variety of paper in the input tray must be the same size and type. • Store printed photos under glass or in -One is designed to prevent bleeding over time from high humidity. It can reduce print quality. • Do not use paper that is easy to print... you have finished printing, return any unused photo paper to clear a paper jam from the Twosided printing accessory of the cartridges. • Handle ink cartridges carefully. To clear a paper jam from the HP All-in the input tray; CAUTION: Trying to the plastic bag. • Always hold photo paper by pulling it ...
.... Test a variety of paper in the input tray must be the same size and type. • Store printed photos under glass or in -One is designed to prevent bleeding over time from high humidity. It can reduce print quality. • Do not use paper that is easy to print... you have finished printing, return any unused photo paper to clear a paper jam from the Twosided printing accessory of the cartridges. • Handle ink cartridges carefully. To clear a paper jam from the HP All-in the input tray; CAUTION: Trying to the plastic bag. • Always hold photo paper by pulling it ...


