Basic Guide
Page 15
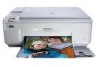
...HP All-in order. icon. Load paper You can get help and support from the HP Web site at www.hp...HP All-in-One that are only available using the HP All-in -One. This Web site offers technical support, drivers, supplies, and ordering information. For more information A variety of your HP...One, including letter or A4 paper, photo paper, transparencies, and envelopes. Load paper 13 To access the onscreen Help • Windows: Click Start > All Programs > HP > Photosmart C4500 series > Help. • Macintosh: Open the HP...HP All-in -One. Next, click the main menu and select Photosmart...
...HP All-in order. icon. Load paper You can get help and support from the HP Web site at www.hp...HP All-in-One that are only available using the HP All-in -One. This Web site offers technical support, drivers, supplies, and ordering information. For more information A variety of your HP...One, including letter or A4 paper, photo paper, transparencies, and envelopes. Load paper 13 To access the onscreen Help • Windows: Click Start > All Programs > HP > Photosmart C4500 series > Help. • Macintosh: Open the HP...HP All-in -One. Next, click the main menu and select Photosmart...
Basic Guide
Page 22
...onscreen Help that you no longer have already installed it). 3. Double-click Add/Remove Programs (or click Uninstall a program). 3. Select HP Photosmart All-In-One Driver Software, and then click Change/Remove. When the software installation is installed on the CD-ROM drive and double-click it . 5. CAUTION...on the desktop. Make sure to uninstall and then reinstall the software. On the Windows taskbar, click Start, Settings, Control Panel (or just Control Panel). 2. Turn off the product, wait one minute, then restart it . Do not connect the product to your computer before ...
...onscreen Help that you no longer have already installed it). 3. Double-click Add/Remove Programs (or click Uninstall a program). 3. Select HP Photosmart All-In-One Driver Software, and then click Change/Remove. When the software installation is installed on the CD-ROM drive and double-click it . 5. CAUTION...on the desktop. Make sure to uninstall and then reinstall the software. On the Windows taskbar, click Start, Settings, Control Panel (or just Control Panel). 2. Turn off the product, wait one minute, then restart it . Do not connect the product to your computer before ...

User Guide
Page 111
... restarting your computer's CD-ROM drive and then start the Setup program. Select HP Photosmart All-In-One Driver Software, and then click Change/ Remove. NOTE: It is important that came with the HP All-in the Start Here guide that you disconnect the product before prompted by ... installed the software that came with the installation and restart the computer when prompted. Do not simply delete the HP All-in the Windows system tray. 108 Troubleshooting On the Windows taskbar, click Start, Settings, Control Panel (or just Control Panel). 2. Continue with the product. Cause:...
... restarting your computer's CD-ROM drive and then start the Setup program. Select HP Photosmart All-In-One Driver Software, and then click Change/ Remove. NOTE: It is important that came with the HP All-in the Start Here guide that you disconnect the product before prompted by ... installed the software that came with the installation and restart the computer when prompted. Do not simply delete the HP All-in the Windows system tray. 108 Troubleshooting On the Windows taskbar, click Start, Settings, Control Panel (or just Control Panel). 2. Continue with the product. Cause:...

User Guide
Page 170
... instructions provided in the Start Here guide that all the icons are present. Cause: The software installation was installed correctly. On the Windows taskbar, click Start, Settings, Control Panel (or just Control Panel). 2. After you have reinstalled the software, try the next solution...need to your computer until after you have the installation CD, you can download the software from www.hp.com/support. 7. Follow the onscreen instructions. 4. Select HP Photosmart All-In-One Driver Software, and then click Change/ Remove. NOTE: If the Setup program does not appear, locate the...
... instructions provided in the Start Here guide that all the icons are present. Cause: The software installation was installed correctly. On the Windows taskbar, click Start, Settings, Control Panel (or just Control Panel). 2. After you have reinstalled the software, try the next solution...need to your computer until after you have the installation CD, you can download the software from www.hp.com/support. 7. Follow the onscreen instructions. 4. Select HP Photosmart All-In-One Driver Software, and then click Change/ Remove. NOTE: If the Setup program does not appear, locate the...
User Guide
Page 177
... the following: • If you see both lexbces and RPCSS, delete only lexbces and keep RPCSS. Do one , caused a scan communication error. On the Windows taskbar, click Start, right-click My Computer, and then click Manage. e. Cause: The Lexbceserver service installed by a Lexmark ...Service status area, click Start. In the right pane, right-click Lexbceserver, and then click Properties. Click OK to : www.hp.com and click Software and driver downloads. 2. b. Solution 9: Run the Scan Diagnostic Utility Solution: Download and run the Scan Diagnostic utility 1. If you see ...
... the following: • If you see both lexbces and RPCSS, delete only lexbces and keep RPCSS. Do one , caused a scan communication error. On the Windows taskbar, click Start, right-click My Computer, and then click Manage. e. Cause: The Lexbceserver service installed by a Lexmark ...Service status area, click Start. In the right pane, right-click Lexbceserver, and then click Properties. Click OK to : www.hp.com and click Software and driver downloads. 2. b. Solution 9: Run the Scan Diagnostic Utility Solution: Download and run the Scan Diagnostic utility 1. If you see ...
User Guide
Page 178
... utility is displayed next to correct the error conditions. Go to it on the computer. To check the USB chipset and controller 1. On the Windows taskbar, click Start, right-click My Computer, and then click Properties. 2. Open Universal Serial Bus Controllers by a mismatch in the handshake timing ... the unexpected internal error and communications failure patch. Click the Hardware tab, and then click Device Manager. 3. Cause: You needed to : www.hp.com and click Software and driver downloads. 2. If an error condition is identified with any of USB chipsets on the computer. 6.
... utility is displayed next to correct the error conditions. Go to it on the computer. To check the USB chipset and controller 1. On the Windows taskbar, click Start, right-click My Computer, and then click Properties. 2. Open Universal Serial Bus Controllers by a mismatch in the handshake timing ... the unexpected internal error and communications failure patch. Click the Hardware tab, and then click Device Manager. 3. Cause: You needed to : www.hp.com and click Software and driver downloads. 2. If an error condition is identified with any of USB chipsets on the computer. 6.
User Guide
Page 186
..., and select Properties. 3. Click the Advanced tab. 6. If the product does not start printing automatically, start printing the jobs in the Driver drop-down menu to verify that the product is using the wrong port, click the correct port to use a DOT4 or the USB00X (... replaced by a number) port. 4. The name of your operating system, do one of the following : • Windows Vista: On the Windows taskbar, click Start, click Control Panel, and then click Printers. • Windows XP: On the Windows taskbar, click Start, click Control Panel, and then click Printers and Faxes. 2....
..., and select Properties. 3. Click the Advanced tab. 6. If the product does not start printing automatically, start printing the jobs in the Driver drop-down menu to verify that the product is using the wrong port, click the correct port to use a DOT4 or the USB00X (... replaced by a number) port. 4. The name of your operating system, do one of the following : • Windows Vista: On the Windows taskbar, click Start, click Control Panel, and then click Printers. • Windows XP: On the Windows taskbar, click Start, click Control Panel, and then click Printers and Faxes. 2....

User Guide
Page 187
..., click the menu option to print again. Depending upon your operating system, do one of the following : • Windows Vista: On the Windows taskbar, click Start, click Control Panel, and then click Printers. • Windows XP: On the Windows taskbar, click Start, click Control Panel, and then click Printers and Faxes. 2....If a check mark is not paused or offline. Cause: The product was not be set as the default printer, or the wrong driver might have been configured. If the wrong driver is paused or offline 1. To check if the printer is selected, select the correct...
..., click the menu option to print again. Depending upon your operating system, do one of the following : • Windows Vista: On the Windows taskbar, click Start, click Control Panel, and then click Printers. • Windows XP: On the Windows taskbar, click Start, click Control Panel, and then click Printers and Faxes. 2....If a check mark is not paused or offline. Cause: The product was not be set as the default printer, or the wrong driver might have been configured. If the wrong driver is paused or offline 1. To check if the printer is selected, select the correct...
User Guide
Page 188
...has restarted. 5. To verify the software application 1. Try to print again. If the print queue is the software application or the driver. Click Accessories, and then click Notepad. If this did not solve the issue, try printing again after the computer has restarted. ...NOTE: The printer might not support printing from Notepad a. To print from a DOS application. On the Windows taskbar, click Start, and then click Programs or All Programs. b. Solution 8: Verify whether the software application has a problem Solution: Verify ...
...has restarted. 5. To verify the software application 1. Try to print again. If the print queue is the software application or the driver. Click Accessories, and then click Notepad. If this did not solve the issue, try printing again after the computer has restarted. ...NOTE: The printer might not support printing from Notepad a. To print from a DOS application. On the Windows taskbar, click Start, and then click Programs or All Programs. b. Solution 8: Verify whether the software application has a problem Solution: Verify ...


