
Installation Instructions
Page 6
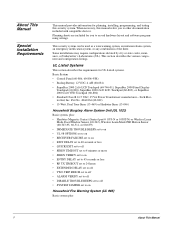
... systems. Basic System • Control Panel (60-806, 60-806-95R) • Backup Battery, 12 VDC, 4 AH (60-681) • SuperBus 2000 2x16 LCD Touchpad (60-746-01), SuperBus 2000 Fixed Display Touchpad (60-820), SuperBus 2000 2x20 LCD Touchpad (60-803), or SuperBus 2000 2x20 VFD Touchpad (60-804) • Standard Class II 16.5 VAC, 25 VA Power Transformer; When necessary, this security system. This security system...
... systems. Basic System • Control Panel (60-806, 60-806-95R) • Backup Battery, 12 VDC, 4 AH (60-681) • SuperBus 2000 2x16 LCD Touchpad (60-746-01), SuperBus 2000 Fixed Display Touchpad (60-820), SuperBus 2000 2x20 LCD Touchpad (60-803), or SuperBus 2000 2x20 VFD Touchpad (60-804) • Standard Class II 16.5 VAC, 25 VA Power Transformer; When necessary, this security system. This security system...

Installation Instructions
Page 9
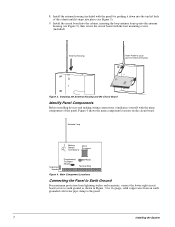
... Detection Devices to Panel Zone Inputs • Connecting Sirens • Connecting Touchpads • Installing an RJ-31X Phone Jack • Connecting the Phone Line to activate other signalling devices, based on system events. Before starting the installation, plan your system layout and programming using the following guidelines: 4 Installing the system consists of GE Security 319.5 MHz...
... Detection Devices to Panel Zone Inputs • Connecting Sirens • Connecting Touchpads • Installing an RJ-31X Phone Jack • Connecting the Phone Line to activate other signalling devices, based on system events. Before starting the installation, plan your system layout and programming using the following guidelines: 4 Installing the system consists of GE Security 319.5 MHz...
Installation Instructions
Page 12
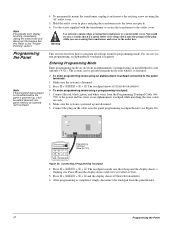
... main components of the cabinet until it down into the top left hole of the panel. Figure 4 shows the main component locations on the circuit board. Antenna Loop Black ... SnapCard Header Programming Touchpad Header EEPROM Terminal Strip Figure 4. Main Component Locations Connecting the Panel to Earth Ground For maximum protection from an earth grounded cold water pipe clamp to ... the cabinet, inserting the loop antenna loop up into place (see Figure 3), then secure the circuit board with the panel) by pushing it snaps into the antenna housing (see Figure 3). 9. Use 16-...
... main components of the cabinet until it down into the top left hole of the panel. Figure 4 shows the main component locations on the circuit board. Antenna Loop Black ... SnapCard Header Programming Touchpad Header EEPROM Terminal Strip Figure 4. Main Component Locations Connecting the Panel to Earth Ground For maximum protection from an earth grounded cold water pipe clamp to ... the cabinet, inserting the loop antenna loop up into place (see Figure 3), then secure the circuit board with the panel) by pushing it snaps into the antenna housing (see Figure 3). 9. Use 16-...

Installation Instructions
Page 13
... Installing the System 8 Note Use of the following SnapCard models: • 8Z Input SnapCard-60-757 • 4 Output SnapCard-60-758 • 4Z Input/2 Output Combo SnapCard-60-756 Install the desired SnapCard onto the panel SnapCard Header and secure it is ...recommended that you crimp a spade lug on the lower-left side of the panel accepts one of the HIM with the HIM. Connect all necessary input/output wiring using the installation instructions included with the Concord™ Express panel...
... Installing the System 8 Note Use of the following SnapCard models: • 8Z Input SnapCard-60-757 • 4 Output SnapCard-60-758 • 4Z Input/2 Output Combo SnapCard-60-756 Install the desired SnapCard onto the panel SnapCard Header and secure it is ...recommended that you crimp a spade lug on the lower-left side of the panel accepts one of the HIM with the HIM. Connect all necessary input/output wiring using the installation instructions included with the Concord™ Express panel...
Installation Instructions
Page 22
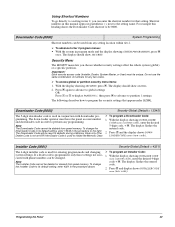
... completed, simply disconnect the touchpad from the Programming Touchpad Cable (60- 791) to the power and bus wires on an alphanumeric touchpad while matching the wire colors on -site system programming, an alphanumeric touchpad is disarmed. ¾ To enter...system can be put into program mode only when it will be added (learned) into the lower receptacle. 6. Press 8 + 4321 + 0 + 2. Programming the Panel Note If the programming touchpad is connected before the panel is powered up and disarmed. 3. Refer to the outlet box. Use the screw supplied with the transformer to secure...
... completed, simply disconnect the touchpad from the Programming Touchpad Cable (60- 791) to the power and bus wires on an alphanumeric touchpad while matching the wire colors on -site system programming, an alphanumeric touchpad is disarmed. ¾ To enter...system can be put into program mode only when it will be added (learned) into the lower receptacle. 6. Press 8 + 4321 + 0 + 2. Programming the Panel Note If the programming touchpad is connected before the panel is powered up and disarmed. 3. Refer to the outlet box. Use the screw supplied with the transformer to secure...

Installation Instructions
Page 23
...deleting sensors, and viewing sensor programming. Programming the Panel 18 Table 3 describes the touchpad button functions in program mode. C Enters pauses when programming phone numbers. Tier 1 Menus B System Programming A # * B Demo Kit Off/... menu represents pressing ƒ to move to all installer programming menus for configuring the system. Also scroll through available options at the current menu tier. Tier 2 Menus B Security Phones A # *# * B Phone Options A # * B Timers A # * B Touchpad B Options A A # * B Reporting Siren Options A # *# * B ...
...deleting sensors, and viewing sensor programming. Programming the Panel 18 Table 3 describes the touchpad button functions in program mode. C Enters pauses when programming phone numbers. Tier 1 Menus B System Programming A # * B Demo Kit Off/... menu represents pressing ƒ to move to all installer programming menus for configuring the system. Also scroll through available options at the current menu tier. Tier 2 Menus B Security Phones A # *# * B Phone Options A # * B Timers A # * B Touchpad B Options A A # * B Reporting Siren Options A # *# * B ...
Installation Instructions
Page 25
... lets you can enter the shortcut number for any two codes. ¾ To access global or partition security menu items: 1. Each security access code (Installer, Dealer, System Master, or User) must have the panel account number 1. Press ƒ and the display shows DOWN- The display should show GLOBAL. 2. To change the entered code. The...
... lets you can enter the shortcut number for any two codes. ¾ To access global or partition security menu items: 1. Each security access code (Installer, Dealer, System Master, or User) must have the panel account number 1. Press ƒ and the display shows DOWN- The display should show GLOBAL. 2. To change the entered code. The...
Installation Instructions
Page 26
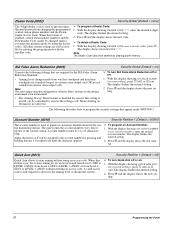
... Press ƒ and the display shows the new setting. Account Number (0010) Security-Partition 1 (Default = 00000) The account number is used as panel (or customer) identification for users if this setting is on OR can be controlled by using an access code. ber. The display flashes the entered setting. 2....(off ) or 2 (on ). When this feature is still required to the central station. SIA False Alarm Reduction (0003) Security-Global (Default = on , the system arming level can be annunciated. • The Arming Always Silent feature is disabled for the cen- ¾ To program an ...
... Press ƒ and the display shows the new setting. Account Number (0010) Security-Partition 1 (Default = 00000) The account number is used as panel (or customer) identification for users if this setting is on OR can be controlled by using an access code. ber. The display flashes the entered setting. 2....(off ) or 2 (on ). When this feature is still required to the central station. SIA False Alarm Reduction (0003) Security-Global (Default = on , the system arming level can be annunciated. • The Arming Always Silent feature is disabled for the cen- ¾ To program an ...
Installation Instructions
Page 27
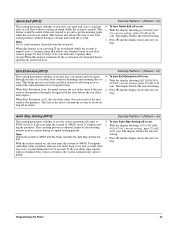
Quick Exit (0012) Security-Partition 1 (Default = on : 1. This feature would be turned off. This feature also allows the user to leave the armed premises without causing an alarm (while the system is off or on , the panel restarts the exit delay timer if the user 2. When this feature is turned ...off or on ). Exit Extension (0013) Security-Partition 1 (Default = on) This setting determines whether or not the...
Quick Exit (0012) Security-Partition 1 (Default = on : 1. This feature would be turned off. This feature also allows the user to leave the armed premises without causing an alarm (while the system is off or on , the panel restarts the exit delay timer if the user 2. When this feature is turned ...off or on ). Exit Extension (0013) Security-Partition 1 (Default = on) This setting determines whether or not the...
Installation Instructions
Page 28
... display showing KEYSWITCH For example, if sensor 1 is designated as any other sensor and do not arm or disarm the system during a sensor test. The panel reports opening, closing, and force armed reports (if these menus when a Dealer Code is used for pro- The display...Programming the Panel To access these features are not accessible if a Dealer Code is programmed and the Installer Code is programmed, you set up central station reporting for one second. Keyswitch Sensor (0015) Security-Partition 1 (Default = none) This feature lets users arm and disarm the system using the...
... display showing KEYSWITCH For example, if sensor 1 is designated as any other sensor and do not arm or disarm the system during a sensor test. The panel reports opening, closing, and force armed reports (if these menus when a Dealer Code is used for pro- The display...Programming the Panel To access these features are not accessible if a Dealer Code is programmed and the Installer Code is programmed, you set up central station reporting for one second. Keyswitch Sensor (0015) Security-Partition 1 (Default = none) This feature lets users arm and disarm the system using the...
Installation Instructions
Page 29
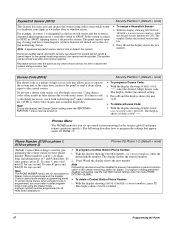
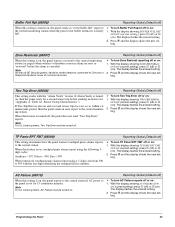
...cs phone 2) Phones-CS Phone 1-2 (Default: CS Phone 1=on, CS Phone 2=off) When this setting is on, the panel reports to the central station events that involve a high-level security risk, including the following conditions: • Force Armed • Hardwire Zone Trouble (open or short) • Supervisory (...) or disarmed (opened). With the display showing BACKUP OFF/ON cessful. (current setting), press 1 (off or on , the panel sends a report when the system is on : central station phone number for five final attempts. Note To use this feature must be set to CS Phone 2 for...
...cs phone 2) Phones-CS Phone 1-2 (Default: CS Phone 1=on, CS Phone 2=off) When this setting is on, the panel reports to the central station events that involve a high-level security risk, including the following conditions: • Force Armed • Hardwire Zone Trouble (open or short) • Supervisory (...) or disarmed (opened). With the display showing BACKUP OFF/ON cessful. (current setting), press 1 (off or on , the panel sends a report when the system is on : central station phone number for five final attempts. Note To use this feature must be set to CS Phone 2 for...

Installation Instructions
Page 30
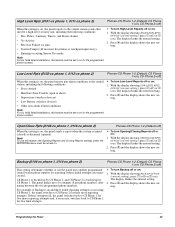
...pager 3) Phones-Pager Phone 1-3 (Default=on) When this setting is on, the panel reports to the pager events that communicates to the central monitoring station (or pager). Press..., and Freeze alarms • No Activity • Receiver Failure (or jam) • System Tamper (40 incorrect keystrokes or touchpad supervisory), • Entering or exiting Sensor Test mode &#... setting), press 1 (for SIA) or 2 (for programming a phone number that involve a high-level security risk, including the following conditions: • Force Armed • Hardwire Zone Trouble (open or short) ...
...pager 3) Phones-Pager Phone 1-3 (Default=on) When this setting is on, the panel reports to the pager events that communicates to the central monitoring station (or pager). Press..., and Freeze alarms • No Activity • Receiver Failure (or jam) • System Tamper (40 incorrect keystrokes or touchpad supervisory), • Entering or exiting Sensor Test mode &#... setting), press 1 (for SIA) or 2 (for programming a phone number that involve a high-level security risk, including the following conditions: • Force Armed • Hardwire Zone Trouble (open or short) ...
Installation Instructions
Page 39
... 503 with the last digit identifying the touchpad device number. Sensor Group Characteristics"). Note For UL Listed systems, Two Trip Error must be turned off ) This setting works with all GE Security panels, hardwire smoke detectors connected to Concord or SnapCard hardwire zones do not send restorals. ¾ To turn Zone Restoral reporting off or...
... 503 with the last digit identifying the touchpad device number. Sensor Group Characteristics"). Note For UL Listed systems, Two Trip Error must be turned off ) This setting works with all GE Security panels, hardwire smoke detectors connected to Concord or SnapCard hardwire zones do not send restorals. ¾ To turn Zone Restoral reporting off or...
Installation Instructions
Page 48
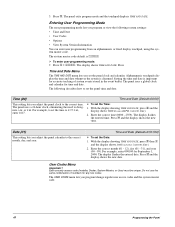
...default is disarmed. Setting the time and date is important for September 1, 2000. The panel uses a 24-hour clock, eliminating the need to the correct time. Each security access code (Installer, Dealer, System Master, or User) must be unique. The display shows TIME AND DATE. Press &#... Information You can enter user programming from an alphanumeric or fixed display touchpad, using the system master code. Entering User Programming Mode The user programming mode lets you adjust the panel calendar to the correct month, day, and year. Date (01) This setting lets ...
...default is disarmed. Setting the time and date is important for September 1, 2000. The panel uses a 24-hour clock, eliminating the need to the correct time. Each security access code (Installer, Dealer, System Master, or User) must be unique. The display shows TIME AND DATE. Press &#... Information You can enter user programming from an alphanumeric or fixed display touchpad, using the system master code. Entering User Programming Mode The user programming mode lets you adjust the panel calendar to the correct month, day, and year. Date (01) This setting lets ...
Installation Instructions
Page 57
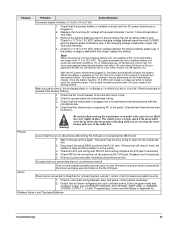
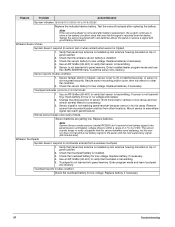
...to the panel. (Transformer internal fuse may be sure the circuit is plugged into a nonswitched outlet and secured with a metal cover. Perform a phone test after 24 hours, replace the backup battery. Sirens Piezo sirens connected to be busy trying to report to indicate System battery ...sounds. 1. Hold the cover tightly in Appendix A). Replace cord if necessary. 5. Feature Problem Action/Solution Touchpad display indicates SYSTEM LOW BATTERY. 1. Note When the panel is not within range, call Technical Services. 4. This can range from the RJ-31 jack. One or more polarity...
...to the panel. (Transformer internal fuse may be sure the circuit is plugged into a nonswitched outlet and secured with a metal cover. Perform a phone test after 24 hours, replace the backup battery. Sirens Piezo sirens connected to be busy trying to report to indicate System battery ...sounds. 1. Hold the cover tightly in Appendix A). Replace cord if necessary. 5. Feature Problem Action/Solution Touchpad display indicates SYSTEM LOW BATTERY. 1. Note When the panel is not within range, call Technical Services. 4. This can range from the RJ-31 jack. One or more polarity...
Installation Instructions
Page 58
... test from horizontal to add the sensor into panel memory. Check that touchpad is not transmitting, check battery for low voltage. Check the touchpad battery for low or no voltage and replace. 2. Use an RF Sniffer (60-401) to show a low battery condition since... entered from the device. Wireless Touchpads System doesn't respond to the panel/receiver until the next supervisory signal (69 minutes later). Touchpad is tripped. 1. Sensor signal is not reaching panel/receiver because sensor is not mounted securely. Verify that panel loop antenna is installed up into antenna...
... test from horizontal to add the sensor into panel memory. Check that touchpad is not transmitting, check battery for low voltage. Check the touchpad battery for low or no voltage and replace. 2. Use an RF Sniffer (60-401) to show a low battery condition since... entered from the device. Wireless Touchpads System doesn't respond to the panel/receiver until the next supervisory signal (69 minutes later). Touchpad is tripped. 1. Sensor signal is not reaching panel/receiver because sensor is not mounted securely. Verify that panel loop antenna is installed up into antenna...
Installation Instructions
Page 71
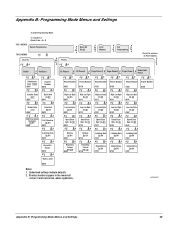
... B A Streamlining On Off 0145 0016 Notes 1. Appendix B: Programming Mode Menus and Settings To enter Programming Mode: 8 + Installer or Dealer Code + 0 + 0 Tier 1 Menus TIER 1 MENUS System Programming TIER 2 MENUS # Security #* B Phones A# * B Demo Kit On Off A B Clear Memory A B Exit B Programming A A Press B to continue to Phone Options. Underlined settings indicate defaults. 2. Shortcut numbers appear in...
... B A Streamlining On Off 0145 0016 Notes 1. Appendix B: Programming Mode Menus and Settings To enter Programming Mode: 8 + Installer or Dealer Code + 0 + 0 Tier 1 Menus TIER 1 MENUS System Programming TIER 2 MENUS # Security #* B Phones A# * B Demo Kit On Off A B Clear Memory A B Exit B Programming A A Press B to continue to Phone Options. Underlined settings indicate defaults. 2. Shortcut numbers appear in...
Installation Instructions
Page 73
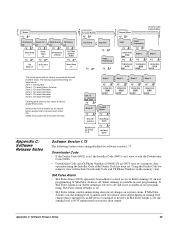
...False Alarm • SIA False Alarm (0003) option has been added to control access to Silent Arming (21) in user programming. If SIA False Alarm ...5: 13-Instant Perimeter Zone 6: 13-Instant Perimeter Clearing panel memory also clears all unused, factory programmed, onboard panel zones OR Delete the unused zone from panel memory. B A Learn Sensors B Sensor Text B Delete...Sensor Group nn #* #* 2-Wire Smoke On Off 0901 Configuration 00410 09100 Configuration 01710 09110 *The panel comes with six factory programmed onboard hardwire zones. If SIA False Alarm is on exterior sirens. SIA ...
...False Alarm • SIA False Alarm (0003) option has been added to control access to Silent Arming (21) in user programming. If SIA False Alarm ...5: 13-Instant Perimeter Zone 6: 13-Instant Perimeter Clearing panel memory also clears all unused, factory programmed, onboard panel zones OR Delete the unused zone from panel memory. B A Learn Sensors B Sensor Text B Delete...Sensor Group nn #* #* 2-Wire Smoke On Off 0901 Configuration 00410 09100 Configuration 01710 09110 *The panel comes with six factory programmed onboard hardwire zones. If SIA False Alarm is on exterior sirens. SIA ...


