
Quick Guide
Page 4
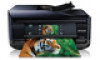
...: one sheet at a time Rear paper feed slot Upper cassette Lower cassette For details on loading paper in the output tray, there may be slight resistance and noise. This is open, close it before going to the next step. (As you slide in the lower cassette, see the Start Here sheet.... or 5 × 7-inch photo paper ■ Lower cassette (Cassette 2): letter-size, A4, legal-size, 4 × 6-, 5 × 7-, or 8 × 10- If the output tray is normal.) 4 Loading Paper...
...: one sheet at a time Rear paper feed slot Upper cassette Lower cassette For details on loading paper in the output tray, there may be slight resistance and noise. This is open, close it before going to the next step. (As you slide in the lower cassette, see the Start Here sheet.... or 5 × 7-inch photo paper ■ Lower cassette (Cassette 2): letter-size, A4, legal-size, 4 × 6-, 5 × 7-, or 8 × 10- If the output tray is normal.) 4 Loading Paper...
Quick Guide
Page 10
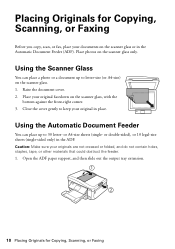
Close the cover gently to keep your originals are not creased or folded, and do not contain holes, staples, tape, or other materials that could obstruct ... corner. 3. Place your documents on the scanner glass. 1. Placing Originals for Copying, Scanning, or Faxing Open the ADF paper support, and then slide out the output tray extension. 10 Placing Originals for Copying, Scanning, or Faxing Before you copy, scan, or fax, place your original facedown on the scanner glass only.
Close the cover gently to keep your originals are not creased or folded, and do not contain holes, staples, tape, or other materials that could obstruct ... corner. 3. Place your documents on the scanner glass. 1. Placing Originals for Copying, Scanning, or Faxing Open the ADF paper support, and then slide out the output tray extension. 10 Placing Originals for Copying, Scanning, or Faxing Before you copy, scan, or fax, place your original facedown on the scanner glass only.


