User Manual
Page 4
Windows 69 4 Windows 66 Print Quality Options - Product Software 58 Placing Originals on the Product ...59 Placing Originals on the Scanner Glass 59 Copying ...62 Copying Documents or Photos...62 Paper Size Settings - Copying...64 Copying Options...64 Printing from a Computer ... Wi-Fi Features ...46 Loading Paper ...48 Loading Paper for Documents and Photos 48 Loading Envelopes ...51 Paper Loading Capacity ...54 Available Epson Papers ...55 Borderless Paper Type Compatibility 56 Paper or Media Type Settings - Windows 69 Multi-Page Printing Options - Control Panel 57 Paper...
Windows 69 4 Windows 66 Print Quality Options - Product Software 58 Placing Originals on the Product ...59 Placing Originals on the Scanner Glass 59 Copying ...62 Copying Documents or Photos...62 Paper Size Settings - Copying...64 Copying Options...64 Printing from a Computer ... Wi-Fi Features ...46 Loading Paper ...48 Loading Paper for Documents and Photos 48 Loading Envelopes ...51 Paper Loading Capacity ...54 Available Epson Papers ...55 Borderless Paper Type Compatibility 56 Paper or Media Type Settings - Windows 69 Multi-Page Printing Options - Control Panel 57 Paper...

User Manual
Page 19
1 Document cover 2 Scanner glass 3 Control panel 4 Control panel release bar (beneath) 5 Memory card slot 6 Memory card access light Parent topic: Product Parts Locations 19
1 Document cover 2 Scanner glass 3 Control panel 4 Control panel release bar (beneath) 5 Memory card slot 6 Memory card access light Parent topic: Product Parts Locations 19
User Manual
Page 25
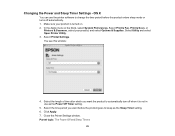
Select Print & Fax, Print & Scan, or Printers & Scanners, select your product is not in use the printer software to change the time period before the product goes to automatically turn off automatically. 1. Close ...
Select Print & Fax, Print & Scan, or Printers & Scanners, select your product is not in use the printer software to change the time period before the product goes to automatically turn off automatically. 1. Close ...

User Manual
Page 59
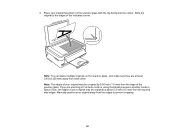
Open the document cover. 59 Caution: Do not place anything on the scanner glass: Letter (8.5 × 11 inches [216 × 279 mm]) or A4 (8.3 × 11.7 inches [210 × 297 mm]). 1. Placing Originals on the Scanner Glass Placing Originals on the Scanner Glass You can place originals up to this size on top of your product or use its cover as a writing surface to place your original documents or photos on the product. Placing Originals on the Product Follow the instructions here to avoid damaging it.
Open the document cover. 59 Caution: Do not place anything on the scanner glass: Letter (8.5 × 11 inches [216 × 279 mm]) or A4 (8.3 × 11.7 inches [210 × 297 mm]). 1. Placing Originals on the Scanner Glass Placing Originals on the Scanner Glass You can place originals up to this size on top of your product or use its cover as a writing surface to place your original documents or photos on the product. Placing Originals on the Product Follow the instructions here to avoid damaging it.
User Manual
Page 60
... 0.8 inch (20 mm) away from the edges to the edges of your original may be cropped by about 0.2 inch (4.5 mm) from the edge of the scanner glass. Note: The edges of your original may be cropped by 0.06 inch (1.5 mm) from the top and side edges. Note: You can place multiple... originals on the scanner glass with the top facing into the corner. Just make sure they are scanning in Full Auto mode or using thumbnail preview in another mode...
... 0.8 inch (20 mm) away from the edges to the edges of your original may be cropped by about 0.2 inch (4.5 mm) from the edge of the scanner glass. Note: The edges of your original may be cropped by 0.06 inch (1.5 mm) from the top and side edges. Note: You can place multiple... originals on the scanner glass with the top facing into the corner. Just make sure they are scanning in Full Auto mode or using thumbnail preview in another mode...

User Manual
Page 64
... Layout Available settings Various levels Borderless With Border Description Adjusts the lightness or darkness of the paper (slight cropping may be available, depending on the Scanner Glass Related topics Loading Paper Paper Size Settings - 9. To view the print settings, press the up or down arrow button. You can copy on these...
... Layout Available settings Various levels Borderless With Border Description Adjusts the lightness or darkness of the paper (slight cropping may be available, depending on the Scanner Glass Related topics Loading Paper Paper Size Settings - 9. To view the print settings, press the up or down arrow button. You can copy on these...
User Manual
Page 93
You see a screen like this: 4. OS X Selecting Printing Preferences - Select Print & Fax, Print & Scan, or Printers & Scanners, select your product. 1. Select Driver or Options. OS X You can select printing preferences that apply to all the print jobs you send to your product, ...
You see a screen like this: 4. OS X Selecting Printing Preferences - Select Print & Fax, Print & Scan, or Printers & Scanners, select your product. 1. Select Driver or Options. OS X You can select printing preferences that apply to all the print jobs you send to your product, ...
User Manual
Page 99
...; Windows 8.x: Navigate to the Apps screen and select EPSON Scan under EPSON or EPSON Software. • Windows (other versions): Click or Start > All Programs or Programs > EPSON Software > Event Manager. • OS X: Open the Applications folder, click Epson Software, and click Event Manager. 2. Open the Scanner (Windows) or Select Scanner (OS X) drop-down list and select the...
...; Windows 8.x: Navigate to the Apps screen and select EPSON Scan under EPSON or EPSON Software. • Windows (other versions): Click or Start > All Programs or Programs > EPSON Software > Event Manager. • OS X: Open the Applications folder, click Epson Software, and click Event Manager. 2. Open the Scanner (Windows) or Select Scanner (OS X) drop-down list and select the...

User Manual
Page 137
...Open image folder after scanning Select to have the File Save Settings window appear automatically before you are scanning an item on the scanner glass, your product using the PDF or Multi-TIFF format, select to scanning with Image Capture, you see the Show Details button, ...in addition to display a prompt for scanning additional pages after the first page is saved after scanning If you scan (in certain Epson Scan modes). To download Epson Scan, visit Epson's driver download site (U.S. Open an image editing application, such as graphic and DTP software. Note: With OS X, in the...
...Open image folder after scanning Select to have the File Save Settings window appear automatically before you are scanning an item on the scanner glass, your product using the PDF or Multi-TIFF format, select to scanning with Image Capture, you see the Show Details button, ...in addition to display a prompt for scanning additional pages after the first page is saved after scanning If you scan (in certain Epson Scan modes). To download Epson Scan, visit Epson's driver download site (U.S. Open an image editing application, such as graphic and DTP software. Note: With OS X, in the...
User Manual
Page 159
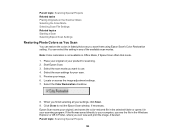
...the Windows Explorer or OS X Finder, where you scan them using Epson Scan's Color Restoration setting. If the file was saved directly to exit the Epson Scan window, if necessary. Place your original on the Scanner Glass Selecting the Scan Mode Selecting Scan File Settings Related topics Starting... a Scan Selecting Epson Scan Settings Restoring Photo Colors as you can view and print...
...the Windows Explorer or OS X Finder, where you scan them using Epson Scan's Color Restoration setting. If the file was saved directly to exit the Epson Scan window, if necessary. Place your original on the Scanner Glass Selecting the Scan Mode Selecting Scan File Settings Related topics Starting... a Scan Selecting Epson Scan Settings Restoring Photo Colors as you can view and print...

User Manual
Page 160
Related tasks Placing Originals on the Scanner Glass Selecting the Scan Mode Related topics Starting a Scan Selecting Epson Scan Settings 160
Related tasks Placing Originals on the Scanner Glass Selecting the Scan Mode Related topics Starting a Scan Selecting Epson Scan Settings 160

User Manual
Page 180
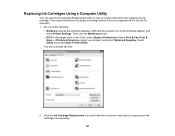
Select EPSON Status Monitor. Select Print & Fax, Print & Scan, or Printers & Scanners, select your Mac. 1. Select Utility and select Open Printer Utility. 2. You see a window like this: 180 Related topics Printing with Black Ink and Expended Color Cartridges Checking Cartridge Status with OS X You can check your cartridge status using a utility on your product, and select Options & Supplies. In the Apple menu or the Dock, select System Preferences.
Select EPSON Status Monitor. Select Print & Fax, Print & Scan, or Printers & Scanners, select your Mac. 1. Select Utility and select Open Printer Utility. 2. You see a window like this: 180 Related topics Printing with Black Ink and Expended Color Cartridges Checking Cartridge Status with OS X You can check your cartridge status using a utility on your product, and select Options & Supplies. In the Apple menu or the Dock, select System Preferences.
User Manual
Page 183
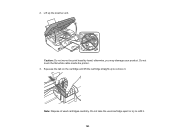
otherwise, you may damage your product. Note: Dispose of used cartridge apart or try to remove it . 183 Caution: Do not move the print head by hand; Squeeze the tab on the cartridge and lift the cartridge straight up the scanner unit. Lift up to refill it . Do not touch the flat white cable inside the printer. 3. 2. Do not take the used cartridges carefully.
otherwise, you may damage your product. Note: Dispose of used cartridge apart or try to remove it . 183 Caution: Do not move the print head by hand; Squeeze the tab on the cartridge and lift the cartridge straight up the scanner unit. Lift up to refill it . Do not touch the flat white cable inside the printer. 3. 2. Do not take the used cartridges carefully.

User Manual
Page 186
... and press the start button. Parent topic: Replacing Ink Cartridges Related concepts Purchase Epson Ink Cartridges 186 This takes about 90 seconds. Always store ink cartridges with the label facing up the scanner unit and press the ink cartridge down . Caution: Never turn off the product while the power light is flashing...
... and press the start button. Parent topic: Replacing Ink Cartridges Related concepts Purchase Epson Ink Cartridges 186 This takes about 90 seconds. Always store ink cartridges with the label facing up the scanner unit and press the ink cartridge down . Caution: Never turn off the product while the power light is flashing...
User Manual
Page 187
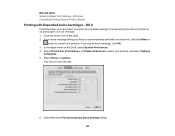
You see a window like this: 2. Select Print & Fax, Print & Scan, or Printers & Scanners, select your ink cartridges as necessary. 187 Click the Ink Cartridge Replacement icon and follow the on-screen instructions to view on-screen instructions for ...
You see a window like this: 2. Select Print & Fax, Print & Scan, or Printers & Scanners, select your ink cartridges as necessary. 187 Click the Ink Cartridge Replacement icon and follow the on-screen instructions to view on-screen instructions for ...
User Manual
Page 189
... with only black ink on plain paper or on an envelope. 1. Click the printer icon in the Dock. 2. Select Print & Fax, Print & Scan, or Printers & Scanners, select your print job. Select Driver or Options. OS X If printing stops, you can temporarily print with only black ink, click the Delete or button...
... with only black ink on plain paper or on an envelope. 1. Click the printer icon in the Dock. 2. Select Print & Fax, Print & Scan, or Printers & Scanners, select your print job. Select Driver or Options. OS X If printing stops, you can temporarily print with only black ink, click the Delete or button...
User Manual
Page 195
... a Computer Utility You can check the print head nozzles using a utility on your product, and select Options & Supplies. Select Print & Fax, Print & Scan, or Printers & Scanners, select your Windows or Mac computer. 1.
... a Computer Utility You can check the print head nozzles using a utility on your product, and select Options & Supplies. Select Print & Fax, Print & Scan, or Printers & Scanners, select your Windows or Mac computer. 1.
User Manual
Page 199
... stays on when the cleaning cycle is finished, you may damage it. 5. When the cleaning cycle is finished. Select Print & Fax, Print & Scan, or Printers & Scanners, select your product, and select Options & Supplies. Caution: Never turn off the product during a cleaning cycle or you can check to begin the cleaning cycle...
... stays on when the cleaning cycle is finished, you may damage it. 5. When the cleaning cycle is finished. Select Print & Fax, Print & Scan, or Printers & Scanners, select your product, and select Options & Supplies. Caution: Never turn off the product during a cleaning cycle or you can check to begin the cleaning cycle...
User Manual
Page 203
... choose the number representing the best printed pattern for each selection. Press the OK button after each set. Select Print & Fax, Print & Scan, or Printers & Scanners, select your Windows or Mac computer. 1. Check the printed pattern and press the arrow buttons to print an alignment sheet.
... choose the number representing the best printed pattern for each selection. Press the OK button after each set. Select Print & Fax, Print & Scan, or Printers & Scanners, select your Windows or Mac computer. 1. Check the printed pattern and press the arrow buttons to print an alignment sheet.
User Manual
Page 206
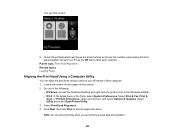
... the product, placing it vertically, or turning it . Caution: Do not use a hard brush, alcohol, or paint thinner to protect it from dust. Clean the scanner glass with a soft, lint-free cloth (microfiber is recommended), moistened with a soft, dry cloth. Cleaning Your Product Transporting Your Product Cleaning Your Product To keep...
... the product, placing it vertically, or turning it . Caution: Do not use a hard brush, alcohol, or paint thinner to protect it from dust. Clean the scanner glass with a soft, lint-free cloth (microfiber is recommended), moistened with a soft, dry cloth. Cleaning Your Product Transporting Your Product Cleaning Your Product To keep...


