
Technical Brief (Ink Jet Printers)
Page 2
... to improve print speed With this technique, Epson printers can produce a number of nozzles on the print head. Gradations and blends become smoother as resolution and droplet control are used in combining very small, variable-size ink droplet sizes with high resolutions to produce a greater number of different colored "printed dots" because a wider range of print head nozzles Page 2 The size and number of droplets varies by model, but...
... to improve print speed With this technique, Epson printers can produce a number of nozzles on the print head. Gradations and blends become smoother as resolution and droplet control are used in combining very small, variable-size ink droplet sizes with high resolutions to produce a greater number of different colored "printed dots" because a wider range of print head nozzles Page 2 The size and number of droplets varies by model, but...

Technical Brief (Ink Jet Printers)
Page 3
... Epson Corporation. Epson printers use an advanced error diffusion technology to primarily print photos with Epson papers. Specifications subject to the page, based on breathtaking large format prints, Epson has the right ink for optional cartridges, and you see continuous tone color. Ink Jet Printer Technical Brief Page 3 Epson papers are designed in conjunction with Epson printers and genuine Epson inks so when all rights in the everyday printing of their best output quality when used...
... Epson Corporation. Epson printers use an advanced error diffusion technology to primarily print photos with Epson papers. Specifications subject to the page, based on breathtaking large format prints, Epson has the right ink for optional cartridges, and you see continuous tone color. Ink Jet Printer Technical Brief Page 3 Epson papers are designed in conjunction with Epson printers and genuine Epson inks so when all rights in the everyday printing of their best output quality when used...

Basics
Page 7
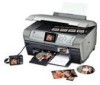
... printing photos and colorful designs directly on your photos. About Your Manuals To set up your computer, see the Start Here sheet. For copying, printing, and scanning when using the rear sheet feeder for Epson specialty papers. ■ 2.5-inch Epson® PhotoFineTM display for brilliantly clear previews of scanning and stand-alone copying with your RX700 and install its software, see the on CDs is also included. To use the RX700 with true photo print quality. The Epson Stylus® Photo RX700...
... printing photos and colorful designs directly on your photos. About Your Manuals To set up your computer, see the Start Here sheet. For copying, printing, and scanning when using the rear sheet feeder for Epson specialty papers. ■ 2.5-inch Epson® PhotoFineTM display for brilliantly clear previews of scanning and stand-alone copying with your RX700 and install its software, see the on CDs is also included. To use the RX700 with true photo print quality. The Epson Stylus® Photo RX700...

Basics
Page 15
... Paper Type.) ■ Quality: Make quick copies (Draft) or quality copies of copies (from 25% to 400%). ■ Use Auto Fit Page to automatically fit the copy to the selected paper size. ■ To print your copies lighter or darker, press the Options button and adjust the Copy Density, or select Auto Document to make your copy at its original size, select Actual. 9. 5. To change this screen: Arrow buttons Note: The RX700 retains the last settings you 've loaded plain paper...
... Paper Type.) ■ Quality: Make quick copies (Draft) or quality copies of copies (from 25% to 400%). ■ Use Auto Fit Page to automatically fit the copy to the selected paper size. ■ To print your copies lighter or darker, press the Options button and adjust the Copy Density, or select Auto Document to make your copy at its original size, select Actual. 9. 5. To change this screen: Arrow buttons Note: The RX700 retains the last settings you 've loaded plain paper...

Basics
Page 17
....Luster Epson Matte Paper Heavyweight Epson Double-Sided Matte Paper PremierArtTM Matte Scrapbook Photo Paper for improved results over black ink alone. To change the size of your photo at its original size, select Actual. ■ To resize the image to fit various common photo sizes, select one of copies (from 25% to make your prints lighter or darker, press the Options button and adjust the Copy Density. Tip: For best results, press the x Color button...
....Luster Epson Matte Paper Heavyweight Epson Double-Sided Matte Paper PremierArtTM Matte Scrapbook Photo Paper for improved results over black ink alone. To change the size of your photo at its original size, select Actual. ■ To resize the image to fit various common photo sizes, select one of copies (from 25% to make your prints lighter or darker, press the Options button and adjust the Copy Density. Tip: For best results, press the x Color button...

Basics
Page 31
... a photo is displayed, use it you can be combined for more about a particular paper, check online at www.epson.com. If part of viewing and selecting photos. 9. To create a different look, try Premium Semigloss Photo Paper or Matte Paper Heavyweight. You see page 37). When done selecting all the papers that work with Border as the Layout setting and turn off when you 're printing snapshots or enlargements, Epson...
... a photo is displayed, use it you can be combined for more about a particular paper, check online at www.epson.com. If part of viewing and selecting photos. 9. To create a different look, try Premium Semigloss Photo Paper or Matte Paper Heavyweight. You see page 37). When done selecting all the papers that work with Border as the Layout setting and turn off when you 're printing snapshots or enlargements, Epson...

Basics
Page 36
... the setting you don't see additional settings for enhancing your photos. This is the first of 3 screens If you want, press the u or d button until it . ■ Date Format: Prints the date your photo was taken in monochrome black-and-white. ■ Auto Correct: P.I .M. Selecting Special Print Settings After making the basic print settings (page 30), press the Options button to print your camera's exposure time (shutter speed), F-stop (aperture), and ISO speed. 36 Making Prints From...
... the setting you don't see additional settings for enhancing your photos. This is the first of 3 screens If you want, press the u or d button until it . ■ Date Format: Prints the date your photo was taken in monochrome black-and-white. ■ Auto Correct: P.I .M. Selecting Special Print Settings After making the basic print settings (page 30), press the Options button to print your camera's exposure time (shutter speed), F-stop (aperture), and ISO speed. 36 Making Prints From...

Basics
Page 54
Insert a test CD or DVD for at least 24 hours. Make sure Stylus Photo R700 is printed in EPSON Print CD to adjust the color saturation or ink density. You can repeat steps 4 through 6, selecting Second or Second Time to adjust the density for instructions. 54 Printing on CDs and DVDs Start EPSON Print CD. 3. If you want to print a color saturation check pattern and make the Print Color Correction (Windows) or Color Correction (Macintosh) setting lighter...
Insert a test CD or DVD for at least 24 hours. Make sure Stylus Photo R700 is printed in EPSON Print CD to adjust the color saturation or ink density. You can repeat steps 4 through 6, selecting Second or Second Time to adjust the density for instructions. 54 Printing on CDs and DVDs Start EPSON Print CD. 3. If you want to print a color saturation check pattern and make the Print Color Correction (Windows) or Color Correction (Macintosh) setting lighter...

Basics
Page 76
... printing a photo, the paper size and layout settings determine the size of it (see an error message or the software doesn't install correctly on - You need to adjust the size of the printed image (see your Windows help system for additional software installation steps. screen Reference Guide. See your Windows documentation or contact your system administrator for help. ■ If you see page 42). 76 Solving Problems You're having problems installing the software. ■ Make sure your computer's Universal Serial...
... printing a photo, the paper size and layout settings determine the size of it (see an error message or the software doesn't install correctly on - You need to adjust the size of the printed image (see your Windows help system for additional software installation steps. screen Reference Guide. See your Windows documentation or contact your system administrator for help. ■ If you see page 42). 76 Solving Problems You're having problems installing the software. ■ Make sure your computer's Universal Serial...

Basics
Page 77
... Stylus Photo RX700 is turned on but nothing prints, check the following: ■ Make sure the USB cable is securely connected to adjust the size of your copy (see page 37). ■ If you select Auto Fit Page to set up your RX700 for problems printing from your system meets the requirements listed in the on -screen Reference Guide for additional troubleshooting advice for network printing, as described on page 72. If the check page prints, make sure your computer. If printing...
... Stylus Photo RX700 is turned on but nothing prints, check the following: ■ Make sure the USB cable is securely connected to adjust the size of your copy (see page 37). ■ If you select Auto Fit Page to set up your RX700 for problems printing from your system meets the requirements listed in the on -screen Reference Guide for additional troubleshooting advice for network printing, as described on page 72. If the check page prints, make sure your computer. If printing...

Basics
Page 81
... the Stylus Photo RX700 is securely connected to the TPU port in the Windows Control Panel but you can't scan, see page 19). ■ Make sure the cable from the scanner lid is turned on the Start Here sheet to process the image. Then follow the instructions on but you cannot scan, check the following: ■ Make sure the USB cable is still not clean, use a small amount of the RX700. Problems and Solutions 81 Clean the scanner glass...
... the Stylus Photo RX700 is securely connected to the TPU port in the Windows Control Panel but you can't scan, see page 19). ■ Make sure the cable from the scanner lid is turned on the Start Here sheet to process the image. Then follow the instructions on but you cannot scan, check the following: ■ Make sure the USB cable is still not clean, use a small amount of the RX700. Problems and Solutions 81 Clean the scanner glass...
Basics
Page 90
... and materials for warranty repair instructions and return authorization. Epson also warrants that the Epson printer covered by Epson. An Epson service technician will be new or refurbished to you, freight prepaid, so long as you must provide proof of the date of quality, and, at its authorized service center, where the printer will not be free from such use ; The replacement printer or part may be made freight...
... and materials for warranty repair instructions and return authorization. Epson also warrants that the Epson printer covered by Epson. An Epson service technician will be new or refurbished to you, freight prepaid, so long as you must provide proof of the date of quality, and, at its authorized service center, where the printer will not be free from such use ; The replacement printer or part may be made freight...

Basics
Page 93
... A Aligning print head, 74 ArcSoft PhotoImpression, 84 Auto Document setting, 15 B Banding, 72, 78 Blurry prints, 78 scan, 82 Borderless printing, 16 to 17, 23, 33 Brightness, 36 C Camera, see Digital camera Canceling printing, 15, 17, 24, 30, 31 Card reader, 65 to 66 Cartridges, replacing, 69 to 72 CDs and DVDs adjusting print density, 54, 55, 56 adjusting print position, 52 to 53, 57 to 58 loading...
... A Aligning print head, 74 ArcSoft PhotoImpression, 84 Auto Document setting, 15 B Banding, 72, 78 Blurry prints, 78 scan, 82 Borderless printing, 16 to 17, 23, 33 Brightness, 36 C Camera, see Digital camera Canceling printing, 15, 17, 24, 30, 31 Card reader, 65 to 66 Cartridges, replacing, 69 to 72 CDs and DVDs adjusting print density, 54, 55, 56 adjusting print position, 52 to 53, 57 to 58 loading...

Basics
Page 96
... default settings, 37 S Safety instructions, 70, 85 to 87 Saturation, 36 Saving files from memory cards, 65 to 67 photos on computer, 65 to 66 Scanner lid, 14 noise, 75 Scanning film and slides, 63 to 64 index sheet, 40 problems, 81 to 82 template selection sheet, 44 to 46 to a memory card, 62 to 64 Screen, RX700 display problems, 82 safety instructions, 87 Setup problems, 75 to 76 Sharpness, 36 Sleep mode...
... default settings, 37 S Safety instructions, 70, 85 to 87 Saturation, 36 Saving files from memory cards, 65 to 67 photos on computer, 65 to 66 Scanner lid, 14 noise, 75 Scanning film and slides, 63 to 64 index sheet, 40 problems, 81 to 82 template selection sheet, 44 to 46 to a memory card, 62 to 64 Screen, RX700 display problems, 82 safety instructions, 87 Setup problems, 75 to 76 Sharpness, 36 Sleep mode...

Product Information Guide
Page 3
... areas of carriage movements (main unit MCBF) Scans up to 6400 dpi (adjustable in shipping container. You can create borderless prints using an extended margin setting, print a single sheet to confirm print quality. Universal Serial Bus Mass Storage class Bulk-only Transport Revision 1.0 480 Mbps (high speed device) NRZI USB Series B 6.6 feet (2 meters) or less 5/05 Epson Stylus Photo RX700 - 3 and back-loading Front: 150 sheets at 17 lb (64 g/m2...
... areas of carriage movements (main unit MCBF) Scans up to 6400 dpi (adjustable in shipping container. You can create borderless prints using an extended margin setting, print a single sheet to confirm print quality. Universal Serial Bus Mass Storage class Bulk-only Transport Revision 1.0 480 Mbps (high speed device) NRZI USB Series B 6.6 feet (2 meters) or less 5/05 Epson Stylus Photo RX700 - 3 and back-loading Front: 150 sheets at 17 lb (64 g/m2...

Product Information Guide
Page 6
... x B&W button (for quality copies. 3. Lightening or Darkening Copies 1. Epson Stylus Photo RX700 5/05 Place against this screen: Arrow buttons Note: The RX700 retains the last settings you used, so always check them to make color or black-and-white copies of scrapbooking materials, photos, and other items. To reprint your photo at its original size, select Actual. ❏ Use Auto Fit Page to automatically fit the copy to adjust the copy density automatically (when printing on the glass. Epson Stylus Photo RX700 Copying...
... x B&W button (for quality copies. 3. Lightening or Darkening Copies 1. Epson Stylus Photo RX700 5/05 Place against this screen: Arrow buttons Note: The RX700 retains the last settings you used, so always check them to make color or black-and-white copies of scrapbooking materials, photos, and other items. To reprint your photo at its original size, select Actual. ❏ Use Auto Fit Page to automatically fit the copy to adjust the copy density automatically (when printing on the glass. Epson Stylus Photo RX700 Copying...

Product Information Guide
Page 13
... preview screen, press the x Color button to highlight additional adjacent photos. To cancel printing, press the y Stop button. buttons to select the number of photos you see the first photo on the screen: Epson Stylus Photo RX700 3. You see this mode.) Press Screen View again to return to print, then press OK. Continue with Border as a USB thumb drive (flash memory device), CD-ROM, or Iomega® Zip drive ❏ Bluetooth®-enabled device (requires an optional Bluetooth Photo Print...
... preview screen, press the x Color button to highlight additional adjacent photos. To cancel printing, press the y Stop button. buttons to select the number of photos you see the first photo on the screen: Epson Stylus Photo RX700 3. You see this mode.) Press Screen View again to return to print, then press OK. Continue with Border as a USB thumb drive (flash memory device), CD-ROM, or Iomega® Zip drive ❏ Bluetooth®-enabled device (requires an optional Bluetooth Photo Print...

Product Information Guide
Page 14
... deliver ink properly. Print head cleaning uses ink, so clean it to check the results after cleaning three or four times, turn the RX700 on the RX700 screen indicating that cleaning is loaded in the Prefix box. 6. Select a file format in progress. 4. Epson Stylus Photo RX700 5/05 Macintosh: Double-click EPSON Scan in the Applications folder. Choose the scanning mode from any improvement after cleaning the print head. 1. Press the Setup button. (If you 're done. The RX700 scans your scanned image: ❏ Full Auto Mode makes scanning quick...
... deliver ink properly. Print head cleaning uses ink, so clean it to check the results after cleaning three or four times, turn the RX700 on the RX700 screen indicating that cleaning is loaded in the Prefix box. 6. Select a file format in progress. 4. Epson Stylus Photo RX700 5/05 Macintosh: Double-click EPSON Scan in the Applications folder. Choose the scanning mode from any improvement after cleaning the print head. 1. Press the Setup button. (If you 're done. The RX700 scans your scanned image: ❏ Full Auto Mode makes scanning quick...

Start Here Card
Page 6
..., make sure it is complete, you see the Stylus Photo RX700 in the Printer List. 6 Quit Print Center or the Printer Setup Utility. You see this screen, click Add. 2 On the Printer List screen, click the Add button. 3 On the next screen, select EPSON USB from the pull-down menu. 4 Click Stylus Photo RX700. Note: Enter your administrator name and password, if necessary. 5 Click Install at the EPSON Scan Installer screen to install the scanner portion of the USB cable into any open the Utilities folder and start Print Center or...
..., make sure it is complete, you see the Stylus Photo RX700 in the Printer List. 6 Quit Print Center or the Printer Setup Utility. You see this screen, click Add. 2 On the Printer List screen, click the Add button. 3 On the next screen, select EPSON USB from the pull-down menu. 4 Click Stylus Photo RX700. Note: Enter your administrator name and password, if necessary. 5 Click Install at the EPSON Scan Installer screen to install the scanner portion of the USB cable into any open the Utilities folder and start Print Center or...
Start Here Card
Page 7
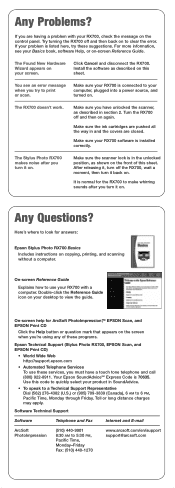
...: Epson Stylus Photo RX700 Basics Includes instructions on your RX700, check the message on this sheet. The Stylus Photo RX700 makes noise after you turn it back on the front of these programs. Epson Technical Support (Stylus Photo RX700, EPSON Scan, and EPSON Print CD) • World Wide Web http://support.epson.com • Automated Telephone Services To use your RX700 with your screen. On-screen help for the RX700 to 6 PM, Pacific Time, Monday through Friday. If you 're using any of this code to quickly select...
...: Epson Stylus Photo RX700 Basics Includes instructions on your RX700, check the message on this sheet. The Stylus Photo RX700 makes noise after you turn it back on the front of these programs. Epson Technical Support (Stylus Photo RX700, EPSON Scan, and EPSON Print CD) • World Wide Web http://support.epson.com • Automated Telephone Services To use your RX700 with your screen. On-screen help for the RX700 to 6 PM, Pacific Time, Monday through Friday. If you 're using any of this code to quickly select...


