Basics Guide
Page 20
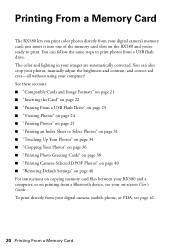
... lighting in your digital camera, mobile phone, or PDA, see your on the RX580 and you print color photos directly from your images are automatically corrected. See these sections: ■ "Compatible Cards and Image Formats" on page 21 ■ "Inserting the Card" on ...Settings" on page 40 For instructions on copying memory card files between your RX580 and a computer, or on printing from a USB flash drive. Printing From a Memory Card The RX580 lets you 're ready to print. You can also crop your photos, manually adjust the brightness and contrast, and correct red eyes-all without using...
... lighting in your digital camera, mobile phone, or PDA, see your on the RX580 and you print color photos directly from your images are automatically corrected. See these sections: ■ "Compatible Cards and Image Formats" on page 21 ■ "Inserting the Card" on ...Settings" on page 40 For instructions on copying memory card files between your RX580 and a computer, or on printing from a USB flash drive. Printing From a Memory Card The RX580 lets you 're ready to print. You can also crop your photos, manually adjust the brightness and contrast, and correct red eyes-all without using...

Basics Guide
Page 35
... of these steps: 1. Press OK again, then press the x Start button to the automatic ones, follow these options, then press r. ■ Color Effect: choose Off, Sepia (for an old-fashioned brown effect) or B&W (for black and white printing) ■ Brightness: choose Standard, Brighter,...in effect until you change them. Touching Up Your Photos 35 3. Note: This setting remains in the next section. To make manual adjustments in addition to print your pictures contain P.I.M. Manually Adjusting Your Photos First, select the photo or photos you want to the defaults, see page 40. ...
... of these steps: 1. Press OK again, then press the x Start button to the automatic ones, follow these options, then press r. ■ Color Effect: choose Off, Sepia (for an old-fashioned brown effect) or B&W (for black and white printing) ■ Brightness: choose Standard, Brighter,...in effect until you change them. Touching Up Your Photos 35 3. Note: This setting remains in the next section. To make manual adjustments in addition to print your pictures contain P.I.M. Manually Adjusting Your Photos First, select the photo or photos you want to the defaults, see page 40. ...
Basics Guide
Page 40
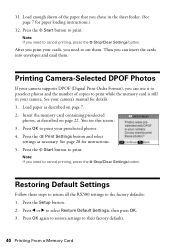
... and select settings as described on page 22. 11. Load enough sheets of copies to print your camera's manual for details. 1. Insert the memory card containing preselected photos, as described on page 7. 2. See page 28 for paper loading instructions.) 12. Restoring Default Settings Follow ...these steps to return all the RX580 settings to print. Press the x Start button to the factory defaults: 1. See your preselected photos. 4. Press OK to print while the memory card is still in the sheet feeder. (See...
... and select settings as described on page 22. 11. Load enough sheets of copies to print your camera's manual for details. 1. Insert the memory card containing preselected photos, as described on page 7. 2. See page 28 for paper loading instructions.) 12. Restoring Default Settings Follow ...these steps to return all the RX580 settings to print. Press the x Start button to the factory defaults: 1. See your preselected photos. 4. Press OK to print while the memory card is still in the sheet feeder. (See...

Basics Guide
Page 42
To reset all settings to the external device USB (EXT. I/F) port on your RX580. Turn on the front of the following messages is displayed on your camera's or phone's manual for details. 42 Printing From a Camera, PDA, or Phone Connect the USB cable that came with your camera or phone to their defaults... camera or phone. See your camera or phone. 8. Note: These settings remain in effect until you change them the first time you print from your photos. One of your camera or phone. After you select the settings you want to select the...
To reset all settings to the external device USB (EXT. I/F) port on your RX580. Turn on the front of the following messages is displayed on your camera's or phone's manual for details. 42 Printing From a Camera, PDA, or Phone Connect the USB cable that came with your camera or phone to their defaults... camera or phone. See your camera or phone. 8. Note: These settings remain in effect until you change them the first time you print from your photos. One of your camera or phone. After you select the settings you want to select the...

Basics Guide
Page 44
... infrared port at the RX580's port, and send your mobile phone or PDA manual for details. See your photos. Note: You can send up to transmit if direct sunlight or fluorescent light is 4M bits/second. 44 Printing From a Camera, PDA, or Phone The RX580 is 3MB), including photos that are being printed.... You may not be able to 10 photos (the maximum...
... infrared port at the RX580's port, and send your mobile phone or PDA manual for details. See your photos. Note: You can send up to transmit if direct sunlight or fluorescent light is 4M bits/second. 44 Printing From a Camera, PDA, or Phone The RX580 is 3MB), including photos that are being printed.... You may not be able to 10 photos (the maximum...
Basics Guide
Page 63
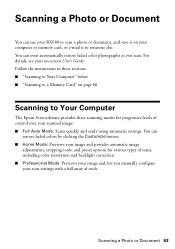
...Auto Mode: Scans quickly and easily using automatic settings. Scanning a Photo or Document You can use your RX580 to scan a photo or document, and save it to someone else. Scanning a Photo or Document 63 Follow the instructions in these sections: ■ ..."Scanning to Your Computer" below ■ "Scanning to a Memory Card" on page 66 Scanning to Your Computer The Epson Scan software provides three scanning modes for various types of tools. You can even automatically restore faded color photographs as you manually...
...Auto Mode: Scans quickly and easily using automatic settings. Scanning a Photo or Document You can use your RX580 to scan a photo or document, and save it to someone else. Scanning a Photo or Document 63 Follow the instructions in these sections: ■ ..."Scanning to Your Computer" below ■ "Scanning to a Memory Card" on page 66 Scanning to Your Computer The Epson Scan software provides three scanning modes for various types of tools. You can even automatically restore faded color photographs as you manually...

Product Information Guide
Page 10
... sure the memory card access light is inserted; Press l or r to choose the photo you print color photos directly from Your Camera's Memory Card The RX580 lets you want to print. 5. When you see a photo you 're ready to print. Press u or d to choose your paper size, ... 3. You can also crop your photos, manually adjust the brightness and contrast, and correct red eyes-all without using your photos. Press r to select View and Print, then press OK. 4. Press u or d to choose your layout option, then press OK. Epson Stylus Photo RX580 11/06 Do not insert more ...
... sure the memory card access light is inserted; Press l or r to choose the photo you print color photos directly from Your Camera's Memory Card The RX580 lets you want to print. 5. When you see a photo you 're ready to print. Press u or d to choose your paper size, ... 3. You can also crop your photos, manually adjust the brightness and contrast, and correct red eyes-all without using your photos. Press r to select View and Print, then press OK. 4. Press u or d to choose your layout option, then press OK. Epson Stylus Photo RX580 11/06 Do not insert more ...


