Printer Basics
Page 4
... 26 Adjusting the Printing Position 27 Resetting Default Settings 28 Printing From Your Computer 29 Basic Printing in Windows 29 Selecting Default Settings 31 Basic Printing in Mac OS X 31 Selecting the Correct Paper Type 34 Printing Borderless Photos 35 Windows 36 Mac OS X ... 41 Adjusting the Print Density 43 Maintaining Your Printer 45 Cleaning the Print Head 45 Replacing an Ink Cartridge 47 Removing and Installing Ink Cartridges 48 Aligning the Print Head 50 Cleaning the Printer 50 Transporting the Printer 51 Adjusting the LCD Brightness 52 4 Contents
... 26 Adjusting the Printing Position 27 Resetting Default Settings 28 Printing From Your Computer 29 Basic Printing in Windows 29 Selecting Default Settings 31 Basic Printing in Mac OS X 31 Selecting the Correct Paper Type 34 Printing Borderless Photos 35 Windows 36 Mac OS X ... 41 Adjusting the Print Density 43 Maintaining Your Printer 45 Cleaning the Print Head 45 Replacing an Ink Cartridge 47 Removing and Installing Ink Cartridges 48 Aligning the Print Head 50 Cleaning the Printer 50 Transporting the Printer 51 Adjusting the LCD Brightness 52 4 Contents
Printer Basics
Page 18
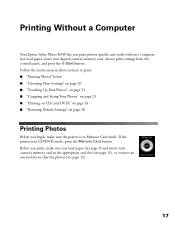
Printing Without a Computer Your Epson Stylus Photo R340 lets you begin, make sure you load paper (see page 12). 17 Just load paper, insert your camera's memory card in Memory Card mode. Before you print, make sure the printer is in CD/DVD mode, press the Memory Card button. Follow ...CDs and DVDs" on page 24 ■ "Resetting Default Settings" on page 28 Printing Photos Before you print photos quickly and easily without a computer. If the printer is in the appropriate card slot (see page 11), or connect an external device that has photos (see page 9) and insert your digital camera...
Printing Without a Computer Your Epson Stylus Photo R340 lets you begin, make sure you load paper (see page 12). 17 Just load paper, insert your camera's memory card in Memory Card mode. Before you print, make sure the printer is in CD/DVD mode, press the Memory Card button. Follow ...CDs and DVDs" on page 24 ■ "Resetting Default Settings" on page 28 Printing Photos Before you print photos quickly and easily without a computer. If the printer is in the appropriate card slot (see page 11), or connect an external device that has photos (see page 9) and insert your digital camera...
Printer Basics
Page 23
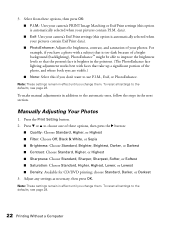
... background (backlighting), PhotoEnhance™ might be able to improve the brightness levels so that the person's face is automatically selected when your photos. To reset all settings to the defaults, see page 28. 3. Select from these options, then press the r button: ■ Quality: Choose... Density: Available for CD/DVD printing; To make manual adjustments in addition to use P.I .M. Press the Print Setting button. 2. To reset all settings to the defaults, see page 28. 22 Printing Without a Computer Note: These settings remain in effect until you don't want...
... background (backlighting), PhotoEnhance™ might be able to improve the brightness levels so that the person's face is automatically selected when your photos. To reset all settings to the defaults, see page 28. 3. Select from these options, then press the r button: ■ Quality: Choose... Density: Available for CD/DVD printing; To make manual adjustments in addition to use P.I .M. Press the Print Setting button. 2. To reset all settings to the defaults, see page 28. 22 Printing Without a Computer Note: These settings remain in effect until you don't want...

Printer Basics
Page 25
... ink jet-printable CDs and DVDs from your computer. Caution: Use only ink jet-printable CDs or DVDs for printing. Fit to Frame If your photo is too long or wide to fit inside the available space on your selected layout, part of the image will be used with this... printer. Note: These settings remain in the sections below to the defaults, see page 28. To reset all photos, not just borderless layouts. Thermal-printable and regular CDs and DVDs should not be automatically cropped. Follow...
... ink jet-printable CDs and DVDs from your computer. Caution: Use only ink jet-printable CDs or DVDs for printing. Fit to Frame If your photo is too long or wide to fit inside the available space on your selected layout, part of the image will be used with this... printer. Note: These settings remain in the sections below to the defaults, see page 28. To reset all photos, not just borderless layouts. Thermal-printable and regular CDs and DVDs should not be automatically cropped. Follow...

Printer Basics
Page 29
...it right. Press the Setup button. 2. Note: Not all settings are adjusting up to Factory Settings feature. 28 Printing Without a Computer Resetting Default Settings You can adjust the position by up and down , or u to 2 mm in either direction. 4. Press the Setup ...button to the default settings before printing other photos. 1. 3. Press r. 4. If you made and return to choose Restore Factory Settings. 3. Then press the OK button. You can reset the printer's settings (such as the layout, color effects, or crop settings) to exit the Setup menu.
...it right. Press the Setup button. 2. Note: Not all settings are adjusting up to Factory Settings feature. 28 Printing Without a Computer Resetting Default Settings You can adjust the position by up and down , or u to 2 mm in either direction. 4. Press the Setup ...button to the default settings before printing other photos. 1. 3. Press r. 4. If you made and return to choose Restore Factory Settings. 3. Then press the OK button. You can reset the printer's settings (such as the layout, color effects, or crop settings) to exit the Setup menu.

Printer Basics
Page 79
... to 57 LCD panel, 57 memory card, 58 miscellaneous, 62 to 63 paper feeding, 61 print quality, 59 to 61 printer, 53 to 63 setup, 56 to 57 Proof sheet, 19 Protecting photos, 10 Q Quality problems, 59 to 61 Quality setting, 22 Quality Type setting, 30 Quality/Speed setting, 32 R Range of... photos, 18 to 19 Resetting default settings, 28 Resolution Performance Management (RPM), 7, 30 Roller, cleaning, 25, 38 S Safety instructions, 68 to 69 Saturation, 22 SD card, 11 Secure Digital card, ...
... to 57 LCD panel, 57 memory card, 58 miscellaneous, 62 to 63 paper feeding, 61 print quality, 59 to 61 printer, 53 to 63 setup, 56 to 57 Proof sheet, 19 Protecting photos, 10 Q Quality problems, 59 to 61 Quality setting, 22 Quality Type setting, 30 Quality/Speed setting, 32 R Range of... photos, 18 to 19 Resetting default settings, 28 Resolution Performance Management (RPM), 7, 30 Roller, cleaning, 25, 38 S Safety instructions, 68 to 69 Saturation, 22 SD card, 11 Secure Digital card, ...
Quick Reference Guide
Page 4
Resetting Default Settings After you change your print settings, you save the photo files from your printer right from CDs, DVDs, thumb drives and Zip disks. Print Wirelessly You can maintain your camera's memory card directly to a... a computer or by using the control panel. *410228400* *410228400* Epson, Epson Stylus, and Print Image Matching and the Print Image Matching logo are for the best results. Automatically Adjust Photos You printer automatically adjusts images with an optional Bluetooth photo print adapter. Follow these steps: 1 Press the Setup button. 2 ...
Resetting Default Settings After you change your print settings, you save the photo files from your printer right from CDs, DVDs, thumb drives and Zip disks. Print Wirelessly You can maintain your camera's memory card directly to a... a computer or by using the control panel. *410228400* *410228400* Epson, Epson Stylus, and Print Image Matching and the Print Image Matching logo are for the best results. Automatically Adjust Photos You printer automatically adjusts images with an optional Bluetooth photo print adapter. Follow these steps: 1 Press the Setup button. 2 ...


