
Product Information Guide
Page 9
...with soap and water. You see a message that ink cartridge replacement will begin . Press the button to the replacement position. 4. The print head moves to select Ink Cartridge Replacement. 3. Press in the Advanced Settings menu. Press OK. ❏ If the b error light is...the cartridge cover. 6. Caution: Don't touch the green circuit board or remove any labels. 7. The printer begins charging the ink delivery system. 11. If ink gets in one of the printer. Epson Stylus Photo R320 Removing and Installing Ink Cartridges Be sure you have a new ink cartridge before ...
...with soap and water. You see a message that ink cartridge replacement will begin . Press the button to the replacement position. 4. The print head moves to select Ink Cartridge Replacement. 3. Press in the Advanced Settings menu. Press OK. ❏ If the b error light is...the cartridge cover. 6. Caution: Don't touch the green circuit board or remove any labels. 7. The printer begins charging the ink delivery system. 11. If ink gets in one of the printer. Epson Stylus Photo R320 Removing and Installing Ink Cartridges Be sure you have a new ink cartridge before ...

Product Information Guide
Page 11
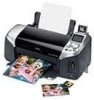
.... After transporting the printer, remove the tape securing the print head and test your Start Here sheet. Make sure the CD/DVD tray guide is closed, then push in its attachments in print quality, clean the print head (see page 10). Repeat step 6 to prepare it . 7/04 Epson Stylus Photo R320 - 11 Transporting the Printer If you move your printer some distance, you...
.... After transporting the printer, remove the tape securing the print head and test your Start Here sheet. Make sure the CD/DVD tray guide is closed, then push in its attachments in print quality, clean the print head (see page 10). Repeat step 6 to prepare it . 7/04 Epson Stylus Photo R320 - 11 Transporting the Printer If you move your printer some distance, you...


