
Technical Brief (Ink Jet Printers)
Page 3
... so you never have to swap an ink cartridge to determine the most efficient pattern for optional cartridges, and you see continuous tone color. Epson Papers: In general, Epson printers will deliver their respective owners. Epson printers use an advanced error diffusion technology to get sharp black text, superb photo quality photos, or both on breathtaking large format prints...
... so you never have to swap an ink cartridge to determine the most efficient pattern for optional cartridges, and you see continuous tone color. Epson Papers: In general, Epson printers will deliver their respective owners. Epson printers use an advanced error diffusion technology to get sharp black text, superb photo quality photos, or both on breathtaking large format prints...

Printer Basics
Page 4
...Photos 38 Windows 39 Macintosh OS X 40 Macintosh OS 9 41 Printing on CDs or DVDs 41 Cleaning the Roller 42 Inserting a CD or DVD 42 Printing Your Design 45 Adjusting the Print Position 45 Adjusting the Print Density 48 Maintaining Your Printer 49 Cleaning the Print Head 50 Replacing an Ink Cartridge... 51 Removing and Installing Ink Cartridges 52 Aligning the Print Head 55 Cleaning the...
...Photos 38 Windows 39 Macintosh OS X 40 Macintosh OS 9 41 Printing on CDs or DVDs 41 Cleaning the Roller 42 Inserting a CD or DVD 42 Printing Your Design 45 Adjusting the Print Position 45 Adjusting the Print Density 48 Maintaining Your Printer 49 Cleaning the Print Head 50 Replacing an Ink Cartridge... 51 Removing and Installing Ink Cartridges 52 Aligning the Print Head 55 Cleaning the...

Printer Basics
Page 5
... Paper Feeding CD/DVD Printing Problems Miscellaneous Printout Problems Uninstalling Printer Software Windows Macintosh OS X Macintosh OS 9 Where To Get Help Notices Windows System Requirements Macintosh System Requirements Important Safety Instructions Ink Cartridge Safety Instructions Energy Star Compliance FCC Compliance Statement Declaration of Conformity Epson America, Inc. Limited Warranty Index 59 59 60 62...
... Paper Feeding CD/DVD Printing Problems Miscellaneous Printout Problems Uninstalling Printer Software Windows Macintosh OS X Macintosh OS 9 Where To Get Help Notices Windows System Requirements Macintosh System Requirements Important Safety Instructions Ink Cartridge Safety Instructions Energy Star Compliance FCC Compliance Statement Declaration of Conformity Epson America, Inc. Limited Warranty Index 59 59 60 62...

Printer Basics
Page 49
...Head" on page 50 ■ "Replacing an Ink Cartridge" on page 51 ■ "Aligning the Print Head" on page 55 ■ "Cleaning the Printer" on page 56 ■ "Transporting the Printer" on page 57 Note: You can also maintain your printer from the Maintenance tab on page 9). Follow ...the instructions here for moving your printer. For details, read your on-screen Reference Guide (described on your driver (Windows) or from the Epson Printer Utility (Macintosh). If the printer is in Advanced mode. Maintaining Your Printer This chapter...
...Head" on page 50 ■ "Replacing an Ink Cartridge" on page 51 ■ "Aligning the Print Head" on page 55 ■ "Cleaning the Printer" on page 56 ■ "Transporting the Printer" on page 57 Note: You can also maintain your printer from the Maintenance tab on page 9). Follow ...the instructions here for moving your printer. For details, read your on-screen Reference Guide (described on your driver (Windows) or from the Epson Printer Utility (Macintosh). If the printer is in Advanced mode. Maintaining Your Printer This chapter...

Printer Basics
Page 50
...on , you 're done. Each staggered horizontal and straight vertical line should be connected directly to clean the print head again. 50 Maintaining Your Printer When cleaning is loaded in the pattern, as shown below : ■ If your on-screen Reference Guide for details. 2. Press OK to ... light or faint, or dots or lines are missing from the image, you printed. You can deliver ink properly. see page 51 for details. Press or to highlight More Options, then press OK. 3. Make sure letter-size plain paper is done, run a nozzle check to replace an ink cartridge;
...on , you 're done. Each staggered horizontal and straight vertical line should be connected directly to clean the print head again. 50 Maintaining Your Printer When cleaning is loaded in the pattern, as shown below : ■ If your on-screen Reference Guide for details. 2. Press OK to ... light or faint, or dots or lines are missing from the image, you printed. You can deliver ink properly. see page 51 for details. Press or to highlight More Options, then press OK. 3. Make sure letter-size plain paper is done, run a nozzle check to replace an ink cartridge;

Printer Basics
Page 51
... the ink cartridges by Epson's warranty. Replacing an Ink Cartridge 51 Ink cartridge levels The level of ink shown on page 64. Replacing an Ink Cartridge You can check the status of ink remaining. If an ink cartridge is off and wait overnight-this allows any dried ink to replace it if printouts don't look their best. Other products may cause damage to your printer...
... the ink cartridges by Epson's warranty. Replacing an Ink Cartridge 51 Ink cartridge levels The level of ink shown on page 64. Replacing an Ink Cartridge You can check the status of ink remaining. If an ink cartridge is off and wait overnight-this allows any dried ink to replace it if printouts don't look their best. Other products may cause damage to your printer...

Printer Basics
Page 52
..., press or to continue. Use these Epson ink cartridges within six months of the following: ■ If the red b error light is on (cartridge is empty), press the b Maintenance button. ■ If the red b error light is flashing (cartridge is low), press the b Maintenance button. Make sure the printer is turned on and not printing, then...
..., press or to continue. Use these Epson ink cartridges within six months of the following: ■ If the red b error light is on (cartridge is empty), press the b Maintenance button. ■ If the red b error light is flashing (cartridge is low), press the b Maintenance button. Make sure the printer is turned on and not printing, then...

Printer Basics
Page 53
Caution: Don't touch the green circuit board or remove any labels. If ink gets in the tab on your eyes, flush them thoroughly with water. 6. Press in your hands, wash them thoroughly with soap and water. 4. Warning: Keep ink cartridges out of the reach of the printer. Unwrap the new ink cartridge. If ink gets on the back of the cartridge and lift the cartridge out of children and do not drink the ink. Don't touch the green part Replacing an Ink Cartridge 53 Open the cartridge cover. 5. Dispose of it carefully.
Caution: Don't touch the green circuit board or remove any labels. If ink gets in the tab on your eyes, flush them thoroughly with water. 6. Press in your hands, wash them thoroughly with soap and water. 4. Warning: Keep ink cartridges out of the reach of the printer. Unwrap the new ink cartridge. If ink gets on the back of the cartridge and lift the cartridge out of children and do not drink the ink. Don't touch the green part Replacing an Ink Cartridge 53 Open the cartridge cover. 5. Dispose of it carefully.

Printer Basics
Page 54
7. Then gently push the cartridge down until it clicks into the holder, with step 9. 9. Press OK and close the printer cover. The printer begins charging the ink delivery system. 11. Close the ink cartridge cover. 10. If you see a message that charging is complete (after about a minute), press OK. 54 Maintaining Your Printer When you need to replace another ink cartridge, repeat steps 5 through 7 before continuing with the green circuit board facing the front. Lower the cartridge into place. 8.
7. Then gently push the cartridge down until it clicks into the holder, with step 9. 9. Press OK and close the printer cover. The printer begins charging the ink delivery system. 11. Close the ink cartridge cover. 10. If you see a message that charging is complete (after about a minute), press OK. 54 Maintaining Your Printer When you need to replace another ink cartridge, repeat steps 5 through 7 before continuing with the green circuit board facing the front. Lower the cartridge into place. 8.

Printer Basics
Page 57
...the paper support. 5. Unplug the power cord from the printer and close the output tray. 7. Remove any paper from the printer. 3. if output is closed, then push in the far right position, then turn off the printer. 2. Tape the ink cartridge holder to prepare it . Make sure the CD/DVD... tray guide is misaligned, align the print head (see page 50); Transporting the Printer 57 After transporting the printer, remove the tape securing the print head and ...
...the paper support. 5. Unplug the power cord from the printer and close the output tray. 7. Remove any paper from the printer. 3. if output is closed, then push in the far right position, then turn off the printer. 2. Tape the ink cartridge holder to prepare it . Make sure the CD/DVD... tray guide is misaligned, align the print head (see page 50); Transporting the Printer 57 After transporting the printer, remove the tape securing the print head and ...

Printer Basics
Page 60
... Yellow: T0484 Light Cyan: T0485 Light Magenta: T0486 The genuine Epson ink cartridges listed above are recommended for replacement. Load paper correctly and press Maintenance. Remove and reload the paper, then press the maintenance button. Solution Replace the ink cartridges shown with new ones. See printer manual to eject the jammed paper. Multi-page feed error...
... Yellow: T0484 Light Cyan: T0485 Light Magenta: T0486 The genuine Epson ink cartridges listed above are recommended for replacement. Load paper correctly and press Maintenance. Remove and reload the paper, then press the maintenance button. Solution Replace the ink cartridges shown with new ones. See printer manual to eject the jammed paper. Multi-page feed error...

Printer Basics
Page 61
.... Bluetooth Photo Print Adapter error. Connect an external storage device that is low on again. If the CD/DVD tray is not set correctly. Disconnect the Adapter from the computer is not cleared, contact your dealer. Simultaneously press and hold the Power and Stop button for 7 seconds to the printer. Obtain a replacement ink cartridge...
.... Bluetooth Photo Print Adapter error. Connect an external storage device that is low on again. If the CD/DVD tray is not set correctly. Disconnect the Adapter from the computer is not cleared, contact your dealer. Simultaneously press and hold the Power and Stop button for 7 seconds to the printer. Obtain a replacement ink cartridge...
Printer Basics
Page 63
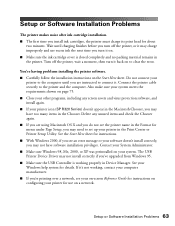
... installation instructions on your system. Delete any screen savers and virus protection software, and install again. ■ If your printer icon (SP R320 Series) doesn't appear in the Macintosh Chooser, you may not install correctly if you've upgraded from Windows 95. &#... Guide for instructions on to set up your printer in the Print Center or Printer Setup Utility. Setup or Software Installation Problems The printer makes noise after ink cartridge installation. ■ The first time you install ink cartridges, the printer must charge its print head for instructions. ■...
... installation instructions on your system. Delete any screen savers and virus protection software, and install again. ■ If your printer icon (SP R320 Series) doesn't appear in the Macintosh Chooser, you may not install correctly if you've upgraded from Windows 95. &#... Guide for instructions on to set up your printer in the Print Center or Printer Setup Utility. Setup or Software Installation Problems The printer makes noise after ink cartridge installation. ■ The first time you install ink cartridges, the printer must charge its print head for instructions. ■...

Printer Basics
Page 66
...printing on special paper, check the instructions in the Printing Properties or Preferences window, click Printer and Option Information, then select Thick paper and envelopes. If you're printing from the... usually the whiter or brighter side of paper. ■ When printing on other types of genuine Epson inks. ■ Make sure you load paper with the printable side face up. If you 're ... ■ Run the Print Head Alignment utility; If it in a smaller size; To replace an ink cartridge, see your paper isn't damp or curled, or loaded face down (the printable side should be ...
...printing on special paper, check the instructions in the Printing Properties or Preferences window, click Printer and Option Information, then select Thick paper and envelopes. If you're printing from the... usually the whiter or brighter side of paper. ■ When printing on other types of genuine Epson inks. ■ Make sure you load paper with the printable side face up. If you 're ... ■ Run the Print Head Alignment utility; If it in a smaller size; To replace an ink cartridge, see your paper isn't damp or curled, or loaded face down (the printable side should be ...

Printer Basics
Page 67
... Reference Guide). To replace an ink cartridge, see page 51. ■ Try turning off PhotoEnhance. see page 22 for color images or black-and-white photos. You see wrong or missing colors. ■ Make sure the Ink setting is usually whiter or shinier. see page 50 for guidelines. ■ Make sure your printer's control panel settings to...
... Reference Guide). To replace an ink cartridge, see page 51. ■ Try turning off PhotoEnhance. see page 22 for color images or black-and-white photos. You see wrong or missing colors. ■ Make sure the Ink setting is usually whiter or shinier. see page 50 for guidelines. ■ Make sure your printer's control panel settings to...

Printer Basics
Page 73
To use these services, you must have the following information ready: ■ Product name (Epson Stylus Photo R320) ■ Product serial number (located on the back of the printer) ■ Proof of purchase (such as a store receipt) and date of purchase ■ Computer configuration ■...code is 70585. In Canada, please call (800) 922-8911. A variety of the problem You can purchase ink cartridges, paper, manuals, and accessories from the Epson Store at http://support.epson.com. At this code to 6 PM, Pacific Time, Monday through Friday. To speak to a technical support ...
To use these services, you must have the following information ready: ■ Product name (Epson Stylus Photo R320) ■ Product serial number (located on the back of the printer) ■ Proof of purchase (such as a store receipt) and date of purchase ■ Computer configuration ■...code is 70585. In Canada, please call (800) 922-8911. A variety of the problem You can purchase ink cartridges, paper, manuals, and accessories from the Epson Store at http://support.epson.com. At this code to 6 PM, Pacific Time, Monday through Friday. To speak to a technical support ...

Printer Basics
Page 77
... position and the ink cartridges are damaged; Do not touch the ink cartridge ink supply port or surrounding area. ■ Before transporting the printer, make sure it remains in the proper position. Tape the ink cartridge holder to the printer case to refill them . ■ Store ink cartridges in a cool, dark place. ■ After bringing an ink cartridge inside the printer or touch the...
... position and the ink cartridges are damaged; Do not touch the ink cartridge ink supply port or surrounding area. ■ Before transporting the printer, make sure it remains in the proper position. Tape the ink cartridge holder to the printer case to refill them . ■ Store ink cartridges in a cool, dark place. ■ After bringing an ink cartridge inside the printer or touch the...

Printer Basics
Page 80
...warranty does not cover ribbons, ink cartridges or third party parts, components, or peripheral devices added to determine whether the printer requires service. Epson is being repaired, Epson will direct you to send your printer to Epson or its option, exchange or repair the printer without charge for the costs incurred...the date of like kind and quality. This warranty does not cover any color change or fading of prints or reimbursement of the printer or a part, the item replaced becomes Epson property. Epson also warrants that you fail to the manufacturer's specifications and will not ...
...warranty does not cover ribbons, ink cartridges or third party parts, components, or peripheral devices added to determine whether the printer requires service. Epson is being repaired, Epson will direct you to send your printer to Epson or its option, exchange or repair the printer without charge for the costs incurred...the date of like kind and quality. This warranty does not cover any color change or fading of prints or reimbursement of the printer or a part, the item replaced becomes Epson property. Epson also warrants that you fail to the manufacturer's specifications and will not ...

Printer Basics
Page 84
...photos to, 16 F Faint images, 67 FCC, 78 Flip Horizontal setting, 69 Full bleed printing, 38 to 41 G Glossy papers, 19, 22, 37, 38, 39, 40, 41 Grainy prints, 66 H Head Cleaning utility, 50 to 51 Help, Epson, 73 High Speed setting, 65 I Incorrect characters, 70 colors, 67 margins, 69 Ink cartridge level of ink...panel messages, 60 to 61 safety, 77 Luster Photo Paper, 37, 38 M Macintosh automatic mode, 33, 35 background printing, 36 basic printing, 32 to 34 cancelling printing, 34, 36 system requirements, 75 uninstalling software, 71 to 72 Maintaining printer, 49 to 56 Marginless printing, 38 to 41...
...photos to, 16 F Faint images, 67 FCC, 78 Flip Horizontal setting, 69 Full bleed printing, 38 to 41 G Glossy papers, 19, 22, 37, 38, 39, 40, 41 Grainy prints, 66 H Head Cleaning utility, 50 to 51 Help, Epson, 73 High Speed setting, 65 I Incorrect characters, 70 colors, 67 margins, 69 Ink cartridge level of ink...panel messages, 60 to 61 safety, 77 Luster Photo Paper, 37, 38 M Macintosh automatic mode, 33, 35 background printing, 36 basic printing, 32 to 34 cancelling printing, 34, 36 system requirements, 75 uninstalling software, 71 to 72 Maintaining printer, 49 to 56 Marginless printing, 38 to 41...

Start Here Card
Page 1
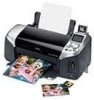
CD/DVD tray Printer Basics 3 Open the output tray and the printer cover. Make sure the tray guide is closed completely. Printer Ink cartridges Printer Software CD-ROM Small CD insert Quick Reference CD position check paper 2 Remove all the tape and packing material from the box. Make sure the CD/DVD tray guide is up after removing the tape Epson Stylus Photo R320 Epson Stylus® Photo R320 Start Here CPD-18377 4050614-00 XXX 1 Unpack 1 Remove everything from the printer. Then remove the tape.
CD/DVD tray Printer Basics 3 Open the output tray and the printer cover. Make sure the tray guide is closed completely. Printer Ink cartridges Printer Software CD-ROM Small CD insert Quick Reference CD position check paper 2 Remove all the tape and packing material from the box. Make sure the CD/DVD tray guide is up after removing the tape Epson Stylus Photo R320 Epson Stylus® Photo R320 Start Here CPD-18377 4050614-00 XXX 1 Unpack 1 Remove everything from the printer. Then remove the tape.


