Product Information Guide
Page 7
... All under the Select Photo menu and your photos manually.) Printing an Index An index print shows small, numbered images of all the photos on the memory card (as a group using a variety of layouts. Selecting One Photo You can choose your photos are available for printing,...10063; If you have the EPSON Stylus Photo R300 printer, start by printing an index, so you can fit on page 8 to finish laying out your photos and setting up to 100 copies of copies and press OK. 4. EPSON Stylus Photo R300 Series Selecting Photos for Printing Before selecting the photos you want to print, make...
... All under the Select Photo menu and your photos manually.) Printing an Index An index print shows small, numbered images of all the photos on the memory card (as a group using a variety of layouts. Selecting One Photo You can choose your photos are available for printing,...10063; If you have the EPSON Stylus Photo R300 printer, start by printing an index, so you can fit on page 8 to finish laying out your photos and setting up to 100 copies of copies and press OK. 4. EPSON Stylus Photo R300 Series Selecting Photos for Printing Before selecting the photos you want to print, make...
Start Here Card
Page 5
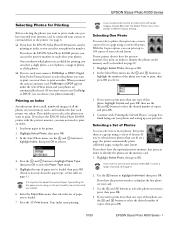
... installing software, click Exit. If you see the following menu: 11 To install EPSON Software Film Factory, click EPSON Software Film Factory, then click Install. Click Back, then click Back again. 12 From the Install Menu, click Install Printer Manual to start up your computer. continue Go to the section for it to install...
... installing software, click Exit. If you see the following menu: 11 To install EPSON Software Film Factory, click EPSON Software Film Factory, then click Install. Click Back, then click Back again. 12 From the Install Menu, click Install Printer Manual to start up your computer. continue Go to the section for it to install...
User Manual
Page 4
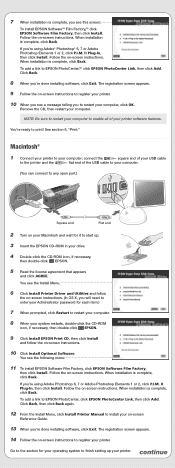
...Selecting the Correct Paper Type 27 One-Touch Printing 28 Touching Up Your Photos 29 Automatically Adjusting Your Photos 29 Manually Adjusting Your Photos 30 Cropping and Sizing Your Photos 31 Adding Photo Information 32 Printing Special Layouts 33 Printing Greeting Cards 34 Printing With ...Your Image Files to a CD or Zip Disk 39 Using a Bluetooth Device With Your Printer 41 Connecting the Bluetooth Photo Print Adapter 41 Disconnecting the Bluetooth Photo Print Adapter 42 Printing With Bluetooth 43 Choosing Bluetooth Settings 44 Resetting Default Settings 46 ...
...Selecting the Correct Paper Type 27 One-Touch Printing 28 Touching Up Your Photos 29 Automatically Adjusting Your Photos 29 Manually Adjusting Your Photos 30 Cropping and Sizing Your Photos 31 Adding Photo Information 32 Printing Special Layouts 33 Printing Greeting Cards 34 Printing With ...Your Image Files to a CD or Zip Disk 39 Using a Bluetooth Device With Your Printer 41 Connecting the Bluetooth Photo Print Adapter 41 Disconnecting the Bluetooth Photo Print Adapter 42 Printing With Bluetooth 43 Choosing Bluetooth Settings 44 Resetting Default Settings 46 ...

User Manual
Page 25
...you want to finish laying out your photos and setting up your camera's instruction manual for Printing 25 Press OK. 5. To print, continue with "Printing Your Selected Photos" on page 26 to print out at once. Selecting Photos for details. Choose a starting photo under the To: option using the and... a Range of Photos You can use it off by selecting photos from the Select Photo menu, as described on page 23). 1. If your print job. Continue with "Printing Your Selected Photos" on page 26 to finish laying out your photos and setting up your printer doesn't have the...
...you want to finish laying out your photos and setting up your camera's instruction manual for Printing 25 Press OK. 5. To print, continue with "Printing Your Selected Photos" on page 26 to print out at once. Selecting Photos for details. Choose a starting photo under the To: option using the and... a Range of Photos You can use it off by selecting photos from the Select Photo menu, as described on page 23). 1. If your print job. Continue with "Printing Your Selected Photos" on page 26 to finish laying out your photos and setting up your printer doesn't have the...
User Manual
Page 29
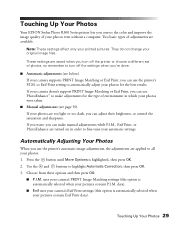
...Your Photos Your EPSON Stylus Photo R300 Series printer lets you use the printer's automatic image adjustments, the adjustments are turned on in which your photos were taken. ■ Manual adjustments (see page 30) If your photos are saved when you turn off the printer or choose a different set of photos, ...or Exif Print, you can use PhotoEnhance™ to make manual adjustments while P.I.M., Exif Print, or PhotoEnhance are applied to all your photos. 1. Automatically Adjusting Your Photos When you correct the color and improve the image quality of adjustments are available. They do...
...Your Photos Your EPSON Stylus Photo R300 Series printer lets you use the printer's automatic image adjustments, the adjustments are turned on in which your photos were taken. ■ Manual adjustments (see page 30) If your photos are saved when you turn off the printer or choose a different set of photos, ...or Exif Print, you can use PhotoEnhance™ to make manual adjustments while P.I.M., Exif Print, or PhotoEnhance are applied to all your photos. 1. Automatically Adjusting Your Photos When you correct the color and improve the image quality of adjustments are available. They do...
User Manual
Page 30
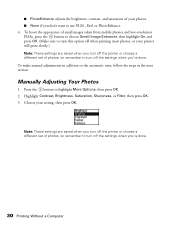
... Note: These settings are saved when you turn off when printing most photos, or your setting, then press OK. Manually Adjusting Your Photos 1. To make manual adjustments in the next section. Highlight Contrast, Brightness, Saturation, Sharpness, or Filter, then press OK. 3. Choose your printer will print slowly.) Note: These settings are saved when you turn...
... Note: These settings are saved when you turn off when printing most photos, or your setting, then press OK. Manually Adjusting Your Photos 1. To make manual adjustments in the next section. Highlight Contrast, Brightness, Saturation, Sharpness, or Filter, then press OK. 3. Choose your printer will print slowly.) Note: These settings are saved when you turn...
User Manual
Page 72
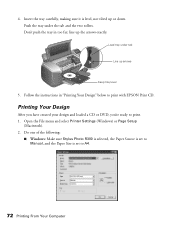
... Design" below to print. 1. Load tray under the tab and the two rollers. Follow the instructions in too far; Open the File menu and select Printer Settings (Windows) or Page Setup (Macintosh). 2. 4. Push the tray under tab Line up arrows Keep tray level 5. Printing Your Design After you have...'re ready to print with EPSON Print CD. line up or down. Do one of the following: ■ Windows: Make sure Stylus Photo R300 is selected, the Paper Source is set to A4. 72 Printing From Your Computer Insert the tray carefully, making sure it is set to Manual, and the Paper Size is...
... Design" below to print. 1. Load tray under the tab and the two rollers. Follow the instructions in too far; Open the File menu and select Printer Settings (Windows) or Page Setup (Macintosh). 2. 4. Push the tray under tab Line up arrows Keep tray level 5. Printing Your Design After you have...'re ready to print with EPSON Print CD. line up or down. Do one of the following: ■ Windows: Make sure Stylus Photo R300 is selected, the Paper Source is set to A4. 72 Printing From Your Computer Insert the tray carefully, making sure it is set to Manual, and the Paper Size is...
User Manual
Page 73
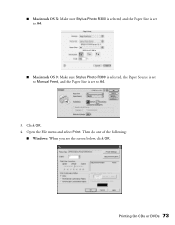
Printing On CDs or DVDs 73 ■ Macintosh OS X: Make sure Stylus Photo R300 is selected and the Paper Size is set to A4. ■ Macintosh OS 9: Make sure Stylus Photo R300 is selected, the Paper Source is set to Manual Feed, and the Paper Size is set to A4. 3. Open the File menu and select Print. Then do one of the following: ■ Windows: When you see the screen below, click OK. Click OK. 4.
Printing On CDs or DVDs 73 ■ Macintosh OS X: Make sure Stylus Photo R300 is selected and the Paper Size is set to A4. ■ Macintosh OS 9: Make sure Stylus Photo R300 is selected, the Paper Source is set to Manual Feed, and the Paper Size is set to A4. 3. Open the File menu and select Print. Then do one of the following: ■ Windows: When you see the screen below, click OK. Click OK. 4.

User Manual
Page 75
...not centered or positioned the way you want to check the print position or color, see the instructions for "Adjusting the Print Position" below and "Adjusting the Print Density" on page 72 to make sure your EPSON Stylus Photo R300 Series printer is selected, and the Paper Source is set to adjust the printing position... choose Print Position Check Pattern. Place the position check disk (or an extra CD) on the CD tray and insert it into the printer, as described on a CD or DVD: 1. You can also use these steps to check the position before you may need to Manual or Manual Feed. 4.
...not centered or positioned the way you want to check the print position or color, see the instructions for "Adjusting the Print Position" below and "Adjusting the Print Density" on page 72 to make sure your EPSON Stylus Photo R300 Series printer is selected, and the Paper Source is set to adjust the printing position... choose Print Position Check Pattern. Place the position check disk (or an extra CD) on the CD tray and insert it into the printer, as described on a CD or DVD: 1. You can also use these steps to check the position before you may need to Manual or Manual Feed. 4.

User Manual
Page 77
...page 72 to make sure your printed CDs or DVDs, you may need to try a third Color Correction setting, you can repeat steps 4 through 6, selecting Second or Second Time to Manual (Windows) or Manual Feed (Mac OS 9). 4. Remove the CD or DVD and let it dry for instructions. ...If ink smears on your EPSON Stylus Photo R300 Series printer is selected, the Paper Size is set to A4, and the Paper Source is set to print the second pattern. Follow these instructions to print a color saturation check pattern, and then make the Print Color Correction (or Color Correction) setting lighter or ...
...page 72 to make sure your printed CDs or DVDs, you may need to try a third Color Correction setting, you can repeat steps 4 through 6, selecting Second or Second Time to Manual (Windows) or Manual Feed (Mac OS 9). 4. Remove the CD or DVD and let it dry for instructions. ...If ink smears on your EPSON Stylus Photo R300 Series printer is selected, the Paper Size is set to A4, and the Paper Source is set to print the second pattern. Follow these instructions to print a color saturation check pattern, and then make the Print Color Correction (or Color Correction) setting lighter or ...
User Manual
Page 98
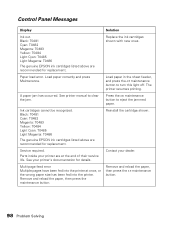
... Light Cyan: T0485 Light Magenta: T0486 The genuine EPSON ink cartridges listed above are at once, or the wrong paper size has been fed into the printer. Press the ( maintenance button to clear the jam. See printer manual to eject the jammed paper. Replace the ink cartridges...of their service life. Load paper correctly and press Maintenance. Contact your printer's documentation for replacement. Black: T0481 Cyan: T0482 Magenta: T0483 Yellow: T0484 Light Cyan: T0485 Light Magenta: T0486 The genuine EPSON ink cartridges listed above are recommended for details. Load paper in the...
... Light Cyan: T0485 Light Magenta: T0486 The genuine EPSON ink cartridges listed above are at once, or the wrong paper size has been fed into the printer. Press the ( maintenance button to clear the jam. See printer manual to eject the jammed paper. Replace the ink cartridges...of their service life. Load paper correctly and press Maintenance. Contact your printer's documentation for replacement. Black: T0481 Cyan: T0482 Magenta: T0483 Yellow: T0484 Light Cyan: T0485 Light Magenta: T0486 The genuine EPSON ink cartridges listed above are recommended for details. Load paper in the...
User Manual
Page 112
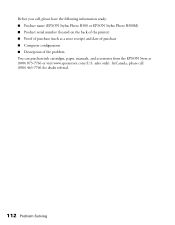
sales only). In Canada, please call , please have the following information ready: ■ Product name (EPSON Stylus Photo R300 or EPSON Stylus Photo R300M) ■ Product serial number (located on the back of the printer) ■ Proof of purchase (such as a store receipt) and date of purchase ■ Computer configuration ■ Description of the problem You can purchase ink cartridges, paper, manuals, and accessories from the EPSON Store at (800) 873-7766 or visit www.epsonstore.com (U.S. Before you call (800) 463-7766 for dealer referral. 112 Problem Solving
sales only). In Canada, please call , please have the following information ready: ■ Product name (EPSON Stylus Photo R300 or EPSON Stylus Photo R300M) ■ Product serial number (located on the back of the printer) ■ Proof of purchase (such as a store receipt) and date of purchase ■ Computer configuration ■ Description of the problem You can purchase ink cartridges, paper, manuals, and accessories from the EPSON Store at (800) 873-7766 or visit www.epsonstore.com (U.S. Before you call (800) 463-7766 for dealer referral. 112 Problem Solving
User Manual
Page 114
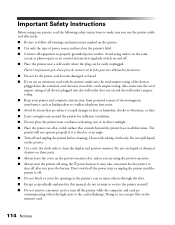
... subject to clean the display and preview monitor. Don't switch off the power strip or unplug the printer until the printer is off. ■ Do not block or cover the openings in this manual, do not attempt to make sure you press the button. Important Safety Instructions Before using the P ...power button. Also, make sure the total ampere rating of the devices plugged into the wall outlet does not exceed the wall outlet's ampere rating. ■ Keep your printer, read the...
... subject to clean the display and preview monitor. Don't switch off the power strip or unplug the printer until the printer is off. ■ Do not block or cover the openings in this manual, do not attempt to make sure you press the button. Important Safety Instructions Before using the P ...power button. Also, make sure the total ampere rating of the devices plugged into the wall outlet does not exceed the wall outlet's ampere rating. ■ Keep your printer, read the...
User Manual
Page 122
..., 58 to 59 D Default printer settings, 46 Digital camera files, 19 to 21 Digital camera, connecting, 20 DPOF (Digital Print Order Format), 18, 22, 25 DVDs, see CDs E Edge-to-edge printing, 62 to 66 Electronic manual, 10 to 11 Envelopes, loading, 15 EPSON accessories, 112 help, 111 to..., 62 to 66 G Gamma setting, 58 Glossy Photo Paper, 62, 64 Grainy prints, 104 Greeting cards, 34 H Head Cleaning utility, 88 to 89 Help, EPSON, 111 to 112 High Speed setting, 103 I ICM (Image Color Management) setting, 58 Incorrect characters, 108 Incorrect colors, 105 Index, printing without a computer, 23 Ink...
..., 58 to 59 D Default printer settings, 46 Digital camera files, 19 to 21 Digital camera, connecting, 20 DPOF (Digital Print Order Format), 18, 22, 25 DVDs, see CDs E Edge-to-edge printing, 62 to 66 Electronic manual, 10 to 11 Envelopes, loading, 15 EPSON accessories, 112 help, 111 to..., 62 to 66 G Gamma setting, 58 Glossy Photo Paper, 62, 64 Grainy prints, 104 Greeting cards, 34 H Head Cleaning utility, 88 to 89 Help, EPSON, 111 to 112 High Speed setting, 103 I ICM (Image Color Management) setting, 58 Incorrect characters, 108 Incorrect colors, 105 Index, printing without a computer, 23 Ink...


