Product Brochure
Page 1
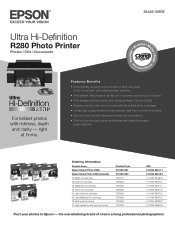
SALES GUIDE Ultra Hi-Definition R280 Photo Printer Photos | CDs | Documents Scratch • Wa Smudge • s ter • Fade R esistant Photo For brilliant photos with Epson's versatile paper selection Ordering Information Product Name Epson Stylus® Photo R280 Epson Stylus Photo R280 (Canada) 78 Black ink cartridge 78 Cyan ink cartridge 78 Magenta ink cartridge 78 Yellow ink cartridge 78 Light Cyan ink cartridge 78 Light...
SALES GUIDE Ultra Hi-Definition R280 Photo Printer Photos | CDs | Documents Scratch • Wa Smudge • s ter • Fade R esistant Photo For brilliant photos with Epson's versatile paper selection Ordering Information Product Name Epson Stylus® Photo R280 Epson Stylus Photo R280 (Canada) 78 Black ink cartridge 78 Cyan ink cartridge 78 Magenta ink cartridge 78 Yellow ink cartridge 78 Light Cyan ink cartridge 78 Light...

Product Brochure
Page 2
... use genuine Epson ink cartridges. For print quality, a small amount of prints on system configuration, software application and page complexity. Epson R280 Ultra Hi-Definition Photo Printer Specifications Printer Specifications Printing Technology Advanced MicroPiezo® 6-color ink jet printing...gloss, Presentation Paper Matte, Premium Presentation Paper Matte and Matte Scrapbook Paper (letter) Envelope Types No. 10, DL, C6; Packaging Specifications Epson Stylus Photo R280 Single Carton Dimensions 20.2" x 13.8" x 9.4" (W x D x H) Single Carton Weight 17.9 lb Pallet 42.5" x 40.9" x...
... use genuine Epson ink cartridges. For print quality, a small amount of prints on system configuration, software application and page complexity. Epson R280 Ultra Hi-Definition Photo Printer Specifications Printer Specifications Printing Technology Advanced MicroPiezo® 6-color ink jet printing...gloss, Presentation Paper Matte, Premium Presentation Paper Matte and Matte Scrapbook Paper (letter) Envelope Types No. 10, DL, C6; Packaging Specifications Epson Stylus Photo R280 Single Carton Dimensions 20.2" x 13.8" x 9.4" (W x D x H) Single Carton Weight 17.9 lb Pallet 42.5" x 40.9" x...

Product Information Guide
Page 1
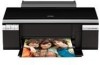
... cartridge (78). You can purchase genuine Epson ink and paper from an Epson authorized reseller. sales) or www.epson.ca (Canadian sales). You can still use any combination of cartridge sizes. To find the nearest one, call 800-GO-EPSON (800-463-7766). 7/07 1 If...cartridge (77), for example, you can also purchase supplies from Epson Supplies CentralSM at http://www.epson.com/highcapacity (U.S. Printer Parts Paper support Right edge guide Left edge guide Sheet feeder Printer cover Epson Stylus Photo R280 USB port Front tray Front cover Front tray extensions CD/DVD ...
... cartridge (78). You can purchase genuine Epson ink and paper from an Epson authorized reseller. sales) or www.epson.ca (Canadian sales). You can still use any combination of cartridge sizes. To find the nearest one, call 800-GO-EPSON (800-463-7766). 7/07 1 If...cartridge (77), for example, you can also purchase supplies from Epson Supplies CentralSM at http://www.epson.com/highcapacity (U.S. Printer Parts Paper support Right edge guide Left edge guide Sheet feeder Printer cover Epson Stylus Photo R280 USB port Front tray Front cover Front tray extensions CD/DVD ...
Product Information Guide
Page 3
...;F (-20 to 40 °C) 1 month at 104 °F (40 °C) Humidity (without ink cartridges Ink Cartridges Colors Black, cyan, magenta, yellow, light cyan light magenta Cartridge life Within 6 months after opening the package. Epson Stylus Photo R280 Printer Specifications Printing Epson MicroPiezo® head with DX5™ variable droplets Mechanical Paper feed Paper path Sheet feeder capacity...
...;F (-20 to 40 °C) 1 month at 104 °F (40 °C) Humidity (without ink cartridges Ink Cartridges Colors Black, cyan, magenta, yellow, light cyan light magenta Cartridge life Within 6 months after opening the package. Epson Stylus Photo R280 Printer Specifications Printing Epson MicroPiezo® head with DX5™ variable droplets Mechanical Paper feed Paper path Sheet feeder capacity...
Product Information Guide
Page 4
... into the sheet feeder with ink: Inner hub area Outer periphery area 18 to 42 mm 117 to 120 mm for a 8-cm CD/DVD 4 7/07 Epson Stylus Photo R280 Paper Single sheets Size Paper type Thickness Weight (for plain bond paper) A4 (8.3 × 11.7 inches) A6 (4.1 × 5.8 inches) Letter (8.5 × 11 ...215; 5 inches 8 × 10 inches 16:9 (4 × 7.11 inches) User Defined up to 8.5 × 44 inches Plain bond paper or special paper distributed by Epson 0.003 to 0.004 inch (0.08 to 0.11 mm) 17 lb (64 g/m²) to 24 lb (90 g/m²) Envelopes Size Paper type Weight No. 10 (4.1 ×...
... into the sheet feeder with ink: Inner hub area Outer periphery area 18 to 42 mm 117 to 120 mm for a 8-cm CD/DVD 4 7/07 Epson Stylus Photo R280 Paper Single sheets Size Paper type Thickness Weight (for plain bond paper) A4 (8.3 × 11.7 inches) A6 (4.1 × 5.8 inches) Letter (8.5 × 11 ...215; 5 inches 8 × 10 inches 16:9 (4 × 7.11 inches) User Defined up to 8.5 × 44 inches Plain bond paper or special paper distributed by Epson 0.003 to 0.004 inch (0.08 to 0.11 mm) 17 lb (64 g/m²) to 24 lb (90 g/m²) Envelopes Size Paper type Weight No. 10 (4.1 ×...
Product Information Guide
Page 5
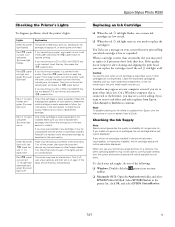
...or reliability of the cartridges is expended, even if other foreign objects. Epson Stylus Photo R280 Checking the Printer's Lights To diagnose problems, check the printer's lights: Lights Explanation Green power The printer is off the printer, open the cover and remove any torn pieces. Press the paper button ...continue. A window may be displayed. To check your on , contact Epson. You'll also see the instructions in the printer list, click OK, and select EPSON StatusMonitor. 7/07 5 Select SP R280 Series in your ink supply, do one or more paper and press the...
...or reliability of the cartridges is expended, even if other foreign objects. Epson Stylus Photo R280 Checking the Printer's Lights To diagnose problems, check the printer's lights: Lights Explanation Green power The printer is off the printer, open the cover and remove any torn pieces. Press the paper button ...continue. A window may be displayed. To check your on , contact Epson. You'll also see the instructions in the printer list, click OK, and select EPSON StatusMonitor. 7/07 5 Select SP R280 Series in your ink supply, do one or more paper and press the...

Product Information Guide
Page 6
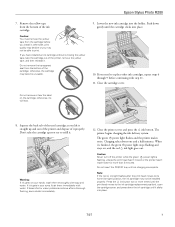
... print head nozzles may continue to the ink cartridge replacement position. Always install an ink cartridge immediately after removing the old cartridge. Epson Stylus Photo R280 Removing and Installing Ink Cartridges Be sure you have a new ink cartridge before it from its package. Once you must complete all...again. ❏ If more than one session. Repeat this may dry out and be replaced stops under the mark. Make sure the printer is in printer damage. Open the cartridge cover. ❏ If you are replacing a low or expended cartridge, the print head moves to the ...
... print head nozzles may continue to the ink cartridge replacement position. Always install an ink cartridge immediately after removing the old cartridge. Epson Stylus Photo R280 Removing and Installing Ink Cartridges Be sure you have a new ink cartridge before it from its package. Once you must complete all...again. ❏ If more than one session. Repeat this may dry out and be replaced stops under the mark. Make sure the printer is in printer damage. Open the cartridge cover. ❏ If you are replacing a low or expended cartridge, the print head moves to the ...
Product Information Guide
Page 7
... not remove or tear the label on your eyes, flush them thoroughly with water. Press the ink button two or more than 5 minutes. Epson Stylus Photo R280 7. Lower the new ink cartridge into place. 10. Push down the ink cartridge until it 's finished, the green power light stops flashing... cartridge replacement position), open the cartridge cover, and press down gently until ink charging is complete. The green power light flashes and the printer makes noise. When it clicks into place. 7/07 7 Don't take the cartridge out of the ink cartridge. Charging takes about one and...
... not remove or tear the label on your eyes, flush them thoroughly with water. Press the ink button two or more than 5 minutes. Epson Stylus Photo R280 7. Lower the new ink cartridge into place. 10. Push down the ink cartridge until it 's finished, the green power light stops flashing... cartridge replacement position), open the cartridge cover, and press down gently until ink charging is complete. The green power light flashes and the printer makes noise. When it clicks into place. 7/07 7 Don't take the cartridge out of the ink cartridge. Charging takes about one and...
Product Information Guide
Page 8
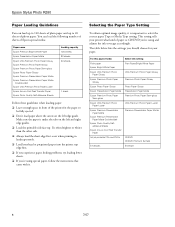
... loading paper: ❏ Leave enough space in front of the printer for your printer what kind of paper or CD/DVD you 're using and ...Epson Stylus Photo R280 Paper Loading Guidelines You can load the following number of sheets of Epson special media: Paper name Epson Premium Bright White Paper Epson Presentation Paper Matte Epson Ultra Premium Photo Paper Glossy Epson Premium Photo Paper Glossy Epson Premium Photo Paper Semi-gloss Epson Photo Paper Glossy Epson Premium Presentation Paper Matte Epson Premium Presentation Paper Matte Double-sided Epson Ultra Premium Photo Paper Luster Epson...
... loading paper: ❏ Leave enough space in front of the printer for your printer what kind of paper or CD/DVD you 're using and ...Epson Stylus Photo R280 Paper Loading Guidelines You can load the following number of sheets of Epson special media: Paper name Epson Premium Bright White Paper Epson Presentation Paper Matte Epson Ultra Premium Photo Paper Glossy Epson Premium Photo Paper Glossy Epson Premium Photo Paper Semi-gloss Epson Photo Paper Glossy Epson Premium Presentation Paper Matte Epson Premium Presentation Paper Matte Double-sided Epson Ultra Premium Photo Paper Luster Epson...
Product Information Guide
Page 9
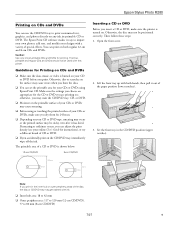
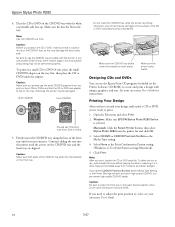
..., you can adjust the print density (see your CDs or DVDs using or touching the printed surface of your CDs or DVDs, make sure the printer is shown below: 12-cm CD/DVD 8-cm CD/DVD Inserting a CD or DVD Before you are appropriate for the CD or DVD you insert... the printable surface of your CDs or DVDs may cause errors when you accidentally print on the CD/DVD tray, immediately wipe off the ink. Epson Stylus Photo R280 Printing on CDs and DVDs You can print on both hands, then pull it out of the paper position (lower notches). 3.
..., you can adjust the print density (see your CDs or DVDs using or touching the printed surface of your CDs or DVDs, make sure the printer is shown below: 12-cm CD/DVD 8-cm CD/DVD Inserting a CD or DVD Before you are appropriate for the CD or DVD you insert... the printable surface of your CDs or DVDs may cause errors when you accidentally print on the CD/DVD tray, immediately wipe off the ink. Epson Stylus Photo R280 Printing on CDs and DVDs You can print on both hands, then pull it out of the paper position (lower notches). 3.
Product Information Guide
Page 10
...printable side face-up. Keep printed discs away from the printer list and click OK. 3. If you select CD/DVD Premium Surface as this printer. If you 're ready to adjust the print position or color, see your printer may be damaged or the surface of the CD or ...in the Printer Settings window and use the small CD/DVD adapter when you can use the CD/DVD tray provided with images, graphics, and text. Caution: Be sure to dry, wait at a time. Select None as the Media Type setting. 4. Windows: Make sure EPSON Stylus Photo R280 Series is printing; Epson Stylus Photo R280 4. ...
...printable side face-up. Keep printed discs away from the printer list and click OK. 3. If you select CD/DVD Premium Surface as this printer. If you 're ready to adjust the print position or color, see your printer may be damaged or the surface of the CD or ...in the Printer Settings window and use the small CD/DVD adapter when you can use the CD/DVD tray provided with images, graphics, and text. Caution: Be sure to dry, wait at a time. Select None as the Media Type setting. 4. Windows: Make sure EPSON Stylus Photo R280 Series is printing; Epson Stylus Photo R280 4. ...
Product Information Guide
Page 11
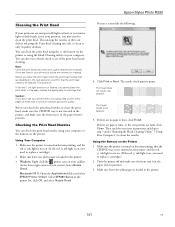
... turned on but not printing, that the print head needs to be cleaned: 5. Click Print or Next. Then read the on the Printer 1. Epson Stylus Photo R280 Cleaning the Print Head If your printouts are unexpectedly light or faint, or you notice light or dark bands across your printout, you clean the ... Check. This unclogs the nozzles so they can clean the print head using the ink button on the printer or using your screen). If the red ink light comes on your printout or colors are incorrect or missing). Note: Clean the print head only when print quality declines (for example, if you...
... turned on but not printing, that the print head needs to be cleaned: 5. Click Print or Next. Then read the on the Printer 1. Epson Stylus Photo R280 Cleaning the Print Head If your printouts are unexpectedly light or faint, or you notice light or dark bands across your printout, you clean the ... Check. This unclogs the nozzles so they can clean the print head using the ink button on the printer or using your screen). If the red ink light comes on your printout or colors are incorrect or missing). Note: Clean the print head only when print quality declines (for example, if you...
Product Information Guide
Page 12
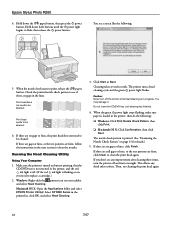
Epson Stylus Photo R280 4. Hold down both buttons until cleaning has finished. 4. Print head does not need to ... follow the instructions in progress. Running the Head Cleaning Utility Using Your Computer 1. Caution: Never turn the printer off . (If the red ink light is flashing or on but not printing, that the CD/DVD tray is ... print head does not need to flash, then release the power button. Macintosh OS X: Open the Applications folder and select EPSON Printer Utility2. Do not insert the CD/DVD tray until the power light begins to replace a cartridge.) 2. Hold down the...
Epson Stylus Photo R280 4. Hold down both buttons until cleaning has finished. 4. Print head does not need to ... follow the instructions in progress. Running the Head Cleaning Utility Using Your Computer 1. Caution: Never turn the printer off . (If the red ink light is flashing or on but not printing, that the CD/DVD tray is ... print head does not need to flash, then release the power button. Macintosh OS X: Open the Applications folder and select EPSON Printer Utility2. Do not insert the CD/DVD tray until the power light begins to replace a cartridge.) 2. Hold down the...
Product Information Guide
Page 13
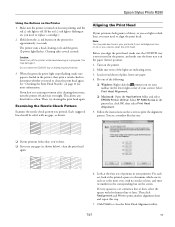
.... 7. Load several seconds. Do one of the following: ❏ Windows: Right-click the printer icon on the Printer 1. Look at the printed squares to align the print head. Then click Realignment and Print to print the alignment pattern. Epson Stylus Photo R280 Using the Buttons on your taskbar (in the lower right corner of your screen...
.... 7. Load several seconds. Do one of the following: ❏ Windows: Right-click the printer icon on the Printer 1. Look at the printed squares to align the print head. Then click Realignment and Print to print the alignment pattern. Epson Stylus Photo R280 Using the Buttons on your taskbar (in the lower right corner of your screen...
Product Information Guide
Page 14
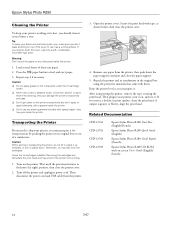
... top of the cover or use any cleaning sheets included with special paper; they may prevent the printer from the printer, then push down . Open the printer cover. Related Documentation CPD-23761 CPD-23763 CPD-23764 CPD-23765 Epson Stylus Photo R280 Start Here (English/French) Epson Stylus Photo R280 Quick Guide (English) Epson Stylus Photo R280 Guide Rapide (French) Epson Stylus Photo R280 CD-ROM with on the...
... top of the cover or use any cleaning sheets included with special paper; they may prevent the printer from the printer, then push down . Open the printer cover. Related Documentation CPD-23761 CPD-23763 CPD-23764 CPD-23765 Epson Stylus Photo R280 Start Here (English/French) Epson Stylus Photo R280 Quick Guide (English) Epson Stylus Photo R280 Guide Rapide (French) Epson Stylus Photo R280 CD-ROM with on the...
Quick Reference Guide
Page 3
Tip: Tips contain hints for it on your R280 Series instructions: Warning: Warnings must be followed carefully to avoid bodily injury. Introduction 3 Note: Notes contain important information about your equipment. Caution: Cautions must be... ■ Solve simple problems For additional instructions, see the on the Start Here sheet, turn here to your R280 Series. Please follow these guidelines as described on -screen User's Guide by selecting the icon for better printing. Introduction After you have set up your Epson Stylus® Photo R280 Series as you read your desktop.
Tip: Tips contain hints for it on your R280 Series instructions: Warning: Warnings must be followed carefully to avoid bodily injury. Introduction 3 Note: Notes contain important information about your equipment. Caution: Cautions must be... ■ Solve simple problems For additional instructions, see the on the Start Here sheet, turn here to your R280 Series. Please follow these guidelines as described on -screen User's Guide by selecting the icon for better printing. Introduction After you have set up your Epson Stylus® Photo R280 Series as you read your desktop.
Quick Reference Guide
Page 7
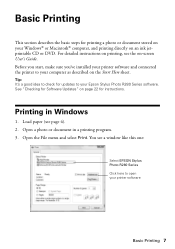
... paper (see the on printing, see page 4). 2. Before you start, make sure you've installed your printer software and connected the printer to your Epson Stylus Photo R280 Series software. Basic Printing This section describes the basic steps for printing a photo or document stored on your Windows® or Macintosh® computer, and printing directly on page...
... paper (see the on printing, see page 4). 2. Before you start, make sure you've installed your printer software and connected the printer to your Epson Stylus Photo R280 Series software. Basic Printing This section describes the basic steps for printing a photo or document stored on your Windows® or Macintosh® computer, and printing directly on page...
Quick Reference Guide
Page 8
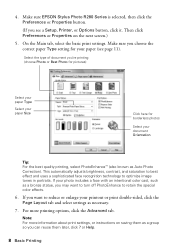
...so you can reuse them later, click ? Select the type of document you choose the correct paper Type setting for borderless photos Select your paper (see a Setup, Printer, or Options button, click it. Note: For more printing options, click the Advanced tab. On the Main tab, ... or enlarge your photo includes a face with an intentional color cast, such as necessary. 7. If your printout or print double-sided, click the Page Layout tab and select settings as a bronze statue, you see page 11). or Help. 8 Basic Printing Make sure EPSON Stylus Photo R280 Series is selected,...
...so you can reuse them later, click ? Select the type of document you choose the correct paper Type setting for borderless photos Select your paper (see a Setup, Printer, or Options button, click it. Note: For more printing options, click the Advanced tab. On the Main tab, ... or enlarge your photo includes a face with an intentional color cast, such as necessary. 7. If your printout or print double-sided, click the Page Layout tab and select settings as a bronze statue, you see page 11). or Help. 8 Basic Printing Make sure EPSON Stylus Photo R280 Series is selected,...
Quick Reference Guide
Page 9
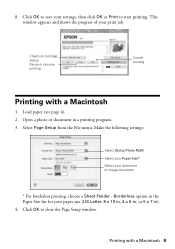
... menu. Make the following settings: Select Stylus Photo R280 Select your Paper Size* Select your paper size (US Letter, 8 x 10 in, 4 x 6 in, or 5 x 7 in). 4. Check ink cartridge status Pause or resume printing Cancel printing Printing with a Macintosh 9 Load paper (see page 4). 2. Borderless option in a printing program. 3. Open a photo or document in the Paper Size...
... menu. Make the following settings: Select Stylus Photo R280 Select your Paper Size* Select your paper size (US Letter, 8 x 10 in, 4 x 6 in, or 5 x 7 in). 4. Check ink cartridge status Pause or resume printing Cancel printing Printing with a Macintosh 9 Load paper (see page 4). 2. Borderless option in a printing program. 3. Open a photo or document in the Paper Size...
Quick Reference Guide
Page 10
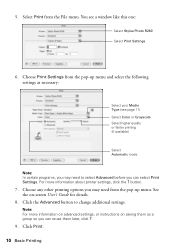
... following settings as a group so you can reuse them as necessary: Select your Media Type (see a window like this one: Select Stylus Photo R280 Select Print Settings 6. For more information on advanced settings, or instructions on -screen User's Guide for details. 8. Click the Advanced button... to select Advanced before you can select Print Settings. 5. You see page 11) Select Color or Grayscale Select higher quality or faster printing (if available) Select Automatic mode Note: In certain programs, you may need to change ...
... following settings as a group so you can reuse them as necessary: Select your Media Type (see a window like this one: Select Stylus Photo R280 Select Print Settings 6. For more information on advanced settings, or instructions on -screen User's Guide for details. 8. Click the Advanced button... to select Advanced before you can select Print Settings. 5. You see page 11) Select Color or Grayscale Select higher quality or faster printing (if available) Select Automatic mode Note: In certain programs, you may need to change ...


