
User Manual
Page 3
CContents Welcome 1Setting Up the Projector 2Using the Projector Getting the Most from Your Projector 2 Using Your Documentation 3 Reading This Manual Online 3 Getting More Information 4 Registration and Warranty 5 Unpacking the Projector 6 Additional Components 7 Optional Accessories 8 Positioning the Projector 10 Connecting to a Laptop Computer 12 Connecting the Computer Cable 12 Connecting the Cable for ... Cables 16 Connecting S-Video 17 Connecting Component Video Cables 18 Turning On Your Equipment 20 Turning On the Projector 20 What To Do If You See a Blank Screen 22 iii
CContents Welcome 1Setting Up the Projector 2Using the Projector Getting the Most from Your Projector 2 Using Your Documentation 3 Reading This Manual Online 3 Getting More Information 4 Registration and Warranty 5 Unpacking the Projector 6 Additional Components 7 Optional Accessories 8 Positioning the Projector 10 Connecting to a Laptop Computer 12 Connecting the Computer Cable 12 Connecting the Cable for ... Cables 16 Connecting S-Video 17 Connecting Component Video Cables 18 Turning On Your Equipment 20 Turning On the Projector 20 What To Do If You See a Blank Screen 22 iii
User Manual
Page 9
For details, see the Quick Setup sheet that came in your Owner's Kit. note The EMP Link program is ceiling-mounted), you can install it to use the projector. Using Your Documentation To connect the projector to your laptop and get your presentation running fast, see page 78. I Cautions must... your CD-ROM drive, select the Install/View User's Guide button and click Install User's Guide or View User's Guide. Reading This Manual Online Your PowerLite 7700p CD-ROM includes an electronic copy of this program lets you customize the highlighting tools (special effects buttons on the...
For details, see the Quick Setup sheet that came in your Owner's Kit. note The EMP Link program is ceiling-mounted), you can install it to use the projector. Using Your Documentation To connect the projector to your laptop and get your presentation running fast, see page 78. I Cautions must... your CD-ROM drive, select the Install/View User's Guide button and click Install User's Guide or View User's Guide. Reading This Manual Online Your PowerLite 7700p CD-ROM includes an electronic copy of this program lets you customize the highlighting tools (special effects buttons on the...
User Manual
Page 10
... Quick Setup sheet, warranty brochures, CD-ROMs, and EPSON PrivateLineSM Support card. Here's where you can look for setting up and connected to a laptop or PowerBook computer. I Owner's Kit folder Includes your projector at all the instructions you see your Acrobat Reader online... guide. Getting More Information Need tips on the road. When you open the manual, you need to get your projector set up your projector? I Quick Setup sheet Gives you all times...
... Quick Setup sheet, warranty brochures, CD-ROMs, and EPSON PrivateLineSM Support card. Here's where you can look for setting up and connected to a laptop or PowerBook computer. I Owner's Kit folder Includes your projector at all the instructions you see your Acrobat Reader online... guide. Getting More Information Need tips on the road. When you open the manual, you need to get your projector set up your projector? I Quick Setup sheet Gives you all times...

User Manual
Page 18
..., including PC notebook and laptop computers, Macintosh PowerBooks, and hand-held devices. Connecting the Computer Cable Before you start, make sure your computer manual for connecting to the left ) 3. Computer 1 port computer cable note Laptop configurations vary. Make sure the Computer 1 switch is flipped to ...a video device on page 83 (available from EPSON; If you're using a PowerBook and you can connect the PowerLite projector to slide it over. Computer 1 switch (slide to left (to connect your laptop's video-out or ...
..., including PC notebook and laptop computers, Macintosh PowerBooks, and hand-held devices. Connecting the Computer Cable Before you start, make sure your computer manual for connecting to the left ) 3. Computer 1 port computer cable note Laptop configurations vary. Make sure the Computer 1 switch is flipped to ...a video device on page 83 (available from EPSON; If you're using a PowerBook and you can connect the PowerLite projector to slide it over. Computer 1 switch (slide to left (to connect your laptop's video-out or ...

User Manual
Page 20
...cable to make any other connections, you don't need more volume or better sound quality, you can connect the audio cable to your computer manual if you're not sure of which jack to use.) If you can plug in amplifier and stereo speakers. 1. see your laptop's headphone... audio-out jack. (Jack locations vary; however, it on the projector. audio cable 2. See page 20 for your projector and turn it may not be adequate for instructions. 14 Setting Up the Projector Connect one end of the projector's built-in your presentation. Amplifying Computer Audio Your laptop probably has...
...cable to make any other connections, you don't need more volume or better sound quality, you can connect the audio cable to your computer manual if you're not sure of which jack to use.) If you can plug in amplifier and stereo speakers. 1. see your laptop's headphone... audio-out jack. (Jack locations vary; however, it on the projector. audio cable 2. See page 20 for your projector and turn it may not be adequate for instructions. 14 Setting Up the Projector Connect one end of the projector's built-in your presentation. Amplifying Computer Audio Your laptop probably has...

User Manual
Page 29
Check your laptop's manual or online help for the projector to sync up after making the selection.) If you're using a PC laptop: I Depending on your computer's documentation or online help for the projector to sync up after pressing it . You may also be labelled CRT/LCD. I Press the ...Click the Monitor icon. On most systems, the key lets you toggle between the LCD screen and the projector, or display on both the LCD screen and external monitor port are enabled. Using the Projector 23 Select a Simulscan resolution as but it may have to hold down the Fn ...
Check your laptop's manual or online help for the projector to sync up after making the selection.) If you're using a PC laptop: I Depending on your computer's documentation or online help for the projector to sync up after pressing it . You may also be labelled CRT/LCD. I Press the ...Click the Monitor icon. On most systems, the key lets you toggle between the LCD screen and the projector, or display on both the LCD screen and external monitor port are enabled. Using the Projector 23 Select a Simulscan resolution as but it may have to hold down the Fn ...

User Manual
Page 32
... panel. note Images will be projected more of the following: I If your image will be slightly smaller. You can also correct the image manually using the projector's Setting menu. I Press the Sync - I If your image looks like or , press the + or - See page 52. and ...shape, do one side of the screen, facing the screen squarely. After correction, your image looks like or , you've placed the projector off to eliminate flashing, blurring, or vertical noise on the remote control). Adjusting the Tracking and Synchronization If you're projecting from a computer...
... panel. note Images will be projected more of the following: I If your image will be slightly smaller. You can also correct the image manually using the projector's Setting menu. I Press the Sync - I If your image looks like or , press the + or - See page 52. and ...shape, do one side of the screen, facing the screen squarely. After correction, your image looks like or , you've placed the projector off to eliminate flashing, blurring, or vertical noise on the remote control). Adjusting the Tracking and Synchronization If you're projecting from a computer...

User Manual
Page 47
...Contrast Sharpness Gamma Dynamic Resolution Preset Reset :Select :Enter Adjustment : 9999 : 99 : 0 : 0 : 0 : Normal Natural : Auto Manual [ Select Execute Select ] The eight menus are listed on the left, and the options available for the highlighted menu are shown on the... Tracking Keystone Shift Volume Sync Tracking Esc Menu Help Comp1 Comp2/YCbCr E@sy-MP Video Auto Resize P in P Preset - Fine-tuning the Projector 41 Volume + You see the menu screen: menu options menus Video Audio Effect Setting Capture Advanced About Reset All Position Tracking Sync.
...Contrast Sharpness Gamma Dynamic Resolution Preset Reset :Select :Enter Adjustment : 9999 : 99 : 0 : 0 : 0 : Normal Natural : Auto Manual [ Select Execute Select ] The eight menus are listed on the left, and the options available for the highlighted menu are shown on the... Tracking Keystone Shift Volume Sync Tracking Esc Menu Help Comp1 Comp2/YCbCr E@sy-MP Video Auto Resize P in P Preset - Fine-tuning the Projector 41 Volume + You see the menu screen: menu options menus Video Audio Effect Setting Capture Advanced About Reset All Position Tracking Sync.

User Manual
Page 49
...Sharpness Gamma Dynamic Resolution Preset Reset :Select :Enter Adjustment : 9999 : 99 : 0 : 0 : 0 : Normal Natural : Auto Manual [ Select Execute Select ] Video menu for standard computer display Video Audio Effect Setting Capture Advanced About Reset All Brightness Contrast Sharpness Gamma Dynamic ... Dynamic Normal Natural Video Signal Select [Auto ] Reset Execute :Select :Enter Video menu for component video Fine-tuning the Projector 43 Video Audio Effect Setting Capture Advanced About Reset All Position Tracking Sync. Adjusting the Image The Video menu lets you ...
...Sharpness Gamma Dynamic Resolution Preset Reset :Select :Enter Adjustment : 9999 : 99 : 0 : 0 : 0 : Normal Natural : Auto Manual [ Select Execute Select ] Video menu for standard computer display Video Audio Effect Setting Capture Advanced About Reset All Brightness Contrast Sharpness Gamma Dynamic ... Dynamic Normal Natural Video Signal Select [Auto ] Reset Execute :Select :Enter Video menu for component video Fine-tuning the Projector 43 Video Audio Effect Setting Capture Advanced About Reset All Position Tracking Sync. Adjusting the Image The Video menu lets you ...

User Manual
Page 51
...using a 60-hertz PAL system (select PAL60). 4. This is useful if you can save the settings for each one computer with the computer, select Manual and choose from a computer source, you use more than one and recall them when necessary. Use the down arrow (control panel) or Enter button... as charts or graphs), or Natural to select the Video menu. 3. I Resolution (computer images only) Leave this setting at Auto to allow the projector to five different sessions. Follow these steps to magenta in the image. I Tint (video only) Adjusts the balance of green to save the current ...
...using a 60-hertz PAL system (select PAL60). 4. This is useful if you can save the settings for each one computer with the computer, select Manual and choose from a computer source, you use more than one and recall them when necessary. Use the down arrow (control panel) or Enter button... as charts or graphs), or Natural to select the Video menu. 3. I Resolution (computer images only) Leave this setting at Auto to allow the projector to five different sessions. Follow these steps to magenta in the image. I Tint (video only) Adjusts the balance of green to save the current ...
User Manual
Page 76
... or Video button (on the control panel) or the Comp1, Comp2/YCbCr, or Video button (on your laptop's manual or online help for details. Allow a few seconds for the projector to sync up after pressing it . See page 12. On most systems, the key lets you 've connected more... information. Click the Arrange icon. 70 Solving Problems I If you toggle between the LCD screen and the projector, or to display on an external monitor. It's often labelled with the message No Signal displayed. You see a blue screen with an ...
... or Video button (on the control panel) or the Comp1, Comp2/YCbCr, or Video button (on your laptop's manual or online help for details. Allow a few seconds for the projector to sync up after pressing it . See page 12. On most systems, the key lets you 've connected more... information. Click the Arrange icon. 70 Solving Problems I If you toggle between the LCD screen and the projector, or to display on an external monitor. It's often labelled with the message No Signal displayed. You see a blue screen with an ...
User Manual
Page 78
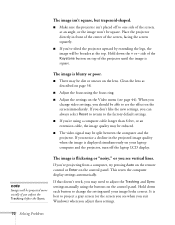
...looks correct. If that doesn't work, you notice a decline in front of the center of the projector until your laptop computer and the projector, turn off to adjust the Tracking and Sync settings manually using a computer cable longer than 6 feet, or an extension cable, the image quality may need ... The image is displayed simultaneously on the control panel. Clean the lens as described on the control panel. I Make sure the projector isn't placed off the laptop LCD display. Hold down the + or - If you can always select Reset to return to see page 44). side of the ...
...looks correct. If that doesn't work, you notice a decline in front of the center of the projector until your laptop computer and the projector, turn off to adjust the Tracking and Sync settings manually using a computer cable longer than 6 feet, or an extension cable, the image quality may need ... The image is displayed simultaneously on the control panel. Clean the lens as described on the control panel. I Make sure the projector isn't placed off the laptop LCD display. Hold down the + or - If you can always select Reset to return to see page 44). side of the ...

User Manual
Page 85
You can connect the projector to external speakers or a public address (PA) system. Connecting to an external sound system, you will automatically switch the audio source along with your hard disk. If you can access this manual in your CD-ROM drive and follow the instructions on ... or page 32.) To connect the projector to an External Audio System The projector's internal speakers are turned off. 1. The installation program also installs the EMP Link V User's Guide on the screen. To install EMP Link V, insert the Projector Software CD-ROM in the EMP Link V folder for most rooms. ...
You can connect the projector to external speakers or a public address (PA) system. Connecting to an external sound system, you will automatically switch the audio source along with your hard disk. If you can access this manual in your CD-ROM drive and follow the instructions on ... or page 32.) To connect the projector to an External Audio System The projector's internal speakers are turned off. 1. The installation program also installs the EMP Link V User's Guide on the screen. To install EMP Link V, insert the Projector Software CD-ROM in the EMP Link V folder for most rooms. ...

User Manual
Page 89
...shows the connections you want to connect your projector. Macintosh monitor cable computer cable 1. Before beginning, turn off the projector and computer if they are on the back...shown.) For details, follow the steps below. see page 8. Appendix A: Connecting to the projector's Computer 1 port, as a mouse) I Connecting the mouse cable (if you 'll...you'll be making. (You may not need to use your computer manual for the cables you may require a Macintosh adapter set, which you need... projector to connect. See your remote control as shown. Disconnect the monitor cable from...
...shows the connections you want to connect your projector. Macintosh monitor cable computer cable 1. Before beginning, turn off the projector and computer if they are on the back...shown.) For details, follow the steps below. see page 8. Appendix A: Connecting to the projector's Computer 1 port, as a mouse) I Connecting the mouse cable (if you 'll...you'll be making. (You may not need to use your computer manual for the cables you may require a Macintosh adapter set, which you need... projector to connect. See your remote control as shown. Disconnect the monitor cable from...

User Manual
Page 114
...EMP Link V, 3, 78 to 79 Enter button, 31 Environmental specifications, 99 EPSON accessories, 8, 76 PrivateLine Support, 5, 75 technical support, 5, 75 to 76 Esc button, 38 E-Zoom button, 33 F FCC compliance statement, 95 Filter See Air filter Focusing, 24 Foot release levers, 25 Freeze button, 33 FTP site, EPSON..., 75 G Gamma setting, 44 H Height of image, adjusting, 25 Help, 4 to 5, 75 to 76 Help button, 66 Help system, using, 66 Highlighting tools, 35 to 37 I iBook, connecting to, 12 iMac, connecting to, 7 Image adjusting, 24 to 26, 43 to 45 capturing and saving in projector... projector,...
...EMP Link V, 3, 78 to 79 Enter button, 31 Environmental specifications, 99 EPSON accessories, 8, 76 PrivateLine Support, 5, 75 technical support, 5, 75 to 76 Esc button, 38 E-Zoom button, 33 F FCC compliance statement, 95 Filter See Air filter Focusing, 24 Foot release levers, 25 Freeze button, 33 FTP site, EPSON..., 75 G Gamma setting, 44 H Height of image, adjusting, 25 Help, 4 to 5, 75 to 76 Help button, 66 Help system, using, 66 Highlighting tools, 35 to 37 I iBook, connecting to, 12 iMac, connecting to, 7 Image adjusting, 24 to 26, 43 to 45 capturing and saving in projector... projector,...

