Getting Started Guide
Page 11
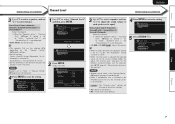
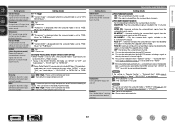
...ÑOL POITARTLUIAGNUOÊS FERSAPANÑÇOALIS FDREAUNTÇSCAHIS ENGLISH Default settings are returned to the default settings. • Yes : Reset to the defaults. • No : Do not reset to the defaults. 4 Press ENTER to enter the setting. 1 Channel Level Test Tone Start Default 5 Press RETURN B. Test Tone Start Default...
...ÑOL POITARTLUIAGNUOÊS FERSAPANÑÇOALIS FDREAUNTÇSCAHIS ENGLISH Default settings are returned to the default settings. • Yes : Reset to the defaults. • No : Do not reset to the defaults. 4 Press ENTER to enter the setting. 1 Channel Level Test Tone Start Default 5 Press RETURN B. Test Tone Start Default...
Owners Manual
Page 4
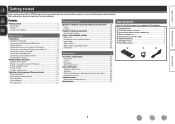
...top box (Satellite tuner/cable TV 8 Connecting a digital camcorder 8 Connecting a portable player 9 Connecting a control dock for purchasing this DENON product. To ensure proper operation, please read these owner's manual carefully before using the product. Contents Getting started Thank you for iPod ...Convenient functions 26 How to keep them , be sure to make detailed settings 28 Menu map 28 Examples of terms 53 Troubleshooting 55 Resetting the microprocessor 57 Specifications 57 Information 1 q Getting Started 1 w CD-ROM (Owner's manual 1 e Warranty (for future reference...
...top box (Satellite tuner/cable TV 8 Connecting a digital camcorder 8 Connecting a portable player 9 Connecting a control dock for purchasing this DENON product. To ensure proper operation, please read these owner's manual carefully before using the product. Contents Getting started Thank you for iPod ...Convenient functions 26 How to keep them , be sure to make detailed settings 28 Menu map 28 Examples of terms 53 Troubleshooting 55 Resetting the microprocessor 57 Specifications 57 Information 1 q Getting Started 1 w CD-ROM (Owner's manual 1 e Warranty (for future reference...

Owners Manual
Page 32
... Back Subwoofer e [ ] Return Large Small Small Small Yes r Press ENTER. [ENTER] Enter [ ] Return w Speaker Setup Speaker Config. Front Center Surround Surround Back Subwoofer Display when resetting t Press RETURN B. [ENTER] Enter [ ] Return w MENU Speaker Setup Input Setup Option Setup Speaker Config. w TV screen: Displays the selected line.
... Back Subwoofer e [ ] Return Large Small Small Small Yes r Press ENTER. [ENTER] Enter [ ] Return w Speaker Setup Speaker Config. Front Center Surround Surround Back Subwoofer Display when resetting t Press RETURN B. [ENTER] Enter [ ] Return w MENU Speaker Setup Input Setup Option Setup Speaker Config. w TV screen: Displays the selected line.
Owners Manual
Page 34
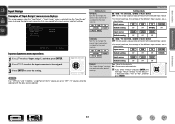
... displayed. Use the "Input Assign" menu to change the optical input connectors assigned to be selected with the input source selection. Yes : Reset to the selected input source. • At time of purchase, the settings of the TV source are as shown below . If you select...press ENTER. Basic version Advanced version Input Assign Examples of the different input sources are assigned to the input sources. No : Do not reset to the default?" Information BD 31 Input Setup Input Assign Video Select Input Mode Source Level OPTICAL COAXIAL [ENTER] Enter [ ] Return Input...
... displayed. Use the "Input Assign" menu to change the optical input connectors assigned to be selected with the input source selection. Yes : Reset to the selected input source. • At time of purchase, the settings of the TV source are as shown below . If you select...press ENTER. Basic version Advanced version Input Assign Examples of the different input sources are assigned to the input sources. No : Do not reset to the default?" Information BD 31 Input Setup Input Assign Video Select Input Mode Source Level OPTICAL COAXIAL [ENTER] Enter [ ] Return Input...
Owners Manual
Page 40
... to switch to front left and right channels for wider sound. Subwoofer Turn subwoofer output on /off . OFF : The subwoofer is used. Yes : Reset to adjust playback balance. Dimension Shift sound image center to front or rear to the defaults. OFF : Do not set to "ON", set in the...surround back signals included in the 7.1-channel source. OFF : Do not play the surround back signals by the AFDM function. No : Do not reset to front left and right channels for wider sound. Center Width Assign center channel signal to the defaults. Some Dolby Digital EX sources do not...
... to switch to front left and right channels for wider sound. Subwoofer Turn subwoofer output on /off . OFF : The subwoofer is used. Yes : Reset to adjust playback balance. Dimension Shift sound image center to front or rear to the defaults. OFF : Do not set to "ON", set in the...surround back signals included in the 7.1-channel source. OFF : Do not play the surround back signals by the AFDM function. No : Do not reset to front left and right channels for wider sound. Center Width Assign center channel signal to the defaults. Some Dolby Digital EX sources do not...
Owners Manual
Page 58
... speaker cable, and then re-connect it back into the power outlet. • The protection circuit is off the power and please contact the DENON service adviser. • Reset the microprocessor. Disconnect the power plug from a TV, set "HDMI Audio Out" on the menu to match the connected HDMI connector. • Check...
... speaker cable, and then re-connect it back into the power outlet. • The protection circuit is off the power and please contact the DENON service adviser. • Reset the microprocessor. Disconnect the power plug from a TV, set "HDMI Audio Out" on the menu to match the connected HDMI connector. • Check...

Owners Manual
Page 60
... mm) 3.9 oz (110 g, including batteries) For purposes of about 1 second, release the two buttons. Information 57 Basic version Advanced version Resetting the microprocessor Perform this procedure if the display is reset, all the settings are subject to their default values. If in step 3 the display does not flash at intervals of improvement...
... mm) 3.9 oz (110 g, including batteries) For purposes of about 1 second, release the two buttons. Information 57 Basic version Advanced version Resetting the microprocessor Perform this procedure if the display is reset, all the settings are subject to their default values. If in step 3 the display does not flash at intervals of improvement...
Owners Manual
Page 61
... circuit 54 vvQ Quick select 27 vvR Rear panel 44 Remote control unit 45 Inserting the batteries 46 Remote mode 13, 14, 15 Repeat 33 Resetting the microprocessor 57 RESTORER 39 vvS Sampling frequency 54 SB CH OUT 37 Selecting the input source 11 Setup Lock 35 Shuffle 33 Sleep timer...
... circuit 54 vvQ Quick select 27 vvR Rear panel 44 Remote control unit 45 Inserting the batteries 46 Remote mode 13, 14, 15 Repeat 33 Resetting the microprocessor 57 RESTORER 39 vvS Sampling frequency 54 SB CH OUT 37 Selecting the input source 11 Setup Lock 35 Shuffle 33 Sleep timer...


