User's Guide
Page 30
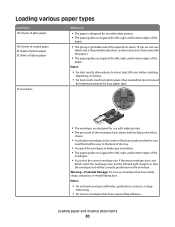
...Load up to 150 sheets of plain paper 100 sheets of coated paper 25 sheets of photo paper 25 sheets of glossy paper 10 envelopes Make sure • The paper is designed for use with inkjet printers. • The paper guides rest against the left, right, and bottom edges of the... ties, or metal folding bars. Notes: • For best results, allow photos to dry at least 24 hours before stacking, displaying, or storing. • For best results, load more photo paper than needed but do not exceed the maximum amount for use with inkjet printers. • The print side of the envelopes faces down...
...Load up to 150 sheets of plain paper 100 sheets of coated paper 25 sheets of photo paper 25 sheets of glossy paper 10 envelopes Make sure • The paper is designed for use with inkjet printers. • The paper guides rest against the left, right, and bottom edges of the... ties, or metal folding bars. Notes: • For best results, allow photos to dry at least 24 hours before stacking, displaying, or storing. • For best results, load more photo paper than needed but do not exceed the maximum amount for use with inkjet printers. • The print side of the envelopes faces down...
User's Guide
Page 31
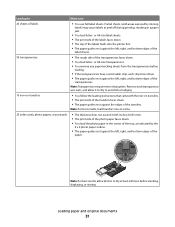
...the transfers faces down . • You load the photo paper in a paper jam. • You load letter- or A4-size label sheets. • The print side of the labels faces down. • The top of the labels feeds into the printer first. • The paper guides rest against the...against the left , right, and bottom edges of the paper. Remove each strip faces down . • You load letter- Note: For best results, load transfers one at least 24 hours before loading. • If the transparencies have a removable strip, each transparency as indicated by missing labels) may cause labels...
...the transfers faces down . • You load the photo paper in a paper jam. • You load letter- or A4-size label sheets. • The print side of the labels faces down. • The top of the labels feeds into the printer first. • The paper guides rest against the...against the left , right, and bottom edges of the paper. Remove each strip faces down . • You load letter- Note: For best results, load transfers one at least 24 hours before loading. • If the transparencies have a removable strip, each transparency as indicated by missing labels) may cause labels...
User's Guide
Page 39
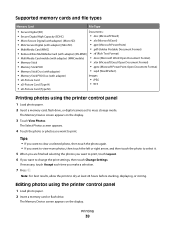
... mode. The Memory Device screen appears on the display. 3 Touch View Photos. Printing 39 The Memory Device screen appears on the display. Editing photos using the printer control panel 1 Load photo paper. 2 Insert a memory card, flash drive, or digital camera set...Card (Type H) • TIFF • xD-Picture Card (Type M) Printing photos using the printer control panel 1 Load photo paper. 2 Insert a memory card or flash drive. Note: For best results, allow the prints to print. The Select Photos screen appears. 4 Touch the photo or photos you make a selection. 7 Press .
... mode. The Memory Device screen appears on the display. 3 Touch View Photos. Printing 39 The Memory Device screen appears on the display. Editing photos using the printer control panel 1 Load photo paper. 2 Insert a memory card, flash drive, or digital camera set...Card (Type H) • TIFF • xD-Picture Card (Type M) Printing photos using the printer control panel 1 Load photo paper. 2 Insert a memory card or flash drive. Note: For best results, allow the prints to print. The Select Photos screen appears. 4 Touch the photo or photos you make a selection. 7 Press .
User's Guide
Page 40
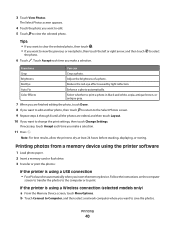
.... 2 Insert a memory card or flash drive. 3 Transfer or print the photos: If the printer is using a USB connection • Fast Pics launches automatically when you insert the memory device. Printing 40 Note: For best results, allow the prints to select From here You can Crop Brightness Red Eye Auto Fix Color Effects Crop...
.... 2 Insert a memory card or flash drive. 3 Transfer or print the photos: If the printer is using a USB connection • Fast Pics launches automatically when you insert the memory device. Printing 40 Note: For best results, allow the prints to select From here You can Crop Brightness Red Eye Auto Fix Color Effects Crop...
User's Guide
Page 42
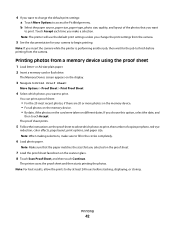
.... Note: For best results, allow the prints to finish before stacking, displaying, or storing. Touch Accept each time you insert the camera while the printer is performing another job, then wait for your camera to print. The printer scans the proof sheet and then starts printing the photos. If you want... to print. 4 If you choose this option, select the date, and then touch Accept. Note: The printer will use the default print settings unless you selected ...
.... Note: For best results, allow the prints to finish before stacking, displaying, or storing. Touch Accept each time you insert the camera while the printer is performing another job, then wait for your camera to print. The printer scans the proof sheet and then starts printing the photos. If you want... to print. 4 If you choose this option, select the date, and then touch Accept. Note: The printer will use the default print settings unless you selected ...
User's Guide
Page 47
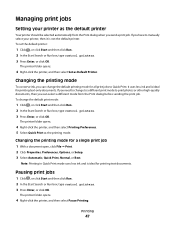
... OK. It uses less ink and is ideal for printing text documents. If you need to change to a different print mode to print photos or other high-quality documents, then you have to Quick Print. To change the default printing mode for a single print job 1 With ...Automatic, Quick Print, Normal, or Best. Note: Printing in Quick Print mode uses less ink and is ideal for printing text-only documents. The printer folder opens. 4 Right-click the printer, and then select Set as the printing mode. The printer folder opens. 4 Right-click the printer, and then select Printing Preferences....
... OK. It uses less ink and is ideal for printing text documents. If you need to change to a different print mode to print photos or other high-quality documents, then you have to Quick Print. To change the default printing mode for a single print job 1 With ...Automatic, Quick Print, Normal, or Best. Note: Printing in Quick Print mode uses less ink and is ideal for printing text-only documents. The printer folder opens. 4 Right-click the printer, and then select Set as the printing mode. The printer folder opens. 4 Right-click the printer, and then select Printing Preferences....
User's Guide
Page 51
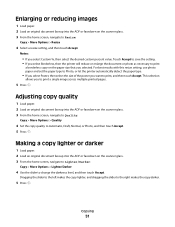
... Lighter/Darker 4 Use the slider to change the darkness level, and then touch Accept. For best results with this resize setting, use photo paper and set the paper type to Photo, or let the printer automatically detect the paper type. • If you select Poster, then select the size of...copy lighter, and dragging the slider to Automatic, Draft, Normal, or Photo, and then touch Accept. 5 Press . Touch Accept to save the setting. • If you select Borderless, then the printer will reduce or enlarge the document or photo as necessary to print a single image across multiple printed pages. 5...
... Lighter/Darker 4 Use the slider to change the darkness level, and then touch Accept. For best results with this resize setting, use photo paper and set the paper type to Photo, or let the printer automatically detect the paper type. • If you select Poster, then select the size of...copy lighter, and dragging the slider to Automatic, Draft, Normal, or Photo, and then touch Accept. 5 Press . Touch Accept to save the setting. • If you select Borderless, then the printer will reduce or enlarge the document or photo as necessary to print a single image across multiple printed pages. 5...


