
Owners Manual
Page 4
... 28 10 Hard Drive 29 Removing the Hard Drive 29 Installing the Hard Drive 30 11 Optical Drive 31 Removing The Optical Drive 31 Installing the Optical Drive 34 12 Memory Card 35 Removing the Memory Card 35 Installing the Memory Card 36 13 Wireless Local Area Network (WLAN) Card ...37 Removing the Wireless Local Area Network (WLAN) Card 37 Installing the Wireless Local Area Network (WLAN) ...
... 28 10 Hard Drive 29 Removing the Hard Drive 29 Installing the Hard Drive 30 11 Optical Drive 31 Removing The Optical Drive 31 Installing the Optical Drive 34 12 Memory Card 35 Removing the Memory Card 35 Installing the Memory Card 36 13 Wireless Local Area Network (WLAN) Card ...37 Removing the Wireless Local Area Network (WLAN) Card 37 Installing the Wireless Local Area Network (WLAN) ...

Owners Manual
Page 36
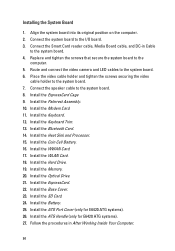
Push the memory module into the memory slot. 2. Install the Secure Digital (SD) card. 5. Follow the procedures in After Working Inside Your Computer. 36 Press the clips to secure the memory module to the system board. 3. Installing the Memory Card 1. Install the Battery. 6. Install the Base Cover. 4. Install the ATG Port Cover (only for E6420 ATG systems). 8. Install the ATG Handle (only for E6420 ATG systems). 7.
Push the memory module into the memory slot. 2. Install the Secure Digital (SD) card. 5. Follow the procedures in After Working Inside Your Computer. 36 Press the clips to secure the memory module to the system board. 3. Installing the Memory Card 1. Install the Battery. 6. Install the Base Cover. 4. Install the ATG Port Cover (only for E6420 ATG systems). 8. Install the ATG Handle (only for E6420 ATG systems). 7.
Owners Manual
Page 84
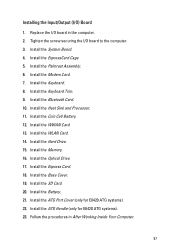
... camera and LED cables to the system board. 8. Install the Palmrest Assembly. 10. Install the Keyboard. 12. Install the Heat Sink and Processor. 15. Install the WWAN Card. 17. Install the Memory. 20. Install the ExpressCard. 22. Install the ExpressCard Cage 9. Connect the speaker cable to the...to the system board. 4. Install the Hard Drive. 19. Install the ATG Port Cover (only for E6420 ATG systems). 27. Install the Coin Cell Battery. 16. Install the SD Card. 24. Install the ATG Handle (only for E6420 ATG systems). 26. Install the WLAN Card. 18. Follow...
... camera and LED cables to the system board. 8. Install the Palmrest Assembly. 10. Install the Keyboard. 12. Install the Heat Sink and Processor. 15. Install the WWAN Card. 17. Install the Memory. 20. Install the ExpressCard. 22. Install the ExpressCard Cage 9. Connect the speaker cable to the...to the system board. 4. Install the Hard Drive. 19. Install the ATG Port Cover (only for E6420 ATG systems). 27. Install the Coin Cell Battery. 16. Install the SD Card. 24. Install the ATG Handle (only for E6420 ATG systems). 26. Install the WLAN Card. 18. Follow...
Owners Manual
Page 87
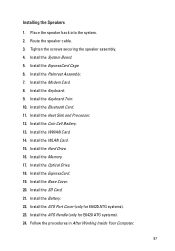
... Keyboard Trim. 10. Install the WWAN Card. 14. Install the Optical Drive. 18. Install the Bluetooth Card. 11. Install the Heat Sink and Processor. 12. Install the ExpressCard. 19. Installing the Speakers 1. Install the Keyboard. 9. Install the System Board. 5. Install the Coin Cell Battery. 13. Install the Hard Drive. 16. Install the Memory. 17. Install the ATG Handle (only for E6420 ATG systems). 23...
... Keyboard Trim. 10. Install the WWAN Card. 14. Install the Optical Drive. 18. Install the Bluetooth Card. 11. Install the Heat Sink and Processor. 12. Install the ExpressCard. 19. Installing the Speakers 1. Install the Keyboard. 9. Install the System Board. 5. Install the Coin Cell Battery. 13. Install the Hard Drive. 16. Install the Memory. 17. Install the ATG Handle (only for E6420 ATG systems). 23...
Owners Manual
Page 93
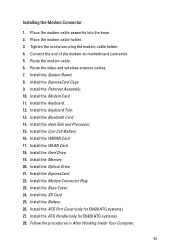
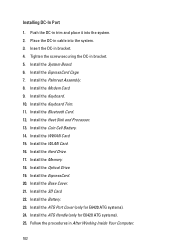
... procedures in After Working Inside Your Computer. 93 Install the System Board. 8. Install the ExpressCard Cage 9. Install the WWAN Card. 17. Install the ATG Port Cover (only for E6420 ATG systems). 28. Install the Coin Cell Battery. 16. Install the Memory. 20. Install the Optical Drive. 21. Install the Base Cover. 24. Installing the Modem Connector 1. Route the video and wireless...
... procedures in After Working Inside Your Computer. 93 Install the System Board. 8. Install the ExpressCard Cage 9. Install the WWAN Card. 17. Install the ATG Port Cover (only for E6420 ATG systems). 28. Install the Coin Cell Battery. 16. Install the Memory. 20. Install the Optical Drive. 21. Install the Base Cover. 24. Installing the Modem Connector 1. Route the video and wireless...
Owners Manual
Page 97
... Card. 13. Install the Memory. 16. Install the ATG Handle (only for E6420 ATG systems). 22. Install the System Board. 4. Install the Hard Drive. 15. Install the ATG Port Cover (only for E6420 ATG systems). 23. Follow the procedures in the computer. 2. Install the ExpressCard Cage 5. Install the Keyboard Trim. 9. Install the SD Card. 20. Install the Battery. 21. Install the Base Cover...
... Card. 13. Install the Memory. 16. Install the ATG Handle (only for E6420 ATG systems). 22. Install the System Board. 4. Install the Hard Drive. 15. Install the ATG Port Cover (only for E6420 ATG systems). 23. Follow the procedures in the computer. 2. Install the ExpressCard Cage 5. Install the Keyboard Trim. 9. Install the SD Card. 20. Install the Battery. 21. Install the Base Cover...
Owners Manual
Page 102
... ATG Handle (only for E6420 ATG systems). 24. Install the Palmrest Assembly. 8. Install the Hard Drive. 17. Install the ATG Port Cover (only for E6420 ATG systems). 25. Install the Keyboard. 10. Install the ExpressCard. 20. Install the Base Cover. 21. Place the DC-in After Working Inside Your Computer. 102 Install the ExpressCard Cage. 7. Install the Memory. 18. Follow the...
... ATG Handle (only for E6420 ATG systems). 24. Install the Palmrest Assembly. 8. Install the Hard Drive. 17. Install the ATG Port Cover (only for E6420 ATG systems). 25. Install the Keyboard. 10. Install the ExpressCard. 20. Install the Base Cover. 21. Place the DC-in After Working Inside Your Computer. 102 Install the ExpressCard Cage. 7. Install the Memory. 18. Follow the...
Owners Manual
Page 106
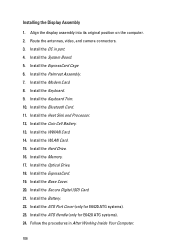
.... 11. Install the Coin Cell Battery. 13. Install the ExpressCard. 19. Install the ExpressCard Cage 6. Install the Palmrest Assembly. 7. Install the Keyboard. 9. Install the Battery. 22. Install the Modem Card. 8. Installing the Display Assembly 1. Install the WLAN Card. 15. Install the Optical Drive. 18. Install the ATG Handle (only for E6420 ATG systems). 23. Install the Secure Digital (SD) Card. 21. Install the Memory. 17...
.... 11. Install the Coin Cell Battery. 13. Install the ExpressCard. 19. Install the ExpressCard Cage 6. Install the Palmrest Assembly. 7. Install the Keyboard. 9. Install the Battery. 22. Install the Modem Card. 8. Installing the Display Assembly 1. Install the WLAN Card. 15. Install the Optical Drive. 18. Install the ATG Handle (only for E6420 ATG systems). 23. Install the Secure Digital (SD) Card. 21. Install the Memory. 17...

Owners Manual
Page 110
.... 2. Install the ExpressCard Cage 7. Install the Coin Cell Battery. 14. Install the WLAN Card. 16. Install the Hard Drive. 17. Install the DC-in port. 5. Install the Keyboard. 10. Installing the Display Hinge Covers 1. Install the Memory. 18. Install the ExpressCard. 20. Install the Keyboard Trim. 11. Install the Heat Sink and Processor. 13. Install the Modem Card. 9. Install the ATG Handle (only for E6420...
.... 2. Install the ExpressCard Cage 7. Install the Coin Cell Battery. 14. Install the WLAN Card. 16. Install the Hard Drive. 17. Install the DC-in port. 5. Install the Keyboard. 10. Installing the Display Hinge Covers 1. Install the Memory. 18. Install the ExpressCard. 20. Install the Keyboard Trim. 11. Install the Heat Sink and Processor. 13. Install the Modem Card. 9. Install the ATG Handle (only for E6420...
Owners Manual
Page 129
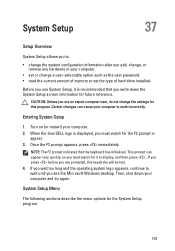
When the blue DELL logo is recommended that the keyboard has initialized. If you press before you are an expert computer user, do not change a user-selectable option such as the user password. • read the current amount of memory or set the type of hard drive installed. Certain changes can appear very quickly...
When the blue DELL logo is recommended that the keyboard has initialized. If you press before you are an expert computer user, do not change a user-selectable option such as the user password. • read the current amount of memory or set the type of hard drive installed. Certain changes can appear very quickly...
Owners Manual
Page 130
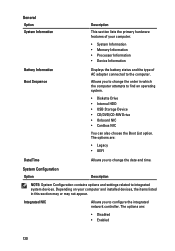
...time. The options are : • Disabled • Enabled 130 Depending on your computer. • System Information • Memory Information • Processor Information • Device Information Battery Information Boot Sequence Displays the battery status and the type of AC adapter... you to the computer. General Option System Information Description This section lists the primary hardware features of your computer and installed devices, the items listed in which the computer attempts to integrated system devices. System Configuration Option Description NOTE: System...
...time. The options are : • Disabled • Enabled 130 Depending on your computer. • System Information • Memory Information • Processor Information • Device Information Battery Information Boot Sequence Displays the battery status and the type of AC adapter... you to the computer. General Option System Information Description This section lists the primary hardware features of your computer and installed devices, the items listed in which the computer attempts to integrated system devices. System Configuration Option Description NOTE: System...
Owners Manual
Page 141
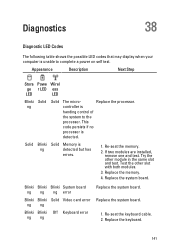
... Blinki ng Solid Solid The micro- Test the other module in the same slot and test. Solid Blinki Solid Memory is detected. If two modules are installed, remove one and test. Replace the memory. 4. Try the other slot with both modules. 3. Replace the processor. Blinki Blinki Blinki System board ng ng ng error...
... Blinki ng Solid Solid The micro- Test the other module in the same slot and test. Solid Blinki Solid Memory is detected. If two modules are installed, remove one and test. Replace the memory. 4. Try the other slot with both modules. 3. Replace the processor. Blinki Blinki Blinki System board ng ng ng error...
Owners Manual
Page 142
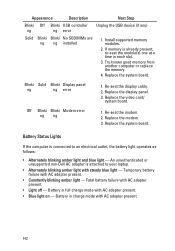
... Next Step Blinki Off Blinki USB controller ng ng error Unplug the USB device (if any) Solid Blinki Blinki No SODIMMs are ng ng installed 1. Install supported memory modules. 2. Blinki Solid Blinki Display panel ng ng error 1. Off Blinki Blinki Modem error ng ng 1. Re-seat the modem. 2. Replace... the module(s) one at a time in charge mode with AC adapter present. • Light off - An unauthenticated or unsupported non-Dell AC adapter is attached to an electrical outlet, the battery light operates as follows: • Alternately blinking amber light and blue light -
... Next Step Blinki Off Blinki USB controller ng ng error Unplug the USB device (if any) Solid Blinki Blinki No SODIMMs are ng ng installed 1. Install supported memory modules. 2. Blinki Solid Blinki Display panel ng ng error 1. Off Blinki Blinki Modem error ng ng 1. Re-seat the modem. 2. Replace... the module(s) one at a time in charge mode with AC adapter present. • Light off - An unauthenticated or unsupported non-Dell AC adapter is attached to an electrical outlet, the battery light operates as follows: • Alternately blinking amber light and blue light -


