Owner's Manual (PDF)
Page 3
Contents 1 Before You Begin 11 Turn Off Your Computer and Connected Devices . . . . 11 Safety Instructions 12 Recommended Tools 12 2 After Working Inside Your Computer . . . . 13 3 Technical Overview 15 Inside View of Your Computer 16 System Board Components 17 4 Stand 19 Removing the Stand 19 Replacing the Stand 21 5 Back Cover 23 Removing the Back Cover 23 Replacing the Back Cover 24 Contents 3
Contents 1 Before You Begin 11 Turn Off Your Computer and Connected Devices . . . . 11 Safety Instructions 12 Recommended Tools 12 2 After Working Inside Your Computer . . . . 13 3 Technical Overview 15 Inside View of Your Computer 16 System Board Components 17 4 Stand 19 Removing the Stand 19 Replacing the Stand 21 5 Back Cover 23 Removing the Back Cover 23 Replacing the Back Cover 24 Contents 3
Owner's Manual (PDF)
Page 7
21 I/O Cover 81 Removing the I/O Cover 81 Replacing the I/O Cover 83 22 I/O Board Shield 85 Removing the I/O Board Shield 85 Replacing the I/O Board Shield 88 23 Power-Supply Unit 89 Removing the Power-Supply Unit 89 Replacing the Power-Supply Unit 91 24 Power-Supply Fan 93 Removing the Power-Supply Fan 93 Replacing the Power-Supply Fan 95 25 TV-In Port 97 Removing the TV-In Port 97 Replacing the TV-In Port 99 Contents 7
21 I/O Cover 81 Removing the I/O Cover 81 Replacing the I/O Cover 83 22 I/O Board Shield 85 Removing the I/O Board Shield 85 Replacing the I/O Board Shield 88 23 Power-Supply Unit 89 Removing the Power-Supply Unit 89 Replacing the Power-Supply Unit 91 24 Power-Supply Fan 93 Removing the Power-Supply Fan 93 Replacing the Power-Supply Fan 95 25 TV-In Port 97 Removing the TV-In Port 97 Replacing the TV-In Port 99 Contents 7
Owner's Manual (PDF)
Page 18
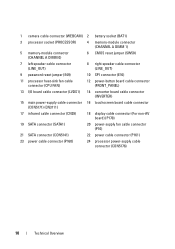
... (For non-AV board) (P170) 19 SATA connector (SATA1) 20 power-supply fan cable connector (P10) 21 SATA connector (CON5141) 22 power cable connector (P161) 23 power cable connector (P160) 24 processor power-supply cable connector (CON5176) 18 Technical Overview
... (For non-AV board) (P170) 19 SATA connector (SATA1) 20 power-supply fan cable connector (P10) 21 SATA connector (CON5141) 22 power cable connector (P161) 23 power cable connector (P160) 24 processor power-supply cable connector (CON5176) 18 Technical Overview
Owner's Manual (PDF)
Page 23
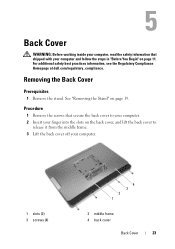
... with your computer. 1 slots (2) 3 screws (4) 2 1 4 3 2 middle frame 4 back cover Back Cover 23 See "Removing the Stand" on page 11. Removing the Back Cover Prerequisites 1 Remove the stand. For additional safety best practices information, see the Regulatory Compliance Homepage at dell.com/regulatory_compliance. Back Cover WARNING: Before working inside your computer, read the...
... with your computer. 1 slots (2) 3 screws (4) 2 1 4 3 2 middle frame 4 back cover Back Cover 23 See "Removing the Stand" on page 11. Removing the Back Cover Prerequisites 1 Remove the stand. For additional safety best practices information, see the Regulatory Compliance Homepage at dell.com/regulatory_compliance. Back Cover WARNING: Before working inside your computer, read the...
Owner's Manual (PDF)
Page 25
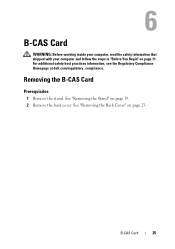
See "Removing the Back Cover" on page 19. 2 Remove the back cover. See "Removing the Stand" on page 23. For additional safety best practices information, see the Regulatory Compliance Homepage at dell.com/regulatory_compliance. Removing the B-CAS Card Prerequisites 1 Remove the stand. B-CAS Card 25 B-CAS Card WARNING: Before working inside your computer, read the safety information that shipped with your computer and follow the steps in "Before You Begin" on page 11.
See "Removing the Back Cover" on page 19. 2 Remove the back cover. See "Removing the Stand" on page 23. For additional safety best practices information, see the Regulatory Compliance Homepage at dell.com/regulatory_compliance. Removing the B-CAS Card Prerequisites 1 Remove the stand. B-CAS Card 25 B-CAS Card WARNING: Before working inside your computer, read the safety information that shipped with your computer and follow the steps in "Before You Begin" on page 11.
Owner's Manual (PDF)
Page 29
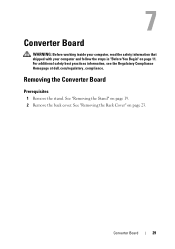
For additional safety best practices information, see the Regulatory Compliance Homepage at dell.com/regulatory_compliance. See "Removing the Stand" on page 23. Converter Board 29 Removing the Converter Board Prerequisites 1 Remove the stand. See "Removing the Back Cover" on page 19. 2 Remove the back cover. Converter Board WARNING: Before working inside your computer, read the safety information that shipped with your computer and follow the steps in "Before You Begin" on page 11.
For additional safety best practices information, see the Regulatory Compliance Homepage at dell.com/regulatory_compliance. See "Removing the Stand" on page 23. Converter Board 29 Removing the Converter Board Prerequisites 1 Remove the stand. See "Removing the Back Cover" on page 19. 2 Remove the back cover. Converter Board WARNING: Before working inside your computer, read the safety information that shipped with your computer and follow the steps in "Before You Begin" on page 11.
Owner's Manual (PDF)
Page 33
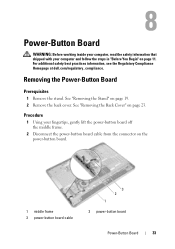
... the back cover. See "Removing the Back Cover" on page 11. Procedure 1 Using your computer and follow the steps in "Before You Begin" on page 23. See "Removing the Stand" on the power-button board. 1 middle frame 3 power-button board cable 3 2 1 2 power-button board Power-Button Board 33 Removing the Power...
... the back cover. See "Removing the Back Cover" on page 11. Procedure 1 Using your computer and follow the steps in "Before You Begin" on page 23. See "Removing the Stand" on the power-button board. 1 middle frame 3 power-button board cable 3 2 1 2 power-button board Power-Button Board 33 Removing the Power...
Owner's Manual (PDF)
Page 35
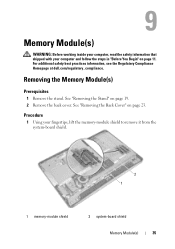
... your computer and follow the steps in "Before You Begin" on page 11. See "Removing the Stand" on page 23. For additional safety best practices information, see the Regulatory Compliance Homepage at dell.com/regulatory_compliance. Memory Module(s) WARNING: Before working inside your computer, read the safety information that shipped with your fingertips...
... your computer and follow the steps in "Before You Begin" on page 11. See "Removing the Stand" on page 23. For additional safety best practices information, see the Regulatory Compliance Homepage at dell.com/regulatory_compliance. Memory Module(s) WARNING: Before working inside your computer, read the safety information that shipped with your fingertips...
Owner's Manual (PDF)
Page 39
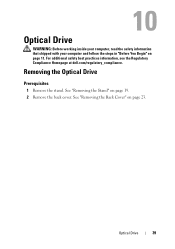
See "Removing the Back Cover" on page 19. 2 Remove the back cover. See "Removing the Stand" on page 23. For additional safety best practices information, see the Regulatory Compliance Homepage at dell.com/regulatory_compliance. Removing the Optical Drive Prerequisites 1 Remove the stand. Optical Drive WARNING: Before working inside your computer, read the safety information that shipped with your computer and follow the steps in "Before You Begin" on page 11. Optical Drive 39
See "Removing the Back Cover" on page 19. 2 Remove the back cover. See "Removing the Stand" on page 23. For additional safety best practices information, see the Regulatory Compliance Homepage at dell.com/regulatory_compliance. Removing the Optical Drive Prerequisites 1 Remove the stand. Optical Drive WARNING: Before working inside your computer, read the safety information that shipped with your computer and follow the steps in "Before You Begin" on page 11. Optical Drive 39
Owner's Manual (PDF)
Page 43
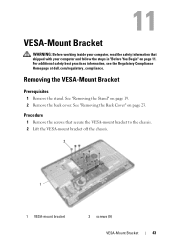
For additional safety best practices information, see the Regulatory Compliance Homepage at dell.com/regulatory_compliance. See "Removing the Stand" on page 23. Procedure 1 Remove the screws that shipped with your computer and follow the steps in "Before You Begin" on page 11. See "Removing the Back Cover" ...
For additional safety best practices information, see the Regulatory Compliance Homepage at dell.com/regulatory_compliance. See "Removing the Stand" on page 23. Procedure 1 Remove the screws that shipped with your computer and follow the steps in "Before You Begin" on page 11. See "Removing the Back Cover" ...
Owner's Manual (PDF)
Page 45
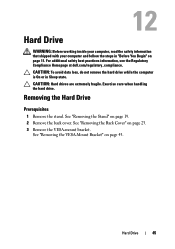
... page 43. CAUTION: To avoid data loss, do not remove the hard drive while the computer is On or in "Before You Begin" on page 23. 3 Remove the VESA-mount bracket. For additional safety best practices information, see the Regulatory Compliance Homepage at...
... page 43. CAUTION: To avoid data loss, do not remove the hard drive while the computer is On or in "Before You Begin" on page 23. 3 Remove the VESA-mount bracket. For additional safety best practices information, see the Regulatory Compliance Homepage at...
Owner's Manual (PDF)
Page 49
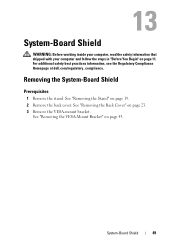
System-Board Shield WARNING: Before working inside your computer, read the safety information that shipped with your computer and follow the steps in "Before You Begin" on page 43. See "Removing the VESA-Mount Bracket" on page 11. For additional safety best practices information, see the Regulatory Compliance Homepage at dell.com/regulatory_compliance. See "Removing the Stand" on page 23. 3 Remove the VESA-mount bracket. System-Board Shield 49 Removing the System-Board Shield Prerequisites 1 Remove the stand. See "Removing the Back Cover" on page 19. 2 Remove the back cover.
System-Board Shield WARNING: Before working inside your computer, read the safety information that shipped with your computer and follow the steps in "Before You Begin" on page 43. See "Removing the VESA-Mount Bracket" on page 11. For additional safety best practices information, see the Regulatory Compliance Homepage at dell.com/regulatory_compliance. See "Removing the Stand" on page 23. 3 Remove the VESA-mount bracket. System-Board Shield 49 Removing the System-Board Shield Prerequisites 1 Remove the stand. See "Removing the Back Cover" on page 19. 2 Remove the back cover.
Owner's Manual (PDF)
Page 53
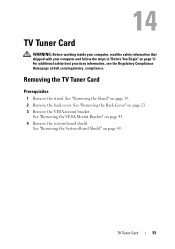
... WARNING: Before working inside your computer, read the safety information that shipped with your computer and follow the steps in "Before You Begin" on page 23. 3 Remove the VESA-mount bracket. See "Removing the Back Cover" on page 11. TV Tuner Card 53 See "Removing the System-Board Shield" on page... "Removing the VESA-Mount Bracket" on page 43. 4 Remove the system-board shield. For additional safety best practices information, see the Regulatory Compliance Homepage at dell.com/regulatory_compliance.
... WARNING: Before working inside your computer, read the safety information that shipped with your computer and follow the steps in "Before You Begin" on page 23. 3 Remove the VESA-mount bracket. See "Removing the Back Cover" on page 11. TV Tuner Card 53 See "Removing the System-Board Shield" on page... "Removing the VESA-Mount Bracket" on page 43. 4 Remove the system-board shield. For additional safety best practices information, see the Regulatory Compliance Homepage at dell.com/regulatory_compliance.
Owner's Manual (PDF)
Page 57
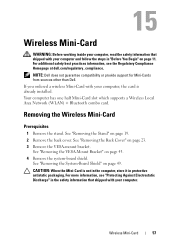
...has one half Mini-Card slot which supports a Wireless Local Area Network (WLAN) + Bluetooth combo card. See "Removing the Back Cover" on page 19. 2 Remove the back cover. For more information, see the Regulatory Compliance Homepage at dell.com/regulatory_compliance. NOTE: Dell does... not guarantee compatibility or provide support for Mini-Cards from sources other than Dell. See "Removing the Stand" on page 23. 3 Remove the VESA-mount bracket. Removing the Wireless Mini...
...has one half Mini-Card slot which supports a Wireless Local Area Network (WLAN) + Bluetooth combo card. See "Removing the Back Cover" on page 19. 2 Remove the back cover. For more information, see the Regulatory Compliance Homepage at dell.com/regulatory_compliance. NOTE: Dell does... not guarantee compatibility or provide support for Mini-Cards from sources other than Dell. See "Removing the Stand" on page 23. 3 Remove the VESA-mount bracket. Removing the Wireless Mini...
Owner's Manual (PDF)
Page 61
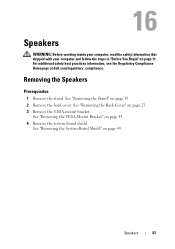
... Begin" on page 43. 4 Remove the system-board shield. See "Removing the Back Cover" on page 49. See "Removing the System-Board Shield" on page 23. 3 Remove the VESA-mount bracket. See "Removing the Stand" on page 19. 2 Remove the back cover. Speakers 61 For additional safety best practices information, see...
... Begin" on page 43. 4 Remove the system-board shield. See "Removing the Back Cover" on page 49. See "Removing the System-Board Shield" on page 23. 3 Remove the VESA-mount bracket. See "Removing the Stand" on page 19. 2 Remove the back cover. Speakers 61 For additional safety best practices information, see...
Owner's Manual (PDF)
Page 65
... WARNING: Before working inside your computer, read the safety information that shipped with your computer and follow the steps in "Before You Begin" on page 23. 3 Remove the VESA-mount bracket. See "Removing the VESA-Mount Bracket" on page 43. 4 Remove the system-board shield. For additional safety best practices information...
... WARNING: Before working inside your computer, read the safety information that shipped with your computer and follow the steps in "Before You Begin" on page 23. 3 Remove the VESA-mount bracket. See "Removing the VESA-Mount Bracket" on page 43. 4 Remove the system-board shield. For additional safety best practices information...
Owner's Manual (PDF)
Page 69
... the safety information that shipped with your computer and follow the steps in "Before You Begin" on page 49. See "Removing the Stand" on page 23. 3 Remove the VESA-mount bracket. Removing the Processor Heat-Sink Fan Prerequisites 1 Remove the stand. See "Removing the Back Cover" on page 19. 2 Remove the... "Removing the VESA-Mount Bracket" on page 43. 4 Remove the system-board shield. For additional safety best practices information, see the Regulatory Compliance Homepage at dell.com/regulatory_compliance.
... the safety information that shipped with your computer and follow the steps in "Before You Begin" on page 49. See "Removing the Stand" on page 23. 3 Remove the VESA-mount bracket. Removing the Processor Heat-Sink Fan Prerequisites 1 Remove the stand. See "Removing the Back Cover" on page 19. 2 Remove the... "Removing the VESA-Mount Bracket" on page 43. 4 Remove the system-board shield. For additional safety best practices information, see the Regulatory Compliance Homepage at dell.com/regulatory_compliance.
Owner's Manual (PDF)
Page 73
... WARNING: Before working inside your computer, read the safety information that shipped with your computer and follow the steps in "Before You Begin" on page 23. 3 Remove the VESA-mount bracket. For additional safety best practices information, see the Regulatory Compliance Homepage at...
... WARNING: Before working inside your computer, read the safety information that shipped with your computer and follow the steps in "Before You Begin" on page 23. 3 Remove the VESA-mount bracket. For additional safety best practices information, see the Regulatory Compliance Homepage at...
Owner's Manual (PDF)
Page 77
See "Removing the Back Cover" on page 19. 2 Remove the back cover. See "Removing the Stand" on page 23. Power-Supply Fan Bracket 77 Removing the Power-Supply Fan Bracket Prerequisites 1 Remove the stand. For additional safety best practices information, see the Regulatory Compliance Homepage at dell.com/regulatory_compliance. Power-Supply Fan Bracket WARNING: Before working inside your computer, read the safety information that shipped with your computer and follow the steps in "Before You Begin" on page 11.
See "Removing the Back Cover" on page 19. 2 Remove the back cover. See "Removing the Stand" on page 23. Power-Supply Fan Bracket 77 Removing the Power-Supply Fan Bracket Prerequisites 1 Remove the stand. For additional safety best practices information, see the Regulatory Compliance Homepage at dell.com/regulatory_compliance. Power-Supply Fan Bracket WARNING: Before working inside your computer, read the safety information that shipped with your computer and follow the steps in "Before You Begin" on page 11.
Owner's Manual (PDF)
Page 81
For additional safety best practices information, see the Regulatory Compliance Homepage at dell.com/regulatory_compliance. Removing the I /O Cover WARNING: Before working inside your computer, read the safety information that shipped with your computer and follow the steps in "Before You Begin" on page 19. 2 Remove the back cover. See "Removing the B-CAS Card" on page 23. 3 Remove the B-CAS card. See "Removing the Back Cover" on page 25. See "Removing the Stand" on page 11. I /O Cover Prerequisites 1 Remove the stand. I/O Cover 81
For additional safety best practices information, see the Regulatory Compliance Homepage at dell.com/regulatory_compliance. Removing the I /O Cover WARNING: Before working inside your computer, read the safety information that shipped with your computer and follow the steps in "Before You Begin" on page 19. 2 Remove the back cover. See "Removing the B-CAS Card" on page 23. 3 Remove the B-CAS card. See "Removing the Back Cover" on page 25. See "Removing the Stand" on page 11. I /O Cover Prerequisites 1 Remove the stand. I/O Cover 81


