Owner's Manual (PDF)
Page 8
26 Infrared Port 101 Removing the Infrared Port 101 Replacing the Infrared Port 103 27 I/O Board 105 Removing the I/O Board 105 Replacing the I/O Board 108 28 Coin-Cell Battery 109 Removing the Coin-Cell Battery 109 Replacing the Coin-Cell Battery 111 29 System Board 113 Removing the System Board 113 Replacing the System Board 115 Entering the Service Tag in the BIOS 116 30 Antenna Module(s 117 Removing the Antenna Module(s 117 Replacing the Antenna Module(s 120 8 Contents
26 Infrared Port 101 Removing the Infrared Port 101 Replacing the Infrared Port 103 27 I/O Board 105 Removing the I/O Board 105 Replacing the I/O Board 108 28 Coin-Cell Battery 109 Removing the Coin-Cell Battery 109 Replacing the Coin-Cell Battery 111 29 System Board 113 Removing the System Board 113 Replacing the System Board 115 Entering the Service Tag in the BIOS 116 30 Antenna Module(s 117 Removing the Antenna Module(s 117 Replacing the Antenna Module(s 120 8 Contents
Owner's Manual (PDF)
Page 9
31 Display Panel 123 Removing the Display Panel 123 Replacing the Display Panel 128 32 Infrared Sensor 131 Removing the Infrared Sensor 131 Replacing the Infrared Sensor 134 33 Camera Module 137 Removing the Camera Module 137 Replacing the Camera Module 140 34 System Setup 143 Overview 143 Entering System Setup 143 Clearing Forgotten Passwords 152 Clearing CMOS Settings 154 35 Flashing the BIOS 157 Contents 9
31 Display Panel 123 Removing the Display Panel 123 Replacing the Display Panel 128 32 Infrared Sensor 131 Removing the Infrared Sensor 131 Replacing the Infrared Sensor 134 33 Camera Module 137 Removing the Camera Module 137 Replacing the Camera Module 140 34 System Setup 143 Overview 143 Entering System Setup 143 Clearing Forgotten Passwords 152 Clearing CMOS Settings 154 35 Flashing the BIOS 157 Contents 9
Owner's Manual (PDF)
Page 109
..., read the safety information that you note the BIOS settings before removing the coin-cell battery. Prerequisites 1 Remove the stand. Coin-Cell Battery WARNING: The battery may explode if installed incorrectly. For additional safety best practices information, see the Regulatory Compliance Homepage at dell.com/regulatory_compliance. See "Removing the Stand" on page... default. It is recommended that shipped with the same or equivalent type. Removing the Coin-Cell Battery CAUTION: Removing the coin-cell battery resets the BIOS settings to the manufacturer's instructions.
..., read the safety information that you note the BIOS settings before removing the coin-cell battery. Prerequisites 1 Remove the stand. Coin-Cell Battery WARNING: The battery may explode if installed incorrectly. For additional safety best practices information, see the Regulatory Compliance Homepage at dell.com/regulatory_compliance. See "Removing the Stand" on page... default. It is recommended that shipped with the same or equivalent type. Removing the Coin-Cell Battery CAUTION: Removing the coin-cell battery resets the BIOS settings to the manufacturer's instructions.

Owner's Manual (PDF)
Page 111
... 51. 2 Replace the VESA-mount bracket. See "Replacing the System-Board Shield" on page 13. See "Replacing the Back Cover" on page 21. 5 Update the BIOS with values you may have noted before removing the coin-cell battery. See "Replacing the Stand" on page 24. 4 Replace the stand. See "Replacing the...
... 51. 2 Replace the VESA-mount bracket. See "Replacing the System-Board Shield" on page 13. See "Replacing the Back Cover" on page 21. 5 Update the BIOS with values you may have noted before removing the coin-cell battery. See "Replacing the Stand" on page 24. 4 Replace the stand. See "Replacing the...
Owner's Manual (PDF)
Page 113
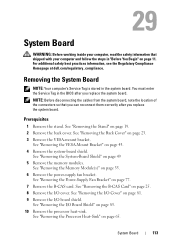
...and follow the steps in "Before You Begin" on page 11. Removing the System Board NOTE: Your computer's Service Tag is stored in the BIOS after you replace the system board. See "Removing the VESA-Mount Bracket" on page 23. 3 Remove the VESA-mount bracket. See "Removing... the I /O Board Shield" on page 85. 10 Remove the processor heat-sink. For additional safety best practices information, see the Regulatory Compliance Homepage at dell.com/regulatory_compliance. See "Removing the Stand" on page 65. See "Removing the Processor Heat-Sink" on page 19. 2 Remove the back cover. See ...
...and follow the steps in "Before You Begin" on page 11. Removing the System Board NOTE: Your computer's Service Tag is stored in the BIOS after you replace the system board. See "Removing the VESA-Mount Bracket" on page 23. 3 Remove the VESA-mount bracket. See "Removing... the I /O Board Shield" on page 85. 10 Remove the processor heat-sink. For additional safety best practices information, see the Regulatory Compliance Homepage at dell.com/regulatory_compliance. See "Removing the Stand" on page 65. See "Removing the Processor Heat-Sink" on page 19. 2 Remove the back cover. See ...
Owner's Manual (PDF)
Page 116
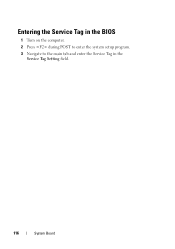
Entering the Service Tag in the BIOS 1 Turn on the computer. 2 Press during POST to enter the system setup program. 3 Navigate to the main tab and enter the Service Tag in the Service Tag Setting field. 116 System Board
Entering the Service Tag in the BIOS 1 Turn on the computer. 2 Press during POST to enter the system setup program. 3 Navigate to the main tab and enter the Service Tag in the Service Tag Setting field. 116 System Board

Owner's Manual (PDF)
Page 144
... your computer, if present Displayed if the Service Tag is not present; System Information BIOS Revision BIOS Build Date System Name System Time System Date Service Tag Service Tag Input Asset Tag Display the BIOS revision number Displays the BIOS build date Displays the system name Displays the system time in hh:mm:ss...
... your computer, if present Displayed if the Service Tag is not present; System Information BIOS Revision BIOS Build Date System Name System Time System Date Service Tag Service Tag Input Asset Tag Display the BIOS revision number Displays the BIOS build date Displays the system name Displays the system time in hh:mm:ss...
Owner's Manual (PDF)
Page 150
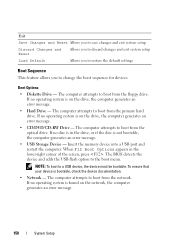
... restore the default settings Boot Sequence This feature allows you to the boot menu. The computer attempts to boot from the primary hard drive. The BIOS detects the device and adds the USB flash option to change the boot sequence for devices. NOTE: To boot to boot from the floppy drive...
... restore the default settings Boot Sequence This feature allows you to the boot menu. The computer attempts to boot from the primary hard drive. The BIOS detects the device and adds the USB flash option to change the boot sequence for devices. NOTE: To boot to boot from the floppy drive...
Owner's Manual (PDF)
Page 157
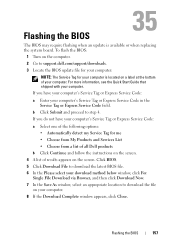
...'s Service Tag or Express Service Code: a Select one of the following options: • Automatically detect my Service Tag for your computer is available or when replacing the system board. Click BIOS. 5 Click Download File to download the latest BIOS file. 6 In the Please select your download method... File Download via Browser, and then click Download Now. 7 In the Save As window, select an appropriate location to support.dell.com/support/downloads. 3 Locate the BIOS update file for your computer: NOTE: The Service Tag for me • Choose from My Products and Services List •...
...'s Service Tag or Express Service Code: a Select one of the following options: • Automatically detect my Service Tag for your computer is available or when replacing the system board. Click BIOS. 5 Click Download File to download the latest BIOS file. 6 In the Please select your download method... File Download via Browser, and then click Download Now. 7 In the Save As window, select an appropriate location to support.dell.com/support/downloads. 3 Locate the BIOS update file for your computer: NOTE: The Service Tag for me • Choose from My Products and Services List •...
Owner's Manual (PDF)
Page 158
The file icon appears in the folder and is titled the same as the downloaded BIOS update file. 10 Double-click the BIOS update file icon and follow the instructions that appear on the screen. 158 Flashing the BIOS 9 Navigate to the folder where you downloaded the BIOS update file.
The file icon appears in the folder and is titled the same as the downloaded BIOS update file. 10 Double-click the BIOS update file icon and follow the instructions that appear on the screen. 158 Flashing the BIOS 9 Navigate to the folder where you downloaded the BIOS update file.


