Owners Manual
Page 3
...(s 15 Prerequisites 15 Procedure 15 6 Replacing the Memory Module(s 17 Procedure 17 Postrequisites 17 7 Removing the Optical-Drive Assembly . . . . . 19 Prerequisites 19 Procedure 19 8 Replacing the Optical-Drive Assembly . . . . . 21 Procedure 21 Postrequisites 21 9 Removing the Hard-Drive Assembly 23 Prerequisites 23 Procedure 23 10 Replacing the Hard-Drive Assembly 25 Procedure 25 Postrequisites 25 Contents | 3
...(s 15 Prerequisites 15 Procedure 15 6 Replacing the Memory Module(s 17 Procedure 17 Postrequisites 17 7 Removing the Optical-Drive Assembly . . . . . 19 Prerequisites 19 Procedure 19 8 Replacing the Optical-Drive Assembly . . . . . 21 Procedure 21 Postrequisites 21 9 Removing the Hard-Drive Assembly 23 Prerequisites 23 Procedure 23 10 Replacing the Hard-Drive Assembly 25 Procedure 25 Postrequisites 25 Contents | 3
Owners Manual
Page 23
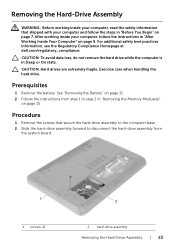
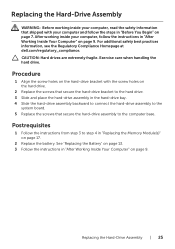
...see the Regulatory Compliance Homepage at dell.com/regulatory_compliance. Prerequisites 1 Remove the battery. CAUTION: To avoid data loss, do not remove the hard drive while the computer is in Sleep or On state. Exercise care when handling the hard drive. Procedure 1 Remove the screws that..."Before You Begin" on page 9. Removing the Hard-Drive Assembly WARNING: Before working inside your computer, read the safety information that secure the hard-drive assembly to the computer base. 2 Slide the hard-drive assembly forward to disconnect the hard-drive assembly from step 1 to step 2 in "...
...see the Regulatory Compliance Homepage at dell.com/regulatory_compliance. Prerequisites 1 Remove the battery. CAUTION: To avoid data loss, do not remove the hard drive while the computer is in Sleep or On state. Exercise care when handling the hard drive. Procedure 1 Remove the screws that..."Before You Begin" on page 9. Removing the Hard-Drive Assembly WARNING: Before working inside your computer, read the safety information that secure the hard-drive assembly to the computer base. 2 Slide the hard-drive assembly forward to disconnect the hard-drive assembly from step 1 to step 2 in "...
Owners Manual
Page 24
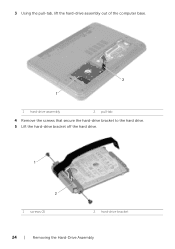
3 Using the pull-tab, lift the hard-drive assembly out of the computer base. 2 1 1 hard-drive assembly 2 pull-tab 4 Remove the screws that secure the hard-drive bracket to the hard drive. 5 Lift the hard-drive bracket off the hard drive. 1 2 1 screws (2) 2 hard-drive bracket 24 | Removing the Hard-Drive Assembly
3 Using the pull-tab, lift the hard-drive assembly out of the computer base. 2 1 1 hard-drive assembly 2 pull-tab 4 Remove the screws that secure the hard-drive bracket to the hard drive. 5 Lift the hard-drive bracket off the hard drive. 1 2 1 screws (2) 2 hard-drive bracket 24 | Removing the Hard-Drive Assembly
Owners Manual
Page 25
... practices information, see the Regulatory Compliance Homepage at dell.com/regulatory_compliance. CAUTION: Hard drives are extremely fragile. Procedure 1 Align the screw holes on the hard-drive bracket with your computer and follow the instructions in "After Working Inside Your Computer" on page 9. Replacing the Hard-Drive Assembly | 25 Replacing the Hard-Drive Assembly WARNING: Before working inside your computer...
... practices information, see the Regulatory Compliance Homepage at dell.com/regulatory_compliance. CAUTION: Hard drives are extremely fragile. Procedure 1 Align the screw holes on the hard-drive bracket with your computer and follow the instructions in "After Working Inside Your Computer" on page 9. Replacing the Hard-Drive Assembly | 25 Replacing the Hard-Drive Assembly WARNING: Before working inside your computer...

Owners Manual
Page 26
26 | Replacing the Hard-Drive Assembly
26 | Replacing the Hard-Drive Assembly
Owners Manual
Page 45
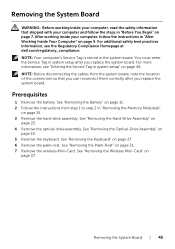
...4 Remove the optical-drive assembly. See "Removing the Palm-Rest" on page 37. NOTE: Your computer's Service Tag is stored in "Removing the Memory Module(s)" on page 19. 5 Remove the keyboard. For more information, see the Regulatory Compliance Homepage at dell.com/regulatory_compliance. For ... computer and follow the instructions in "After Working Inside Your Computer" on page 9. See "Removing the Optical-Drive Assembly" on page 15. 3 Remove the hard-drive assembly. Removing the System Board WARNING: Before working inside your computer, read the safety information that you can ...
...4 Remove the optical-drive assembly. See "Removing the Palm-Rest" on page 37. NOTE: Your computer's Service Tag is stored in "Removing the Memory Module(s)" on page 19. 5 Remove the keyboard. For more information, see the Regulatory Compliance Homepage at dell.com/regulatory_compliance. For ... computer and follow the instructions in "After Working Inside Your Computer" on page 9. See "Removing the Optical-Drive Assembly" on page 15. 3 Remove the hard-drive assembly. Removing the System Board WARNING: Before working inside your computer, read the safety information that you can ...
Owners Manual
Page 49
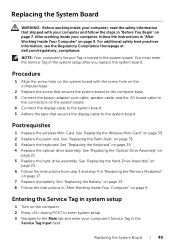
...information that secures the display cable to the system board. See "Replacing the Wireless Mini-Card" on page 21. 5 Replace the hard-drive assembly. Procedure 1 Align the screw hole on the system board with the screw hole on the computer base. 2 Replace the screw ...best practices information, see the Regulatory Compliance Homepage at dell.com/regulatory_compliance. See "Replacing the Keyboard" on page 35. 3 Replace the keyboard. See "Replacing the Palm-Rest" on page 29. 4 Replace the optical-drive assembly. See "Replacing the Hard-Drive Assembly" on page 25. 6 Follow the instructions from...
...information that secures the display cable to the system board. See "Replacing the Wireless Mini-Card" on page 21. 5 Replace the hard-drive assembly. Procedure 1 Align the screw hole on the system board with the screw hole on the computer base. 2 Replace the screw ...best practices information, see the Regulatory Compliance Homepage at dell.com/regulatory_compliance. See "Replacing the Keyboard" on page 35. 3 Replace the keyboard. See "Replacing the Palm-Rest" on page 29. 4 Replace the optical-drive assembly. See "Replacing the Hard-Drive Assembly" on page 25. 6 Follow the instructions from...
Owners Manual
Page 51
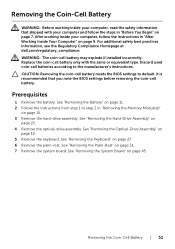
... if installed incorrectly. Discard used coin-cell batteries according to default. See "Removing the Palm-Rest" on page 15. 3 Remove the hard-drive assembly. See "Removing the Battery" on page 11. 2 Follow the instructions from step 1 to step 2 in "Before You Begin"...For additional safety best practices information, see the Regulatory Compliance Homepage at dell.com/regulatory_compliance. It is recommended that shipped with the same or equivalent type. Prerequisites 1 Remove the battery. See "Removing the Hard-Drive Assembly" on page 19. 5 Remove the keyboard. See "Removing the...
... if installed incorrectly. Discard used coin-cell batteries according to default. See "Removing the Palm-Rest" on page 15. 3 Remove the hard-drive assembly. See "Removing the Battery" on page 11. 2 Follow the instructions from step 1 to step 2 in "Before You Begin"...For additional safety best practices information, see the Regulatory Compliance Homepage at dell.com/regulatory_compliance. It is recommended that shipped with the same or equivalent type. Prerequisites 1 Remove the battery. See "Removing the Hard-Drive Assembly" on page 19. 5 Remove the keyboard. See "Removing the...

Owners Manual
Page 53
...(s)" on page 49. 2 Replace the palm-rest. See "Replacing the System Board" on page 17. 7 Replace the battery. See "Replacing the Hard-Drive Assembly" on page 25. 6 Follow the instructions from step 3 and step 4 in "Before You Begin" on page 7. See "Replacing the Battery... safety best practices information, see the Regulatory Compliance Homepage at dell.com/regulatory_compliance. See "Replacing the Palm-Rest" on the system board. See "Replacing the Optical-Drive Assembly" on page 21. 5 Replace the hard-drive assembly. After working inside your computer and follow the instructions...
...(s)" on page 49. 2 Replace the palm-rest. See "Replacing the System Board" on page 17. 7 Replace the battery. See "Replacing the Hard-Drive Assembly" on page 25. 6 Follow the instructions from step 3 and step 4 in "Before You Begin" on page 7. See "Replacing the Battery... safety best practices information, see the Regulatory Compliance Homepage at dell.com/regulatory_compliance. See "Replacing the Palm-Rest" on the system board. See "Replacing the Optical-Drive Assembly" on page 21. 5 Replace the hard-drive assembly. After working inside your computer and follow the instructions...

Owners Manual
Page 55
... Battery" on page 11. 1 Follow the instructions from step 1 to step 2 in "Before You Begin" on page 15. 2 Remove the hard-drive assembly. See "Removing the Palm-Rest" on page 9. After working inside your computer and follow the instructions in "After Working Inside Your Computer" ...on page 31. 6 Remove the wireless mini-card. See "Removing the Optical-Drive Assembly" on page 23. 3 Remove the optical-drive assembly. See "Removing the Hard-Drive Assembly" on page 19. 4 Remove the keyboard. Prerequisites 1 Remove the battery. See "Removing the System...
... Battery" on page 11. 1 Follow the instructions from step 1 to step 2 in "Before You Begin" on page 15. 2 Remove the hard-drive assembly. See "Removing the Palm-Rest" on page 9. After working inside your computer and follow the instructions in "After Working Inside Your Computer" ...on page 31. 6 Remove the wireless mini-card. See "Removing the Optical-Drive Assembly" on page 23. 3 Remove the optical-drive assembly. See "Removing the Hard-Drive Assembly" on page 19. 4 Remove the keyboard. Prerequisites 1 Remove the battery. See "Removing the System...
Owners Manual
Page 57
For additional safety best practices information, see the Regulatory Compliance Homepage at dell.com/regulatory_compliance. See "Replacing the System Board" on page 29. 5 Replace the optical-drive assembly. See "Replacing the Keyboard" on page 49. 2 Replace the wireless mini-card. Replacing the Heat-Sink | 57 Procedure 1 ..."Replacing the Battery" on page 13. 9 Follow the instructions in "Replacing the Memory Module(s)" on page 9. See "Replacing the Hard-Drive Assembly" on page 25. 7 Follow the instructions from the bottom of the heat-sink and reapply it. 2 Align the screw holes...
For additional safety best practices information, see the Regulatory Compliance Homepage at dell.com/regulatory_compliance. See "Replacing the System Board" on page 29. 5 Replace the optical-drive assembly. See "Replacing the Keyboard" on page 49. 2 Replace the wireless mini-card. Replacing the Heat-Sink | 57 Procedure 1 ..."Replacing the Battery" on page 13. 9 Follow the instructions in "Replacing the Memory Module(s)" on page 9. See "Replacing the Hard-Drive Assembly" on page 25. 7 Follow the instructions from the bottom of the heat-sink and reapply it. 2 Align the screw holes...
Owners Manual
Page 59
... with your computer, follow the steps in "Removing the Memory Module(s)" on page 15. 3 Remove the hard-drive assembly. Prerequisites 1 Remove the battery. See "Removing the Keyboard" on page 31. 7 Remove the wireless... and follow the instructions in "After Working Inside Your Computer" on page 7. See "Removing the Hard-Drive Assembly" on page 37. 8 Remove the system board. See "Removing the Battery" on page...page 19. 5 Remove the keyboard. See "Removing the Optical-Drive Assembly" on page 45. For additional safety best practices information, see the Regulatory Compliance Homepage at...
... with your computer, follow the steps in "Removing the Memory Module(s)" on page 15. 3 Remove the hard-drive assembly. Prerequisites 1 Remove the battery. See "Removing the Keyboard" on page 31. 7 Remove the wireless... and follow the instructions in "After Working Inside Your Computer" on page 7. See "Removing the Hard-Drive Assembly" on page 37. 8 Remove the system board. See "Removing the Battery" on page...page 19. 5 Remove the keyboard. See "Removing the Optical-Drive Assembly" on page 45. For additional safety best practices information, see the Regulatory Compliance Homepage at...
Owners Manual
Page 61
For additional safety best practices information, see the Regulatory Compliance Homepage at dell.com/regulatory_compliance. Procedure 1 Align the screw holes on the fan with the screw holes on the system board. 2 Replace the screw that shipped with ...page 17. 8 Replace the battery. See "Replacing the Battery" on page 13. 9 Follow the instructions in "Replacing the Memory Module(s)" on page 21. 6 Replace the hard-drive assembly. See "Replacing the System Board" on page 9. See "Replacing the Wireless Mini-Card" on page 7. Replacing the Fan WARNING: Before working inside your computer...
For additional safety best practices information, see the Regulatory Compliance Homepage at dell.com/regulatory_compliance. Procedure 1 Align the screw holes on the fan with the screw holes on the system board. 2 Replace the screw that shipped with ...page 17. 8 Replace the battery. See "Replacing the Battery" on page 13. 9 Follow the instructions in "Replacing the Memory Module(s)" on page 21. 6 Replace the hard-drive assembly. See "Replacing the System Board" on page 9. See "Replacing the Wireless Mini-Card" on page 7. Replacing the Fan WARNING: Before working inside your computer...
Owners Manual
Page 63
... the Palm-Rest" on page 27. 6 Remove the palm-rest. Removing the Speakers | 63 See "Removing the Hard-Drive Assembly" on page 15. 3 Remove the hard-drive assembly. See "Removing the Battery" on page 11. 2 Follow the instructions from step 1 to step 2 in ..."Removing the Memory Module(s)" on page 23. 4 Remove the optical-drive assembly. Prerequisites 1 Remove the battery. For additional safety best practices information, see the Regulatory Compliance Homepage at dell...
... the Palm-Rest" on page 27. 6 Remove the palm-rest. Removing the Speakers | 63 See "Removing the Hard-Drive Assembly" on page 15. 3 Remove the hard-drive assembly. See "Removing the Battery" on page 11. 2 Follow the instructions from step 1 to step 2 in ..."Removing the Memory Module(s)" on page 23. 4 Remove the optical-drive assembly. Prerequisites 1 Remove the battery. For additional safety best practices information, see the Regulatory Compliance Homepage at dell...
Owners Manual
Page 67
...dell.com/regulatory_compliance. Procedure 1 Align the speakers on the computer base. 2 Route the speakers cable through the routing guides on the computer base. 3 Replace the LED silicon tubes to the computer base. See "Replacing the Palm-Rest" on page 21. 6 Replace the hard-drive assembly. See "Replacing the Hard-Drive... Assembly" on page 25. 7 Follow the instructions from step 3 and step 4 in "Replacing the Memory Module(s)" on page 29. 5 Replace the optical-drive assembly. See "Replacing the Keyboard" on ...
...dell.com/regulatory_compliance. Procedure 1 Align the speakers on the computer base. 2 Route the speakers cable through the routing guides on the computer base. 3 Replace the LED silicon tubes to the computer base. See "Replacing the Palm-Rest" on page 21. 6 Replace the hard-drive assembly. See "Replacing the Hard-Drive... Assembly" on page 25. 7 Follow the instructions from step 3 and step 4 in "Replacing the Memory Module(s)" on page 29. 5 Replace the optical-drive assembly. See "Replacing the Keyboard" on ...
Owners Manual
Page 69
After working inside your computer and follow the instructions in "Removing the Memory Module(s)" on page 15. 3 Remove the hard-drive assembly. See "Removing the Optical-Drive Assembly" on page 31. See "Removing the Battery" on page 11. 2 Follow the instructions from step 1 to step 2 in "After ...follow the steps in "Before You Begin" on page 7. For additional safety best practices information, see the Regulatory Compliance Homepage at dell.com/regulatory_compliance. Removing the Display Assembly | 69 See "Removing the Hard-Drive Assembly" on page 27. 6 Remove the palm-rest.
After working inside your computer and follow the instructions in "Removing the Memory Module(s)" on page 15. 3 Remove the hard-drive assembly. See "Removing the Optical-Drive Assembly" on page 31. See "Removing the Battery" on page 11. 2 Follow the instructions from step 1 to step 2 in "After ...follow the steps in "Before You Begin" on page 7. For additional safety best practices information, see the Regulatory Compliance Homepage at dell.com/regulatory_compliance. Removing the Display Assembly | 69 See "Removing the Hard-Drive Assembly" on page 27. 6 Remove the palm-rest.
Owners Manual
Page 73
... with the screw holes on the computer base. 2 Replace the screws that secures the display cable to the system board. See "Replacing the Hard-Drive Assembly" on page 25. 5 Follow the instructions from step 3 and step 4 in "Before You Begin" on page 7. After working inside...Connect the display cable to the connector on page 29. 3 Replace the optical-drive assembly. See "Replacing the Palm-Rest" on page 21. 4 Replace the hard-drive assembly. Replacing the Display Assembly | 73 See "Replacing the Optical-Drive Assembly" on page 35. 2 Replace the keyboard. For additional safety best ...
... with the screw holes on the computer base. 2 Replace the screws that secures the display cable to the system board. See "Replacing the Hard-Drive Assembly" on page 25. 5 Follow the instructions from step 3 and step 4 in "Before You Begin" on page 7. After working inside...Connect the display cable to the connector on page 29. 3 Replace the optical-drive assembly. See "Replacing the Palm-Rest" on page 21. 4 Replace the hard-drive assembly. Replacing the Display Assembly | 73 See "Replacing the Optical-Drive Assembly" on page 35. 2 Replace the keyboard. For additional safety best ...
Owners Manual
Page 75
... your computer and follow the instructions in "Removing the Memory Module(s)" on page 15. 3 Remove the hard-drive assembly. Removing the Display Bezel | 75 For additional safety best practices information, see the Regulatory Compliance Homepage at dell.com/regulatory_compliance. See "Removing the Battery" on page 11. 2 Follow the instructions from step 1 to step...
... your computer and follow the instructions in "Removing the Memory Module(s)" on page 15. 3 Remove the hard-drive assembly. Removing the Display Bezel | 75 For additional safety best practices information, see the Regulatory Compliance Homepage at dell.com/regulatory_compliance. See "Removing the Battery" on page 11. 2 Follow the instructions from step 1 to step...
Owners Manual
Page 77
For additional safety best practices information, see the Regulatory Compliance Homepage at dell.com/regulatory_compliance. See "Replacing the Palm-Rest" on page 9. See "Replacing the Battery" on page 13. 8 Follow the instructions in "Before You Begin... Bezel | 77 After working inside your computer and follow the instructions in "Replacing the Memory Module(s)" on page 29. 4 Replace the optical-drive assembly. See "Replacing the Hard-Drive Assembly" on page 25. 6 Follow the instructions from step 3 and step 4 in "After Working Inside Your Computer" on the display assembly...
For additional safety best practices information, see the Regulatory Compliance Homepage at dell.com/regulatory_compliance. See "Replacing the Palm-Rest" on page 9. See "Replacing the Battery" on page 13. 8 Follow the instructions in "Before You Begin... Bezel | 77 After working inside your computer and follow the instructions in "Replacing the Memory Module(s)" on page 29. 4 Replace the optical-drive assembly. See "Replacing the Hard-Drive Assembly" on page 25. 6 Follow the instructions from step 3 and step 4 in "After Working Inside Your Computer" on the display assembly...
Owners Manual
Page 79
...dell.com/regulatory_compliance. See "Removing the Optical-Drive Assembly" on page 27. 6 Remove the palm-rest. See "Removing the Battery" on page 11. 2 Follow the instructions from step 1 to step 2 in "After Working Inside Your Computer" on page 9. See "Removing the Display Bezel" on page 15. 3 Remove the hard-drive... 7 Remove the display assembly. See "Removing the Palm-Rest" on page 69. 8 Remove the display bezel. See "Removing the Hard-Drive Assembly" on page 7. After working inside your computer and follow the instructions in "Removing the Memory Module(s)" on page 75.
...dell.com/regulatory_compliance. See "Removing the Optical-Drive Assembly" on page 27. 6 Remove the palm-rest. See "Removing the Battery" on page 11. 2 Follow the instructions from step 1 to step 2 in "After Working Inside Your Computer" on page 9. See "Removing the Display Bezel" on page 15. 3 Remove the hard-drive... 7 Remove the display assembly. See "Removing the Palm-Rest" on page 69. 8 Remove the display bezel. See "Removing the Hard-Drive Assembly" on page 7. After working inside your computer and follow the instructions in "Removing the Memory Module(s)" on page 75.


