Dell™ Technology Guide
Page 6
... Keyboard 66 Backlit Keyboard 66 Changing the Input Language of Your Keyboard 67 Using the Numeric Keypad on a Laptop Computer 68 General Keyboard Shortcuts 69 5 Printers-Settings and Drivers 71 Accessing Printer Information 71 Changing Printer Settings 72 For Windows Vista 72 For Windows® XP 72 Setting up Printers 73 Adding a Printer 73 Setting the Default Printer 74 Sharing Printers on a Network 74 Installing a Printer Driver 75 6 Drives and Media 77 Freeing up Hard Drive...
... Keyboard 66 Backlit Keyboard 66 Changing the Input Language of Your Keyboard 67 Using the Numeric Keypad on a Laptop Computer 68 General Keyboard Shortcuts 69 5 Printers-Settings and Drivers 71 Accessing Printer Information 71 Changing Printer Settings 72 For Windows Vista 72 For Windows® XP 72 Setting up Printers 73 Adding a Printer 73 Setting the Default Printer 74 Sharing Printers on a Network 74 Installing a Printer Driver 75 6 Drives and Media 77 Freeing up Hard Drive...
Dell™ Technology Guide
Page 20
... 1394 Device Problems 291 Keyboard Problems for External Keyboards . . . 292 Lockups and Software Problems 292 Memory Problems 294 Mouse Problems 295 Network Problems 296 Power Problems 296 Printer Problems 298 Scanner Problems 299 Sound and Speaker Problems 299 Touch Pad or Mouse Problems for Laptop Computers 301 Video and Monitor Problems 302 Power Lights 304 Dell Technical Update Service 305 21 System Setup 307 Viewing System Settings With the System Setup Program 307 Entering the System Setup Program 308 Working With Options on the System Setup Program Screen 308 Changing...
... 1394 Device Problems 291 Keyboard Problems for External Keyboards . . . 292 Lockups and Software Problems 292 Memory Problems 294 Mouse Problems 295 Network Problems 296 Power Problems 296 Printer Problems 298 Scanner Problems 299 Sound and Speaker Problems 299 Touch Pad or Mouse Problems for Laptop Computers 301 Video and Monitor Problems 302 Power Lights 304 Dell Technical Update Service 305 21 System Setup 307 Viewing System Settings With the System Setup Program 307 Entering the System Setup Program 308 Working With Options on the System Setup Program Screen 308 Changing...
Dell™ Technology Guide
Page 64
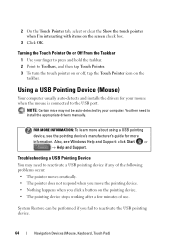
.... Using a USB Pointing Device (Mouse) Your computer usually auto-detects and installs the drivers for more about using a USB pointing device, see Windows Help and Support: click Start or → Help and Support. NOTE: Certain mice may need to reactivate a USB pointing device if any of use. You then need to install the appropriate drivers manually. System Restore can be auto-detected by your mouse when the mouse is connected to the USB port. 2 On the Touch Pointer...
.... Using a USB Pointing Device (Mouse) Your computer usually auto-detects and installs the drivers for more about using a USB pointing device, see Windows Help and Support: click Start or → Help and Support. NOTE: Certain mice may need to reactivate a USB pointing device if any of use. You then need to install the appropriate drivers manually. System Restore can be auto-detected by your mouse when the mouse is connected to the USB port. 2 On the Touch Pointer...
Dell™ Technology Guide
Page 79
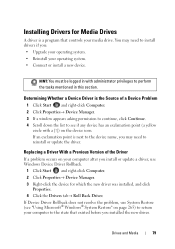
...; Upgrade your operating system. • Reinstall your media drive. Replacing a Driver With a Previous Version of a Device Problem 1 Click Start and right-click Computer. 2 Click Properties→ Device Manager. 3 If a window appears asking permission to continue, click Continue. 4 Scroll down the list to see "Using Microsoft® Windows® System Restore" on page 265) to return your computer to install drivers if you installed the new driver. If Device Driver Rollback does not resolve the problem, use Windows Device Driver...
...; Upgrade your operating system. • Reinstall your media drive. Replacing a Driver With a Previous Version of a Device Problem 1 Click Start and right-click Computer. 2 Click Properties→ Device Manager. 3 If a window appears asking permission to continue, click Continue. 4 Scroll down the list to see "Using Microsoft® Windows® System Restore" on page 265) to return your computer to install drivers if you installed the new driver. If Device Driver Rollback does not resolve the problem, use Windows Device Driver...
Dell™ Technology Guide
Page 81
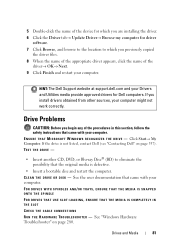
... DRIVES THAT USE SLOT-LOADING, ENSURE THAT THE MEDIA IS COMPLETELY IN THE SLOT CHECK THE CABLE CONNECTIONS R U N T H E H A R D W A R E TR O U B L E S H O O T E R - Drives and Media 81 TEST THE DRIVE - • Insert another CD, DVD, or Blu-ray Disc® (BD) to which you are installing the driver. 6 Click the Driver tab→ Update Driver→ Browse my computer for Dell computers. See "Windows Hardware Troubleshooter" on page 337). E N S U R E T H A T M I C R O S O F T W I N D O W S R E C O G N I Z E S T H E D R I V E - Click Start→ My Computer. See the user...
... DRIVES THAT USE SLOT-LOADING, ENSURE THAT THE MEDIA IS COMPLETELY IN THE SLOT CHECK THE CABLE CONNECTIONS R U N T H E H A R D W A R E TR O U B L E S H O O T E R - Drives and Media 81 TEST THE DRIVE - • Insert another CD, DVD, or Blu-ray Disc® (BD) to which you are installing the driver. 6 Click the Driver tab→ Update Driver→ Browse my computer for Dell computers. See "Windows Hardware Troubleshooter" on page 337). E N S U R E T H A T M I C R O S O F T W I N D O W S R E C O G N I Z E S T H E D R I V E - Click Start→ My Computer. See the user...
Dell™ Technology Guide
Page 94
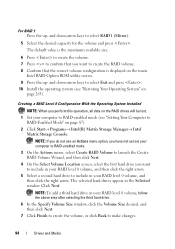
... RAID-enabled mode (see "Restoring Your Operating System" on the main Intel RAID Option ROM utility screen. 9 Press the up - Creating a RAID Level 0 Configuration With the Operating System Installed NOTE: When you want to select RAID1 (Mirror). 5 Select the desired capacity for the volume and press . NOTE: If you do not see an Actions menu option, you have not yet set your computer to RAID-enabled mode. 3 On...
... RAID-enabled mode (see "Restoring Your Operating System" on the main Intel RAID Option ROM utility screen. 9 Press the up - Creating a RAID Level 0 Configuration With the Operating System Installed NOTE: When you want to select RAID1 (Mirror). 5 Select the desired capacity for the volume and press . NOTE: If you do not see an Actions menu option, you have not yet set your computer to RAID-enabled mode. 3 On...

Dell™ Technology Guide
Page 95
... enter the Intel RAID Option ROM utility. 3 Under DEGRADED VOLUME DETECTED, confirm that the new (non-RAID) drive is listed and then press . 4 Under Disk/Volume Information, confirm that the volume status is Rebuild. Drives and Media 95 NOTE: If you do not see an Actions menu option, you have replaced the failed hard drive (see "Setting Your Computer to RAID-Enabled Mode" on the new RAID volume. Creating a RAID Level 1 Configuration With the Operating System Installed...
... enter the Intel RAID Option ROM utility. 3 Under DEGRADED VOLUME DETECTED, confirm that the new (non-RAID) drive is listed and then press . 4 Under Disk/Volume Information, confirm that the volume status is Rebuild. Drives and Media 95 NOTE: If you do not see an Actions menu option, you have replaced the failed hard drive (see "Setting Your Computer to RAID-Enabled Mode" on the new RAID volume. Creating a RAID Level 1 Configuration With the Operating System Installed...
Dell™ Technology Guide
Page 245
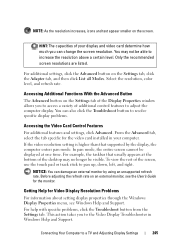
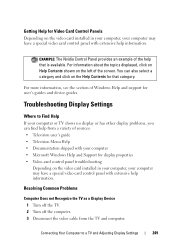
Accessing Additional Functions With the Advanced Button The Advanced button on the screen. You can change the screen resolution. NOTICE: You can damage an external monitor by the display, the computer enters pan mode. Getting Help for Video Display Resolution Problems For information about setting display properties through the Windows Display Properties menu, see the User's Guide for the video card installed in your display and video card determine how much you to increase the resolution above a certain level...
Accessing Additional Functions With the Advanced Button The Advanced button on the screen. You can change the screen resolution. NOTICE: You can damage an external monitor by the display, the computer enters pan mode. Getting Help for Video Display Resolution Problems For information about setting display properties through the Windows Display Properties menu, see the User's Guide for the video card installed in your display and video card determine how much you to increase the resolution above a certain level...
Dell™ Technology Guide
Page 249
... shows no display or has other display problems, you can also select a category and click on the Help Contents for user's guides and device guides. Troubleshooting Display Settings Where to a TV and Adjusting Display Settings 249 For information about the topics displayed, click on Help Contents shown on the left of the help that category. Getting Help for display properties • Video-card control panel troubleshooting Depending on the video card installed in...
... shows no display or has other display problems, you can also select a category and click on the Help Contents for user's guides and device guides. Troubleshooting Display Settings Where to a TV and Adjusting Display Settings 249 For information about the topics displayed, click on Help Contents shown on the left of the help that category. Getting Help for display properties • Video-card control panel troubleshooting Depending on the video card installed in...
Dell™ Technology Guide
Page 276
... correct the configuration error. System Messages for Laptop Computers NOTE: If the message you received is installed properly and partitioned as a boot device. • Enter the system setup program and ensure that was running when the message appeared. ERROR 8602 - Contact Dell (see "Keyboard Problems for External Keyboards" on page 292). I N V A L I D C O N F I G U R A T I O N I N F O R M A T I V E P R O B L E M . - MEMORY ADDRESS LINE FAILURE AT (ADDRESS), READ VALUE EXPECTING 276 Troubleshooting NOTICE - See "Lockups and Software Problems" on...
... correct the configuration error. System Messages for Laptop Computers NOTE: If the message you received is installed properly and partitioned as a boot device. • Enter the system setup program and ensure that was running when the message appeared. ERROR 8602 - Contact Dell (see "Keyboard Problems for External Keyboards" on page 292). I N V A L I D C O N F I G U R A T I O N I N F O R M A T I V E P R O B L E M . - MEMORY ADDRESS LINE FAILURE AT (ADDRESS), READ VALUE EXPECTING 276 Troubleshooting NOTICE - See "Lockups and Software Problems" on...

Dell™ Technology Guide
Page 295
... the mouse cable is not damaged or frayed and check cable connectors for bent or broken pins. Straighten any bent pins. • Remove any of memory supported by your computer. TE S T T H E M O U S E - Troubleshooting 295 RESTART THE COMPUTER - 1 Simultaneously press to the computer. • Verify that the cable is connected as shown on the setup diagram. 4 Turn on page 281). • See the software documentation...
... the mouse cable is not damaged or frayed and check cable connectors for bent or broken pins. Straighten any bent pins. • Remove any of memory supported by your computer. TE S T T H E M O U S E - Troubleshooting 295 RESTART THE COMPUTER - 1 Simultaneously press to the computer. • Verify that the cable is connected as shown on the setup diagram. 4 Turn on page 281). • See the software documentation...
Dell™ Technology Guide
Page 352
... your computer. 352 trusted platform module - U UMA - uninterruptible power supply - universal serial bus - A video standard for example, Windows Notepad uses a text editor. for video cards and controllers that plugs in combination with security software enhances network and computer security by enabling features such as a USB-compatible keyboard, mouse, joystick, scanner, set of cable used to an unacceptable voltage level. USB devices can also be connected and disconnected while the computer is...
... your computer. 352 trusted platform module - U UMA - uninterruptible power supply - universal serial bus - A video standard for example, Windows Notepad uses a text editor. for video cards and controllers that plugs in combination with security software enhances network and computer security by enabling features such as a USB-compatible keyboard, mouse, joystick, scanner, set of cable used to an unacceptable voltage level. USB devices can also be connected and disconnected while the computer is...
Setup Guide
Page 5
... Cable (Optional 7 Press the Power Button 8 Enable or Disable Wireless 9 Windows Vista® Setup 10 Connect to the Internet (Optional 10 Using Your Inspiron Laptop 14 Right Side Features 14 Left Side Features 16 Front Side Features 18 Computer Base and Keyboard Features 22 Media Controls 24 Display Features 25 Solving Problems 26 Removing and Replacing the Battery 26 Software Features 27 Network Problems 29 Power Problems 30 Memory Problems 32 Lockups and Software Problems 33 Using Support Tools 35 Dell Support Center 35 System Messages 36 Hardware Troubleshooter...
... Cable (Optional 7 Press the Power Button 8 Enable or Disable Wireless 9 Windows Vista® Setup 10 Connect to the Internet (Optional 10 Using Your Inspiron Laptop 14 Right Side Features 14 Left Side Features 16 Front Side Features 18 Computer Base and Keyboard Features 22 Media Controls 24 Display Features 25 Solving Problems 26 Removing and Replacing the Battery 26 Software Features 27 Network Problems 29 Power Problems 30 Memory Problems 32 Lockups and Software Problems 33 Using Support Tools 35 Dell Support Center 35 System Messages 36 Hardware Troubleshooter...
Setup Guide
Page 31
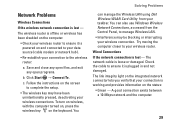
... can manage the Wireless LAN using Dell Wireless WLAN Card Utility from the Control Panel, to manage Wireless LAN. • Interference may have been unintentionally pressed, deactivating your wireless connections. The wireless router is offline or wireless has been disabled on the computer. • Check your wireless router to ensure it is loose or damaged. c. Click Start → Connect To. You can also use Windows Wireless Network Connections, accessed from your taskbar. Solving Problems Network Problems Wireless Connections If the wireless network connection is powered on...
... can manage the Wireless LAN using Dell Wireless WLAN Card Utility from the Control Panel, to manage Wireless LAN. • Interference may have been unintentionally pressed, deactivating your wireless connections. The wireless router is offline or wireless has been disabled on the computer. • Check your wireless router to ensure it is loose or damaged. c. Click Start → Connect To. You can also use Windows Wireless Network Connections, accessed from your taskbar. Solving Problems Network Problems Wireless Connections If the wireless network connection is powered on...
Setup Guide
Page 58
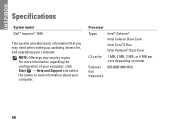
Processor Types L2 cache External bus frequency Intel® Celeron® Intel Celeron Dual-Core Intel Core™2 Duo Intel Pentium® Dual-Core 1 MB, 2 MB, 3 MB, or 6 MB per core depending on model 667/800/1066 MHz 56 NOTE: Offerings may need when setting up, updating drivers for, and upgrading your computer. INSPIRON Specifications System model Dell™ Inspiron™ 1545 This section provides...
Processor Types L2 cache External bus frequency Intel® Celeron® Intel Celeron Dual-Core Intel Core™2 Duo Intel Pentium® Dual-Core 1 MB, 2 MB, 3 MB, or 6 MB per core depending on model 667/800/1066 MHz 56 NOTE: Offerings may need when setting up, updating drivers for, and upgrading your computer. INSPIRON Specifications System model Dell™ Inspiron™ 1545 This section provides...
Service Manual
Page 8
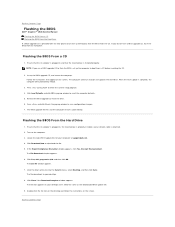
... BIOS Dell™ Inspiron™ 1545 Service Manual Flashing the BIOS From a CD Flashing the BIOS From the Hard Drive If a BIOS upgrade CD is provided with the new processor or new system board, flash the BIOS from the hard drive. The file downloads to your computer at support.dell.com. 4. The computer continues to view the Save In menu, select Desktop, and then click Save. If you use a BIOS upgrade CD to flash the BIOS, set up window to reset the computer defaults...
... BIOS Dell™ Inspiron™ 1545 Service Manual Flashing the BIOS From a CD Flashing the BIOS From the Hard Drive If a BIOS upgrade CD is provided with the new processor or new system board, flash the BIOS from the hard drive. The file downloads to your computer at support.dell.com. 4. The computer continues to view the Save In menu, select Desktop, and then click Save. If you use a BIOS upgrade CD to flash the BIOS, set up window to reset the computer defaults...
Service Manual
Page 14
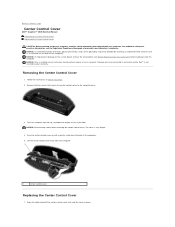
... prevent damage to the system board, remove the main battery (see the Regulatory Compliance Homepage at www.dell.com/regulatory_compliance. Back to Contents Page Center Control Cover Dell™ Inspiron™ 1545 Service Manual Removing the Center Control Cover Replacing the Center Control Cover CAUTION: Before working inside your warranty. Remove the two screws that shipped with a plastic scribe from the computer. 1 center control cover Replacing the Center Control Cover 1. For additional safety best...
... prevent damage to the system board, remove the main battery (see the Regulatory Compliance Homepage at www.dell.com/regulatory_compliance. Back to Contents Page Center Control Cover Dell™ Inspiron™ 1545 Service Manual Removing the Center Control Cover Replacing the Center Control Cover CAUTION: Before working inside your warranty. Remove the two screws that shipped with a plastic scribe from the computer. 1 center control cover Replacing the Center Control Cover 1. For additional safety best...
Service Manual
Page 32
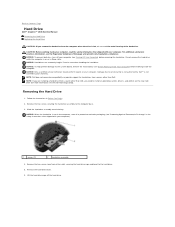
... provide support for more information see the Dell Technology Guide). Removing the Hard Drive 1. Back to Contents Page Hard Drive Dell™ Inspiron™ 1545 Service Manual Removing the Hard Drive Replacing the Hard Drive CAUTION: If you need to install an operating system, drivers, and utilities on the new hard drive (for hard drives from either side) securing the hard drive cage and bezel to the hard drive. 5. Remove the hard drive bezel. 6. For additional safety best practices information, see Turning Off Your Computer) before working inside...
... provide support for more information see the Dell Technology Guide). Removing the Hard Drive 1. Back to Contents Page Hard Drive Dell™ Inspiron™ 1545 Service Manual Removing the Hard Drive Replacing the Hard Drive CAUTION: If you need to install an operating system, drivers, and utilities on the new hard drive (for hard drives from either side) securing the hard drive cage and bezel to the hard drive. 5. Remove the hard drive bezel. 6. For additional safety best practices information, see Turning Off Your Computer) before working inside...

Service Manual
Page 33
.... 7. Install the operating system for your computer, as needed (see Dell Technology Guide). Replace the hard drive cage and the hard drive bezel. 3. Failure to do so may damage the connector. 2. Replace the two screws (one on the computer, replace all screws and ensure that secure the hard drive assembly to the computer base. NOTICE: Use firm and even pressure to Contents Page Install the drivers and utilities...
.... 7. Install the operating system for your computer, as needed (see Dell Technology Guide). Replace the hard drive cage and the hard drive bezel. 3. Failure to do so may damage the connector. 2. Replace the two screws (one on the computer, replace all screws and ensure that secure the hard drive assembly to the computer base. NOTICE: Use firm and even pressure to Contents Page Install the drivers and utilities...
Service Manual
Page 36
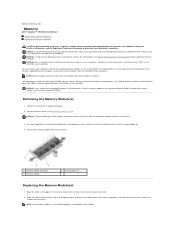
... the memory module is located directly above the DIMM A memory module located on each end of the computer. The DIMM B memory module is not installed properly, the computer may not boot. Use your computer. Remove the base cover (see Before Working Inside Your Computer) before you do not use tools to spread the memory module securing clips. 3. Back to Contents Page Memory Dell™ Inspiron™ 1545 Service Manual Removing the Memory Module(s) Replacing the Memory Module(s) CAUTION: Before working...
... the memory module is located directly above the DIMM A memory module located on each end of the computer. The DIMM B memory module is not installed properly, the computer may not boot. Use your computer. Remove the base cover (see Before Working Inside Your Computer) before you do not use tools to spread the memory module securing clips. 3. Back to Contents Page Memory Dell™ Inspiron™ 1545 Service Manual Removing the Memory Module(s) Replacing the Memory Module(s) CAUTION: Before working...


