Dell™ Technology Guide
Page 21
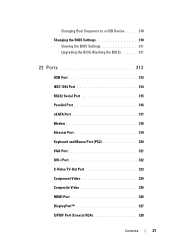
Changing Boot Sequence to a USB Device . . . . 310 Changing the BIOS Settings 310 Viewing the BIOS Settings 311 Upgrading the BIOS (Flashing the BIOS 311 22 Ports 313 USB Port 313 IEEE 1394 Port 314 RS232 Serial Port 315 Parallel Port 316 eSATA Port 317 Modem 318 Ethernet Port 319 Keyboard and Mouse Port (PS2 320 VGA Port 321 DVI-I Port 322 S-Video TV-Out Port 323 Component Video 324 Composite Video 325 HDMI Port 326 DisplayPort 327 S/PDIF Port (Coaxial RCA 328 Contents 21
Changing Boot Sequence to a USB Device . . . . 310 Changing the BIOS Settings 310 Viewing the BIOS Settings 311 Upgrading the BIOS (Flashing the BIOS 311 22 Ports 313 USB Port 313 IEEE 1394 Port 314 RS232 Serial Port 315 Parallel Port 316 eSATA Port 317 Modem 318 Ethernet Port 319 Keyboard and Mouse Port (PS2 320 VGA Port 321 DVI-I Port 322 S-Video TV-Out Port 323 Component Video 324 Composite Video 325 HDMI Port 326 DisplayPort 327 S/PDIF Port (Coaxial RCA 328 Contents 21

Dell™ Technology Guide
Page 30
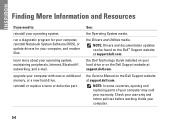
... • Troubleshooting Search • Windows Vista Center • Windows XP Support Center • Wireless Center Customer Service • Dell Financial Services • FAQs • Invoices • Missing, Wrong & Damaged • Order Status • Ownership Transfer •...8226; Packing Slips • Pickup/Redelivery • Dell Dollars/Rebate Center • Report a Stolen System • Returns • Update Billing Address Warranty Information • Expired Warranty Service • Extend & Upgrade Warranty • Ownership Transfer • International Ownership...
... • Troubleshooting Search • Windows Vista Center • Windows XP Support Center • Wireless Center Customer Service • Dell Financial Services • FAQs • Invoices • Missing, Wrong & Damaged • Order Status • Ownership Transfer •...8226; Packing Slips • Pickup/Redelivery • Dell Dollars/Rebate Center • Report a Stolen System • Returns • Update Billing Address Warranty Information • Expired Warranty Service • Extend & Upgrade Warranty • Ownership Transfer • International Ownership...
Dell™ Technology Guide
Page 75
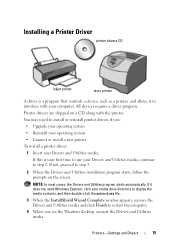
....exe file. 3 When the InstallShield Wizard Complete window appears, remove the Drivers and Utilities media and click Finish to restart the computer. 4 When you : • Upgrade your operating system • Reinstall your operating system • Connect or install a new printer To install a printer driver: 1 Insert your Drivers and Utilities media, continue...
....exe file. 3 When the InstallShield Wizard Complete window appears, remove the Drivers and Utilities media and click Finish to restart the computer. 4 When you : • Upgrade your operating system • Reinstall your operating system • Connect or install a new printer To install a printer driver: 1 Insert your Drivers and Utilities media, continue...
Dell™ Technology Guide
Page 79
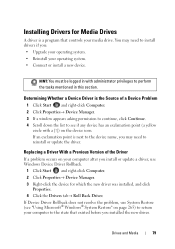
... an exclamation point is the Source of the Driver If a problem occurs on the device icon. You may need to install drivers if you: • Upgrade your operating system. • Reinstall your computer to reinstall or update the driver.
... an exclamation point is the Source of the Driver If a problem occurs on the device icon. You may need to install drivers if you: • Upgrade your operating system. • Reinstall your computer to reinstall or update the driver.
Dell™ Technology Guide
Page 92
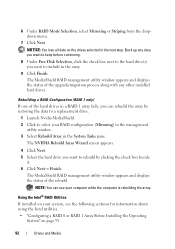
... 93. 92 Drives and Media Back up any other installed hard drives. The MediaShield RAID management utility window appears and displays the status of the upgrade/migration process along with any data you want to keep before continuing. 8 Under Free Disk Selection, click the check box next to the hard drive...
... 93. 92 Drives and Media Back up any other installed hard drives. The MediaShield RAID management utility window appears and displays the status of the upgrade/migration process along with any data you want to keep before continuing. 8 Under Free Disk Selection, click the check box next to the hard drive...
Dell™ Technology Guide
Page 311
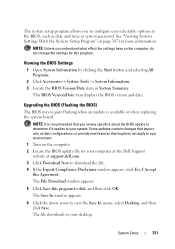
... computer, do not change the settings for this program to download the file. 4 If the Export Compliance Disclaimer window appears, click Yes, I Accept this Agreement. Upgrading the BIOS (Flashing the BIOS) The BIOS may require flashing when an update is recommended that may/may not apply to your desktop. The Save... provide new features that you understand what effect the settings have on page 307 for your system. The file downloads to your computer at the Dell Support website at support.dell.com. 3 Click Download Now to disk, and then click OK.
... computer, do not change the settings for this program to download the file. 4 If the Export Compliance Disclaimer window appears, click Yes, I Accept this Agreement. Upgrading the BIOS (Flashing the BIOS) The BIOS may require flashing when an update is recommended that may/may not apply to your desktop. The Save... provide new features that you understand what effect the settings have on page 307 for your system. The file downloads to your computer at the Dell Support website at support.dell.com. 3 Click Download Now to disk, and then click OK.

Setup Guide
Page 37
..., click the Services tab at support.dell.com. 35 For more information about the Dell Support Center, see the Dell Technology Guide on your computer's model number along with PC CheckUp) • About Your System (System Documentation, Warranty Information, System Information, Upgrades & Accessories) The top of the Dell Support Center home page displays your hard...
..., click the Services tab at support.dell.com. 35 For more information about the Dell Support Center, see the Dell Technology Guide on your computer's model number along with PC CheckUp) • About Your System (System Documentation, Warranty Information, System Information, Upgrades & Accessories) The top of the Dell Support Center home page displays your hard...
Setup Guide
Page 56
..., Internet, Bluetooth®, networking, and e-mail. the Dell Technology Guide installed on the Dell Support website at support.dell.com. upgrade your computer. 54 the Service Manual on the Dell™ Support website at support.dell.com. Check your warranty and return policies before working inside... your computer with new or additional memory, or a new hard drive. INSPIRON ...
..., Internet, Bluetooth®, networking, and e-mail. the Dell Technology Guide installed on the Dell Support website at support.dell.com. upgrade your computer. 54 the Service Manual on the Dell™ Support website at support.dell.com. Check your warranty and return policies before working inside... your computer with new or additional memory, or a new hard drive. INSPIRON ...
Setup Guide
Page 58
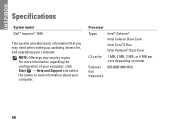
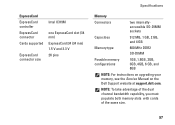
... per core depending on model 667/800/1066 MHz 56 NOTE: Offerings may need when setting up, updating drivers for, and upgrading your computer. INSPIRON Specifications System model Dell™ Inspiron™ 1545 This section provides basic information that you may vary by region. For more information regarding the configuration of your computer, click Start...
... per core depending on model 667/800/1066 MHz 56 NOTE: Offerings may need when setting up, updating drivers for, and upgrading your computer. INSPIRON Specifications System model Dell™ Inspiron™ 1545 This section provides basic information that you may vary by region. For more information regarding the configuration of your computer, click Start...
Setup Guide
Page 59
..., 2 GB, and 4 GB Memory type 800 MHz DDR2 SO-DIMM Possible memory configurations 1GB, 1.5GB, 2GB, 3GB, 4GB, 6 GB, and 8GB NOTE: For instructions on upgrading your memory, see the Service Manual on the Dell Support website at support...
..., 2 GB, and 4 GB Memory type 800 MHz DDR2 SO-DIMM Possible memory configurations 1GB, 1.5GB, 2GB, 3GB, 4GB, 6 GB, and 8GB NOTE: For instructions on upgrading your memory, see the Service Manual on the Dell Support website at support...
Service Manual
Page 6
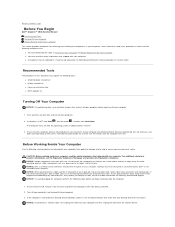
... with your computer, read the safety information that came with locking tabs; Back to Contents Page Before You Begin Dell™ Inspiron™ 1545 Service Manual Recommended Tools Turning Off Your Computer Before Working Inside Your Computer This section provides procedures for removing and ... cover from being scratched. 2. Ensure that the following tools: l Small flat-blade screwdriver l Phillips screwdriver l Processor extraction tool l BIOS upgrade CD Turning Off Your Computer NOTICE: To avoid losing data, save and close all open files and exit all open programs. 2. If the...
... with your computer, read the safety information that came with locking tabs; Back to Contents Page Before You Begin Dell™ Inspiron™ 1545 Service Manual Recommended Tools Turning Off Your Computer Before Working Inside Your Computer This section provides procedures for removing and ... cover from being scratched. 2. Ensure that the following tools: l Small flat-blade screwdriver l Phillips screwdriver l Processor extraction tool l BIOS upgrade CD Turning Off Your Computer NOTICE: To avoid losing data, save and close all open files and exit all open programs. 2. If the...
Service Manual
Page 8
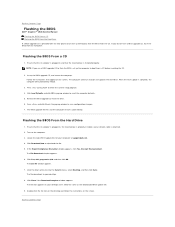
.... 4. Back to enter the system setup program. 4. Back to Contents Page Flashing the BIOS Dell™ Inspiron™ 1545 Service Manual Flashing the BIOS From a CD Flashing the BIOS From the Hard Drive If a BIOS upgrade CD is titled the same as the downloaded BIOS update file. 9. Flashing the BIOS From a... CD 1. Insert the BIOS upgrade CD, and restart the computer. Press during POST to ...
.... 4. Back to enter the system setup program. 4. Back to Contents Page Flashing the BIOS Dell™ Inspiron™ 1545 Service Manual Flashing the BIOS From a CD Flashing the BIOS From the Hard Drive If a BIOS upgrade CD is titled the same as the downloaded BIOS update file. 9. Flashing the BIOS From a... CD 1. Insert the BIOS upgrade CD, and restart the computer. Press during POST to ...
Service Manual
Page 19
... turning the cam screw. 2. Peel the backing off the thermal cooling pad and adhere the pad to Contents Page Update the BIOS using the BIOS upgrade CD (see Replacing the Processor Heat Sink). 5. If one or more corners of the processor so that it clicks into the ZIF socket. Replace the...
... turning the cam screw. 2. Peel the backing off the thermal cooling pad and adhere the pad to Contents Page Update the BIOS using the BIOS upgrade CD (see Replacing the Processor Heat Sink). 5. If one or more corners of the processor so that it clicks into the ZIF socket. Replace the...

Service Manual
Page 48
... the computer. Replace the palm rest (see Replacing the Memory Module(s)). 10. Replace any installed memory modules (see Replacing the Palm Rest). 7. Insert the BIOS upgrade CD that appear on the screen. Replace the processor heat sink and the processor (see Replacing the Keyboard). 12. Replace the keyboard (see Replacing the...
... the computer. Replace the palm rest (see Replacing the Memory Module(s)). 10. Replace any installed memory modules (see Replacing the Palm Rest). 7. Insert the BIOS upgrade CD that appear on the screen. Replace the processor heat sink and the processor (see Replacing the Keyboard). 12. Replace the keyboard (see Replacing the...


