User Guide
Page 32
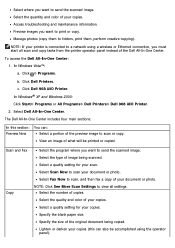
... to view all scan and copy tasks from the printer operator panel instead of the Dell All-In-One Center. Specify the size of the original document being scanned. Select the quantity and color of your printer is connected to send the scanned image. Access troubleshooting...where you want to scan your copies. Specify the blank paper size. Click Dell Printers. In Windows® XP and Windows 2000: Click Start® Programs or All Programs® Dell Printers® Dell 968 AIO Printer. 2. Manage photos (copy them , perform creative copying). View an image of what will be...
... to view all scan and copy tasks from the printer operator panel instead of the Dell All-In-One Center. Specify the size of the original document being scanned. Select the quantity and color of your printer is connected to send the scanned image. Access troubleshooting...where you want to scan your copies. Specify the blank paper size. Click Dell Printers. In Windows® XP and Windows 2000: Click Start® Programs or All Programs® Dell Printers® Dell 968 AIO Printer. 2. Manage photos (copy them , perform creative copying). View an image of what will be...
User Guide
Page 35
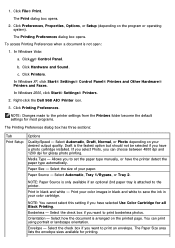
...Printers. 2. Allows you want to print borderless photos...attached to the printer settings from the Printers folder become the ...printer detect the paper type automatically. Orientation - In Windows XP, click Start® Settings® Control Panel® Printers and Other Hardware® Printers...In Windows Vista: a. Click Printers. Select the size of your ...printer. Paper Size - The Paper Size area lists the envelope sizes available for glossy photo printing. Click File® Print. b. Select Automatic, Draft, Normal, or Photo...select Photo, you have a photo cartridge installed....
...Printers. 2. Allows you want to print borderless photos...attached to the printer settings from the Printers folder become the ...printer detect the paper type automatically. Orientation - In Windows XP, click Start® Settings® Control Panel® Printers and Other Hardware® Printers...In Windows Vista: a. Click Printers. Select the size of your ...printer. Paper Size - The Paper Size area lists the envelope sizes available for glossy photo printing. Click File® Print. b. Select Automatic, Draft, Normal, or Photo...select Photo, you have a photo cartridge installed....

User Guide
Page 118
...® Printers and Other Hardware® Printers and Faxes. Click ® Control Panel. In Windows 2000, click Start® Settings® Printers. 2. b. Click Printers. Click Printers. Select Printing Preferences. 4. In Windows Vista: a. Click Open. 4. b. Right-click the Dell 968 AIO Printer icon. ...Changing Printing Preferences Defaults When you send a document or photo to Automatic, Draft, Normal, or Photo. Click Hardware and Sound. In Windows XP, click Start ® Settings® Control Panel® Printers and Other Hardware® Printers and Faxes. c. c.
...® Printers and Other Hardware® Printers and Faxes. Click ® Control Panel. In Windows 2000, click Start® Settings® Printers. 2. b. Click Printers. Click Printers. Select Printing Preferences. 4. In Windows Vista: a. Click Open. 4. b. Right-click the Dell 968 AIO Printer icon. ...Changing Printing Preferences Defaults When you send a document or photo to Automatic, Draft, Normal, or Photo. Click Hardware and Sound. In Windows XP, click Start ® Settings® Control Panel® Printers and Other Hardware® Printers and Faxes. c. c.
User Guide
Page 122
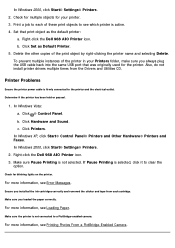
... print object as Default Printer. 5. Make sure the printer is not selected. Set that was originally used for the printer. Right-click the Dell 968 AIO Printer icon. Click Set as the default printer: a. Right-click the Dell 968 AIO Printer icon. 3. Determine if the printer has been held or... object by right-clicking the printer name and selecting Delete. In Windows Vista: a. Click Hardware and Sound. For more information, see which printer is active. 4. Ensure you loaded the paper correctly. For more information, see Printing Photos From a PictBridge-Enabled Camera...
... print object as Default Printer. 5. Make sure the printer is not selected. Set that was originally used for the printer. Right-click the Dell 968 AIO Printer icon. Click Set as the default printer: a. Right-click the Dell 968 AIO Printer icon. 3. Determine if the printer has been held or... object by right-clicking the printer name and selecting Delete. In Windows Vista: a. Click Hardware and Sound. For more information, see which printer is active. 4. Ensure you loaded the paper correctly. For more information, see Printing Photos From a PictBridge-Enabled Camera...
User Guide
Page 133
...® Dell Printers® Dell 968 AIO Printer. 2. The Advanced Copy Settings dialog box opens. 4. Ensure the USB cable is clean. Make sure the scanner glass is firmly connected to your printer and your computer. In Windows Vista: a. Make sure the document or photo is loaded correctly on the operator panel or the Dell All-In-One Center. Check...
...® Dell Printers® Dell 968 AIO Printer. 2. The Advanced Copy Settings dialog box opens. 4. Ensure the USB cable is clean. Make sure the scanner glass is firmly connected to your printer and your computer. In Windows Vista: a. Make sure the document or photo is loaded correctly on the operator panel or the Dell All-In-One Center. Check...
User Guide
Page 136
Click Dell 968 AIO Printer. Ensure the printer is clean. Contact your Internet Service Provider for more in the drop-down Arrow button Select button . From the Send scanned images to locate and ... line. In Windows XP and Windows 2000: Click Start® Programs or All Programs® Dell Printers® Dell 968 AIO Printer. 2. Select Dell All-In-One Center. Make sure the document or photo is properly inserted. When sending color pages, set the printer to Fax, and then press 2. Press the down Arrow button button to scroll to fax...
Click Dell 968 AIO Printer. Ensure the printer is clean. Contact your Internet Service Provider for more in the drop-down Arrow button Select button . From the Send scanned images to locate and ... line. In Windows XP and Windows 2000: Click Start® Programs or All Programs® Dell Printers® Dell 968 AIO Printer. 2. Select Dell All-In-One Center. Make sure the document or photo is properly inserted. When sending color pages, set the printer to Fax, and then press 2. Press the down Arrow button button to scroll to fax...

User Guide
Page 152
... Start® Programs or All Programs® Dell Printers® Dell 968 AIO Printer. 5. NOTE: You must make sure they are connected. 2. Load your copy. 8. Click Dell Printers. On the Print tab, select the Collate Copies check box. 10. Copying Photos Using the Operator Panel 1. Using the Computer 1. For more than one copy before you can collate documents. 7. The...
... Start® Programs or All Programs® Dell Printers® Dell 968 AIO Printer. 5. NOTE: You must make sure they are connected. 2. Load your copy. 8. Click Dell Printers. On the Print tab, select the Collate Copies check box. 10. Copying Photos Using the Operator Panel 1. Using the Computer 1. For more than one copy before you can collate documents. 7. The...
User Guide
Page 153
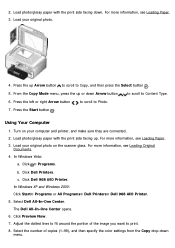
... sure they are connected. 2. For more information, see Loading Paper. 3. Click Dell 968 AIO Printer. Select Dell All-In-One Center. Load your original photo. 4. Using Your Computer 1. c. Click Dell Printers. Click Preview Now. 7. Press the up . 2. Press the Start button . The Dell All-In-One Center opens. 6. Load photo/glossy paper with the print side facing up Arrow button to...
... sure they are connected. 2. For more information, see Loading Paper. 3. Click Dell 968 AIO Printer. Select Dell All-In-One Center. Load your original photo. 4. Using Your Computer 1. c. Click Dell Printers. Click Preview Now. 7. Press the up . 2. Press the Start button . The Dell All-In-One Center opens. 6. Load photo/glossy paper with the print side facing up Arrow button to...
User Guide
Page 159
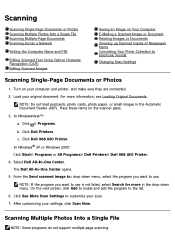
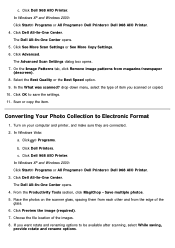
...). Turn on the scanner glass. 3. Place these items on your scan. 7. From the Send scanned image to: drop-down menu. Click Dell 968 AIO Printer. Select Dell All-In-One Center. Scanning Multiple Photos Into a Single File NOTE: Some programs do not support multiple-page scanning. In WindowsVista™: a. In Windows® XP or Windows 2000...
...). Turn on the scanner glass. 3. Place these items on your scan. 7. From the Send scanned image to: drop-down menu. Click Dell 968 AIO Printer. Select Dell All-In-One Center. Scanning Multiple Photos Into a Single File NOTE: Some programs do not support multiple-page scanning. In WindowsVista™: a. In Windows® XP or Windows 2000...
User Guide
Page 168
.... 6. Turn on the scanner glass, spacing them from each other and from magazine/newspaper (descreen). 8. Click ® Programs. b. Click Dell 968 AIO Printer. Click Dell All-In-One Center. Place the photos on your computer and printer, and make sure they are connected. 2. drop-down menu, select the type of the images. 8. In Windows Vista: a. In Windows...
.... 6. Turn on the scanner glass, spacing them from each other and from magazine/newspaper (descreen). 8. Click ® Programs. b. Click Dell 968 AIO Printer. Click Dell All-In-One Center. Place the photos on your computer and printer, and make sure they are connected. 2. drop-down menu, select the type of the images. 8. In Windows Vista: a. In Windows...


