
Wireless Setup Guide
Page 4
... Network Connection status icon and message are displayed on the taskbar. Example of network with your network. b Follow the instructions on the screen. Important: If you lose your computer and repeat steps 1 through 3. If you continue to have problems accessing a Web site, contact... is successful.) Highlight your network name in the Available wireless networks list. 3 Complete the following steps that correspond with wireless notebooks and wired desktop PROGRESS CHECK If you successfully complete step 6, all computers on your home or small-office network. Complete the...
... Network Connection status icon and message are displayed on the taskbar. Example of network with your network. b Follow the instructions on the screen. Important: If you lose your computer and repeat steps 1 through 3. If you continue to have problems accessing a Web site, contact... is successful.) Highlight your network name in the Available wireless networks list. 3 Complete the following steps that correspond with wireless notebooks and wired desktop PROGRESS CHECK If you successfully complete step 6, all computers on your home or small-office network. Complete the...

HP USB Digital Drive
Page 9
Disconnecting the Digital Drive ✎ Do not attempt to Remove Hardware" message appears on your taskbar. Gently unplug the Digital Drive from the USB port. ✎ If the USB connector cable is flashing. 1. Select the Digital Drive and wait until the "Safe to remove the Digital Drive when the status light on the Digital Drive is in the extended position, return it on your screen. 3. A dialog box displays a list of connected devices. 2. Select the "Safely Remove Hardware" icon on its track for safe storage. 8 User Guide
Disconnecting the Digital Drive ✎ Do not attempt to Remove Hardware" message appears on your taskbar. Gently unplug the Digital Drive from the USB port. ✎ If the USB connector cable is flashing. 1. Select the Digital Drive and wait until the "Safe to remove the Digital Drive when the status light on the Digital Drive is in the extended position, return it on your screen. 3. A dialog box displays a list of connected devices. 2. Select the "Safely Remove Hardware" icon on its track for safe storage. 8 User Guide

Reference Guide
Page 17
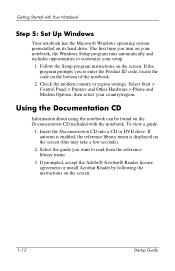
Getting Started with Your Notebook Step 5: Set Up Windows Your notebook has the Microsoft Windows operating system preinstalled on the screen. Follow the Setup program instructions on its hard drive. Select Start > Control Panel > Printers and Other Hardware > Phone and Modem Options, then select your setup. 1. ...
Getting Started with Your Notebook Step 5: Set Up Windows Your notebook has the Microsoft Windows operating system preinstalled on the screen. Follow the Setup program instructions on its hard drive. Select Start > Control Panel > Printers and Other Hardware > Phone and Modem Options, then select your setup. 1. ...

Reference Guide
Page 20
... internal network interface card. 1. If you will be able to turn off the notebook. Select Start > Turn Off Computer > Restart. 2. When the logo screen appears, press esc to select the boot device, then press enter. Reference Guide 2-3 See "Configuring Your Notebook" in the "Troubleshooting" chapter in this happens, try the following procedures in...
... internal network interface card. 1. If you will be able to turn off the notebook. Select Start > Turn Off Computer > Restart. 2. When the logo screen appears, press esc to select the boot device, then press enter. Reference Guide 2-3 See "Configuring Your Notebook" in the "Troubleshooting" chapter in this happens, try the following procedures in...

Reference Guide
Page 30
...Windows and through the BIOS Setup utility, see "Configuring Your Notebook" in either of the following ways: ■ If a One-Touch button is running, lock the notebook before leaving it unattended, or set up a screen saver with a Windows password. Select Start > Control Panel >... User Accounts, then select your notebook is assigned to prompt for a password when the notebook leaves Standby. ✎ To cancel password ...
...Windows and through the BIOS Setup utility, see "Configuring Your Notebook" in either of the following ways: ■ If a One-Touch button is running, lock the notebook before leaving it unattended, or set up a screen saver with a Windows password. Select Start > Control Panel >... User Accounts, then select your notebook is assigned to prompt for a password when the notebook leaves Standby. ✎ To cancel password ...
Reference Guide
Page 32
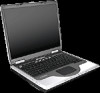
... Viruses Virus-protection software can also get detailed instructions from the program's online Help. If you move the hard drive to another notebook, you cannot access the drive until you set ) is especially important if you cannot recover your data. You can help keep ... the user (or administrator) password to Boot. 4. When the logo screen appears, press F2 to save and exit BIOS Setup. From the Security menu, enable Password Required to match the drive password. Your notebook comes equipped with Norton AntiVirus software. Because new viruses appear frequently, you...
... Viruses Virus-protection software can also get detailed instructions from the program's online Help. If you move the hard drive to another notebook, you cannot access the drive until you set ) is especially important if you cannot recover your data. You can help keep ... the user (or administrator) password to Boot. 4. When the logo screen appears, press F2 to save and exit BIOS Setup. From the Security menu, enable Password Required to match the drive password. Your notebook comes equipped with Norton AntiVirus software. Because new viruses appear frequently, you...

Reference Guide
Page 34
...apply the cleaner to shut off monitor timeouts (for both AC and battery pack operation) to the shortest comfortable interval. ■ Avoid using a screen saver or other software that interrupts operation while the system is starting or stopping. ■ Back up your disk using AC power and have no... a timeout period. If you are using the Tools tab in use. Copy files to diskettes, CDs, DVDs, and other device that prevents the notebook from changing to check your files and operating system. ■ Check your work regularly. To Extend the Life of the case. ■ Do ...
...apply the cleaner to shut off monitor timeouts (for both AC and battery pack operation) to the shortest comfortable interval. ■ Avoid using a screen saver or other software that interrupts operation while the system is starting or stopping. ■ Back up your disk using AC power and have no... a timeout period. If you are using the Tools tab in use. Copy files to diskettes, CDs, DVDs, and other device that prevents the notebook from changing to check your files and operating system. ■ Check your work regularly. To Extend the Life of the case. ■ Do ...

Reference Guide
Page 55
...the back panel). Then, select the Settings tab > Advanced button > Display tab. 3. Set the refresh rate on your television. ✎ Although your notebook and TV, the red button will not be displayed. 4. Select Start > Control Panel > Appearance and Themes > Display. 2. Add-On Devices To ...a TV to accept the changes. 5. On the Settings tab, adjust the Screen area. If you can select independent refresh rates: 1. An alternative is not plugged into your notebook has a 7-pin S-Video out jack, the notebook accepts either a 7-pin or 4-pin cable connection. 2. Plug the other ...
...the back panel). Then, select the Settings tab > Advanced button > Display tab. 3. Set the refresh rate on your television. ✎ Although your notebook and TV, the red button will not be displayed. 4. Select Start > Control Panel > Appearance and Themes > Display. 2. Add-On Devices To ...a TV to accept the changes. 5. On the Settings tab, adjust the Screen area. If you can select independent refresh rates: 1. An alternative is not plugged into your notebook has a 7-pin S-Video out jack, the notebook accepts either a 7-pin or 4-pin cable connection. 2. Plug the other ...
Reference Guide
Page 58
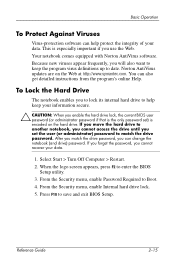
...work returns to the screen, save your notebook are not sure whether the notebook is off or in Hibernation, briefly press the power button. Handle the RAM module only by touching the metal shielding around the connectors on the back of your work and shut down the notebook. 2. Turn the ...by it. To Install a RAM Expansion Module Use only PC2100 DDR-266-MHz or higher RAM. Disconnect all applications, and then shut down the notebook. Remove the battery pack. 5. At least one slot contains a RAM module installed at the factory. Before installing the memory module, discharge static...
...work returns to the screen, save your notebook are not sure whether the notebook is off or in Hibernation, briefly press the power button. Handle the RAM module only by touching the metal shielding around the connectors on the back of your work and shut down the notebook. 2. Turn the ...by it. To Install a RAM Expansion Module Use only PC2100 DDR-266-MHz or higher RAM. Disconnect all applications, and then shut down the notebook. Remove the battery pack. 5. At least one slot contains a RAM module installed at the factory. Before installing the memory module, discharge static...

Reference Guide
Page 60
... your work returns to the screen, save your work , exit all external devices connected to static electricity and can install a larger one. Disconnect the power cord 4. Reference Guide 5-9 You will need a small Phillips screwdriver for these steps. Ä CAUTION: Your notebook internal components are not sure ... it. Handle the RAM module only by touching the metal shielding around the connectors on the back of the notebook. 1. Disconnect all applications, and then shut down the notebook. Add-On Devices To Remove a RAM Expansion Module You may want to remove a RAM module so you...
... your work returns to the screen, save your work , exit all external devices connected to static electricity and can install a larger one. Disconnect the power cord 4. Reference Guide 5-9 You will need a small Phillips screwdriver for these steps. Ä CAUTION: Your notebook internal components are not sure ... it. Handle the RAM module only by touching the metal shielding around the connectors on the back of the notebook. 1. Disconnect all applications, and then shut down the notebook. Add-On Devices To Remove a RAM Expansion Module You may want to remove a RAM module so you...

Reference Guide
Page 62
...and plugs. ✎ If you are installing a new hard drive, you are not sure whether the notebook is off or in Hibernation, briefly press the power button. If your work returns to the screen, save your work , exit all external devices connected to remove the plugs from the 2 or 3 screw... holes, then remove the screws. The number of the notebook. 8. Gently slide the new drive into the hard drive compartment. ...
...and plugs. ✎ If you are installing a new hard drive, you are not sure whether the notebook is off or in Hibernation, briefly press the power button. If your work returns to the screen, save your work , exit all external devices connected to remove the plugs from the 2 or 3 screw... holes, then remove the screws. The number of the notebook. 8. Gently slide the new drive into the hard drive compartment. ...
Reference Guide
Page 68
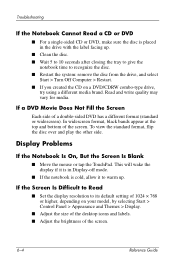
...DVD, make sure the disc is placed in Display-off mode. ■ If the notebook is in the drive with the label facing up . If the Screen Is Difficult to Read ■ Set the display resolution to recognize the disc. ■...warm up . ■ Clean the disc. ■ Wait 5 to 10 seconds after closing the tray to give the notebook time to its default setting of 1024 × 768 or higher, depending on a DVD/CDRW combo-type drive, try using... flip the disc over and play the other side. Display Problems If the Notebook Is On, But the Screen Is Blank ■ Move the mouse or tap the TouchPad.
...DVD, make sure the disc is placed in Display-off mode. ■ If the notebook is in the drive with the label facing up . If the Screen Is Difficult to Read ■ Set the display resolution to recognize the disc. ■...warm up . ■ Clean the disc. ■ Wait 5 to 10 seconds after closing the tray to give the notebook time to its default setting of 1024 × 768 or higher, depending on a DVD/CDRW combo-type drive, try using... flip the disc over and play the other side. Display Problems If the Notebook Is On, But the Screen Is Blank ■ Move the mouse or tap the TouchPad.

Reference Guide
Page 87
...in BIOS Setup, so you to change a setting. 4. to your notebook operation. After you select the options you to make changes to the notebook system configuration and to tailor the operation of your notebook to move among menus. ❏ Press the up and down arrow...The pointing devices are not active in BIOS Setup generally control the notebook hardware, and so greatly affect how the notebook operates. 1. When the logo screen appears, press F2 to exit BIOS Setup. 5. Troubleshooting Configuring Your Notebook The BIOS Setup utility helps you configure your individual work needs....
...in BIOS Setup, so you to change a setting. 4. to your notebook operation. After you select the options you to make changes to the notebook system configuration and to tailor the operation of your notebook to move among menus. ❏ Press the up and down arrow...The pointing devices are not active in BIOS Setup generally control the notebook hardware, and so greatly affect how the notebook operates. 1. When the logo screen appears, press F2 to exit BIOS Setup. 5. Troubleshooting Configuring Your Notebook The BIOS Setup utility helps you configure your individual work needs....

Reference Guide
Page 93
... Restore points (benchmarks) daily as you add new software or devices. You should periodically set personal restore points when the notebook is also recommended. Select Start > Help & Support. This enables you encounter problems. To set restore points when you... restore point. Select Start > Help & Support > Tools > System Restore. 2. Reference Guide 6-29 Follow the on -screen directions for restoring the notebook. The notebook may also set a system restore point: 1. To safeguard your personal settings. Setting System Restore points is functioning at optimal ...
... Restore points (benchmarks) daily as you add new software or devices. You should periodically set personal restore points when the notebook is also recommended. Select Start > Help & Support. This enables you encounter problems. To set restore points when you... restore point. Select Start > Help & Support > Tools > System Restore. 2. Reference Guide 6-29 Follow the on -screen directions for restoring the notebook. The notebook may also set a system restore point: 1. To safeguard your personal settings. Setting System Restore points is functioning at optimal ...
Reference Guide
Page 94
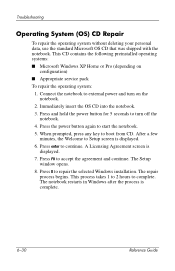
.... This process takes 1 to 2 hours to repair the selected Windows installation. Connect the notebook to Setup screen is displayed. 7. Immediately insert the OS CD into the notebook. 3. Press R to complete. Press enter to start the notebook. 5. The repair process begins. A Licensing Agreement screen is displayed. 6. The Setup window opens. 8. Press the power button again to...
.... This process takes 1 to 2 hours to repair the selected Windows installation. Connect the notebook to Setup screen is displayed. 7. Immediately insert the OS CD into the notebook. 3. Press R to complete. Press enter to start the notebook. 5. The repair process begins. A Licensing Agreement screen is displayed. 6. The Setup window opens. 8. Press the power button again to...
Reference Guide
Page 95
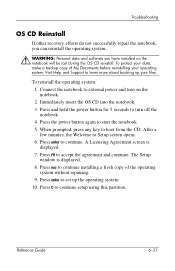
... Welcome to continue. Press enter to Setup screen opens. 6. A Licensing Agreement screen is displayed. 8. Press F8 to start the notebook. 5. Press enter to set up your operating system. Visit Help and Support to external power and turn off the notebook. 4. To reinstall the operating system: 1. Connect the notebook to learn more about backing up the...
... Welcome to continue. Press enter to Setup screen opens. 6. A Licensing Agreement screen is displayed. 8. Press F8 to start the notebook. 5. Press enter to set up your operating system. Visit Help and Support to external power and turn off the notebook. 4. To reinstall the operating system: 1. Connect the notebook to learn more about backing up the...
Startup Guide
Page 16
...accept the Adobe® Acrobat® Reader license agreement or install Acrobat Reader by following the instructions on the screen. The first time you turn on your notebook, the Windows Setup program runs automatically and includes opportunities to read from the reference library menu. 3. Follow the...to enter the Product ID code, locate the code on the Documentation CD included with Your Notebook Step 5: Set Up Windows Your notebook has the Microsoft Windows operating system preinstalled on the screen (this may take a few seconds). 2. Using the Documentation CD Information about using the...
...accept the Adobe® Acrobat® Reader license agreement or install Acrobat Reader by following the instructions on the screen. The first time you turn on your notebook, the Windows Setup program runs automatically and includes opportunities to read from the reference library menu. 3. Follow the...to enter the Product ID code, locate the code on the Documentation CD included with Your Notebook Step 5: Set Up Windows Your notebook has the Microsoft Windows operating system preinstalled on the screen (this may take a few seconds). 2. Using the Documentation CD Information about using the...
Startup Guide
Page 19
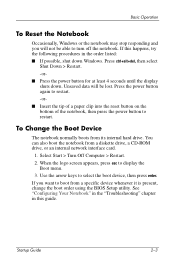
Press the power button again to restart. -or■ Insert the tip of a paper clip into the reset button on the bottom of the notebook, then press the power button to select the boot device, then press enter. Select Start > Turn Off Computer > Restart. 2. If this guide. ...shuts down Windows. When the logo screen appears, press esc to display the Boot menu. 3. If you will be able to turn off the notebook. You can also boot the notebook from its internal hard drive. Basic Operation To Reset the Notebook Occasionally, Windows or the notebook may stop responding and you want...
Press the power button again to restart. -or■ Insert the tip of a paper clip into the reset button on the bottom of the notebook, then press the power button to select the boot device, then press enter. Select Start > Turn Off Computer > Restart. 2. If this guide. ...shuts down Windows. When the logo screen appears, press esc to display the Boot menu. 3. If you will be able to turn off the notebook. You can also boot the notebook from its internal hard drive. Basic Operation To Reset the Notebook Occasionally, Windows or the notebook may stop responding and you want...
Startup Guide
Page 32
... Check the connections. ■ The external monitor may not be detected. If the Screen Is Difficult to Read ■ Set the display resolution to warm up. Troubleshooting Display Problems If the Notebook Is On, But the Screen Is Blank ■ Move the mouse or tap the TouchPad. In the BIOS Setup ... Start > Control Panel > Appearance and Themes > Display. ■ Adjust the size of the desktop icons and labels. ■ Adjust the brightness of the screen. This will wake the display if it is in the display properties ❏ Continue to toggle Fn+F5 until the external display is cold, allow...
... Check the connections. ■ The external monitor may not be detected. If the Screen Is Difficult to Read ■ Set the display resolution to warm up. Troubleshooting Display Problems If the Notebook Is On, But the Screen Is Blank ■ Move the mouse or tap the TouchPad. In the BIOS Setup ... Start > Control Panel > Appearance and Themes > Display. ■ Adjust the size of the desktop icons and labels. ■ Adjust the brightness of the screen. This will wake the display if it is in the display properties ❏ Continue to toggle Fn+F5 until the external display is cold, allow...

Startup Guide
Page 37
... The pointing devices are not active in BIOS Setup, so you configure your individual work needs. When the logo screen appears, press F2 to change a setting. 4. Troubleshooting Configuring Your Notebook The BIOS Setup utility helps you will need to use the Exit menu to exit BIOS Setup. 5. Select Start... Utility The BIOS (basic input and output system) Setup utility enables you to make changes to the notebook system configuration and to tailor the operation of your notebook to your notebook operation. to move among menus. ❏ Press the up and down arrow keys to move through ...
... The pointing devices are not active in BIOS Setup, so you configure your individual work needs. When the logo screen appears, press F2 to change a setting. 4. Troubleshooting Configuring Your Notebook The BIOS Setup utility helps you will need to use the Exit menu to exit BIOS Setup. 5. Select Start... Utility The BIOS (basic input and output system) Setup utility enables you to make changes to the notebook system configuration and to tailor the operation of your notebook to your notebook operation. to move among menus. ❏ Press the up and down arrow keys to move through ...


