

User Guide
Page 2
... be trademarks or registered trademarks of their respective companies. If any error or omission is found, contact us directly or an authorized Canon representative. • Canon is not responsible for any part of this document is prohibited. • The content of this document is subject to change without notice. • Every effort has...
... be trademarks or registered trademarks of their respective companies. If any error or omission is found, contact us directly or an authorized Canon representative. • Canon is not responsible for any part of this document is prohibited. • The content of this document is subject to change without notice. • Every effort has...

User Guide
Page 5
Regulations for this product FCC Regulations Canon Large Format Printer, Model K90017/K90018 IEEE1394 Expansion Board EB-01, Model K90023 This device complies with Part 15 of FCC Rules. Operation is subject to the following measures: • Reorient or relocate the receiving antenna...equipment off and on a circuit different from that may cause harmful interference to the equipment unless otherwise specified in a residential installation. Canon U.S.A. Inc. Tel No. 516-328-5600 iii If this device must accept any changes or modifications to radio communications. Note:...
Regulations for this product FCC Regulations Canon Large Format Printer, Model K90017/K90018 IEEE1394 Expansion Board EB-01, Model K90023 This device complies with Part 15 of FCC Rules. Operation is subject to the following measures: • Reorient or relocate the receiving antenna...equipment off and on a circuit different from that may cause harmful interference to the equipment unless otherwise specified in a residential installation. Canon U.S.A. Inc. Tel No. 516-328-5600 iii If this device must accept any changes or modifications to radio communications. Note:...
User Guide
Page 9
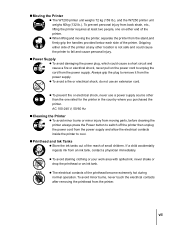
... and Ink Tanks z Store the ink tanks out of the reach of the printhead become extremely hot during normal operation. TMoving the Printer z The W7200 printer unit weighs 72 kg (159 lb.), and the W7250 printer unit weighs 60kg (132 lb.). z The electrical contacts of small children. Gripping ... could cause a short circuit and cause a fire or electrical shock, never pull on either side of the printer. z When lifting and moving parts, before cleaning the printer always press the Power button to switch off the printer then unplug the power cord from back strain, etc., lifting the...
... and Ink Tanks z Store the ink tanks out of the reach of the printhead become extremely hot during normal operation. TMoving the Printer z The W7200 printer unit weighs 72 kg (159 lb.), and the W7250 printer unit weighs 60kg (132 lb.). z The electrical contacts of small children. Gripping ... could cause a short circuit and cause a fire or electrical shock, never pull on either side of the printer. z When lifting and moving parts, before cleaning the printer always press the Power button to switch off the printer then unplug the power cord from back strain, etc., lifting the...

User Guide
Page 10
... unit is operating. viii To avoid a fire or electrical shock, never attempt to switch the printer off then unplug the printer power cord from moving parts inside the printer. z To avoid a fire or electrical shock, never use the printer until it has been checked by a qualified service technician.
... unit is operating. viii To avoid a fire or electrical shock, never attempt to switch the printer off then unplug the printer power cord from moving parts inside the printer. z To avoid a fire or electrical shock, never use the printer until it has been checked by a qualified service technician.

User Guide
Page 11
... Regulations iii Canadian Radio Interference Regulations iv International ENERGY STAR® Program iv Safety Warnings and Precautions v Contents ix Chapter 1 Before Using the Printer Printer Part Names 1-2 Printer Main Unit 1-2 Switching the Printer On and Off 1-9 Switching the Printer On 1-9 Switching the Printer Off 1-10 Setting the Printer Online and Offline...
... Regulations iii Canadian Radio Interference Regulations iv International ENERGY STAR® Program iv Safety Warnings and Precautions v Contents ix Chapter 1 Before Using the Printer Printer Part Names 1-2 Printer Main Unit 1-2 Switching the Printer On and Off 1-9 Switching the Printer On 1-9 Switching the Printer Off 1-10 Setting the Printer Online and Offline...

User Guide
Page 15
1 Before Using the Printer This section describes printer parts and procedures you should know before you use the printer.
1 Before Using the Printer This section describes printer parts and procedures you should know before you use the printer.

User Guide
Page 16
... Stand (option for W7250) A stand mounted on four casters to load roll media. (Æ P.2-7) d Roll media tray Holds the roll holder and roll media. Printer Part Names Printer Main Unit TFront View a b g c d h e i f j a Upper cover Open to install the printhead or to remove paper jams inside the ...stand. 1-2 Before Using the Printer The output stacker, or optional Media Take-up Unit (W7200 only), can be mounted inside the printer. (Æ P.6-18, P.7-26) b Left cover Open to replace the mist filter. (Æ Filter ...
... Stand (option for W7250) A stand mounted on four casters to load roll media. (Æ P.2-7) d Roll media tray Holds the roll holder and roll media. Printer Part Names Printer Main Unit TFront View a b g c d h e i f j a Upper cover Open to install the printhead or to remove paper jams inside the ...stand. 1-2 Before Using the Printer The output stacker, or optional Media Take-up Unit (W7200 only), can be mounted inside the printer. (Æ P.6-18, P.7-26) b Left cover Open to replace the mist filter. (Æ Filter ...

User Guide
Page 17
... to the USB port of media remaining on the roll. TBack View a b ef g c d a USB port Provides a connection point for the LAN. (Æ Setup Guide) Printer Part Names 1-3
... to the USB port of media remaining on the roll. TBack View a b ef g c d a USB port Provides a connection point for the LAN. (Æ Setup Guide) Printer Part Names 1-3

User Guide
Page 19
This important part is not installed before you must be adjusted for printing. Open to install the printhead. (Æ Setup Guide) e Printhead height adjustment lever Lever used to ... adjust the height of the printhead. For high quality printing, the lever position must install it left and right across the paper during printing. Printer Part Names 1-5 Open the carriage cover to install the printhead. (Æ Setup Guide) b Printhead lock cover Holds the printhead in place.
This important part is not installed before you must be adjusted for printing. Open to install the printhead. (Æ Setup Guide) e Printhead height adjustment lever Lever used to ... adjust the height of the printhead. For high quality printing, the lever position must install it left and right across the paper during printing. Printer Part Names 1-5 Open the carriage cover to install the printhead. (Æ Setup Guide) b Printhead lock cover Holds the printhead in place.

User Guide
Page 20
... of the paper guide on the media in the printer. d Roll holder Used when loading roll media in the paper path. e Paper guide An important part in the media feed path. c Tray open lever Pull on the roll holder. Use this lever to fasten the belt stopper for storage. (Æ Setup...
... of the paper guide on the media in the printer. d Roll holder Used when loading roll media in the paper path. e Paper guide An important part in the media feed path. c Tray open lever Pull on the roll holder. Use this lever to fasten the belt stopper for storage. (Æ Setup...

User Guide
Page 21
Printer Part Names 1-7 The ink tanks are not installed before shipping, so you must install all the ink tanks before you can use the printer. Open the ...
Printer Part Names 1-7 The ink tanks are not installed before shipping, so you must install all the ink tanks before you can use the printer. Open the ...

User Guide
Page 46
... cover and clean the interior of the printer to do so. 2 Raise the paper release lever. 2-20 Print Media You Can Use First, remove any part inside the printer unless instructed to ensure that can be loaded in the tray.
... cover and clean the interior of the printer to do so. 2 Raise the paper release lever. 2-20 Print Media You Can Use First, remove any part inside the printer unless instructed to ensure that can be loaded in the tray.

User Guide
Page 52
Important z To avoid soiling your hands or damaging the printer, never touch any part inside the printer unless instructed to clean the printhead height adjustment lever. 2-26 Print Media You Can Use 2 Press and hold for more than 1 second. z If the printhead height adjustment lever is dirty, before continuing with this procedure, wring out a damp cloth and use it to do so. Paper Source Roll Media Cut Sheet Data Message Power Cancel Enter Online The carriage moves to the center. 3 Open the upper cover.
Important z To avoid soiling your hands or damaging the printer, never touch any part inside the printer unless instructed to clean the printhead height adjustment lever. 2-26 Print Media You Can Use 2 Press and hold for more than 1 second. z If the printhead height adjustment lever is dirty, before continuing with this procedure, wring out a damp cloth and use it to do so. Paper Source Roll Media Cut Sheet Data Message Power Cancel Enter Online The carriage moves to the center. 3 Open the upper cover.

User Guide
Page 107
... Printer 6-9 Paper Source Roll Media Cut Sheet Data Message Power Cancel Enter Online 2 Disconnect the power cord from high voltage points, hot components, or moving parts inside the printer, this printer, clean the printer surfaces at least once a month. 1 Press and hold the Power button for 3 seconds, then switch the printer...
... Printer 6-9 Paper Source Roll Media Cut Sheet Data Message Power Cancel Enter Online 2 Disconnect the power cord from high voltage points, hot components, or moving parts inside the printer, this printer, clean the printer surfaces at least once a month. 1 Press and hold the Power button for 3 seconds, then switch the printer...

User Guide
Page 109
... media is dirty, or at least once a month. Cleaning the Printer 6-11 Important z To avoid soiling your hands or damaging the printer, never touch any part inside the printer unless instructed to do so.
... media is dirty, or at least once a month. Cleaning the Printer 6-11 Important z To avoid soiling your hands or damaging the printer, never touch any part inside the printer unless instructed to do so.

User Guide
Page 118
... "Please Wait" is displayed. 6 Open the upper cover. Preparation requires about 2 minutes. Important z To avoid soiling your hands or damaging the printer, never touch any part inside the printer unless instructed to select "Replace P.Head" then press . z Check the carriage cover, printhead lock cover, and the printhead lock lever. System Setup...
... "Please Wait" is displayed. 6 Open the upper cover. Preparation requires about 2 minutes. Important z To avoid soiling your hands or damaging the printer, never touch any part inside the printer unless instructed to select "Replace P.Head" then press . z Check the carriage cover, printhead lock cover, and the printhead lock lever. System Setup...

User Guide
Page 120
... carriage. z Discard a used printhead in the illustration, pull down to cool for a new minutes (the metal parts of the printhead and remove it from its case. To avoid minor burns, do not touch these metal parts when you are removing the printhead immediately after printing, allow the printhead to remove protective cap...
... carriage. z Discard a used printhead in the illustration, pull down to cool for a new minutes (the metal parts of the printhead and remove it from its case. To avoid minor burns, do not touch these metal parts when you are removing the printhead immediately after printing, allow the printhead to remove protective cap...

User Guide
Page 132
.... (Æ P.7-31) Problem 4: An ink tank has run out of ink. Solution: Call for removing a media jam. Problem 1: A blank page is cut sheet was a normal part of the procedure in order to restart the print job. Problem 2: The leading edge of the roll media is ejected from feeding. Problem 3: Roll media...
.... (Æ P.7-31) Problem 4: An ink tank has run out of ink. Solution: Call for removing a media jam. Problem 1: A blank page is cut sheet was a normal part of the procedure in order to restart the print job. Problem 2: The leading edge of the roll media is ejected from feeding. Problem 3: Roll media...

User Guide
Page 145
... for the type of media loaded in the printer then press Enter. Important z To avoid soiling your hands or damaging the printer, never touch any part inside the printer unless instructed to switch the printer off. Removing Paper Jams 7-21 8 Press or to select the setting for 3 seconds the Power button...
... for the type of media loaded in the printer then press Enter. Important z To avoid soiling your hands or damaging the printer, never touch any part inside the printer unless instructed to switch the printer off. Removing Paper Jams 7-21 8 Press or to select the setting for 3 seconds the Power button...

User Guide
Page 150
Removing a Cut Sheet Jam Follow the procedure below to do so. 2 Raise the paper release lever. 7-26 Troubleshooting Important z To avoid soiling your hands or damaging the printer, never touch any part inside the printer unless instructed to remove a cut sheet jam that occurs during printing. 1 Open the upper cover.
Removing a Cut Sheet Jam Follow the procedure below to do so. 2 Raise the paper release lever. 7-26 Troubleshooting Important z To avoid soiling your hands or damaging the printer, never touch any part inside the printer unless instructed to remove a cut sheet jam that occurs during printing. 1 Open the upper cover.


