
User Guide
Page 1
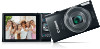
... ●● Make sure you read this guide, including the "Safety Precautions" (= 13) section, before using the camera. ●● Reading this guide will help you learn to use the camera properly. ●● Store this guide safely so that you can use it in the future. ●● Click...you clicked a link ●● To jump to the beginning of a chapter, click the chapter title at right. Before Use Basic Guide Advanced Guide Camera Basics Auto Mode / Hybrid Auto Mode Other Shooting Modes P Mode Playback Mode Wi-Fi Functions Setting Menu Accessories Appendix Index ©...
... ●● Make sure you read this guide, including the "Safety Precautions" (= 13) section, before using the camera. ●● Reading this guide will help you learn to use the camera properly. ●● Store this guide safely so that you can use it in the future. ●● Click...you clicked a link ●● To jump to the beginning of a chapter, click the chapter title at right. Before Use Basic Guide Advanced Guide Camera Basics Auto Mode / Hybrid Auto Mode Other Shooting Modes P Mode Playback Mode Wi-Fi Functions Setting Menu Accessories Appendix Index ©...

User Guide
Page 2
...pack. ●● Printed matter is also included. ●● A memory card is missing, contact your camera retailer. However, not all memory cards have been verified to SD standards. Before Use Basic Guide Advanced Guide Camera Basics Auto Mode / Hybrid Auto Mode Other Shooting Modes P Mode Playback Mode Wi-Fi Functions Setting..., regardless of capacity. ●● SD memory cards* ●● SDHC memory cards* ●● SDXC memory cards* * Cards conforming to work with the camera. Compatible Memory Cards The following items are included in the package.
...pack. ●● Printed matter is also included. ●● A memory card is missing, contact your camera retailer. However, not all memory cards have been verified to SD standards. Before Use Basic Guide Advanced Guide Camera Basics Auto Mode / Hybrid Auto Mode Other Shooting Modes P Mode Playback Mode Wi-Fi Functions Setting..., regardless of capacity. ●● SD memory cards* ●● SDHC memory cards* ●● SDXC memory cards* * Cards conforming to work with the camera. Compatible Memory Cards The following items are included in the package.
User Guide
Page 3
... For convenience, all supported memory cards are simply referred to the camera under extremely high-precision manufacturing conditions and more than 99.99% of purchase. If covered, remove the film before contacting a Canon Customer Support Help Desk. ●● Although the LCD monitor ...=xx: Pages with a thin plastic film for any consequential damages arising from unauthorized recording that Canon Inc., its subsidiaries and affiliates, and its distributors are represented by the camera shall be for personal use , photography may become warm. Refrain from any malfunction of an ...
... For convenience, all supported memory cards are simply referred to the camera under extremely high-precision manufacturing conditions and more than 99.99% of purchase. If covered, remove the film before contacting a Canon Customer Support Help Desk. ●● Although the LCD monitor ...=xx: Pages with a thin plastic film for any consequential damages arising from unauthorized recording that Canon Inc., its subsidiaries and affiliates, and its distributors are represented by the camera shall be for personal use , photography may become warm. Refrain from any malfunction of an ...

User Guide
Page 4
... Connection)] button (10) Indicator (11) Movie button (12) FUNC. (Function) / SET button (13) [ (Flash)] / Right button (14) [ (Menu)] button Before Use Basic Guide Advanced Guide Camera Basics Auto Mode / Hybrid Auto Mode Other Shooting Modes P Mode Playback Mode Wi-Fi Functions Setting Menu Accessories Appendix Index 4
... Connection)] button (10) Indicator (11) Movie button (12) FUNC. (Function) / SET button (13) [ (Flash)] / Right button (14) [ (Menu)] button Before Use Basic Guide Advanced Guide Camera Basics Auto Mode / Hybrid Auto Mode Other Shooting Modes P Mode Playback Mode Wi-Fi Functions Setting Menu Accessories Appendix Index 4

User Guide
Page 5
... as the Subject Moves (Auto Zoom).......36 Using the Self-Timer 37 Using the Self-Timer to Avoid Camera Shake 38 Customizing the Self-Timer 38 Before Use Basic Guide Advanced Guide Camera Basics Auto Mode / Hybrid Auto Mode Other Shooting Modes P Mode Playback Mode Wi-Fi Functions Setting Menu...5 Menu 26 Using the Menu Screen 27 On-Screen Keyboard 28 Indicator Display 29 Clock 29 Auto Mode / Hybrid Auto Mode 30 Shooting with Camera-Determined Settings 30 Shooting (Smart Auto 30 Shooting in Playback Mode 25 Shutter Button 25 Shooting Display Options 26 Using the FUNC.
... as the Subject Moves (Auto Zoom).......36 Using the Self-Timer 37 Using the Self-Timer to Avoid Camera Shake 38 Customizing the Self-Timer 38 Before Use Basic Guide Advanced Guide Camera Basics Auto Mode / Hybrid Auto Mode Other Shooting Modes P Mode Playback Mode Wi-Fi Functions Setting Menu...5 Menu 26 Using the Menu Screen 27 On-Screen Keyboard 28 Indicator Display 29 Clock 29 Auto Mode / Hybrid Auto Mode 30 Shooting with Camera-Determined Settings 30 Shooting (Smart Auto 30 Shooting in Playback Mode 25 Shutter Button 25 Shooting Display Options 26 Using the FUNC.

User Guide
Page 6
...the IS Mode Settings 44 Deactivating Image Stabilization 44 Shooting Movies with Subjects at the Same Size Shown before Shooting 44 Customizing Camera Operation 45 Deactivating the AF-Assist Beam 45 Deactivating the Red-Eye Reduction Lamp 45 Changing the Image Display Style after Shots... Resembling Miniature Models (Miniature Effect 51 Playback Speed and Estimated Playback Time (for One-Minute Clips 52 Shooting with a Toy Camera Effect (Toy Camera Effect 52 Shooting in Monochrome 53 Special Modes for Other Purposes 53 Auto Shooting after Face Detection (Smart Shutter 53 Auto Shooting...
...the IS Mode Settings 44 Deactivating Image Stabilization 44 Shooting Movies with Subjects at the Same Size Shown before Shooting 44 Customizing Camera Operation 45 Deactivating the AF-Assist Beam 45 Deactivating the Red-Eye Reduction Lamp 45 Changing the Image Display Style after Shots... Resembling Miniature Models (Miniature Effect 51 Playback Speed and Estimated Playback Time (for One-Minute Clips 52 Shooting with a Toy Camera Effect (Toy Camera Effect 52 Shooting in Monochrome 53 Special Modes for Other Purposes 53 Auto Shooting after Face Detection (Smart Shutter 53 Auto Shooting...

User Guide
Page 7
... Features 89 Sending Images to a Smartphone 90 Sending Images to an NFC-Compatible Smartphone 90 Connecting via NFC When Camera Is Off or in Shooting Mode 90 Before Use Basic Guide Advanced Guide Camera Basics Auto Mode / Hybrid Auto Mode Other Shooting Modes P Mode Playback Mode Wi-Fi Functions Setting Menu Accessories...
... Features 89 Sending Images to a Smartphone 90 Sending Images to an NFC-Compatible Smartphone 90 Connecting via NFC When Camera Is Off or in Shooting Mode 90 Before Use Basic Guide Advanced Guide Camera Basics Auto Mode / Hybrid Auto Mode Other Shooting Modes P Mode Playback Mode Wi-Fi Functions Setting Menu Accessories...
User Guide
Page 8
...to Listed Access Points 101 Previous Access Points 102 Sending Images to a Registered Web Service 103 Registering Web Services 103 Registering CANON iMAGE GATEWAY 103 Registering Other Web Services 105 Uploading Images to Web Services 105 Printing Images Wirelessly from a Connected Printer........... ...106 Sending Images to Another Camera 108 Image Sending Options 109 Sending Multiple Images 109 Select a range 109 Sending Images Tagged as Favorites 110 Notes on ...
...to Listed Access Points 101 Previous Access Points 102 Sending Images to a Registered Web Service 103 Registering Web Services 103 Registering CANON iMAGE GATEWAY 103 Registering Other Web Services 105 Uploading Images to Web Services 105 Printing Images Wirelessly from a Connected Printer........... ...106 Sending Images to Another Camera 108 Image Sending Options 109 Sending Multiple Images 109 Select a range 109 Sending Images Tagged as Favorites 110 Notes on ...

User Guide
Page 9
...-Fi Functions Setting Menu Accessories Appendix Index 9 Checking Certification Logos 123 Display Language 123 Adjusting Other Settings 124 Restoring Default Camera Settings 124 Accessories 125 System Map 125 Optional Accessories 126 Power Supplies 126 Flash Units 127 Other Accessories 127 Printers 127 ... 128 Playback on a TV 128 Playback on a High-Definition TV 128 Playback on a Standard-Definition TV 129 Powering the Camera with Household Power 129 Using the Software 130 Computer Connections via a Cable 131 Checking Your Computer Environment 131 Installing the Software ...
...-Fi Functions Setting Menu Accessories Appendix Index 9 Checking Certification Logos 123 Display Language 123 Adjusting Other Settings 124 Restoring Default Camera Settings 124 Accessories 125 System Map 125 Optional Accessories 126 Power Supplies 126 Flash Units 127 Other Accessories 127 Printers 127 ... 128 Playback on a TV 128 Playback on a High-Definition TV 128 Playback on a Standard-Definition TV 129 Powering the Camera with Household Power 129 Using the Software 130 Computer Connections via a Cable 131 Checking Your Computer Environment 131 Installing the Software ...

User Guide
Page 10
...-Fi (Wireless LAN) Precautions 161 Radio Wave Interference Precautions 161 Security Precautions 161 Trademarks and Licensing 162 Disclaimer 162 Before Use Basic Guide Advanced Guide Camera Basics Auto Mode / Hybrid Auto Mode Other Shooting Modes P Mode Playback Mode Wi-Fi Functions Setting Menu Accessories Appendix Index 10
...-Fi (Wireless LAN) Precautions 161 Radio Wave Interference Precautions 161 Security Precautions 161 Trademarks and Licensing 162 Disclaimer 162 Before Use Basic Guide Advanced Guide Camera Basics Auto Mode / Hybrid Auto Mode Other Shooting Modes P Mode Playback Mode Wi-Fi Functions Setting Menu Accessories Appendix Index 10

User Guide
Page 11
... scenes Low Light (= 49) Fireworks (= 49) Applying special effects Vivid Colors (= 50) Poster Effect (= 50) Fish-Eye Effect (= 51) Miniature Effect (= 51) Toy Camera Effect (= 52) ●● Focus on faces -- =30, =49, =63 ●● Without using the flash (Flash Off) -- =30, =67 ●&#...a date stamp -- =39 ●● Movie clips and photos together (Movie Digest) -- =32 Monochrome (= 53) Before Use Basic Guide Advanced Guide Camera Basics Auto Mode / Hybrid Auto Mode Other Shooting Modes P Mode Playback Mode Wi-Fi Functions Setting Menu Accessories Appendix Index 11
... scenes Low Light (= 49) Fireworks (= 49) Applying special effects Vivid Colors (= 50) Poster Effect (= 50) Fish-Eye Effect (= 51) Miniature Effect (= 51) Toy Camera Effect (= 52) ●● Focus on faces -- =30, =49, =63 ●● Without using the flash (Flash Off) -- =30, =67 ●&#...a date stamp -- =39 ●● Movie clips and photos together (Movie Digest) -- =32 Monochrome (= 53) Before Use Basic Guide Advanced Guide Camera Basics Auto Mode / Hybrid Auto Mode Other Shooting Modes P Mode Playback Mode Wi-Fi Functions Setting Menu Accessories Appendix Index 11

User Guide
Page 12
...;● Send images to a smartphone -- =90 ●● Share images online -- =103 ●● Send images to a computer -- =97 Before Use Basic Guide Advanced Guide Camera Basics Auto Mode / Hybrid Auto Mode Other Shooting Modes P Mode Playback Mode Wi-Fi Functions Setting Menu Accessories Appendix Index 12
...;● Send images to a smartphone -- =90 ●● Share images online -- =103 ●● Send images to a computer -- =97 Before Use Basic Guide Advanced Guide Camera Basics Auto Mode / Hybrid Auto Mode Other Shooting Modes P Mode Playback Mode Wi-Fi Functions Setting Menu Accessories Appendix Index 12

User Guide
Page 13
.... Remove the plug periodically and, using a dry cloth, wipe away any separately sold accessories you use. The electromagnetic waves emitted by the camera may result in asphyxiation. ●● Use only recommended power sources. ●● Do not disassemble, alter, or apply heat to ...using the product immediately if it . ●● Avoid dropping or subjecting the product to explode or leak, resulting in places where camera use is broken, such as alcohol, benzine, or thinner to prevent you read the safety precautions described below. Warning Denotes the possibility ...
.... Remove the plug periodically and, using a dry cloth, wipe away any separately sold accessories you use. The electromagnetic waves emitted by the camera may result in asphyxiation. ●● Use only recommended power sources. ●● Do not disassemble, alter, or apply heat to ...using the product immediately if it . ●● Avoid dropping or subjecting the product to explode or leak, resulting in places where camera use is broken, such as alcohol, benzine, or thinner to prevent you read the safety precautions described below. Warning Denotes the possibility ...

User Guide
Page 14
... burns, or other injuries. ●● The slideshow transition effects may cause discomfort when viewed for prolonged periods. ●● When using the camera on a clear day or an intense artificial light source. This could cause leakage, overheating, or an explosion of glass may cause product damage. ...extended periods. If the screen cracks, injury may result from the flash may cause foreign matter to smoke or the product to enter the camera. ●● On products that occurs may lead to cuts. ●● On products that raise and lower the flash automatically, ...
... burns, or other injuries. ●● The slideshow transition effects may cause discomfort when viewed for prolonged periods. ●● When using the camera on a clear day or an intense artificial light source. This could cause leakage, overheating, or an explosion of glass may cause product damage. ...extended periods. If the screen cracks, injury may result from the flash may cause foreign matter to smoke or the product to enter the camera. ●● On products that occurs may lead to cuts. ●● On products that raise and lower the flash automatically, ...
User Guide
Page 15
... Auto Mode Other Shooting Modes P Mode Playback Mode Wi-Fi Functions Setting Menu Accessories Appendix Index 15 Do not insert the batteries with the camera in your bag, ensure that have different levels of charge together, and do not use batteries that hard objects do not use old and ...uses multiple batteries, do not come into contact with the screen. Doing so may cause malfunctions or damage the screen. ●● When putting the camera in your pant pocket. terminals reversed. Also close the screen (so that it faces the body), if your product's screen closes. ●●...
... Auto Mode Other Shooting Modes P Mode Playback Mode Wi-Fi Functions Setting Menu Accessories Appendix Index 15 Do not insert the batteries with the camera in your bag, ensure that have different levels of charge together, and do not use batteries that hard objects do not use old and ...uses multiple batteries, do not come into contact with the screen. Doing so may cause malfunctions or damage the screen. ●● When putting the camera in your pant pocket. terminals reversed. Also close the screen (so that it faces the body), if your product's screen closes. ●●...

User Guide
Page 16
...not rest your fingers on the (2) threaded end (2). (1) Holding the Camera ●●Place the strap around your wrist. ●●When shooting, keep your arms close to your body and hold the camera securely to shooting and playback Initial Preparations Prepare for shooting as follows.... Before Use Basic Guide Advanced Guide Camera Basics Auto Mode / Hybrid Auto Mode Other Shooting Modes P Mode Playback Mode Wi...
...not rest your fingers on the (2) threaded end (2). (1) Holding the Camera ●●Place the strap around your wrist. ●●When shooting, keep your arms close to your body and hold the camera securely to shooting and playback Initial Preparations Prepare for shooting as follows.... Before Use Basic Guide Advanced Guide Camera Basics Auto Mode / Hybrid Auto Mode Other Shooting Modes P Mode Playback Mode Wi...

User Guide
Page 17
...;● For battery chargers that use a power cord, do not charge it in malfunction or damage to other objects. Before Use Basic Guide Advanced Guide Camera Basics Auto Mode / Hybrid Auto Mode Other Shooting Modes P Mode Playback Mode Wi-Fi Functions Setting Menu Accessories Appendix Index 17 Doing so could result..., which may damage the battery pack. Never use . ●● The charger can be used . Be sure to charge the battery pack initially, because the camera is not sold with 100 - 240 V AC power (50/60 Hz).
...;● For battery chargers that use a power cord, do not charge it in malfunction or damage to other objects. Before Use Basic Guide Advanced Guide Camera Basics Auto Mode / Hybrid Auto Mode Other Shooting Modes P Mode Playback Mode Wi-Fi Functions Setting Menu Accessories Appendix Index 17 Doing so could result..., which may damage the battery pack. Never use . ●● The charger can be used . Be sure to charge the battery pack initially, because the camera is not sold with 100 - 240 V AC power (50/60 Hz).

User Guide
Page 18
...on one memory card, see "Number of the arrow. ●●The battery pack will pop up . Before Use Basic Guide Advanced Guide Camera Basics Auto Mode / Hybrid Auto Mode Other Shooting Modes P Mode Playback Mode Wi-Fi Functions Setting Menu Accessories Appendix Index 18 Inserting the ... be locked into place. (1) (2) ●●Make sure the memory card is facing the right way when you should format the memory card with this camera (= 121). (2) 1 Open the cover. ●●Slide the cover (1) and open it (2). (1) 2 Insert the battery pack. ●●Holding the battery ...
...on one memory card, see "Number of the arrow. ●●The battery pack will pop up . Before Use Basic Guide Advanced Guide Camera Basics Auto Mode / Hybrid Auto Mode Other Shooting Modes P Mode Playback Mode Wi-Fi Functions Setting Menu Accessories Appendix Index 18 Inserting the ... be locked into place. (1) (2) ●●Make sure the memory card is facing the right way when you should format the memory card with this camera (= 121). (2) 1 Open the cover. ●●Slide the cover (1) and open it (2). (1) 2 Insert the battery pack. ●●Holding the battery ...

User Guide
Page 19
...] button. 3 Specify your home time zone. ●●Press the [ ][ ] buttons to close the Before Use Basic Guide Advanced Guide Camera Basics Auto Mode / Hybrid Auto Mode Other Shooting Modes P Mode Playback Mode Wi-Fi Functions Setting Menu Accessories Appendix Index 19 Changing the Date ...you manage images by pressing the [ ][ ] buttons. After a confirmation message, the setting screen is no longer displayed. ●●To turn the camera on. Setting the Date and Time Set the current date and time correctly as follows. 1 Access the menu screen. ●●Press the [ ]...
...] button. 3 Specify your home time zone. ●●Press the [ ][ ] buttons to close the Before Use Basic Guide Advanced Guide Camera Basics Auto Mode / Hybrid Auto Mode Other Shooting Modes P Mode Playback Mode Wi-Fi Functions Setting Menu Accessories Appendix Index 19 Changing the Date ...you manage images by pressing the [ ][ ] buttons. After a confirmation message, the setting screen is no longer displayed. ●●To turn the camera on. Setting the Date and Time Set the current date and time correctly as follows. 1 Access the menu screen. ●●Press the [ ]...

User Guide
Page 20
...you press the [ ] button. Display Language Change the display language as described in about 4 hours once you insert a charged battery pack or connect the camera to dismiss the time display and repeat step 2. ●● You can also change the display language by pressing the [ ] button and choosing [...Language ] on . In this case, press the [ ] button to an AC adapter kit (sold separately, =126), even if the camera is left off. ●● Once the date/time battery is depleted, the [Date/Time] screen will be charged in "Setting the Date and Time...
...you press the [ ] button. Display Language Change the display language as described in about 4 hours once you insert a charged battery pack or connect the camera to dismiss the time display and repeat step 2. ●● You can also change the display language by pressing the [ ] button and choosing [...Language ] on . In this case, press the [ ] button to an AC adapter kit (sold separately, =126), even if the camera is left off. ●● Once the date/time battery is depleted, the [Date/Time] screen will be charged in "Setting the Date and Time...


