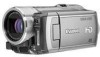
Digital Video Software (Macintosh) Ver.30 Instruction Manual
Page 2
...] Window 19 Installing the Digital Video Software 20 Before Downloading Still Images 23 Connecting the Camcorder to a Computer 23 Settings on the camcorder 23 Connecting the camcorder 24 Downloading Still Images 25 Using the Computer to Download Still Images (CameraWindow 26 Auto-...downloading 26 Applying Auto-downloading Settings 27 Downloading the Selected Still Images from the CameraWindow 30 Using the Camcorder to Download Still Images (Direct Transfer Function) ........ 32 Setting the Direct Transfer Download Destination Folder 32 Direct Transfer 33 ...
Digital Video Software (Macintosh) Ver.30 Instruction Manual
Page 3
Renaming Multiple Files 54 Searching for Images 55 Exporting Images ...57 Changing the File Type and Saving 57 Uploading Still Images to the camcorder 60 Using Various Functions 62 Attaching Images to E-mail Messages 62 Running a Slide Show 64 Adding Sound to a Still Image 65 Reviewing and Changing the Owner Name of the Camcorder 66 Uninstalling the Software 67 Uninstalling ImageBrowser 67 Troubleshooting ...68 Macintosh Contents 3
Digital Video Software (Macintosh) Ver.30 Instruction Manual
Page 4
...; Trademark Acknowledgments • Macintosh, Mac OS and iPhoto are trademarks of a CD-ROM played on your camcorder may be accepted for any means, without prior notice. • No part of this manual. Canon reserves the right to change the specifications of the hardware and software described herein at any CD player that...
Digital Video Software (Macintosh) Ver.30 Instruction Manual
Page 6
...still image CameraWindow • Downloading still images to your computer • Viewing still images directly from the camcorder, without downloading them • Printing still images directly from the camcorder, without downloading them to the computer This instruction manual explains how to install the software, what you can do with... the main features and how to a computer and manage, print, and edit them . Your camcorder may not support some features of the software. 6 What is Digital Video Software? What is Digital Video Software?
Digital Video Software (Macintosh) Ver.30 Instruction Manual
Page 7
... to Using the Computer to the computer. The Remote capture function is not in the Dock, double click the [Canon Utilities] folder on the drive where the program was installed, followed by the camcorder. Click the [CameraWindow] icon in the Camera Control window. Furthermore, you can print still images directly from...
Digital Video Software (Macintosh) Ver.30 Instruction Manual
Page 8
... varies depending on the selected printing type. Camera Control window Prints all still images as an index page (rows of the still images in the camcorder (built-in memory or memory card), allowing you to select which ones to the DPOF print settings set by the...
Digital Video Software (Macintosh) Ver.30 Instruction Manual
Page 9
Camera Control window Uploading the images from the computer. My Camera function is used for confirming and changing the owner's name of the camcorder's owner. [Set to the camcorder. Enter or change the name of the camcorder you can specify ( 66) and uploading the still images to Camera] Tab This tab is not supported by the camcorder. Macintosh Windows 9
Digital Video Software (Macintosh) Ver.30 Instruction Manual
Page 10
The sample images used on this window will be also 16:9 images. Changes the size of the thumbnail. If your camcorder supports wide size still image (16:9 such as 1920 x 1080 pixels) recording, the thumbnails that appear in this instruction manual are normal size still images (4:3). 10 Windows Camera Browser Window Camera Browser window Still image information and a histogram Starts ImageBrowser. Prints the selected still images. Selects the still image selection method. Selects whether to show or hide the image frame and file name.
Digital Video Software (Macintosh) Ver.30 Instruction Manual
Page 15
... the image. 1 Back/Next 2 Save 3 Edit 4 Number of the image will be displayed. [Show AF Frame] cannot be used for the images recorded by the camcorder. Allows you to perform the following operations: red-eye correction, auto correct, color and brightness correction, sharpness adjustment, trimming, inserting text, or registering external image...
Digital Video Software (Macintosh) Ver.30 Instruction Manual
Page 20
..., you must install the Digital Video Software. Either install ImageBrowser to download the still images or use the following procedure. 1) Connect the camcorder to the computer, and start Image Capture. 2) Click [Options]. 3) Remove the checkmark from [Embed Colorsync profile] in the computer's ...click the CD-ROM icon and the [Canon Digital Video Installer] icon. 20 Installing the Digital Video Software Installing the Digital Video Software Before you connect the camcorder to 2.1 and image information may be modified. Your digital video camcorder is not connected to a computer with ...
Digital Video Software (Macintosh) Ver.30 Instruction Manual
Page 21
...[Easy Installation] and click [Next]. Macintosh When installing the software by selecting [Easy Installation], EOS Utility (software for compatible Canon EOS Digital SLR Cameras, and the camcorder does not support this software. 6 Read the license agreement and click [Agree] to accept the terms. Installing the Digital... Video Software 21 This software is used only for downloading still images from the Canon EOS Digital SLR Cameras) will...
Digital Video Software (Macintosh) Ver.30 Instruction Manual
Page 22
When installation is complete, restart the computer as prompted. 9 Remove the DIGITAL VIDEO Solution Disk from the CD-ROM drive. After the installation is complete, remove the DIGITAL VIDEO Solution Disk before you connect the camcorder to the computer. 22 Installing the Digital Video Software 7 Review the installation settings and click [Next]. 8 When the "Installation has finished." message appears, click [Finish].
Digital Video Software (Macintosh) Ver.30 Instruction Manual
Page 23
... following options. - [PC/PRINTER]: To simply connect the camcorder to the computer without further operations. - [CONNECT&SET]: Select [PC/PRINTER] on the camcorder Before connecting the camcorder to the computer, change the following camcorder settings in advance. • In the still images index ...of the computer's USB ports. For details about changing settings on the camcorder and connecting the camcorder to the computer, see the camcorder's instruction manual. Settings on the camcorder every time you are using the power adapter before connecting it to a computer. ...
Digital Video Software (Macintosh) Ver.30 Instruction Manual
Page 24
Wait until the ACCESS indicator stops flashing. 4 Attach the supplied USB cable to still image playback mode. USB Terminal on the Camcorder USB Cable Camcorder End Computer End USB Port on the Computer 24 Before Downloading Still Images Connecting the camcorder 1 Connect the compact power adapter to the camcorder. 2 If downloading images from a memory card, insert the memory card into the camcorder. 3 Set the camcorder to the computer's USB port and the camcorder's USB Terminal.
Digital Video Software (Macintosh) Ver.30 Instruction Manual
Page 25
...use a card reader/writer to connect a card reader/writer, see Using a Card Reader/Writer ( 34). You cannot connect the camcorder to a computer if the memory card contains 1800 images or more than approximately 1000 images. Do not remove the memory card or detach the ...copy of the mode dial. The still images you are important original data files. Downloading Still Images Below explains the procedure for connecting a camcorder to a computer using and the installed OS) if the memory card contains more , and you may cause data to become corrupted. - For instructions ...
Digital Video Software (Macintosh) Ver.30 Instruction Manual
Page 26
...(the bar at the bottom of the desktop). • If you do not wish the Camera Control window to open automatically when you connect the camcorder, click the [File] menu and clear the check mark from the [Displays this screen when the camera is connected]. 2 Click [Starts to download...Still Images If it does not appear automatically, click the [CameraWindow] icon in the Camera Control window. Auto-downloading 1 Connect the camcorder to close the Camera Control window after downloading images. Click [Exit] to the computer ( 23). • The Camera Control window will be displayed.
Digital Video Software (Macintosh) Ver.30 Instruction Manual
Page 29
Downloading Still Images 29 Macintosh Select a process to perform after the image is downloaded and click [Next]. The window below will be automatically downloaded when the camcorder is connected. Placing a check mark here makes images in the camcorder to be displayed when you select [Perform selected processes consecutively] (you can redisplay the window by clicking [Select]). 5 Specify a process to perform after the image is downloaded, and click [OK]. 6 Click [Finish].
Digital Video Software (Macintosh) Ver.30 Instruction Manual
Page 32
Click [Exit] to download images. Setting the Direct Transfer Download Destination Folder 1 Click the [Acquire Images] tab and click [Preferences]. Using the Camcorder to Download Still Images (Direct Transfer Function) If your camcorder supports the Direct Transfer function, you can use the camcorder to close the Camera Control window. 2 Select [Change direct transfer download destination folder] and click [Next]. 32 Downloading Still Images
Digital Video Software (Macintosh) Ver.30 Instruction Manual
Page 33
Select to specify the name of the subfolder. Direct Transfer 1 Select a transfer option on the camcorder screen and press the button. • See your camcorder instruction manual for how to set and operate the camcorder to specify the destination folder. Destination Folder Click this button to transfer images. • The button cannot be used when it is not lighted. Macintosh Downloading Still Images 33 3 Specify the destination folder settings and click [Finish].
Digital Video Software (Macintosh) Ver.30 Instruction Manual
Page 34
...( 35). • [Lets you need to use a card reader/writer compatible with SDHC cards. 1 Insert a memory card containing images recorded with the camcorder into the card reader/writer and connect it to the computer. 2 Select a method to download the images. • [Download Images]: A progress bar will...images on how to connect the card reader/writer, refer to its manual. If you connect the camcorder to the computer, and ImageBrowser starts. The basic operations are using a camcorder that supports miniSD cards but your card reader/ writer does not support them, please purchase an ...