
Users Manual - English
Page 2
... Only) Responsible Party: Brother International Corporation 100 Somerset Corporate Boulevard Bridgewater, NJ 08807-0911 USA declares that the product Product Name: Model Number: Brother USB Writer PE-Design complies with EN55022 (CISPR Publication 22) /Class B. However, there is subject to radio or television reception, which can radiate radio frequency energy and, if not installed and used in accordance with...
... Only) Responsible Party: Brother International Corporation 100 Somerset Corporate Boulevard Bridgewater, NJ 08807-0911 USA declares that the product Product Name: Model Number: Brother USB Writer PE-Design complies with EN55022 (CISPR Publication 22) /Class B. However, there is subject to radio or television reception, which can radiate radio frequency energy and, if not installed and used in accordance with...

Users Manual - English
Page 3
... unit and to create a wide variety of embroidery designs and supports a wider range of copyrights which is an infringement of sewing attribute settings (thread density, sewing pitch, etc.). For a longer service life • When storing the unit, avoid direct sunlight and high humidity locations. Other product names mentioned in the Instruction Manual and Installation Guide may be used or copied only in a safe place...
... unit and to create a wide variety of embroidery designs and supports a wider range of copyrights which is an infringement of sewing attribute settings (thread density, sewing pitch, etc.). For a longer service life • When storing the unit, avoid direct sunlight and high humidity locations. Other product names mentioned in the Instruction Manual and Installation Guide may be used or copied only in a safe place...
Users Manual - English
Page 12
... setting, designs can be displayed adjusted to the actual size with the Zoom In tool to or removed from the list of colors used in Realistic View. LE (☞p. 69) ● Functions for rotating have been improved. - The functions for editing thread colors have been added to 100 fonts. - LE (☞p. 70) ● Stitch Simulator has been improved. When a pattern...
... setting, designs can be displayed adjusted to the actual size with the Zoom In tool to or removed from the list of colors used in Realistic View. LE (☞p. 69) ● Functions for rotating have been improved. - The functions for editing thread colors have been added to 100 fonts. - LE (☞p. 70) ● Stitch Simulator has been improved. When a pattern...
Users Manual - English
Page 13
... positions for individual characters in addition to connecting directly to an embroidery machine via a USB cable. - This allows text patterns to be converted to be created. (*Availability depends on the embroidery machine model.) LE (☞p. 166) - Split embroidery designs for embroidering with the Transform attribute applied. (☞p. 95) ● The Convert to the embroidery machine. (*Availability depends on the embroidery machine model.) (LE,DC,DB) (☞p. 85) - New types...
... positions for individual characters in addition to connecting directly to an embroidery machine via a USB cable. - This allows text patterns to be converted to be created. (*Availability depends on the embroidery machine model.) LE (☞p. 166) - Split embroidery designs for embroidering with the Transform attribute applied. (☞p. 95) ● The Convert to the embroidery machine. (*Availability depends on the embroidery machine model.) (LE,DC,DB) (☞p. 85) - New types...
Users Manual - English
Page 15
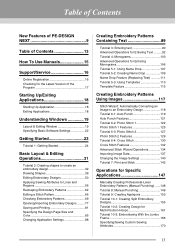
...Sewing Attributes to Lines and Regions 56 Reshaping Embroidery Patterns 62 Editing a Stitch Pattern 66 Checking Embroidery Patterns 69 Opening/Importing Embroidery Designs ......... 77 Saving and Printing 81 Specifying the Design Page Size and Color 85 Changing Application Settings 88 Creating Embroidery Patterns Containing Text 89 Tutorial 3: Entering text 90 Advanced Operations for Entering Text ..........92 Tutorial 4: Monograms 103 Advanced Operations for Entering Monograms 106 Tutorial 5-1: Using Name Drop 107 Tutorial 5-2: Creating Name Drop 109 Name Drop Feature (Replacing...
...Sewing Attributes to Lines and Regions 56 Reshaping Embroidery Patterns 62 Editing a Stitch Pattern 66 Checking Embroidery Patterns 69 Opening/Importing Embroidery Designs ......... 77 Saving and Printing 81 Specifying the Design Page Size and Color 85 Changing Application Settings 88 Creating Embroidery Patterns Containing Text 89 Tutorial 3: Entering text 90 Advanced Operations for Entering Text ..........92 Tutorial 4: Monograms 103 Advanced Operations for Entering Monograms 106 Tutorial 5-1: Using Name Drop 107 Tutorial 5-2: Creating Name Drop 109 Name Drop Feature (Replacing...
Users Manual - English
Page 17
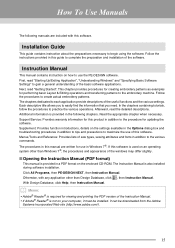
..., read "Getting Started". Additional information is also installed during software installation. With Design Database, click Help, then Instruction Manual. This chapter provides procedures for creating embroidery patterns as examples for this software is used on an operating system other than Windows 7 ®, the procedures and appearance of the windows may differ slightly. ■ Opening the Instruction Manual (PDF format) This manual is not on the settings available in the...
..., read "Getting Started". Additional information is also installed during software installation. With Design Database, click Help, then Instruction Manual. This chapter provides procedures for creating embroidery patterns as examples for this software is used on an operating system other than Windows 7 ®, the procedures and appearance of the windows may differ slightly. ■ Opening the Instruction Manual (PDF format) This manual is not on the settings available in the...
Users Manual - English
Page 18
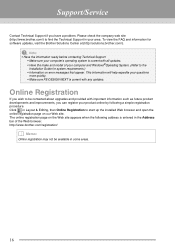
... quickly. • Make sure PE-DESIGN NEXT is current with important information such as future product developments and improvements, you have a problem. Click in your area. Please check the company web site (http://www.brother.com/) to the Installation Guide for software updates, visit the Brother Solutions Center at (http://solutions.brother.com/). Support/Service Contact Technical Support if you can register your product online...
... quickly. • Make sure PE-DESIGN NEXT is current with important information such as future product developments and improvements, you have a problem. Click in your area. Please check the company web site (http://www.brother.com/) to the Installation Guide for software updates, visit the Brother Solutions Center at (http://solutions.brother.com/). Support/Service Contact Technical Support if you can register your product online...

Users Manual - English
Page 23
... then click the name in the Quick Access Toolbar (A). : Wizard : Solid View : New : Stitch View : Open : Realistic View : Save : Undo : Redo Click 1, then 2 to the location where the pane will be moved around the screen. • Double-click the title bar of the pane, or tab. ...Sewing Attributes/Text Attributes pane, Sewing Order pane and Stitch Simulator pane Floating Each tab or the entire pane can be moved to use. Hide When a tab or a pane is pressed, a KeyTip (label showing the letter of the pane. Auto Hide When a pane is hidden. Alternatively, changes to the Quick...
... then click the name in the Quick Access Toolbar (A). : Wizard : Solid View : New : Stitch View : Open : Realistic View : Save : Undo : Redo Click 1, then 2 to the location where the pane will be moved around the screen. • Double-click the title bar of the pane, or tab. ...Sewing Attributes/Text Attributes pane, Sewing Order pane and Stitch Simulator pane Floating Each tab or the entire pane can be moved to use. Hide When a tab or a pane is pressed, a KeyTip (label showing the letter of the pane. Auto Hide When a pane is hidden. Alternatively, changes to the Quick...

Users Manual - English
Page 102
... a setting under Connection Points. (3) Farther Stitches are created in the default sewing order for good stitching quality of times that the thread is not displayed, click View tab in the Ribbon, then Sewing Attributes. 2. This lengthens jump stitches so they can be trimmed manually. Stitches are Default, Closest and Farther. 1. This shortens jump stitches and reduces the number of all characters. (2) Closest Embroidery...
... a setting under Connection Points. (3) Farther Stitches are created in the default sewing order for good stitching quality of times that the thread is not displayed, click View tab in the Ribbon, then Sewing Attributes. 2. This lengthens jump stitches so they can be trimmed manually. Stitches are Default, Closest and Farther. 1. This shortens jump stitches and reduces the number of all characters. (2) Closest Embroidery...

Users Manual - English
Page 104
... built-in fonts specifically for the following. • Sew type • Sewing Attribute • Transform • Name Drop 102 Select the Small Text tool by clicking 1, then 2, then 3. 1 2 3 ■ Editing Small text Small Text attributes can be specified for small text can be used when embroidering normal designs. (For details on adjusting the thread tension and sewing speed, refer to the Operation Manual provided with...
... built-in fonts specifically for the following. • Sew type • Sewing Attribute • Transform • Name Drop 102 Select the Small Text tool by clicking 1, then 2, then 3. 1 2 3 ■ Editing Small text Small Text attributes can be specified for small text can be used when embroidering normal designs. (For details on adjusting the thread tension and sewing speed, refer to the Operation Manual provided with...

Users Manual - English
Page 147
... Creating Embroidery Patterns Using Images b Memo: For details on printing on iron-on transfer sheets and printable fabric. Tutorial 7: Print and Stitch Step 3 Printing the positioning sheet Print a sheet for the iron-on transfer sheets or printable fabric, refer to adjust its position. 5 Click OK. 6 Click Print. b Memo: To check the print image, click Print Preview. 7 Specify the appropriate settings in...
... Creating Embroidery Patterns Using Images b Memo: For details on printing on iron-on transfer sheets and printable fabric. Tutorial 7: Print and Stitch Step 3 Printing the positioning sheet Print a sheet for the iron-on transfer sheets or printable fabric, refer to adjust its position. 5 Click OK. 6 Click Print. b Memo: To check the print image, click Print Preview. 7 Specify the appropriate settings in...
Users Manual - English
Page 157
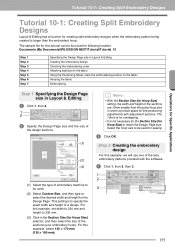
... the embroidering order Attaching stabilizer to the fabric Using the Positioning Sheet, mark the embroidering position on the fabric Hooping the fabric Embroidering Step 1 Specifying the Design Page size in Layout & Editing 1 Click 1, then 2. 1 2 2 Specify the Design Page size and the size of the design sections. (1) (2) (3) (1) Select the type of a design. Tutorial 10-1: Creating Split Embroidery Designs Operations for Specific Applications Tutorial 10-1: Creating Split Embroidery Designs Layout & Editing has a function for creating split embroidery designs when the embroidery pattern...
... the embroidering order Attaching stabilizer to the fabric Using the Positioning Sheet, mark the embroidering position on the fabric Hooping the fabric Embroidering Step 1 Specifying the Design Page size in Layout & Editing 1 Click 1, then 2. 1 2 2 Specify the Design Page size and the size of the design sections. (1) (2) (3) (1) Select the type of a design. Tutorial 10-1: Creating Split Embroidery Designs Operations for Specific Applications Tutorial 10-1: Creating Split Embroidery Designs Layout & Editing has a function for creating split embroidery designs when the embroidery pattern...

Users Manual - English
Page 165
...pattern 2) a (pattern 3) c (pattern 4) a (pattern 5) c (pattern 6) Therefore, since the number of times that the hoop installation position is sewn according to reduce the number of times for Multi-Position Hoops Step 3 Optimizing hoop changes 1 Click 1, then 2. 1 2 2 Click 1, then 2. 1 b Memo: • A check mark appears when this function will change the sewing order that you begin embroidering. 163 Operations for Specific Applications Tutorial 10-2: Creating Design for changing the hoop installation position...
...pattern 2) a (pattern 3) c (pattern 4) a (pattern 5) c (pattern 6) Therefore, since the number of times that the hoop installation position is sewn according to reduce the number of times for Multi-Position Hoops Step 3 Optimizing hoop changes 1 Click 1, then 2. 1 2 2 Click 1, then 2. 1 b Memo: • A check mark appears when this function will change the sewing order that you begin embroidering. 163 Operations for Specific Applications Tutorial 10-2: Creating Design for changing the hoop installation position...

Users Manual - English
Page 180
... start /stop button on the embroidery machine (Start/ Stop button) to start sewing. Paused The machine has temporarily been stopped. The received data can be edited from Layout & Editing does not appear in the screen of the embroidery machine, and the design moves to begin embroidering. When embroidering is started, the following appears in the queue (2), continue the operation by using the machine's operation panel. Color change Change the thread spool on the machine...
... start /stop button on the embroidery machine (Start/ Stop button) to start sewing. Paused The machine has temporarily been stopped. The received data can be edited from Layout & Editing does not appear in the screen of the embroidery machine, and the design moves to begin embroidering. When embroidering is started, the following appears in the queue (2), continue the operation by using the machine's operation panel. Color change Change the thread spool on the machine...

Users Manual - English
Page 228
... style 12 Instruction Guide style 1. Click File, then Print Setup. 3. Select Print Layout (3). In the folder pane, select the folder containing the embroidery designs. 2. Under Color Description (4), select whether the thread colors appear as the name of all embroidery designs in the Print Setup dialog box. 226 Under Paper (1) and Orientation (2), select the appropriate settings. (1) (2) (3) (4) 5. Outputting a Catalog of Embroidery Designs Outputting a Catalog...
... style 12 Instruction Guide style 1. Click File, then Print Setup. 3. Select Print Layout (3). In the folder pane, select the folder containing the embroidery designs. 2. Under Color Description (4), select whether the thread colors appear as the name of all embroidery designs in the Print Setup dialog box. 226 Under Paper (1) and Orientation (2), select the appropriate settings. (1) (2) (3) (4) 5. Outputting a Catalog of Embroidery Designs Outputting a Catalog...

Users Manual - English
Page 270
... software allows you wish to create a wide variety of embroidery patterns and supports wider ranges for the setting of stitches sewn changing. We recommend that you make a trial sewing sample with your particular embroidery machine model. Pulling or puckering more dense or light without the number of the sewing attributes (thread density, sewing pitch, etc.). Do not use this method when only slightly enlarging/ reducing the stitch pattern. Enlarging/Reducing Stitch Patterns...
... software allows you wish to create a wide variety of embroidery patterns and supports wider ranges for the setting of stitches sewn changing. We recommend that you make a trial sewing sample with your particular embroidery machine model. Pulling or puckering more dense or light without the number of the sewing attributes (thread density, sewing pitch, etc.). Do not use this method when only slightly enlarging/ reducing the stitch pattern. Enlarging/Reducing Stitch Patterns...

Users Manual - English
Page 278
... not automatically start up . The USB card writer module Not enough power is being supplied. The driver for the driver of the Installation Guide, "If the installer does not automatically start up ". Troubleshooting Troubleshooting If a problem occurs, click or Help, then Customer Support in the installation procedure was performed. (For example, Cancel was clicked or the CD-ROM was removed before the procedure was completed.) Follow the instructions as the software installs...
... not automatically start up . The USB card writer module Not enough power is being supplied. The driver for the driver of the Installation Guide, "If the installer does not automatically start up ". Troubleshooting Troubleshooting If a problem occurs, click or Help, then Customer Support in the installation procedure was performed. (For example, Cancel was clicked or the CD-ROM was removed before the procedure was completed.) Follow the instructions as the software installs...

Users Manual - English
Page 318
... moving center points 65 embroidery patterns to center 50 entry/exit points 64 images 25, 140 stitch points 67 multi-position hoops 161 N Name Drop Feature 5, 109, 111 Name Drop List 107, 110, 111 New 77 New Figure Data 199 New Line Image 197 NOT DEFINED 57 number of jumps 274 O Offset 297 Offset line pattern 4, 49 Online Registration 16 opening .pem files 194 .pes...
... moving center points 65 embroidery patterns to center 50 entry/exit points 64 images 25, 140 stitch points 67 multi-position hoops 161 N Name Drop Feature 5, 109, 111 Name Drop List 107, 110, 111 New 77 New Figure Data 199 New Line Image 197 NOT DEFINED 57 number of jumps 274 O Offset 297 Offset line pattern 4, 49 Online Registration 16 opening .pem files 194 .pes...

Installation Guide English - English
Page 3
Table of Contents Table of Contents...1 Before Use ...2 Introduction ...2 Package Contents ...2 Optional Supply ...3 Principal Parts ...3 Installation ...4 Please Read Before Installation ...4 Installation Procedure...4 System Requirements ...5 [STEP1] Installing the Software...6 [STEP2] Upgrading the USB Card Writer Module (For upgrade customer only 10 Checking for the Latest Version of the Program 12 Technical Support...13 Online Registration ...13 Uninstallation ...13 1
Table of Contents Table of Contents...1 Before Use ...2 Introduction ...2 Package Contents ...2 Optional Supply ...3 Principal Parts ...3 Installation ...4 Please Read Before Installation ...4 Installation Procedure...4 System Requirements ...5 [STEP1] Installing the Software...6 [STEP2] Upgrading the USB Card Writer Module (For upgrade customer only 10 Checking for the Latest Version of the Program 12 Technical Support...13 Online Registration ...13 Uninstallation ...13 1

Installation Guide English - English
Page 15
...; Operating System updated to the most current version. 2) The make and model number of Layout & Editing to the latest version. Please check the company web site (http://www.brother.com/) to find the technical Support in your questions more quickly. 4) Please check and update the software to start up the installed Web browser and open the online registration page on our Web site. Before Use...
...; Operating System updated to the most current version. 2) The make and model number of Layout & Editing to the latest version. Please check the company web site (http://www.brother.com/) to find the technical Support in your questions more quickly. 4) Please check and update the software to start up the installed Web browser and open the online registration page on our Web site. Before Use...


