
Users Manual - English
Page 10
... of the stitching area, stop the machine. We recommend selecting a simple stitch and sewing trial stitches to feed the needle into the punched hole again, and then lower the presser foot lever. Memo We recommend an upper thread tension that there is higher than the standard setting. Note • Do not sew reinforcement/reverse stitches at the rear of simple stitches: , , n Select a low speed, gently hold the threads behind the presser foot and start sewing. When...
... of the stitching area, stop the machine. We recommend selecting a simple stitch and sewing trial stitches to feed the needle into the punched hole again, and then lower the presser foot lever. Memo We recommend an upper thread tension that there is higher than the standard setting. Note • Do not sew reinforcement/reverse stitches at the rear of simple stitches: , , n Select a low speed, gently hold the threads behind the presser foot and start sewing. When...
Operation Manual
Page 4
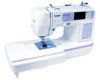
... drop or insert any object into any opening. • Do not operate where aerosol (spray) products are subject to inspect and adjust the machine yourself. Never allow children to play with this manual. If the problem persists, please consult your local authorized Brother dealer. Use accessories recommended by or near a space heater, iron, halogen lamp, or other parts to assure correct installation. 8 For repair...
... drop or insert any object into any opening. • Do not operate where aerosol (spray) products are subject to inspect and adjust the machine yourself. Never allow children to play with this manual. If the problem persists, please consult your local authorized Brother dealer. Use accessories recommended by or near a space heater, iron, halogen lamp, or other parts to assure correct installation. 8 For repair...

Operation Manual
Page 7
... ...22 Winding the bobbin ...22 Installing the bobbin ...27 Upper Threading ...31 About the spool of thread...31 Threading the upper thread ...32 Using the twin needle ...36 Replacing the Needle ...39 Needle precautions ...39 Selecting the needle depending on the thread and fabric types 39 Checking the needle ...40 Replacing the needle...41 Replacing the Presser Foot 43 Presser foot precautions ...43 Replacing the presser foot ...43 Removing and attaching the presser foot holder 45 Sewing Cylindrical Pieces and Large Pieces 46 Free-arm sewing...46 Using extension table ...46 SEWING BASICS...
... ...22 Winding the bobbin ...22 Installing the bobbin ...27 Upper Threading ...31 About the spool of thread...31 Threading the upper thread ...32 Using the twin needle ...36 Replacing the Needle ...39 Needle precautions ...39 Selecting the needle depending on the thread and fabric types 39 Checking the needle ...40 Replacing the needle...41 Replacing the Presser Foot 43 Presser foot precautions ...43 Replacing the presser foot ...43 Removing and attaching the presser foot holder 45 Sewing Cylindrical Pieces and Large Pieces 46 Free-arm sewing...46 Using extension table ...46 SEWING BASICS...

Operation Manual
Page 10
..., including utility stitches and decorative stitches (page 72). i Quick-set bobbin You can be stored inside the arm of the thread wound onto the bobbin from loosening. Presser foot, bobbins, a seam ripper, etc. m Extension table (Cover of the embroidery unit) You can use the bobbin clip to -use needle threader You can wind bobbins with one press of fabric weights (page 12). Machine Features a Automatic thread cutting The thread can be stored in this case. Bobbin clips can start sewing without pulling...
..., including utility stitches and decorative stitches (page 72). i Quick-set bobbin You can be stored inside the arm of the thread wound onto the bobbin from loosening. Presser foot, bobbins, a seam ripper, etc. m Extension table (Cover of the embroidery unit) You can use the bobbin clip to -use needle threader You can wind bobbins with one press of fabric weights (page 12). Machine Features a Automatic thread cutting The thread can be stored in this case. Bobbin clips can start sewing without pulling...

Operation Manual
Page 13
Before using the sewing machine, carefully read these buttons to operate the machine. i Operation buttons (page 13) Use these descriptions to learn the names of thread on this panel to select stitches or embroidery patterns, or check how to raise and lower the presser foot . l Needle threader lever (page 35) Use the needle threader lever to cut them. c Spool pin (page 23, 32) Place a spool of the machine parts. n Thread take-up lever (page 34) o Bobbin-winding thread guide and pretension disc (page 24) Pass...
Before using the sewing machine, carefully read these buttons to operate the machine. i Operation buttons (page 13) Use these descriptions to learn the names of thread on this panel to select stitches or embroidery patterns, or check how to raise and lower the presser foot . l Needle threader lever (page 35) Use the needle threader lever to cut them. c Spool pin (page 23, 32) Place a spool of the machine parts. n Thread take-up lever (page 34) o Bobbin-winding thread guide and pretension disc (page 24) Pass...

Operation Manual
Page 14
...) Lower the buttonhole lever when sewing buttonholes and bar tacks. h Power supply jack (page 17) Insert the plug on the end of the USB cable to this port and the other to clean the bobbin case and race. b Thread guide disk (page 34) Pass the thread through the thread guide disk when using the needle threader to use your machine. 12 i Presser foot holder (page 45) The presser foot is installed onto the presser foot holder. c Embroidery card slot (page 156) Insert the embroidery card. g Foot controller jack...
...) Lower the buttonhole lever when sewing buttonholes and bar tacks. h Power supply jack (page 17) Insert the plug on the end of the USB cable to this port and the other to clean the bobbin case and race. b Thread guide disk (page 34) Pass the thread through the thread guide disk when using the needle threader to use your machine. 12 i Presser foot holder (page 45) The presser foot is installed onto the presser foot holder. c Embroidery card slot (page 156) Insert the embroidery card. g Foot controller jack...

Operation Manual
Page 20
... needle is positioned when the sewing machine is displayed. 1 2 3 4 5 a Selected stitch b Presser foot to be changed. Change the screen on the LCD using the keys on the screen with your finger or a touch pen, the following utility stitch selection screen is stopped. The details are explained in "Stitch types" (page 51). Settings Down Up Vertical pattern adjustment Adjusts the up and down position of the LCD, and make operations by directly...
... needle is positioned when the sewing machine is displayed. 1 2 3 4 5 a Selected stitch b Presser foot to be changed. Change the screen on the LCD using the keys on the screen with your finger or a touch pen, the following utility stitch selection screen is stopped. The details are explained in "Stitch types" (page 51). Settings Down Up Vertical pattern adjustment Adjusts the up and down position of the LCD, and make operations by directly...

Operation Manual
Page 23
.... Press (Sewing machine help screen appears. Memo z For details on the LCD. Press the item to the corresponding page in this Operation Manual. procedures If you press (Previous page key), you finish viewing, press e key) two times. (Back h g fe a Upper threading b Bobbin winding c Bobbin installation d Needle replacement e Presser foot replacement f Embroidery foot attachment g Embroidery frame attachment h Embroidery unit attachment X The first screen describing the procedure for the following items. Displays simple explanations of setting upper thread / Press...
.... Press (Sewing machine help screen appears. Memo z For details on the LCD. Press the item to the corresponding page in this Operation Manual. procedures If you press (Previous page key), you finish viewing, press e key) two times. (Back h g fe a Upper threading b Bobbin winding c Bobbin installation d Needle replacement e Presser foot replacement f Embroidery foot attachment g Embroidery frame attachment h Embroidery unit attachment X The first screen describing the procedure for the following items. Displays simple explanations of setting upper thread / Press...

Operation Manual
Page 58
...the foot controller decreases the sewing speed. When the end of the sewing machine. SEWING BASICS ■ Using the foot controller Sewing can be sure to "Cutting the thread" (page 59). 56 Slower a Foot controller jack Turn on the foot controller. X The machine stops sewing with the needle lowered (in order to start sewing, slowly e press down on the machine. a Note z When connecting the foot controller, be started . a a a Sewing speed controller X The speed set using the foot controller. X The machine starts sewing. Insert the foot controller plug...
...the foot controller decreases the sewing speed. When the end of the sewing machine. SEWING BASICS ■ Using the foot controller Sewing can be sure to "Cutting the thread" (page 59). 56 Slower a Foot controller jack Turn on the foot controller. X The machine stops sewing with the needle lowered (in order to start sewing, slowly e press down on the machine. a Note z When connecting the foot controller, be started . a a a Sewing speed controller X The speed set using the foot controller. X The machine starts sewing. Insert the foot controller plug...

Operation Manual
Page 59
..., the needle remains the end of an opening or where seams do not overlap, use reverse stitching or reinforcement lowered (in the foot controller, otherwise a fire or an electric shock may occur. Press (Start/stop button), or press down , the machine sews at sewing. Sewing 57 Memo Securing the stitching z When the foot controller is plugged in, (Start/stop button) cannot be used to start When sewing with the straight stitch, for a long period of time...
..., the needle remains the end of an opening or where seams do not overlap, use reverse stitching or reinforcement lowered (in the foot controller, otherwise a fire or an electric shock may occur. Press (Start/stop button), or press down , the machine sews at sewing. Sewing 57 Memo Securing the stitching z When the foot controller is plugged in, (Start/stop button) cannot be used to start When sewing with the straight stitch, for a long period of time...

Operation Manual
Page 63
z Stitch settings return to the left needle position or triple stretch stitch) was selected, changing the stitch width changes the needle position. z If the straight stitch (left . reducing the width moves the needle to their defaults if they are changed . z If the foot controller is connected, the sewing speed controller can be adjusted to "Saving stitch settings" (page 67). Setting the Stitch This machine is preset with the default settings for the stitch width and stitch length for some stitches cannot be...
z Stitch settings return to the left needle position or triple stretch stitch) was selected, changing the stitch width changes the needle position. z If the straight stitch (left . reducing the width moves the needle to their defaults if they are changed . z If the foot controller is connected, the sewing speed controller can be adjusted to "Saving stitch settings" (page 67). Setting the Stitch This machine is preset with the default settings for the stitch width and stitch length for some stitches cannot be...

Operation Manual
Page 91
...), the button guide plate should be put through the hole in the button guide plate Add together the diameter and thickness of the button, and then set the button guide plate to the calculated length. (The distance between the markings on the sides of the buttonhole foot, and then lower the presser foot lever. Select a stitch. Buttonhole Stitching/Button Sewing 89 a A b a Mark on fabric (front) b Red marks on buttonhole foot • Pass the upper thread down through the buttonhole. Attach buttonhole foot "A". d •...
...), the button guide plate should be put through the hole in the button guide plate Add together the diameter and thickness of the button, and then set the button guide plate to the calculated length. (The distance between the markings on the sides of the buttonhole foot, and then lower the presser foot lever. Select a stitch. Buttonhole Stitching/Button Sewing 89 a A b a Mark on fabric (front) b Red marks on buttonhole foot • Pass the upper thread down through the buttonhole. Attach buttonhole foot "A". d •...

Operation Manual
Page 94
... stitch width so that the needle does not touch the button, otherwise the needle may bend or break. 92 Adjust the stitch width to "Selecting stitching" (page 51). UTILITY STITCHES Button sewing Buttons can be sewn on with four holes can be attached. a a Drop feed lever (as e the distance between the button holes. a a Button X The button is the same as seen from the rear of the thread will f be sewn, and lower the presser foot lever...
... stitch width so that the needle does not touch the button, otherwise the needle may bend or break. 92 Adjust the stitch width to "Selecting stitching" (page 51). UTILITY STITCHES Button sewing Buttons can be sewn on with four holes can be attached. a a Drop feed lever (as e the distance between the button holes. a a Button X The button is the same as seen from the rear of the thread will f be sewn, and lower the presser foot lever...

Operation Manual
Page 108
... quilting foot "O" when making free-motion quilting. Otherwise the needle may be moved freely in length. Remove the presser foot and the presser foot a holder. • Refer to bend or break. Attach free-motion quilting foot "O" by b positioning the pin of the quilting foot above the needle clamp screw and aligning the lower-left of the quilting foot and the presser bar. 1 3 2 a a Drop feed lever (as seen from the rear of the machine) X The feed dogs are sewn at the beginning and end of sewing. Use both hands to stretch the fabric...
... quilting foot "O" when making free-motion quilting. Otherwise the needle may be moved freely in length. Remove the presser foot and the presser foot a holder. • Refer to bend or break. Attach free-motion quilting foot "O" by b positioning the pin of the quilting foot above the needle clamp screw and aligning the lower-left of the quilting foot and the presser bar. 1 3 2 a a Drop feed lever (as seen from the rear of the machine) X The feed dogs are sewn at the beginning and end of sewing. Use both hands to stretch the fabric...

Operation Manual
Page 119
... bobbin thread. Note z Do not use reverse/reinforcement stitching or thread cutting. d Smooth the gathers by stitching or embroidering over gathers is called "smocking". e • For details, refer to fabric. Pull out the threads for the straight stitches. The smocking stitch adds texture and elasticity to "Selecting stitching" (page 51). Select stitch 31 , 32 , or 33 . f • For details on replacing the presser foot, refer to create gathers. Pull the bobbin threads to "Replacing the presser foot...
... bobbin thread. Note z Do not use reverse/reinforcement stitching or thread cutting. d Smooth the gathers by stitching or embroidering over gathers is called "smocking". e • For details, refer to fabric. Pull out the threads for the straight stitches. The smocking stitch adds texture and elasticity to "Selecting stitching" (page 51). Select stitch 31 , 32 , or 33 . f • For details on replacing the presser foot, refer to create gathers. Pull the bobbin threads to "Replacing the presser foot...

Operation Manual
Page 124
... used, the desired result may occur when satin stitches are sewn, be used. ■ Trial sewing Depending on adjusting the stitch width and length, refer to "Adjusting the stitch width" (page 61) and "Adjusting the stitch length" (page 62). • For details, refer to "Replacing the presser foot" (page 43). Sewing beautiful patterns Start sewing. b • For details, refer to the fabric. ■ Needles and threads When sewing thin, mediumweight or stretch fabrics, use a 90/14 home sewing machine needle...
... used, the desired result may occur when satin stitches are sewn, be used. ■ Trial sewing Depending on adjusting the stitch width and length, refer to "Adjusting the stitch width" (page 61) and "Adjusting the stitch length" (page 62). • For details, refer to "Replacing the presser foot" (page 43). Sewing beautiful patterns Start sewing. b • For details, refer to the fabric. ■ Needles and threads When sewing thin, mediumweight or stretch fabrics, use a 90/14 home sewing machine needle...

Operation Manual
Page 178
... upper thread tension. The fabric is too tight. Turn on it . Lower the presser foot lever. Slide the bobbin winder shaft to firmly tighten the screw. Correctly install the needle. Use the screwdriver to the left. Select a thread and needle that you wish to sew. Correctly install the spool. page 22 176 Replace the needle. service center. Press the start /stop button, disconnect the foot controller. The needle is incorrectly installed. A bobbin designed specifically for this machine is connected. Incorrect bobbins will not work...
... upper thread tension. The fabric is too tight. Turn on it . Lower the presser foot lever. Slide the bobbin winder shaft to firmly tighten the screw. Correctly install the needle. Use the screwdriver to the left. Select a thread and needle that you wish to sew. Correctly install the spool. page 22 176 Replace the needle. service center. Press the start /stop button, disconnect the foot controller. The needle is incorrectly installed. A bobbin designed specifically for this machine is connected. Incorrect bobbins will not work...

Operation Manual
Page 181
... sewing. The presser foot that is used . page 174 The fabric feeds in the bobbin case. does not come on the machine. Turn on . Adjust the brightness of the needle. Correctly install the needle. Clean the race. The bobbin case is not used is not appropriate for example, in the opposite The feed mechanism is appropriate for the type of stitch appropriate for the type of stitch that that you wish to sew. Replace the bobbin case. A bobbin designed specifically...
... sewing. The presser foot that is used . page 174 The fabric feeds in the bobbin case. does not come on the machine. Turn on . Adjust the brightness of the needle. Correctly install the needle. Clean the race. The bobbin case is not used is not appropriate for example, in the opposite The feed mechanism is appropriate for the type of stitch appropriate for the type of stitch that that you wish to sew. Replace the bobbin case. A bobbin designed specifically...

Operation Manual
Page 189
... types 150 bobbin winding 22 bobbin-winding thread guide 11, 24 embroidery sets 9 embroidery sheet 146 button sewing 92 embroidery threads 136 buttonhole lever 12 embroidery unit connector slot 11 buttonhole sewing 88 embroidery unit installation 141 buttonhole stitching 87 embroidery unit removal 143 buzzer 185 error messages 181 even seam allowance 70 C examples of designs 134 care 174 changing sewing direction 68 character spacing 124 checking needle 40 extension table 46 extra spool pin 9, 36 eyelet punch 9, 90, 113 eyelet stitching 113 cleaning...
... types 150 bobbin winding 22 bobbin-winding thread guide 11, 24 embroidery sets 9 embroidery sheet 146 button sewing 92 embroidery threads 136 buttonhole lever 12 embroidery unit connector slot 11 buttonhole sewing 88 embroidery unit installation 141 buttonhole stitching 87 embroidery unit removal 143 buzzer 185 error messages 181 even seam allowance 70 C examples of designs 134 care 174 changing sewing direction 68 character spacing 124 checking needle 40 extension table 46 extra spool pin 9, 36 eyelet punch 9, 90, 113 eyelet stitching 113 cleaning...
Operation Manual
Page 191
...stitches 72, 76 sewing direction change 68 sewing machine help key 14 W sewing speed controller 13 shell tuck stitch 118 winding bobbin 22 wing needle 119 side cutter 80 size 123 smocking 117 Z smocking stitch 114 zigzag stitches 79, 99, 101 solving operation problems 176 spool cap 9, 23, 32 spool net 9, 24 zigzag width adjustment 61 spool of thread 31 stabilizer material 144 start/stop button 13 stippling 101 5 stitch length adjustment 62 stitch selection 51 stitch settings 72 stitch width adjustment 61, 107 stopping embroidering 166 straight stitch...
...stitches 72, 76 sewing direction change 68 sewing machine help key 14 W sewing speed controller 13 shell tuck stitch 118 winding bobbin 22 wing needle 119 side cutter 80 size 123 smocking 117 Z smocking stitch 114 zigzag stitches 79, 99, 101 solving operation problems 176 spool cap 9, 23, 32 spool net 9, 24 zigzag width adjustment 61 spool of thread 31 stabilizer material 144 start/stop button 13 stippling 101 5 stitch length adjustment 62 stitch selection 51 stitch settings 72 stitch width adjustment 61, 107 stopping embroidering 166 straight stitch...


