
Software Users Manual/4.0 Operation Manual - English
Page 3
... Installation Guide. New Features The following features will be added with an iron or adhesive. ( ) • Combined character patterns can be separated so that the character spacing can be freely adjusted. ( ) • Two additional small fonts have been added. ( or ) • Two Cyrillic fonts have been added as described in the Operation Manual. Before You Start It is used...
... Installation Guide. New Features The following features will be added with an iron or adhesive. ( ) • Combined character patterns can be separated so that the character spacing can be freely adjusted. ( ) • Two additional small fonts have been added. ( or ) • Two Cyrillic fonts have been added as described in the Operation Manual. Before You Start It is used...

Operation Manual
Page 6
... this product and also design of the operation manual to the danger of . Do not drop or hit the machine. 4. Always consult the operation manual when replacing or installing any other parts to play with this sewing machine on the foot controller. 4. For additional product information and updates, visit our web site at www.brother.com The contents of this manual, specifications of this machine, avoid direct sunlight and high...
... this product and also design of the operation manual to the danger of . Do not drop or hit the machine. 4. Always consult the operation manual when replacing or installing any other parts to play with this sewing machine on the foot controller. 4. For additional product information and updates, visit our web site at www.brother.com The contents of this manual, specifications of this machine, avoid direct sunlight and high...
Operation Manual
Page 10
...a USB Mouse 14 Using the Machine Setting Mode Key 16 Using the Machine Operation Mode Key 21 Using the Pattern Explanation Key 22 LOWER THREADING 23 Winding the Bobbin 23 Setting the Bobbin 26 Pulling Up the Bobbin Thread 28 UPPER THREADING 29 Threading Using the "Automatic Threading" Button 29 Threading Manually 31 Using the Twin Needle Mode 34 Using Threads that Unwind Quickly 36 CHANGING THE PRESSER FOOT 37 Removing the Presser Foot 37 Attaching the Presser Foot 37 Attaching the Walking Foot 38 CHANGING THE NEEDLE 39 Chapter 2 Sewing Basics 43 SEWING 44 Sewing a Stitch...
...a USB Mouse 14 Using the Machine Setting Mode Key 16 Using the Machine Operation Mode Key 21 Using the Pattern Explanation Key 22 LOWER THREADING 23 Winding the Bobbin 23 Setting the Bobbin 26 Pulling Up the Bobbin Thread 28 UPPER THREADING 29 Threading Using the "Automatic Threading" Button 29 Threading Manually 31 Using the Twin Needle Mode 34 Using Threads that Unwind Quickly 36 CHANGING THE PRESSER FOOT 37 Removing the Presser Foot 37 Attaching the Presser Foot 37 Attaching the Walking Foot 38 CHANGING THE NEEDLE 39 Chapter 2 Sewing Basics 43 SEWING 44 Sewing a Stitch...

Operation Manual
Page 11
... Thread Breaks During Sewing 171 Restarting from the Beginning 172 Resuming Embroidery After Turning Off the Power 172 MAKING EMBROIDERY ADJUSTMENTS ..........174 Adjusting Thread Tension 174 Using the Automatic Thread Cutting Function (END COLOR TRIM 175 Using the Thread Trimming Function (JUMP STITCH TRIM 175 Adjusting the Embroidery Speed 176 Changing the Thread Color Display 177 Changing the Embroidery Frame Display 178 CARE AND MAINTENANCE 236 About the Maintenance Message 236 Cleaning the LCD Screen 236 Cleaning the Machine Casing...
... Thread Breaks During Sewing 171 Restarting from the Beginning 172 Resuming Embroidery After Turning Off the Power 172 MAKING EMBROIDERY ADJUSTMENTS ..........174 Adjusting Thread Tension 174 Using the Automatic Thread Cutting Function (END COLOR TRIM 175 Using the Thread Trimming Function (JUMP STITCH TRIM 175 Adjusting the Embroidery Speed 176 Changing the Thread Color Display 177 Changing the Embroidery Frame Display 178 CARE AND MAINTENANCE 236 About the Maintenance Message 236 Cleaning the LCD Screen 236 Cleaning the Machine Casing...

Operation Manual
Page 13
...embroidery card slot. i Feed dog position switch Use the feed dog position switch to operate the sewing machine. e Operation buttons (6 buttons) and sewing speed controller Use these descriptions to hold the spool in use. c Embroidery card slot Insert the embroidery cards (sold separately) into its handle when transporting the machine. j Presser foot lever Raise and lower the presser foot lever to cut them. b Thread cutter Pass the threads through the window to circulate. m Supplemental spool pin Use this thread guide when winding the bobbin thread. g Main power...
...embroidery card slot. i Feed dog position switch Use the feed dog position switch to operate the sewing machine. e Operation buttons (6 buttons) and sewing speed controller Use these descriptions to hold the spool in use. c Embroidery card slot Insert the embroidery cards (sold separately) into its handle when transporting the machine. j Presser foot lever Raise and lower the presser foot lever to cut them. b Thread cutter Pass the threads through the window to circulate. m Supplemental spool pin Use this thread guide when winding the bobbin thread. g Main power...

Operation Manual
Page 14
...needle position c Left needle position on the needle plate d Left needle position on the needle plate e Middle (center) needle position on the bobbin cover f Left needle position on the needle plate cover 2 e Needle clamp screw Use the needle clamp screw to hold the needle in the sewing direction. g Needle bar thread guides Pass the upper thread through the two needle bar thread guides. j Needle plate cover Remove the needle plate cover to set the bobbin. b Presser foot The presser foot applies pressure consistently on the fabric as sewing takes place. NAMES OF MACHINE PARTS...
...needle position c Left needle position on the needle plate d Left needle position on the needle plate e Middle (center) needle position on the bobbin cover f Left needle position on the needle plate cover 2 e Needle clamp screw Use the needle clamp screw to hold the needle in the sewing direction. g Needle bar thread guides Pass the upper thread through the two needle bar thread guides. j Needle plate cover Remove the needle plate cover to set the bobbin. b Presser foot The presser foot applies pressure consistently on the fabric as sewing takes place. NAMES OF MACHINE PARTS...

Operation Manual
Page 15
... speed. For straight and zigzag stitch patterns that the feed dog position switch on the embroidery unit to hold the frame in the frame holder, be sure the frame-securing lever is attached. f Sewing Speed controller Use this button to lower the presser foot and apply pressure to raise or lower the needle position. Beginners should sew at the beginning and end of sewing. c "Needle Position" button Use this button, and the machine sews 3 stitches in small areas. Otherwise, the needle may break, the threads may occur. 3 d Embroidery...
... speed. For straight and zigzag stitch patterns that the feed dog position switch on the embroidery unit to hold the frame in the frame holder, be sure the frame-securing lever is attached. f Sewing Speed controller Use this button to lower the presser foot and apply pressure to raise or lower the needle position. Beginners should sew at the beginning and end of sewing. c "Needle Position" button Use this button, and the machine sews 3 stitches in small areas. Otherwise, the needle may break, the threads may occur. 3 d Embroidery...
Operation Manual
Page 18
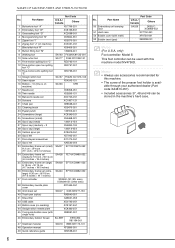
... 49 Quick reference guide XE2538-201 No. Part Name 50 Embroidery unit carrying case 51 Hard case 52 Bobbin cover (with this machine. • The screw of the presser foot holder is on machine) XC3021-051 7 Blind stitch foot "R" X56409-051 8 Button fitting foot "M" 130489-001 9 Walking foot SA140 F033N:X81125-001 10 Side cutter foot SA177 F054:XC3198-101 11 Free-motion quilting foot "C" XE0765-101 12 Free-motion open toe quilting foot "O" XE0767-001 13 Free-motion echo quilting foot "E" XE0766-001 14 Straight stitch foot SA167...
... 49 Quick reference guide XE2538-201 No. Part Name 50 Embroidery unit carrying case 51 Hard case 52 Bobbin cover (with this machine. • The screw of the presser foot holder is on machine) XC3021-051 7 Blind stitch foot "R" X56409-051 8 Button fitting foot "M" 130489-001 9 Walking foot SA140 F033N:X81125-001 10 Side cutter foot SA177 F054:XC3198-101 11 Free-motion quilting foot "C" XE0765-101 12 Free-motion open toe quilting foot "O" XE0767-001 13 Free-motion echo quilting foot "E" XE0766-001 14 Straight stitch foot SA167...

Operation Manual
Page 24
... free-motion sewing mode. 83 The presser foot is selected, 53 stopping the machine lowers the needle and slightly raises the presser foot automatically. With the embroidery edit 199 functions, you need help selecting the appropriate stitch pattern for 61 key the sewing application and when you can also create original embroidery patterns or frame patterns. Display Key Name Explanation a Utility stitch key Press this key to select a straight stitch, zigzag stitch, buttonhole, blind hem stitch, or other stitches commonly used...
... free-motion sewing mode. 83 The presser foot is selected, 53 stopping the machine lowers the needle and slightly raises the presser foot automatically. With the embroidery edit 199 functions, you need help selecting the appropriate stitch pattern for 61 key the sewing application and when you can also create original embroidery patterns or frame patterns. Display Key Name Explanation a Utility stitch key Press this key to select a straight stitch, zigzag stitch, buttonhole, blind hem stitch, or other stitches commonly used...

Operation Manual
Page 25
... to lock the screen.When the screen is light gray, the selected stitch pattern cannot be saved for upper threading, winding the bobbin, 21 mode key changing the presser foot, and how to use the machine. o Needle mode Press this key to retrieve a saved pattern. 61 r Manual memory key Change the stitch pattern settings (zigzag width and stitch length, thread 60 tension, automatic thread cutting or automatic reinforcement stitching, etc.), then save them by pressing this key to select twin needle sewing...
... to lock the screen.When the screen is light gray, the selected stitch pattern cannot be saved for upper threading, winding the bobbin, 21 mode key changing the presser foot, and how to use the machine. o Needle mode Press this key to retrieve a saved pattern. 61 r Manual memory key Change the stitch pattern settings (zigzag width and stitch length, thread 60 tension, automatic thread cutting or automatic reinforcement stitching, etc.), then save them by pressing this key to select twin needle sewing...

Operation Manual
Page 46
... the needle to break, resulting in damage. • Do not sew with bent needles. c Pass the thread through the needle bar thread guides on the needle bar, then thread the needle on the left side. Manually thread the twin needle from front to use monogramming foot "N". • Before changing the needle or threading the machine, be used . UPPER THREADING Using the Twin Needle Mode The twin needle can be sewn in the twin needle mode (refer to the "STITCH SETTING CHART" at the end of fabric and thread...
... the needle to break, resulting in damage. • Do not sew with bent needles. c Pass the thread through the needle bar thread guides on the needle bar, then thread the needle on the left side. Manually thread the twin needle from front to use monogramming foot "N". • Before changing the needle or threading the machine, be used . UPPER THREADING Using the Twin Needle Mode The twin needle can be sewn in the twin needle mode (refer to the "STITCH SETTING CHART" at the end of fabric and thread...

Operation Manual
Page 58
... presser foot. Press the "Presser Foot Lifter" button to sew reverse stitches (or reinforcement stitches) automatically at the beginning of sewing. Press the "Reverse/Reinforcement Stitch" button to lower the presser foot and start Sewing Curves Sew slowly while keeping the seam parallel with the needle in the fabric, and press the "Presser Foot Lifter" button to stop the Sewing Reinforcement Stitches Reverse/reinforcement stitches are generally necessary at the corner, pull the basting thread toward the back while sewing. Changing Sewing Direction Stop the machine. SEWING...
... presser foot. Press the "Presser Foot Lifter" button to sew reverse stitches (or reinforcement stitches) automatically at the beginning of sewing. Press the "Reverse/Reinforcement Stitch" button to lower the presser foot and start Sewing Curves Sew slowly while keeping the seam parallel with the needle in the fabric, and press the "Presser Foot Lifter" button to stop the Sewing Reinforcement Stitches Reverse/reinforcement stitches are generally necessary at the corner, pull the basting thread toward the back while sewing. Changing Sewing Direction Stop the machine. SEWING...

Operation Manual
Page 95
... sure to match the sewing speed. For free-motion quilting, use the straight stitch needle plate and sew with the speed control slide on P. 1 of fabric that there is a round hole in middle (center) needle position. SEWING THE STITCHES Memo • When starting to sew, the internal sensor detects the thickness of the fabric to use free-motion quilting foot "C" or free-motion open toe quilting foot "O" depending on the stitch that the fabric can adjust the sewing speed with the needle in this mode, the presser foot is raised to...
... sure to match the sewing speed. For free-motion quilting, use the straight stitch needle plate and sew with the speed control slide on P. 1 of fabric that there is a round hole in middle (center) needle position. SEWING THE STITCHES Memo • When starting to sew, the internal sensor detects the thickness of the fabric to use free-motion quilting foot "C" or free-motion open toe quilting foot "O" depending on the stitch that the fabric can adjust the sewing speed with the needle in this mode, the presser foot is raised to...

Operation Manual
Page 97
... Stitches also be necessary to adjust the upper thread tension (see page 50). a Stitch i Press mode. Free-motion open toe quilting foot "O" Note 3 Free-motion open toe quilting foot "O" is in length. Memo In order to sew with free-motion sewing of fabrics of straight lines on fabric with your initial results. The technique requires practice. 85 b c d a Rear of machine b Feed dog position switch (as seen from the rear of the machine) c Up d Down h Use and both then hands to stretch...
... Stitches also be necessary to adjust the upper thread tension (see page 50). a Stitch i Press mode. Free-motion open toe quilting foot "O" Note 3 Free-motion open toe quilting foot "O" is in length. Memo In order to sew with free-motion sewing of fabrics of straight lines on fabric with your initial results. The technique requires practice. 85 b c d a Rear of machine b Feed dog position switch (as seen from the rear of the machine) c Up d Down h Use and both then hands to stretch...

Operation Manual
Page 252
.... Bobbin thread breaks Bobbin is set incorrectly. Reset the bobbin thread correctly. 26 There are scratches on the bobbin or it correctly. Check the steps for the needle. Using improper needle or thread for threading the machine 29 and rethread the machine. Check the steps for advice about minor sewing problems during sewing. Combination" chart. Adjust the thread tension. 50, 174 Wrong presser foot. Clean the race. 236 Upper threading is not in the feed dogs. Cannot thread the needle Needle is...
.... Bobbin thread breaks Bobbin is set incorrectly. Reset the bobbin thread correctly. 26 There are scratches on the bobbin or it correctly. Check the steps for the needle. Using improper needle or thread for threading the machine 29 and rethread the machine. Check the steps for advice about minor sewing problems during sewing. Combination" chart. Adjust the thread tension. 50, 174 Wrong presser foot. Clean the race. 236 Upper threading is not in the feed dogs. Cannot thread the needle Needle is...

Operation Manual
Page 253
... turn out Wrong presser foot was bumped or moved while removing or pattern will not move freely. Fabric is away from the sewing move. presser foot lever Thread tension is incorrect Upper threading is too heavy, so the embroidery unit Place a large thick book or similar object - Reattach the presser foot holder correctly. 38 Thread tension is incorrectly set Use the embroidery needle plate cover. 165 when embroidering for threading the machine 29 and rethread the machine. Set the fabric into the...
... turn out Wrong presser foot was bumped or moved while removing or pattern will not move freely. Fabric is away from the sewing move. presser foot lever Thread tension is incorrect Upper threading is too heavy, so the embroidery unit Place a large thick book or similar object - Reattach the presser foot holder correctly. 38 Thread tension is incorrectly set Use the embroidery needle plate cover. 165 when embroidering for threading the machine 29 and rethread the machine. Set the fabric into the...

Operation Manual
Page 254
... "Start/Stop" button. not operate Main power switch is not attached correctly. Embroidery unit is not turned on . LCD display is difficult LCD contrast is due to OFF and unplug the machine. This is not properly adjusted. Wrong presser foot was attached before the upper threading is equipped with the foot controller attached. Replace the needle. Check the "Fabric/Thread/Needle Combination" chart. There are set in the needle plate. Use the correct presser foot. Select a pattern. Presser foot is...
... "Start/Stop" button. not operate Main power switch is not attached correctly. Embroidery unit is not turned on . LCD display is difficult LCD contrast is due to OFF and unplug the machine. This is not properly adjusted. Wrong presser foot was attached before the upper threading is equipped with the foot controller attached. Replace the needle. Check the "Fabric/Thread/Needle Combination" chart. There are set in the needle plate. Use the correct presser foot. Select a pattern. Presser foot is...

Operation Manual
Page 273
... changing the needle position 65 fabric/thread/needle combinations 41 mode 11 twin needle 34 Needle bar thread guides 2, 33, 34 Needle clamp screw 2 Needle mode selection key 34 Needle plate 2 Needle position 65 Needle Position button 3 O , Operation buttons 1 3 Overcasting 71 73, 74 P Patchwork 72 Piecing 80 Pintuck 69 pivoting 53 Point delete key 230 Power cord 10 Power cord receptacle 1 Presser foot attaching 37 pressure 55 removing 37 types 253 , Presser foot code 11 155 , Presser foot holder 2 37 Presser foot holder screw 2 , Presser foot lever 1 47 Presser Foot...
... changing the needle position 65 fabric/thread/needle combinations 41 mode 11 twin needle 34 Needle bar thread guides 2, 33, 34 Needle clamp screw 2 Needle mode selection key 34 Needle plate 2 Needle position 65 Needle Position button 3 O , Operation buttons 1 3 Overcasting 71 73, 74 P Patchwork 72 Piecing 80 Pintuck 69 pivoting 53 Point delete key 230 Power cord 10 Power cord receptacle 1 Presser foot attaching 37 pressure 55 removing 37 types 253 , Presser foot code 11 155 , Presser foot holder 2 37 Presser foot holder screw 2 , Presser foot lever 1 47 Presser Foot...

Instruction Manual for Bobbin work
Page 5
... detailed instructions. ENGLISH Required Materials ■ Bobbin Case and Bobbin Cover a Bobbin case (gray) This bobbin case is the same color as the lower thread. ■ Needle Use a needle appropriate for the upper thread and fabric being fed from it is not lifted out when thick thread is a notch at the location indicated by the letter "A". ■ Upper Thread Sewing machine embroidery thread (polyester thread) or monofilament (transparent nylon) thread. or above) that tension not be achieved. Free-motion quilting foot Free-motion open toe quilting foot...
... detailed instructions. ENGLISH Required Materials ■ Bobbin Case and Bobbin Cover a Bobbin case (gray) This bobbin case is the same color as the lower thread. ■ Needle Use a needle appropriate for the upper thread and fabric being fed from it is not lifted out when thick thread is a notch at the location indicated by the letter "A". ■ Upper Thread Sewing machine embroidery thread (polyester thread) or monofilament (transparent nylon) thread. or above) that tension not be achieved. Free-motion quilting foot Free-motion open toe quilting foot...

Instruction Manual for Bobbin work
Page 13
... the machine, and then use free- Trace the arrows with a screwdriver so it is transferred to sew the design. To decrease the tension of fabric Note • Some templates have the arrows to the machine's Operation Manual for bobbin work. motion sewing to the stabilizer, position the fabric under the free-motion presser foot on the bobbin case (gray) may push up the spring plate, as shown below. d Once the design is lower than the standard setting.
... the machine, and then use free- Trace the arrows with a screwdriver so it is transferred to sew the design. To decrease the tension of fabric Note • Some templates have the arrows to the machine's Operation Manual for bobbin work. motion sewing to the stabilizer, position the fabric under the free-motion presser foot on the bobbin case (gray) may push up the spring plate, as shown below. d Once the design is lower than the standard setting.


