
User Manual
Page 4
... Cleaning the projector case 40 Storing the projector 40 Transporting the projector 40 Cleaning and replacing the dust filter 40 Lamp information 43 Calculation of lamp hour 43 Warning message 43 Replacing the lamp 44 Temperature information 46 Indicators...47 Safety instructions for ceiling mounting of your BenQ projector 49 Troubleshooting 50 Specifications 51 Projector specifications 51...
... Cleaning the projector case 40 Storing the projector 40 Transporting the projector 40 Cleaning and replacing the dust filter 40 Lamp information 43 Calculation of lamp hour 43 Warning message 43 Replacing the lamp 44 Temperature information 46 Indicators...47 Safety instructions for ceiling mounting of your BenQ projector 49 Troubleshooting 50 Specifications 51 Projector specifications 51...

User Manual
Page 12
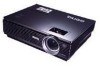
... may differ from those illustrated. Ceiling mount kit Power cord 4. VGA cable USB cable Optional accessories 1. RS232 connector 6. Shipping contents The projector is shipped with battery Cleaning cloth Replacement filter Pull the tab before using the remote control. Carefully unpack and verify that you have all of purchase. The supplied accessories will...
... may differ from those illustrated. Ceiling mount kit Power cord 4. VGA cable USB cable Optional accessories 1. RS232 connector 6. Shipping contents The projector is shipped with battery Cleaning cloth Replacement filter Pull the tab before using the remote control. Carefully unpack and verify that you have all of purchase. The supplied accessories will...

User Manual
Page 13
Projector exterior view Front / upper side 1 2 3 4 5 1. 6 2. 3. 7 4. 5. 6. 7. External control panel (See "External control panel" on page 9 for detailed information.) Ventilation grill Projection lens Front adjuster button Lens ... connections to various equipment. 11 12 13 14 15 16 17 18 19 20 10 9 8 8. USB socket 13. S-Video socket 19. Audio output socket 21. Filter case 11. RGB (PC) / Component video (YPbPr/ YCbCr) signal input socket 16. AC power cord inlet 10. RS232 control port 14. Speaker Introduction 7 RGB signal...
Projector exterior view Front / upper side 1 2 3 4 5 1. 6 2. 3. 7 4. 5. 6. 7. External control panel (See "External control panel" on page 9 for detailed information.) Ventilation grill Projection lens Front adjuster button Lens ... connections to various equipment. 11 12 13 14 15 16 17 18 19 20 10 9 8 8. USB socket 13. S-Video socket 19. Audio output socket 21. Filter case 11. RGB (PC) / Component video (YPbPr/ YCbCr) signal input socket 16. AC power cord inlet 10. RS232 control port 14. Speaker Introduction 7 RGB signal...

User Manual
Page 46
... procedure as described in its original packing or equivalent. Storing the projector If you notice dirt or dust on page 51 or consult your dealer if other chemical detergents. Cleaning and replacing the dust filter It is dirt or smears, use wax, alcohol, benzene, thinner... or other parts need to "Specifications" on the surface. • Use a canister of the projector Your projector needs little maintenance. If the filter is not cleaned, it can damage the...
... procedure as described in its original packing or equivalent. Storing the projector If you notice dirt or dust on page 51 or consult your dealer if other chemical detergents. Cleaning and replacing the dust filter It is dirt or smears, use wax, alcohol, benzene, thinner... or other parts need to "Specifications" on the surface. • Use a canister of the projector Your projector needs little maintenance. If the filter is not cleaned, it can damage the...

User Manual
Page 47
... for computers and other office equipment to clean the filter. filter case 4. Or use a soft brush (such as a clean artist's paintbrush) to replace the filter sponge:" below. If the dirt is difficult to leave To clean the filter: 1. Disconnect the projector from the projector by pressing the filter case into the slot slightly. See "How to gently...
... for computers and other office equipment to clean the filter. filter case 4. Or use a soft brush (such as a clean artist's paintbrush) to replace the filter sponge:" below. If the dirt is difficult to leave To clean the filter: 1. Disconnect the projector from the projector by pressing the filter case into the slot slightly. See "How to gently...

User Manual
Page 48
...and inserting it clicks into place. 9. Press the case back until it into place. Please re-attach the filter cap Otherwise, Power is not correctly seated in place, the projector will display an on . Make sure that there are small plastic pins along the edges to remove from ...the time the first warning message was displayed.) The projector will display 3 times for a 10-second Please check Filter not well attached duration each, if no further action is broken, replace it. 1. Then a second message as ...
...and inserting it clicks into place. 9. Press the case back until it into place. Please re-attach the filter cap Otherwise, Power is not correctly seated in place, the projector will display an on . Make sure that there are small plastic pins along the edges to remove from ...the time the first warning message was displayed.) The projector will display 3 times for a 10-second Please check Filter not well attached duration each, if no further action is broken, replace it. 1. Then a second message as ...


