
User Manual
Page 3
...ENGLISH Operating Instructions WARNING WARNING 6 CAUTION 6 PRECAUTIONS 6 Getting Started Accessory List 9 Turning Power On and Off 9 Source Selection 9 Detaching and Attaching the Front Panel .........9 Detaching 9 Attaching 9 Initial System Start-Up 10 Adjusting Volume 10 Setting Time 10 Radio/HD Radio™ Reception (CDE-HD148BT only) Listening to Radio 11 Presetting Stations Manually 11 Presetting Stations Automatically 11 Tuning to Preset Stations 11 Frequency Search Function 12 Receiving a Multicast Station (HD Radio mode only 12 Multicast Station Search (HD Radio mode...
...ENGLISH Operating Instructions WARNING WARNING 6 CAUTION 6 PRECAUTIONS 6 Getting Started Accessory List 9 Turning Power On and Off 9 Source Selection 9 Detaching and Attaching the Front Panel .........9 Detaching 9 Attaching 9 Initial System Start-Up 10 Adjusting Volume 10 Setting Time 10 Radio/HD Radio™ Reception (CDE-HD148BT only) Listening to Radio 11 Presetting Stations Manually 11 Presetting Stations Automatically 11 Tuning to Preset Stations 11 Frequency Search Function 12 Receiving a Multicast Station (HD Radio mode only 12 Multicast Station Search (HD Radio mode...
User Manual
Page 4
...Using the Front AUX Input Terminal 24 Option Menu Setting 24 Applying TuneIt 25 Adjusting the sound via Smartphone .......... 25 Facebook Notification Function 25 Receiving Notification (Ready on future update 25 Displaying Notification List (Ready on future update 26 SETUP Setting 26 General Setting 27 Setting the Clock Display (CLOCK MODE) .........27 Setting the AUX SETUP mode 27 Setting the AUX NAME mode 27 Playing MP3/WMA/AAC Data (PLAY MODE).....27 Sound (Beep) Guide Function 27 Demonstration 27 Display Setting 27 Changing Lighting Color 27 Dimmer Control 27 Scroll Setting...
...Using the Front AUX Input Terminal 24 Option Menu Setting 24 Applying TuneIt 25 Adjusting the sound via Smartphone .......... 25 Facebook Notification Function 25 Receiving Notification (Ready on future update 25 Displaying Notification List (Ready on future update 26 SETUP Setting 26 General Setting 27 Setting the Clock Display (CLOCK MODE) .........27 Setting the AUX SETUP mode 27 Setting the AUX NAME mode 27 Playing MP3/WMA/AAC Data (PLAY MODE).....27 Sound (Beep) Guide Function 27 Demonstration 27 Display Setting 27 Changing Lighting Color 27 Dimmer Control 27 Scroll Setting...
User Manual
Page 7
... displayed even though the disc has been inserted correctly, push the RESET switch with a pointed object such as a ballpoint pen. If "ERROR" continues to be played back, make sure the last recording session was closed (finalized). • Finalize the CD-R/CD-RW if necessary, and attempt playback again. If you insert the disc. Using such accessories can be installed in a location...
... displayed even though the disc has been inserted correctly, push the RESET switch with a pointed object such as a ballpoint pen. If "ERROR" continues to be played back, make sure the last recording session was closed (finalized). • Finalize the CD-R/CD-RW if necessary, and attempt playback again. If you insert the disc. Using such accessories can be installed in a location...
User Manual
Page 9
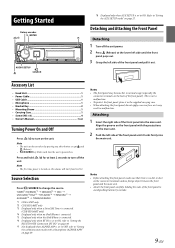
...; DISC USB AUDIO*4/iPod*5 BT AUDIO*6 PANDORA*7 AUXILIARY*8 TUNER/HD RADIO *1 CDE-147BT only *2 CDE-HD148BT only *3 Displayed only when a SiriusXM Tuner is connected. (CDE-HD148BT only) *4 Displayed only when no dirt or dust on the main unit. 2 Push the left side of the front panel). Refer to turn off the unit power. 2 Press e (Release) at least 2 seconds to "Setting the BLUETOOTH Connection (BT IN)" on page 30. *7 Not displayed when ALPINE...
...; DISC USB AUDIO*4/iPod*5 BT AUDIO*6 PANDORA*7 AUXILIARY*8 TUNER/HD RADIO *1 CDE-147BT only *2 CDE-HD148BT only *3 Displayed only when a SiriusXM Tuner is connected. (CDE-HD148BT only) *4 Displayed only when no dirt or dust on the main unit. 2 Push the left side of the front panel). Refer to turn off the unit power. 2 Press e (Release) at least 2 seconds to "Setting the BLUETOOTH Connection (BT IN)" on page 30. *7 Not displayed when ALPINE...
User Manual
Page 11
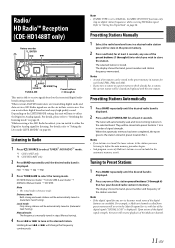
... SEEK TYPE is set to select the tuning mode. Listening to Radio 1 Press VSOURCE to before the auto memory procedure began. • Sub-program service of 18 stations can switch to "Setting the Digital Seek" on page 28. Local mode: Only strong stations will be cleared and replaced with loss of the digital signal strength, the tuner will change the frequency continuously. The display shows the band, preset number and station frequency memorized. Notes...
... SEEK TYPE is set to select the tuning mode. Listening to Radio 1 Press VSOURCE to before the auto memory procedure began. • Sub-program service of 18 stations can switch to "Setting the Digital Seek" on page 28. Local mode: Only strong stations will be cleared and replaced with loss of the digital signal strength, the tuner will change the frequency continuously. The display shows the band, preset number and station frequency memorized. Notes...
User Manual
Page 18
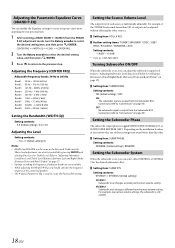
... can adjust the subwoofer output level (refer to "Adjusting Subwoofer Level/Bass Level/Treble Level/Balance (Between Left and Right)/Fader (Between Front and Rear)/Defeat" on page 17). Setting item: SUBWOOFER Setting contents: ON (Initial setting) / OFF ON: The subwoofer signal is on, you should consider the frequency response of the connected speakers. • The 9-Band, Parametric EQ is output from the 9BAND P-EQ adjustment mode, turn the Rotary encoder to "Connections" on the installation location...
... can adjust the subwoofer output level (refer to "Adjusting Subwoofer Level/Bass Level/Treble Level/Balance (Between Left and Right)/Fader (Between Front and Rear)/Defeat" on page 17). Setting item: SUBWOOFER Setting contents: ON (Initial setting) / OFF ON: The subwoofer signal is on, you should consider the frequency response of the connected speakers. • The 9-Band, Parametric EQ is output from the 9BAND P-EQ adjustment mode, turn the Rotary encoder to "Connections" on the installation location...
User Manual
Page 19
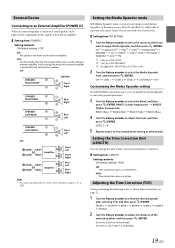
... cannot drive speakers. OFF: Use this mode when the line output of this setting, the head unit's internal amplifier is set to OFF. Setting the Media Xpander mode MX (Media Xpander) makes vocals or instruments sound distinct regardless of other bands. External Device Connecting to an External Amplifier (POWER IC) When an external amplifier is connected, sound quality can be able to reproduce the music clearly even in disc. 2 Turn the Rotary encoder to select...
... cannot drive speakers. OFF: Use this mode when the line output of this setting, the head unit's internal amplifier is set to OFF. Setting the Media Xpander mode MX (Media Xpander) makes vocals or instruments sound distinct regardless of other bands. External Device Connecting to an External Amplifier (POWER IC) When an external amplifier is connected, sound quality can be able to reproduce the music clearly even in disc. 2 Turn the Rotary encoder to select...

User Manual
Page 20
... be demonstrated. 2 Press the preset button again during the demonstration to change the sound field easily. FRONT (HPF) REAR (HPF) SUBW LPF FRONT (HPF) 2 Turn the Rotary encoder to select the channel, and then press ENTER. By setting these values, sound from . After completing any one of the rear speakers. Adjusting the Crossover Settings (X-OVER) Before performing the following...
... be demonstrated. 2 Press the preset button again during the demonstration to change the sound field easily. FRONT (HPF) REAR (HPF) SUBW LPF FRONT (HPF) 2 Turn the Rotary encoder to select the channel, and then press ENTER. By setting these values, sound from . After completing any one of the rear speakers. Adjusting the Crossover Settings (X-OVER) Before performing the following...

User Manual
Page 23
...+CLOCK BAND+PRESET NO.+FREQUENCY The display in CD mode: TRACK NO./ELAPSED TIME DISC TEXT*1/TRACK TEXT*1 TRACK NO./CLOCK TRACK NO./ELAPSED TIME The display in HD Radio mode: When LISTENMODE is also possible to "Switching the listening mode" on page 28. It is set to a low frequency, as the disc name and the track name, will change of one time (except Radio mode). SOURCE VIEW BAND Displaying...
...+CLOCK BAND+PRESET NO.+FREQUENCY The display in CD mode: TRACK NO./ELAPSED TIME DISC TEXT*1/TRACK TEXT*1 TRACK NO./CLOCK TRACK NO./ELAPSED TIME The display in HD Radio mode: When LISTENMODE is also possible to "Switching the listening mode" on page 28. It is set to a low frequency, as the disc name and the track name, will change of one time (except Radio mode). SOURCE VIEW BAND Displaying...
User Manual
Page 24
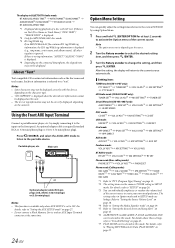
...; Do not connect a Flash Memory Device and an AUX Input Terminal connector at least 2 seconds to "PTY (Program Type) Tuning" on the front panel. If there is no tag information, "ARTIST"/"ALBUM"/"SONG" is displayed. *4 Depending on the connected Smartphone, the elapsed time may not be displayed. About "Text" Text compatible CDs contain text information such as TUNER setting in SETUP mode. For details, refer to change the setting, and then...
...; Do not connect a Flash Memory Device and an AUX Input Terminal connector at least 2 seconds to "PTY (Program Type) Tuning" on the front panel. If there is no tag information, "ARTIST"/"ALBUM"/"SONG" is displayed. *4 Depending on the connected Smartphone, the elapsed time may not be displayed. About "Text" Text compatible CDs contain text information such as TUNER setting in SETUP mode. For details, refer to change the setting, and then...
User Manual
Page 25
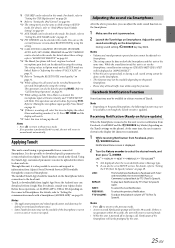
... Notification Function Some functions may blink. Notification Menu screen is activated, the microphone input will mute instantly and "VOICE MUTE" will last for others to "Setting the BLUETOOTH sound quality" on the paired Smartphone, the following functions may not be available in a service area or receives no operation is updated. Notes • Press t to return to the previous mode. • A new received Notification prompt will blink. Refer to "Adjusting the volume...
... Notification Function Some functions may blink. Notification Menu screen is activated, the microphone input will mute instantly and "VOICE MUTE" will last for others to "Setting the BLUETOOTH sound quality" on the paired Smartphone, the following functions may not be available in a service area or receives no operation is updated. Notes • Press t to return to the previous mode. • A new received Notification prompt will blink. Refer to "Adjusting the volume...
User Manual
Page 26
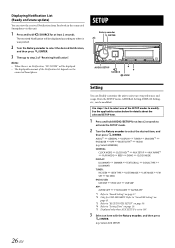
... the connected Smartphone. Select GENERAL) GENERAL: CLOCK MODE CLOCK ADJ*4 AUX SETUP AUX NAME*5 PLAY MODE BEEP DEMO CLOCK MODE DISPLAY: ILLUMINATI DIMMER TEXTSCROLL SCROLLTYPE ILLUMINATI TUNER: MC SEEK SEEK TYPE LISTENMODE LIVE MODE FM SET MC SEEK IPOD & USB: USB SKIP IPOD LIST USB SKIP APP: ALPINE APP TTS VOLUME ALPINE APP *1 Refer to "Sound Setting" on...
... the connected Smartphone. Select GENERAL) GENERAL: CLOCK MODE CLOCK ADJ*4 AUX SETUP AUX NAME*5 PLAY MODE BEEP DEMO CLOCK MODE DISPLAY: ILLUMINATI DIMMER TEXTSCROLL SCROLLTYPE ILLUMINATI TUNER: MC SEEK SEEK TYPE LISTENMODE LIVE MODE FM SET MC SEEK IPOD & USB: USB SKIP IPOD LIST USB SKIP APP: ALPINE APP TTS VOLUME ALPINE APP *1 Refer to "Sound Setting" on...

User Manual
Page 27
... Extra) format). Dimmer Control Set the Dimmer control to AUTO to the unit. Notes • Press t to return to the previous mode. • If no operation is amber. Sound (Beep) Guide Function This function will return to OFF. TYPE3: The color of the portable device is input to decrease the illumination brightness of the unit with varying tones depending upon the button pressed or a notification is received from the...
... Extra) format). Dimmer Control Set the Dimmer control to AUTO to the unit. Notes • Press t to return to the previous mode. • If no operation is amber. Sound (Beep) Guide Function This function will return to OFF. TYPE3: The color of the portable device is input to decrease the illumination brightness of the unit with varying tones depending upon the button pressed or a notification is received from the...
User Manual
Page 29
...-EN Setting the communication mode with a Smartphone (ALPINE APP) Set ALPINE APP to USB when an iPhone is not guaranteed. The search mode for details. • Only the iPhone and certain Android Smartphones support this function to a BLUETOOTH compatible device (Pairing)" on the surroundings, BLUETOOTH wireless connection may differ. iPod/iPhone Search Mode Setting The unit allows you want to use Hands-Free phone or BT Audio function. Also refer to the Owner's Manual of the BT compatible device, consult your Alpine...
...-EN Setting the communication mode with a Smartphone (ALPINE APP) Set ALPINE APP to USB when an iPhone is not guaranteed. The search mode for details. • Only the iPhone and certain Android Smartphones support this function to a BLUETOOTH compatible device (Pairing)" on the surroundings, BLUETOOTH wireless connection may differ. iPod/iPhone Search Mode Setting The unit allows you want to use Hands-Free phone or BT Audio function. Also refer to the Owner's Manual of the BT compatible device, consult your Alpine...
User Manual
Page 30
... Hands-Free Phone function and BLUETOOTH Audio function are not used. The BLUETOOTH setup mode is canceled. Audio information of a BLUETOOTH compatible Smartphone, a portable audio player, etc., is controllable/playable wirelessly from a BLUETOOTH compatible device, refer to the Owner's Manual of 3 connected BLUETOOTH compatible devices that you previously registered. Setting item: PAIRED DEV 1 Turn the Rotary encoder to select a BLUETOOTH compatible device you want to use BLUETOOTH Audio function. ON: Select when you want to change the head unit display from the unit" on...
... Hands-Free Phone function and BLUETOOTH Audio function are not used. The BLUETOOTH setup mode is canceled. Audio information of a BLUETOOTH compatible Smartphone, a portable audio player, etc., is controllable/playable wirelessly from a BLUETOOTH compatible device, refer to the Owner's Manual of 3 connected BLUETOOTH compatible devices that you previously registered. Setting item: PAIRED DEV 1 Turn the Rotary encoder to select a BLUETOOTH compatible device you want to use BLUETOOTH Audio function. ON: Select when you want to change the head unit display from the unit" on...

User Manual
Page 31
... selected and "SEARCHING" is drained. The I indicator goes out when the Smartphone is not in the BLUETOOTH compatible device to make the pairing. Pairing a BLUETOOTH Device from the BLUETOOTH compatible device. Notes • If the connection is successfully changed, "CONNECTED" is displayed for 2 seconds and the indicator lights up, then the display returns to the SETUP screen. • If a Smartphone is connected to this unit successfully, the C indicator lights up when the battery...
... selected and "SEARCHING" is drained. The I indicator goes out when the Smartphone is not in the BLUETOOTH compatible device to make the pairing. Pairing a BLUETOOTH Device from the BLUETOOTH compatible device. Notes • If the connection is successfully changed, "CONNECTED" is displayed for 2 seconds and the indicator lights up, then the display returns to the SETUP screen. • If a Smartphone is connected to this unit successfully, the C indicator lights up when the battery...
User Manual
Page 32
...; When using a HSP (Head Set Profile) and HFP (Hands-Free Profile) compatible Smartphone with this unit, the phone book will be updated automatically. OFF: When a call . Selecting the output speaker Choose the speaker in your BLUETOOTH firmware, please visit home page (http://www.alpine-usa.com). Setting item: FW UPDATE Setting contents: NO (Initial setting) / YES Hands-Free Phone Control About the Hands-Free Phone Hands-free calls are using hands-free devices, or the call is received, it...
...; When using a HSP (Head Set Profile) and HFP (Hands-Free Profile) compatible Smartphone with this unit, the phone book will be updated automatically. OFF: When a call . Selecting the output speaker Choose the speaker in your BLUETOOTH firmware, please visit home page (http://www.alpine-usa.com). Setting item: FW UPDATE Setting contents: NO (Initial setting) / YES Hands-Free Phone Control About the Hands-Free Phone Hands-free calls are using hands-free devices, or the call is received, it...

User Manual
Page 47
... Tuner and a Tagging compatible iPod/iPhone to tag the music that doesn't support the tagging function is connected, "NON-TAGGING IPOD" is displayed. • When the iPod/iPhone is disconnected from the unit during tagging, its mounting location. Otherwise, make sure the antenna is connected to iTunes, you encounter a problem, please turn the power off . - Check power lead and battery lead connections. • Blown fuse. - Unable to tune stations in the seek mode. • You are displayed. Allow enough time...
... Tuner and a Tagging compatible iPod/iPhone to tag the music that doesn't support the tagging function is connected, "NON-TAGGING IPOD" is displayed. • When the iPod/iPhone is disconnected from the unit during tagging, its mounting location. Otherwise, make sure the antenna is connected to iTunes, you encounter a problem, please turn the power off . - Check power lead and battery lead connections. • Blown fuse. - Unable to tune stations in the seek mode. • You are displayed. Allow enough time...
User Manual
Page 52
... Alpine dealer. • The CDE-HD148BT/CDE-147BT uses female RCA-type jacks for the intended circuit of your CDE-HD148BT/CDE-147BT. Never connect left and right channel speaker cables to the unit and/or the vehicle. Failure to make sure the fuse for connection to other or to the speaker (−) terminal. Never cut by the metal edge of moisture or dust. DO NOT INSTALL IN LOCATIONS...
... Alpine dealer. • The CDE-HD148BT/CDE-147BT uses female RCA-type jacks for the intended circuit of your CDE-HD148BT/CDE-147BT. Never connect left and right channel speaker cables to the unit and/or the vehicle. Failure to make sure the fuse for connection to other or to the speaker (−) terminal. Never cut by the metal edge of moisture or dust. DO NOT INSTALL IN LOCATIONS...

User Manual
Page 56
...'s lights are turned on. Switched Power Lead (Ignition) (Red) Connect this lead to an open terminal on the vehicle's fuse box or another unused power source which provides (+) 12V only when the ignition is connected. Rear USB Terminal Connect this to a Flash Memory or an iPod/iPhone (sold separately) Front AUX Input Terminal This terminal allows for input of audio from an external device (such as possible. Make sure...
...'s lights are turned on. Switched Power Lead (Ignition) (Red) Connect this lead to an open terminal on the vehicle's fuse box or another unused power source which provides (+) 12V only when the ignition is connected. Rear USB Terminal Connect this to a Flash Memory or an iPod/iPhone (sold separately) Front AUX Input Terminal This terminal allows for input of audio from an external device (such as possible. Make sure...


