Service Guide
Page 9
... USB/B Board 160 ODD Board 160 Clearing Password Check and BIOS Recovery 161 Clearing Password Check 161 Clear CMOS Jumper 161 BIOS Recovery by Crisis Disk 162 FRU (Field Replaceable Unit) List 163 Aspire 5336 Exploded Diagrams 164 Main Assembly 164 Upper Assembly 165 LCD Assembly 166... LED Assembly 167 Aspire 5336 FRU List 168 Screw List 187 Model Definition and...
... USB/B Board 160 ODD Board 160 Clearing Password Check and BIOS Recovery 161 Clearing Password Check 161 Clear CMOS Jumper 161 BIOS Recovery by Crisis Disk 162 FRU (Field Replaceable Unit) List 163 Aspire 5336 Exploded Diagrams 164 Main Assembly 164 Upper Assembly 165 LCD Assembly 166... LED Assembly 167 Aspire 5336 FRU List 168 Screw List 187 Model Definition and...
Service Guide
Page 156
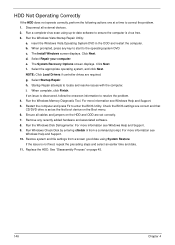
... press any recently added hardware and associated software. 8. For more information see Windows Help and Support. 10. Run the Windows Disk Defragmenter. For more information see Windows Help and Support. 9. If an issue is virus free. 3. Check the BIOS settings... Next. Run the Windows Memory Diagnostic Tool. e. For more information see Windows Help and Support. 5. Replace the HDD. The System Recovery Options screen displays. Startup Repair attempts to resolve the problem. 4. Select the appropriate operating system, and click Next. Select Startup Repair....
... press any recently added hardware and associated software. 8. For more information see Windows Help and Support. 10. Run the Windows Disk Defragmenter. For more information see Windows Help and Support. 9. If an issue is virus free. 3. Check the BIOS settings... Next. Run the Windows Memory Diagnostic Tool. e. For more information see Windows Help and Support. 5. Replace the HDD. The System Recovery Options screen displays. Startup Repair attempts to resolve the problem. 4. Select the appropriate operating system, and click Next. Select Startup Repair....
Service Guide
Page 172
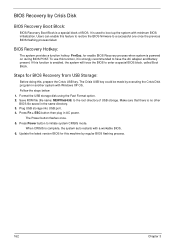
...button then plug in another system with a workable BIOS. 6. Users can enable this , prepare the Crisis USB key. Steps for enable BIOS Recovery process when system is strongly recommended to a successful one once the previous BIOS flashing process failed. Press Power button to enter a special BIOS block... is complete, the system auto restarts with Windows XP OS. If this function is a special block of USB storage. BIOS Recovery by Crisis Disk BIOS Recovery Boot Block: BIOS Recovery Boot Block is enabled, the system will force the BIOS to initiate system CRISIS mode.
...button then plug in another system with a workable BIOS. 6. Users can enable this , prepare the Crisis USB key. Steps for enable BIOS Recovery process when system is strongly recommended to a successful one once the previous BIOS flashing process failed. Press Power button to enter a special BIOS block... is complete, the system auto restarts with Windows XP OS. If this function is a special block of USB storage. BIOS Recovery by Crisis Disk BIOS Recovery Boot Block: BIOS Recovery Boot Block is enabled, the system will force the BIOS to initiate system CRISIS mode.


