Aspire 4315 / 4715Z Service Guide
Page 8
... Removing the LCD Bezel Removing the Camera Board Removing the Inverter Board Removing the LCD with Brackets Removing the LCD Brackets Removing the LCD Module Hinges Removing the Antenna Removing the Microphone Troubleshooting System Check Procedures External CD/DVD-ROM Drive Check Keyboard or Auxiliary Input Device Check Memory Check Power...
... Removing the LCD Bezel Removing the Camera Board Removing the Inverter Board Removing the LCD with Brackets Removing the LCD Brackets Removing the LCD Module Hinges Removing the Antenna Removing the Microphone Troubleshooting System Check Procedures External CD/DVD-ROM Drive Check Keyboard or Auxiliary Input Device Check Memory Check Power...
Aspire 4315 / 4715Z Service Guide
Page 72
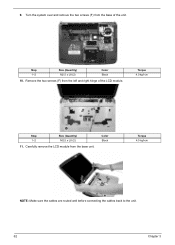
Torque 4.0 kgf-cm Step 1~2 Size (Quantity) M2.5 x L8 (2) 11. Carefully remove the LCD module from the base of the LCD module. Remove the two screws (F) from the left and right hinge of the unit. 9. Step 1~2 Size (Quantity) M2.5 x L8 (2) Color Black 10. Color Black Torque 4.0 kgf-cm NOTE: Make sure the cables are routed well before connecting the cables back to the unit. 62 Chapter 3 Turn the system over and remove the two screws (F) from the base unit.
Torque 4.0 kgf-cm Step 1~2 Size (Quantity) M2.5 x L8 (2) 11. Carefully remove the LCD module from the base of the LCD module. Remove the two screws (F) from the left and right hinge of the unit. 9. Step 1~2 Size (Quantity) M2.5 x L8 (2) Color Black 10. Color Black Torque 4.0 kgf-cm NOTE: Make sure the cables are routed well before connecting the cables back to the unit. 62 Chapter 3 Turn the system over and remove the two screws (F) from the base unit.
Aspire 4315 / 4715Z Service Guide
Page 93
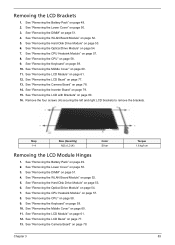
..." on page 80. 16. See "Removing the LCD with Brackets" on page 61. 12. Step 1~4 Size (Quantity) M2 x L3 (4) Color Silver Removing the LCD Module Hinges 1. See "Removing the Optical Drive Module" on page 51. 4. Removing the LCD Brackets 1. See "Removing the DIMM" on page 54. 7. See "Removing the CPU Heatsink...
..." on page 80. 16. See "Removing the LCD with Brackets" on page 61. 12. Step 1~4 Size (Quantity) M2 x L3 (4) Color Silver Removing the LCD Module Hinges 1. See "Removing the Optical Drive Module" on page 51. 4. Removing the LCD Brackets 1. See "Removing the DIMM" on page 54. 7. See "Removing the CPU Heatsink...
Aspire 4315 / 4715Z Service Guide
Page 94
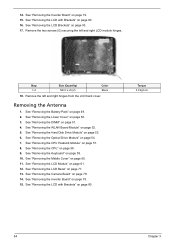
Remove the two screws (G) securing the left and right hinges from the LCD back cover. Removing the Antenna 1. See "Removing the CPU" on page 60. 11. See "Removing the Middle Cover" on page 58. 9. 14. ... "Removing the LCD with Brackets" on page 80. See "Removing the LCD with Brackets" on page 80. 16. Remove the left and right LCD module hinges. See "Removing the Inverter Board" on page 79. 15. See "Removing the Inverter Board" on page 79. 15. See "Removing the LCD Brackets" on page...
Remove the two screws (G) securing the left and right hinges from the LCD back cover. Removing the Antenna 1. See "Removing the CPU" on page 60. 11. See "Removing the Middle Cover" on page 58. 9. 14. ... "Removing the LCD with Brackets" on page 80. See "Removing the LCD with Brackets" on page 80. 16. Remove the left and right LCD module hinges. See "Removing the Inverter Board" on page 79. 15. See "Removing the Inverter Board" on page 79. 15. See "Removing the LCD Brackets" on page...


