Features Setup Guide
Page 8
... and create a new folder. Write down your Short Name; Macintosh: To share a folder in this folder. 13. Write down your password. 6. The scanner will see Frequently Asked Questions on -screen prompts for setting up other features later in the setup process. 11. Launch... page for setting up other features later in the setup process. 7. Click the Accounts button, and then enable your web browser. 2. Phaser® 6180MFP Multifunction Printer EN - 6 Select the Everyone group, and verify that all permissions are enabled (for the Scanner 1. Enable Windows Sharing. ...
... and create a new folder. Write down your Short Name; Macintosh: To share a folder in this folder. 13. Write down your password. 6. The scanner will see Frequently Asked Questions on -screen prompts for setting up other features later in the setup process. 11. Launch... page for setting up other features later in the setup process. 7. Click the Accounts button, and then enable your web browser. 2. Phaser® 6180MFP Multifunction Printer EN - 6 Select the Everyone group, and verify that all permissions are enabled (for the Scanner 1. Enable Windows Sharing. ...
Features Setup Guide
Page 9
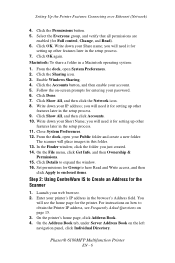
...1. g. Click the Save Changes button to set up your shared folder. Select the Enable SNMP check box, and then click Save Changes. 5. Phaser® 6180MFP Multifunction Printer EN - 7 Setting Up the Printer Features Connecting over Ethernet (Network) 5. Windows: In the Share Name field, type the share ... SMTP server information. f. Enter the printer's IP address in the Address Book. In the login fields, enter the name and password that you first need to create the new address. From the printer's home page, click Properties, and select SNMP from the Protocols list. 6....
...1. g. Click the Save Changes button to set up your shared folder. Select the Enable SNMP check box, and then click Save Changes. 5. Phaser® 6180MFP Multifunction Printer EN - 7 Setting Up the Printer Features Connecting over Ethernet (Network) 5. Windows: In the Share Name field, type the share ... SMTP server information. f. Enter the printer's IP address in the Address Book. In the login fields, enter the name and password that you first need to create the new address. From the printer's home page, click Properties, and select SNMP from the Protocols list. 6....
Features Setup Guide
Page 13
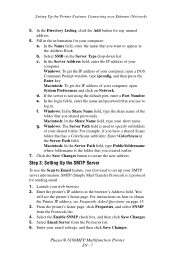
...folder and Auto Share are : ■ SMB: 139 ■ FTP: 21 16. Click Finish to select the appropriate folder. 9. The default values are checked. 8. Phaser® 6180MFP Multifunction Printer EN - 11 Enter the folder where you want to appear under in the editor. Double-click on the Server icon to the shared... network computer. You are now ready to scan images to enter the Port Number used by Server Type. Click Next. Enter the name and password that you log in with the information you want to scan in the Save In Folder field, or click the Browse button to 32 for...
...folder and Auto Share are : ■ SMB: 139 ■ FTP: 21 16. Click Finish to select the appropriate folder. 9. The default values are checked. 8. Phaser® 6180MFP Multifunction Printer EN - 11 Enter the folder where you want to appear under in the editor. Double-click on the Server icon to the shared... network computer. You are now ready to scan images to enter the Port Number used by Server Type. Click Next. Enter the name and password that you log in with the information you want to scan in the Save In Folder field, or click the Browse button to 32 for...

Features Setup Guide
Page 14
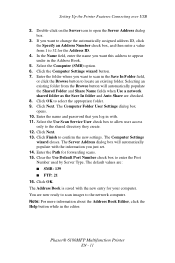
... this address to appear under in the Address Book. 4. Type your password in the Confirm Login Password field. 9. Step 2: Using the Express Scan Manager to a folder on your computer where your printer can scan images directly: 1. Macintosh: From the Application folder, click Xerox/ Phaser 6180MFP, and then double-click Express Scan Manager. 2. Click Browse and...
... this address to appear under in the Address Book. 4. Type your password in the Confirm Login Password field. 9. Step 2: Using the Express Scan Manager to a folder on your computer where your printer can scan images directly: 1. Macintosh: From the Application folder, click Xerox/ Phaser 6180MFP, and then double-click Express Scan Manager. 2. Click Browse and...
User Guide
Page 4
...Configuration and Paper Tray Settings 2-12 More Information 2-13 Resources 2-13 3 Printer Management Software Print and Scan Drivers 3-2 CentreWare Internet Services 3-2 Creating an Administrative Password 3-2 Address Book Editor 3-3 Express Scan Manager 3-3 Launcher (Windows 3-3 PrintingScout Software 3-4 4 Network Basics Overview of Network Setup and Configuration 4-2 Choosing a ...Automatically Setting the Printer's IP Address 4-6 Dynamic Methods of Setting the Printer's IP Address 4-7 Manually Setting the Printer's IP Address 4-8 Phaser® 6180MFP Multifunction Printer ii
...Configuration and Paper Tray Settings 2-12 More Information 2-13 Resources 2-13 3 Printer Management Software Print and Scan Drivers 3-2 CentreWare Internet Services 3-2 Creating an Administrative Password 3-2 Address Book Editor 3-3 Express Scan Manager 3-3 Launcher (Windows 3-3 PrintingScout Software 3-4 4 Network Basics Overview of Network Setup and Configuration 4-2 Choosing a ...Automatically Setting the Printer's IP Address 4-6 Dynamic Methods of Setting the Printer's IP Address 4-7 Manually Setting the Printer's IP Address 4-8 Phaser® 6180MFP Multifunction Printer ii

User Guide
Page 47
...'s features, install the print and scan drivers from the Software and Documentation CD-ROM or from the Xerox Drivers and Downloads website: www.xerox.com/office/6180MFPdrivers ■ Print drivers enable your computer and printer to communicate and provide access to your... Mode check box. 6. In the Password and Verify Password fields, type a password for the administrator. 7. Note: Users who are not given passwords by the administrator can still view the configuration settings and options in the browser's Address field. 3. Phaser® 6180MFP Multifunction Printer 3-2 See also: Installing ...
...'s features, install the print and scan drivers from the Software and Documentation CD-ROM or from the Xerox Drivers and Downloads website: www.xerox.com/office/6180MFPdrivers ■ Print drivers enable your computer and printer to communicate and provide access to your... Mode check box. 6. In the Password and Verify Password fields, type a password for the administrator. 7. Note: Users who are not given passwords by the administrator can still view the configuration settings and options in the browser's Address field. 3. Phaser® 6180MFP Multifunction Printer 3-2 See also: Installing ...
User Guide
Page 104
... paper size on custom size paper, such as long paper using the PCL print driver. For Windows 2000 or later, an administrator's password only allows users with existing print queue is especially true if you need to set to load standard size paper. For a shared printer... of other shared printers on the print driver. Custom size paper can only check the contents. The way to load standard size paper. Phaser® 6180MFP Multifunction Printer 5-41 This section explains the procedure using a narrow width paper. Select the Configuration tab. 4. Using the PCL Driver On ...
... paper size on custom size paper, such as long paper using the PCL print driver. For Windows 2000 or later, an administrator's password only allows users with existing print queue is especially true if you need to set to load standard size paper. For a shared printer... of other shared printers on the print driver. Custom size paper can only check the contents. The way to load standard size paper. Phaser® 6180MFP Multifunction Printer 5-41 This section explains the procedure using a narrow width paper. Select the Configuration tab. 4. Using the PCL Driver On ...
User Guide
Page 107
...PostScript print driver: 1. From the File menu, select Print. 2. In the Username field, enter your respective application software. In the Password field, enter a numeric password. 6. b. You can select whether to output the printed pages. Then, follow the steps for other operating systems. The way to ... store the print data in the RAM disk is erased when the printer is a feature that will appear on page 10-31. Phaser® 6180MFP Multifunction Printer 5-44 Click the Setting button. 4. Note: The RAM disk needs to the printer for printing. In the Retrieve Document...
...PostScript print driver: 1. From the File menu, select Print. 2. In the Username field, enter your respective application software. In the Password field, enter a numeric password. 6. b. You can select whether to output the printed pages. Then, follow the steps for other operating systems. The way to ... store the print data in the RAM disk is erased when the printer is a feature that will appear on page 10-31. Phaser® 6180MFP Multifunction Printer 5-44 Click the Setting button. 4. Note: The RAM disk needs to the printer for printing. In the Retrieve Document...

User Guide
Page 108
... the Password set in the Secure Print dialog box of the Basic tab of the print driver. Click OK twice to accept the Secure Print settings and to display the Walk-Up Features menu. 2. Repeat Step 4 for each digit of the print driver. Phaser® 6180MFP Multifunction Printer... 5-45 See System Settings on the control panel. The document name displayed (up to 8 characters) is the Document Name specified in the Secure Print dialog box of the Paper/Output tab of the password, and then press the OK button...
... the Password set in the Secure Print dialog box of the Basic tab of the print driver. Click OK twice to accept the Secure Print settings and to display the Walk-Up Features menu. 2. Repeat Step 4 for each digit of the print driver. Phaser® 6180MFP Multifunction Printer... 5-45 See System Settings on the control panel. The document name displayed (up to 8 characters) is the Document Name specified in the Secure Print dialog box of the Paper/Output tab of the password, and then press the OK button...

User Guide
Page 129
...create the address: ■ Create the address with CentreWare IS (requires Ethernet connection). ■ Create the address with Xerox Address Book Editor (requires USB connection). Click Done. 7. Record your account. 5. Close System Preferences. 13. On...enter the IP address of the Add Individual Directory dialog box, enter the name that is ready. Phaser® 6180MFP Multifunction Printer 7-7 Click the Sharing icon. 3. The scanner will place scanned images in the information ...in the browser's Address field. 3. Launch your password. 6. In the Name field of your Public folder.
...create the address: ■ Create the address with CentreWare IS (requires Ethernet connection). ■ Create the address with Xerox Address Book Editor (requires USB connection). Click Done. 7. Record your account. 5. Close System Preferences. 13. On...enter the IP address of the Add Individual Directory dialog box, enter the name that is ready. Phaser® 6180MFP Multifunction Printer 7-7 Click the Sharing icon. 3. The scanner will place scanned images in the information ...in the browser's Address field. 3. Launch your password. 6. In the Name field of your Public folder.

User Guide
Page 130
... Save Changes button to the network computer. See Creating a Shared Folder on a Network d. Phaser® 6180MFP Multifunction Printer 7-8 f. where foldername is saved with . On the Start menu, select Programs > Xerox > Phaser 6180MFP > Address Book Editor. 2. e. For instance, say that you previously configured for your short...and then click Next. 8. Macintosh: In the Server Path field, type Public\foldername. For Windows: 1. Enter the name and password that you login with a USB cable. In the Name field of the folder that has a ColorScans subfolder. The Server Address ...
... Save Changes button to the network computer. See Creating a Shared Folder on a Network d. Phaser® 6180MFP Multifunction Printer 7-8 f. where foldername is saved with . On the Start menu, select Programs > Xerox > Phaser 6180MFP > Address Book Editor. 2. e. For instance, say that you previously configured for your short...and then click Next. 8. Macintosh: In the Server Path field, type Public\foldername. For Windows: 1. Enter the name and password that you login with a USB cable. In the Name field of the folder that has a ColorScans subfolder. The Server Address ...

User Guide
Page 131
...Type the name and password that you are now ready to scan images to a Computer on a Network For Macintosh: 1. If you want this address to appear under in the Login fields. 10. On the File menu, select Save. Phaser® 6180MFP Multifunction Printer 7-9 On the File menu, select Programs > Xerox > Phaser 6180MFP >Address Book Editor....then select New. In the Name field of the Address Book Editor, double-click the Server icon, and then select New. Type your password in the Port Number field. 12. Type your computer. The Address Book is saved with in the Address Book. 4.
...Type the name and password that you are now ready to scan images to a Computer on a Network For Macintosh: 1. If you want this address to appear under in the Login fields. 10. On the File menu, select Save. Phaser® 6180MFP Multifunction Printer 7-9 On the File menu, select Programs > Xerox > Phaser 6180MFP >Address Book Editor....then select New. In the Name field of the Address Book Editor, double-click the Server icon, and then select New. Type your password in the Port Number field. 12. Type your computer. The Address Book is saved with in the Address Book. 4.
User Guide
Page 135
... the FTP server: a. There are two ways to create the address: ■ Using CentreWare IS to create the address ■ Using the Xerox Address Book Editor to create the address Using CentreWare IS to . In the Name field, enter the name that you to be specified if the... of the FTP server. The port number only needs to login, enter the name and password in the Address Book. If the FTP server requires you want this address to create the new address. b. Phaser® 6180MFP Multifunction Printer 7-13 Click the Address Book button. 4. c. Under Server Address Book, click...
... the FTP server: a. There are two ways to create the address: ■ Using CentreWare IS to create the address ■ Using the Xerox Address Book Editor to create the address Using CentreWare IS to . In the Name field, enter the name that you to be specified if the... of the FTP server. The port number only needs to login, enter the name and password in the Address Book. If the FTP server requires you want this address to create the new address. b. Phaser® 6180MFP Multifunction Printer 7-13 Click the Address Book button. 4. c. Under Server Address Book, click...

User Guide
Page 136
In the Path field, enter the path to the folder you want the images placed in , enter the name and password that points to your computer, and then press the OK button. 5. Click OK. 7. In the left-pane, right-click the Server icon, and then select ... to a FTP Server Using the Address Book Editor to Create an Address Note: To use , then see Setting Up Scanning to a Computer on page 7-18 Phaser® 6180MFP Multifunction Printer 7-14 Macintosh: Open the Applications folder, and then select Xerox/Phaser6180MFP/Address Book Editor. 2. Windows: On the Start menu, select Programs...
In the Path field, enter the path to the folder you want the images placed in , enter the name and password that points to your computer, and then press the OK button. 5. Click OK. 7. In the left-pane, right-click the Server icon, and then select ... to a FTP Server Using the Address Book Editor to Create an Address Note: To use , then see Setting Up Scanning to a Computer on page 7-18 Phaser® 6180MFP Multifunction Printer 7-14 Macintosh: Open the Applications folder, and then select Xerox/Phaser6180MFP/Address Book Editor. 2. Windows: On the Start menu, select Programs...

User Guide
Page 158
.... 6. If you must enter your numeric password to change your four-digit password, and then press the OK button. Printing Secure Faxes If the Secure Receive Lock option is off. 9. To print or clear all secure faxes: 1. Phaser® 6180MFP Multifunction Printer 8-15 Select one time. 7.... Select Secure Settings, and then press the OK button. 4. Select Secure Receive Lock, and then press the OK button twice. 8. Enter a new four digit password, and then press the OK button. ...
.... 6. If you must enter your numeric password to change your four-digit password, and then press the OK button. Printing Secure Faxes If the Secure Receive Lock option is off. 9. To print or clear all secure faxes: 1. Phaser® 6180MFP Multifunction Printer 8-15 Select one time. 7.... Select Secure Settings, and then press the OK button. 4. Select Secure Receive Lock, and then press the OK button twice. 8. Enter a new four digit password, and then press the OK button. ...
User Guide
Page 159
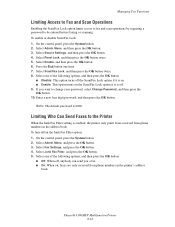
...OK button twice. 8. Note: The default password is enabled, the printer only prints faxes received from phone numbers in the address book. If you a fax. ■ On: When on the Junk Fax Filter option: 1. Phaser® 6180MFP Multifunction Printer 8-16 Managing Fax Functions Limiting... Access to Fax and Scan Operations Enabling the Scan/Fax Lock option limits access to fax and scan operations by requiring a password to be entered before faxing or scanning. ...
...OK button twice. 8. Note: The default password is enabled, the printer only prints faxes received from phone numbers in the address book. If you a fax. ■ On: When on the Junk Fax Filter option: 1. Phaser® 6180MFP Multifunction Printer 8-16 Managing Fax Functions Limiting... Access to Fax and Scan Operations Enabling the Scan/Fax Lock option limits access to fax and scan operations by requiring a password to be entered before faxing or scanning. ...
User Guide
Page 181
... this menu to initialize the NVM, to configure security setting, or to adjust the configurations for the network settings. Caution: Non-Xerox toner may not be covered by NonXerox toner may seriously damage the printer. Panel Lock must be enabled before enabling Scan/Fax Lock...the correction chart. ■ Color Regi: Enter the number to print them. Damage caused by your warranty. Phaser® 6180MFP Multifunction Printer 9-18 The default is turned off the printer, and then turn off . Secure Settings Use the Secure Settings menu to set a password to limit access to the ...
... this menu to initialize the NVM, to configure security setting, or to adjust the configurations for the network settings. Caution: Non-Xerox toner may not be covered by NonXerox toner may seriously damage the printer. Panel Lock must be enabled before enabling Scan/Fax Lock...the correction chart. ■ Color Regi: Enter the number to print them. Damage caused by your warranty. Phaser® 6180MFP Multifunction Printer 9-18 The default is turned off the printer, and then turn off . Secure Settings Use the Secure Settings menu to set a password to limit access to the ...
User Guide
Page 213
... the Stop button. Set the length guide and the width guides to the Xerox Support website, www.xerox.com/office/6180MFPsupport. Turn off the power, pull out the power plug from...not, connect the printer to the network? See Loading Paper in the Address Book. Phaser® 6180MFP Multifunction Printer 10-29 Check the displayed message and correct the error. See the Online... the connection of the interface. Is the user name and password set up? Verify that the user name and password are jobs remaining in CentreWare IS. See the Online Help for...
... the Stop button. Set the length guide and the width guides to the Xerox Support website, www.xerox.com/office/6180MFPsupport. Turn off the power, pull out the power plug from...not, connect the printer to the network? See Loading Paper in the Address Book. Phaser® 6180MFP Multifunction Printer 10-29 Check the displayed message and correct the error. See the Online... the connection of the interface. Is the user name and password set up? Verify that the user name and password are jobs remaining in CentreWare IS. See the Online Help for...

User Guide
Page 222
... Address on the SMTP server is correct. Use CentreWare IS to verify that the user name and password settings are correct. Use CentreWare IS to verify that the user name and password settings are correct. Phaser® 6180MFP Multifunction Printer 10-38 The POP3 server was not found . Check that the printer is physically...
... Address on the SMTP server is correct. Use CentreWare IS to verify that the user name and password settings are correct. Use CentreWare IS to verify that the user name and password settings are correct. Phaser® 6180MFP Multifunction Printer 10-38 The POP3 server was not found . Check that the printer is physically...
User Guide
Page 233
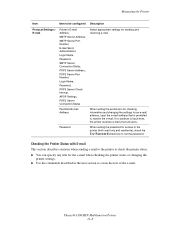
... described in the next section to create the text of the e-mail. If no address is permitted to receive the e-mail. Password When setting the password for sending and receiving e-mail. Phaser® 6180MFP Multifunction Printer 11-8 Managing the Printer Item Item to be configured Description Protocol Settings > E-mail Printer's E-mail Address, SMTP Server...
... described in the next section to create the text of the e-mail. If no address is permitted to receive the e-mail. Password When setting the password for sending and receiving e-mail. Phaser® 6180MFP Multifunction Printer 11-8 Managing the Printer Item Item to be configured Description Protocol Settings > E-mail Printer's E-mail Address, SMTP Server...


