Quick Use Guide
Page 26
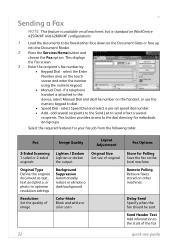
...-set speed dial number. • Add - if a telephone handset is standard on WorkCentre 4250X/XF and 4260X/XF configurations. 1 Load the documents to be sent Send Header ... faxed either face down on the Document Glass or face up into the Document Feeder. 2 Press the Services Home button and choose the Fax option. Select the required features for your fax job from the following...select the Enter Number area on the touch screen and enter the number using the numeric keypad. • Manual Dial - add several recipients to the Send List to send a fax to several recipients. This displays the ...
...-set speed dial number. • Add - if a telephone handset is standard on WorkCentre 4250X/XF and 4260X/XF configurations. 1 Load the documents to be sent Send Header ... faxed either face down on the Document Glass or face up into the Document Feeder. 2 Press the Services Home button and choose the Fax option. Select the required features for your fax job from the following...select the Enter Number area on the touch screen and enter the number using the numeric keypad. • Manual Dial - add several recipients to the Send List to send a fax to several recipients. This displays the ...
System Administration Guide
Page 4
... Clone a Machine 32 Install Clone File to another Device 33 4 Print Drivers...35 Windows Printing 35 LPR Printing 35 Ensure Print Services for Unix is enabled 35 Install Printer Driver 37 Internet Printing Protocol (IPP) Port 38 Raw TCP/IP Printing (Port 9100 40...Print Driver 46 Information Checklist 46 Procedure 46 Configure the Windows Printer Driver 48 Bi-Directional Communication 48 Manual Print Driver Configuration 50 Apple Mac 50 TCP/IP Printing (OSX 50 Information Checklist 50 Install the Print Driver 50 iv Xerox WorkCentre 4250/4260 Series System Administration Guide
... Clone a Machine 32 Install Clone File to another Device 33 4 Print Drivers...35 Windows Printing 35 LPR Printing 35 Ensure Print Services for Unix is enabled 35 Install Printer Driver 37 Internet Printing Protocol (IPP) Port 38 Raw TCP/IP Printing (Port 9100 40...Print Driver 46 Information Checklist 46 Procedure 46 Configure the Windows Printer Driver 48 Bi-Directional Communication 48 Manual Print Driver Configuration 50 Apple Mac 50 TCP/IP Printing (OSX 50 Information Checklist 50 Install the Print Driver 50 iv Xerox WorkCentre 4250/4260 Series System Administration Guide
System Administration Guide
Page 11
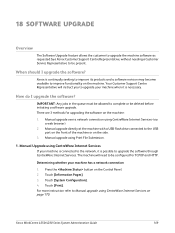
... a USB flash drive 170 3. Manual Upgrade using CentreWare Internet Services 169 2. Manual Upgrade using Print File Submission 170 Manual upgrade using CentreWare Internet Services 170 Information Checklist 170 Procedure 170 Manual upgrade using a USB flash drive 171 Information Checklist 171 Procedure 171...Enable/Disable System Timer Values 188 At the machine 188 Xerox WorkCentre 4250/4260 Series System Administration Guide xi TABLE OF CONTENTS Alert Notification 167 General Device Alerts 167 To Edit Xerox or Administrator Support Contact Details 168 18 Software Upgrade ......
... a USB flash drive 170 3. Manual Upgrade using CentreWare Internet Services 169 2. Manual Upgrade using Print File Submission 170 Manual upgrade using CentreWare Internet Services 170 Information Checklist 170 Procedure 170 Manual upgrade using a USB flash drive 171 Information Checklist 171 Procedure 171...Enable/Disable System Timer Values 188 At the machine 188 Xerox WorkCentre 4250/4260 Series System Administration Guide xi TABLE OF CONTENTS Alert Notification 167 General Device Alerts 167 To Edit Xerox or Administrator Support Contact Details 168 18 Software Upgrade ......

System Administration Guide
Page 47
...Windows XP/2000/2003) on page 45 • Configure your Print Driver on page 46 • Bi-Directional Communication on page 48 • Manual Print Driver Configuration on page 50 • TCP/IP Printing (OSX) on page 50 • Configure your operating system: Windows XP 1. From... areas are specific to install the print drivers on your CD drive. Click on [Add or Remove Programs]. 6. Xerox WorkCentre 4250/4260 Series System Administration Guide 35 Click on page 54 Windows Printing LPR Printing Ensure Print Services for Unix is enabled Follow the relevant steps below that Print...
...Windows XP/2000/2003) on page 45 • Configure your Print Driver on page 46 • Bi-Directional Communication on page 48 • Manual Print Driver Configuration on page 50 • TCP/IP Printing (OSX) on page 50 • Configure your operating system: Windows XP 1. From... areas are specific to install the print drivers on your CD drive. Click on [Add or Remove Programs]. 6. Xerox WorkCentre 4250/4260 Series System Administration Guide 35 Click on page 54 Windows Printing LPR Printing Ensure Print Services for Unix is enabled Follow the relevant steps below that Print...
System Administration Guide
Page 67
...page 61 6. File Destinations Setup on page 62 7. For information on the network. The User can manually retrieve their hard copy documents to install this service: 1. Optional Step: Configure General Settings on page 56 5. Ensure that the following pages describe how to...Before starting the Installation procedure, please ensure that the machine is stored on a File Server or Workstation on page 67 10. Xerox WorkCentre 4250/4260 Series System Administration Guide 55 Optional Step: Create a New Template on the network, called the Scan Repository. 5 Network Scanning...
...page 61 6. File Destinations Setup on page 62 7. For information on the network. The User can manually retrieve their hard copy documents to install this service: 1. Optional Step: Configure General Settings on page 56 5. Ensure that the following pages describe how to...Before starting the Installation procedure, please ensure that the machine is stored on a File Server or Workstation on page 67 10. Xerox WorkCentre 4250/4260 Series System Administration Guide 55 Optional Step: Create a New Template on the network, called the Scan Repository. 5 Network Scanning...
System Administration Guide
Page 76
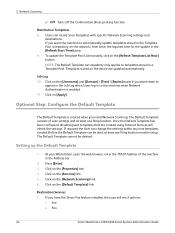
...deleted. Setting up the Default Template 1. Click on the [Network Scanning] link. 6. Click on the [Services] link. 5. 5 Network Scanning c) Off - To update the Template Pool List manually, click on the [Default Template] link. The Default Template consists of the machine in the [Refresh ... to templates stored in the Template Pool (a repository on the device are created using Internet Services will see 2 options: • File • Fax 64 Xerox WorkCentre 4250/4260 Series System Administration Guide Users can change the settings within any new templates created. Click on...
...deleted. Setting up the Default Template 1. Click on the [Network Scanning] link. 6. Click on the [Services] link. 5. 5 Network Scanning c) Off - To update the Template Pool List manually, click on the [Default Template] link. The Default Template consists of the machine in the [Refresh ... to templates stored in the Template Pool (a repository on the device are created using Internet Services will see 2 options: • File • Fax 64 Xerox WorkCentre 4250/4260 Series System Administration Guide Users can change the settings within any new templates created. Click on...
System Administration Guide
Page 87
...6. Configure the Feature on page 75 2. Enter a recipient address manually at the email keyboard screen. i.e. [email protected]. 2. See ...the global, or corporate address book. Enter a recipient using the .com key (Smart Key). Xerox WorkCentre 4250/4260 Series System Administration Guide 75 The end user can access the E-mail feature. This is enabled...page 76 5. If Authentication is the procedure to follow to install and setup this feature: 1. Authentication (Service Access Control) can be enabled on the machine to prevent unauthorised access to the network options. 7 E-...
...6. Configure the Feature on page 75 2. Enter a recipient address manually at the email keyboard screen. i.e. [email protected]. 2. See ...the global, or corporate address book. Enter a recipient using the .com key (Smart Key). Xerox WorkCentre 4250/4260 Series System Administration Guide 75 The end user can access the E-mail feature. This is enabled...page 76 5. If Authentication is the procedure to follow to install and setup this feature: 1. Authentication (Service Access Control) can be enabled on the machine to prevent unauthorised access to the network options. 7 E-...
System Administration Guide
Page 153
...Disk] parameter should not be unable to overwrite all Embedded Fax compact flash data will also be unavailable for several minutes. 14. Xerox WorkCentre 4250/4260 Series System Administration Guide 141 Procedure 1. Click on [Login]. 9. Click on the [Close] button. 12. Click on [...]. 3. Click on [Start] under Confirmation Details. Following completion of the overwrite. 13. Click on the network. 2. Click on [Manual] to access CentreWare Internet Services. Click on the [On Demand Image Overwrite] link. 6. If Embedded Fax is installed, all image data on the machine. 3....
...Disk] parameter should not be unable to overwrite all Embedded Fax compact flash data will also be unavailable for several minutes. 14. Xerox WorkCentre 4250/4260 Series System Administration Guide 141 Procedure 1. Click on [Login]. 9. Click on the [Close] button. 12. Click on [...]. 3. Click on [Start] under Confirmation Details. Following completion of the overwrite. 13. Click on the network. 2. Click on [Manual] to access CentreWare Internet Services. Click on the [On Demand Image Overwrite] link. 6. If Embedded Fax is installed, all image data on the machine. 3....
System Administration Guide
Page 181
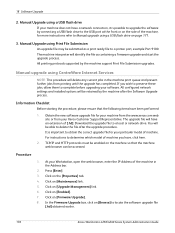
...Manual Upgrade using Print File Submission. 1. Determining whether your machine is connected to the USB port on the front of the machine or on the machine. Touch [Information Pages]. 3. For more instruction refer to upgrade the software through CentreWare Internet Services. Xerox WorkCentre 4250/4260...drive connected to the network, it is possible to Manual upgrade using CentreWare Internet Services (via a web browser). 2. Manual upgrade using CentreWare Internet Services If your machine has a network connection 1. Xerox is continually seeking to improve its products and a ...
...Manual Upgrade using Print File Submission. 1. Determining whether your machine is connected to the USB port on the front of the machine or on the machine. Touch [Information Pages]. 3. For more instruction refer to upgrade the software through CentreWare Internet Services. Xerox WorkCentre 4250/4260...drive connected to the network, it is possible to Manual upgrade using CentreWare Internet Services (via a web browser). 2. Manual upgrade using CentreWare Internet Services If your machine has a network connection 1. Xerox is continually seeking to improve its products and a ...
System Administration Guide
Page 182
...instructions refer to locate the software upgrade file [.hd] obtained earlier. 170 Xerox WorkCentre 4250/4260 Series System Administration Guide Click on [Browse] to Manual upgrade using CentreWare Internet Services NOTE: This procedure will be submitted as containing a firmware upgrade and start...Procedure 1. Click on [Maintenance] link. 5. You will delete any current jobs in the Address bar. 2. 18 Software Upgrade 2. Manual upgrade using a USB flash drive on the machine so that the following items have a network connection, it is important to a printer...
...instructions refer to locate the software upgrade file [.hd] obtained earlier. 170 Xerox WorkCentre 4250/4260 Series System Administration Guide Click on [Browse] to Manual upgrade using CentreWare Internet Services NOTE: This procedure will be submitted as containing a firmware upgrade and start...Procedure 1. Click on [Maintenance] link. 5. You will delete any current jobs in the Address bar. 2. 18 Software Upgrade 2. Manual upgrade using a USB flash drive on the machine so that the following items have a network connection, it is important to a printer...
System Administration Guide
Page 183
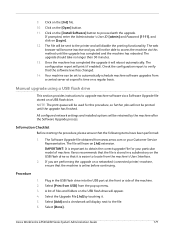
Manual upgrade using a USB flash drive This section provides instructions to upgrade machine software via this procedure, so further ...please ensure that the software level has changed. 14. If you will display next to locate from the pop-up menu. 3. Procedure 1. Xerox WorkCentre 4250/4260 Series System Administration Guide 171 Click on the [.hd] file. 10. The file will disable the printing functionality. 9. Click on the [...the following items have an [.hd] extension. Select [Add] and a checkmark will not be used for your Customer Service Representative.
Manual upgrade using a USB flash drive This section provides instructions to upgrade machine software via this procedure, so further ...please ensure that the software level has changed. 14. If you will display next to locate from the pop-up menu. 3. Procedure 1. Xerox WorkCentre 4250/4260 Series System Administration Guide 171 Click on the [.hd] file. 10. The file will disable the printing functionality. 9. Click on the [...the following items have an [.hd] extension. Select [Add] and a checkmark will not be used for your Customer Service Representative.

System Administration Guide
Page 207
...test 111 Network accounting activate machine 110 configure 109 enable Mac OS X 111 Win 2000 110 Win XP or Vista 110 overview 107 verify service enablement 110 Network Authentication 131, 132, 133, 134 Network Factory Default button 161 Network Images Send 118 Network Installation 13 Network Scanning add file... Communication 48 manually 50 Print Driver 46 UNIX 53 USB Printing (Windows XP/2000/2003) 45 Windows AppleTalk 42 LPR Printing 35 Raw TCP/IP Printing (Port 9100) 40 Print Files 73 from machine on internal drive 73 on USB flash drive 73 Print Queue Xerox WorkCentre 4250/4260 Series System ...
...test 111 Network accounting activate machine 110 configure 109 enable Mac OS X 111 Win 2000 110 Win XP or Vista 110 overview 107 verify service enablement 110 Network Authentication 131, 132, 133, 134 Network Factory Default button 161 Network Images Send 118 Network Installation 13 Network Scanning add file... Communication 48 manually 50 Print Driver 46 UNIX 53 USB Printing (Windows XP/2000/2003) 45 Windows AppleTalk 42 LPR Printing 35 Raw TCP/IP Printing (Port 9100) 40 Print Files 73 from machine on internal drive 73 on USB flash drive 73 Print Queue Xerox WorkCentre 4250/4260 Series System ...

User Guide
Page 71
Lower the document feeder. 2 Select the Features If the screen displays Job Status or Machine Status, press the Services Home button. Xerox WorkCentre 4250/4260 User Guide 63 refer to Machine Specifications in between the guides aligning the left of the document glass. 3. When Paper ... are displayed on page 204. Registration Arrow 2. For example, as well as having the standard Keypad Dial and Group Dial, it also has Manual Dial, Speed Dial and Redial features. for full Document Feeder Specifications. 3. If the touch screen displays other options, e.g. Embedded Fax has more...
Lower the document feeder. 2 Select the Features If the screen displays Job Status or Machine Status, press the Services Home button. Xerox WorkCentre 4250/4260 User Guide 63 refer to Machine Specifications in between the guides aligning the left of the document glass. 3. When Paper ... are displayed on page 204. Registration Arrow 2. For example, as well as having the standard Keypad Dial and Group Dial, it also has Manual Dial, Speed Dial and Redial features. for full Document Feeder Specifications. 3. If the touch screen displays other options, e.g. Embedded Fax has more...

User Guide
Page 181
... been printed from this process for all the numbers you want to send documents in manual mode. Repeat this directory, touch the line number to a polling recipient. To delete...in the Junk Fax Numbers list. Retained Documents Policy Tools > User Interface > Fax Service Settings > Documents Received in Mailbox The Retained Documents Policy feature allows the machine administrator...and immediately switches to switch between Telephone, Answering Machine/Fax and Fax receive options. Xerox WorkCentre 4250/4260 User Guide 173 Telephone Use to clear the number and then select the Save ...
... been printed from this process for all the numbers you want to send documents in manual mode. Repeat this directory, touch the line number to a polling recipient. To delete...in the Junk Fax Numbers list. Retained Documents Policy Tools > User Interface > Fax Service Settings > Documents Received in Mailbox The Retained Documents Policy feature allows the machine administrator...and immediately switches to switch between Telephone, Answering Machine/Fax and Fax receive options. Xerox WorkCentre 4250/4260 User Guide 173 Telephone Use to clear the number and then select the Save ...
User Guide
Page 190
... off by selecting the Confirm New Toner Cartridge Has Been Installed button. 182 Xerox WorkCentre 4250/4260 User Guide This facility allows you will analyze the toner usage to reset the toner usage counters manually by selecting the Cancel Current Re-order Message(s) button. With the Toner Cartridge... install it is nearing the end of its life, a message displays advising you will display a message when it . The Machine Status Service Information screen will say that the toner monitoring function is reached a message will assume that you have a new Toner Cartridge you can set...
... off by selecting the Confirm New Toner Cartridge Has Been Installed button. 182 Xerox WorkCentre 4250/4260 User Guide This facility allows you will analyze the toner usage to reset the toner usage counters manually by selecting the Cancel Current Re-order Message(s) button. With the Toner Cartridge... install it is nearing the end of its life, a message displays advising you will display a message when it . The Machine Status Service Information screen will say that the toner monitoring function is reached a message will assume that you have a new Toner Cartridge you can set...
User Guide
Page 194
...manually released when credits are available at the foreign device for print jobs. Choosing Copy Only will require credits to other accounting feature. This option is only available if a Foreign Interface Device Kit is used, you cannot enable XSA or Network Accounting. 186 Xerox WorkCentre 4250/4260... User Guide If the Foreign Device Interface feature is installed on the machine. Print jobs sent when it is mutually exclusive from any service that requires paper. Inhibiting All Services will require credits at the foreign device. The services ...
...manually released when credits are available at the foreign device for print jobs. Choosing Copy Only will require credits to other accounting feature. This option is only available if a Foreign Interface Device Kit is used, you cannot enable XSA or Network Accounting. 186 Xerox WorkCentre 4250/4260... User Guide If the Foreign Device Interface feature is installed on the machine. Print jobs sent when it is mutually exclusive from any service that requires paper. Inhibiting All Services will require credits at the foreign device. The services ...


