
Owners Manual
Page 3
... openings and surfaces near these openings, oven doors, and windows of pressure may become hot enough to burst and result in use dry chemical or foam-type extinguisher. Moist or damp potholders on Grease Fires - s Placement of fire, electrical shock, injury to cool. s Do Not Leave Children ...Alone - We have had sufficient time to persons, or damage when using the oven.
... openings and surfaces near these openings, oven doors, and windows of pressure may become hot enough to burst and result in use dry chemical or foam-type extinguisher. Moist or damp potholders on Grease Fires - s Placement of fire, electrical shock, injury to cool. s Do Not Leave Children ...Alone - We have had sufficient time to persons, or damage when using the oven.

Owners Manual
Page 4
...some of the substances listed, including benzene, formaldehyde, carbon monoxide, and toluene. The oven you have purchased may not match those of your model. A B G H C D I . Oven door window F. Model and serial number plate (on right mounting rail) Parts and ...defects, or other reproductive harm. PARTS AND FEATURES This manual covers different models. Automatic oven light switch H. Bake element E. Oven lock latch I E F A. Electronic oven control B. Oven vent C. Lower oven (see separate Use and Care Guide) G. WARNING: This product contains a chemical known ...
...some of the substances listed, including benzene, formaldehyde, carbon monoxide, and toluene. The oven you have purchased may not match those of your model. A B G H C D I . Oven door window F. Model and serial number plate (on right mounting rail) Parts and ...defects, or other reproductive harm. PARTS AND FEATURES This manual covers different models. Automatic oven light switch H. Bake element E. Oven lock latch I E F A. Electronic oven control B. Oven vent C. Lower oven (see separate Use and Care Guide) G. WARNING: This product contains a chemical known ...

Owners Manual
Page 5
...MIN "+" or "-" keypads to the time of day from the display: Press and hold CLOCK for the Clock, Timer and Control Lock. On single oven models, press OFF/CANCEL. will be reset. Upper Off/Cancel, Lower Off/Cancel or Off/Cancel The UPPER OFF/CANCEL, LOWER OFF/CANCEL ... OFF/CANCEL or LOWER OFF/CANCEL and retry entry. If the Start pad is first supplied to the display. Upper off/cancel Lower off . 1. On single oven models, press OFF/CANCEL. Repeat to return the time of day and "PF" will light up for 5 seconds. Timer J K F. Temperature setting LM N O K. ...
...MIN "+" or "-" keypads to the time of day from the display: Press and hold CLOCK for the Clock, Timer and Control Lock. On single oven models, press OFF/CANCEL. will be reset. Upper Off/Cancel, Lower Off/Cancel or Off/Cancel The UPPER OFF/CANCEL, LOWER OFF/CANCEL ... OFF/CANCEL or LOWER OFF/CANCEL and retry entry. If the Start pad is first supplied to the display. Upper off/cancel Lower off . 1. On single oven models, press OFF/CANCEL. Repeat to return the time of day and "PF" will light up for 5 seconds. Timer J K F. Temperature setting LM N O K. ...

Owners Manual
Page 6
... will be canceled. Press TIMER SET or START. Press and hold TIMER SET until a single tone sounds, and "Loc," a picture of a lock and "START?" Oven Temperature Control IMPORTANT: Do not use of the ovens. It can be set time ends, if enabled, end-of-cycle tones will sound,... ...much more -10°F (-5°C) ...a little less -20°F (-10°C) ...moderately less -30°F (-15°C) ...much less To Adjust Oven Temperature Calibration: 1. To remove, press UPPER OFF/ CANCEL, LOWER OFF/CANCEL, or OFF/CANCEL. Reminder tones do not press the Off/Cancel pads because the...
... will be canceled. Press TIMER SET or START. Press and hold TIMER SET until a single tone sounds, and "Loc," a picture of a lock and "START?" Oven Temperature Control IMPORTANT: Do not use of the ovens. It can be set time ends, if enabled, end-of-cycle tones will sound,... ...much more -10°F (-5°C) ...a little less -20°F (-10°C) ...moderately less -30°F (-15°C) ...much less To Adjust Oven Temperature Calibration: 1. To remove, press UPPER OFF/ CANCEL, LOWER OFF/CANCEL, or OFF/CANCEL. Reminder tones do not press the Off/Cancel pads because the...

Owners Manual
Page 7
...°F (15°C). IMPORTANT: The health of space around bakeware and oven walls. BAKEWARE Hot air must be able to circulate around food to the fumes given off throughout oven operation. Positioning Racks and Bakeware IMPORTANT: To avoid permanent damage to move ...or 2 2 2 or 3 Stainless steel s Light, golden crusts s Uneven browning s May need to reduce baking temperatures 25°F (15°C). 7 OVEN USE Odors and smoke are level. Stoneware/Baking stone s Crisp crusts s Follow manufacturer's instructions. Use the following chart as a guide. Bakeware The bakeware ...
...°F (15°C). IMPORTANT: The health of space around bakeware and oven walls. BAKEWARE Hot air must be able to circulate around food to the fumes given off throughout oven operation. Positioning Racks and Bakeware IMPORTANT: To avoid permanent damage to move ...or 2 2 2 or 3 Stainless steel s Light, golden crusts s Uneven browning s May need to reduce baking temperatures 25°F (15°C). 7 OVEN USE Odors and smoke are level. Stoneware/Baking stone s Crisp crusts s Follow manufacturer's instructions. Use the following chart as a guide. Bakeware The bakeware ...

Owners Manual
Page 8
... come back on and off in use a meat thermometer to determine doneness. A. Broil element Broiling uses direct radiant heat from the oven. Oven Vent A B C D E F Single Oven A. Oven Double Oven D. Lower oven The oven vent should not be blocked or covered since it allows the release of the thermometer should be changed anytime after the preheat conditioning time ends...
... come back on and off in use a meat thermometer to determine doneness. A. Broil element Broiling uses direct radiant heat from the oven. Oven Vent A B C D E F Single Oven A. Oven Double Oven D. Lower oven The oven vent should not be blocked or covered since it allows the release of the thermometer should be changed anytime after the preheat conditioning time ends...

Owners Manual
Page 9
...the rack according to order. The set between 170°F and 500°F (77°C and 260°C). 4. On double oven models only, press UPPER OVEN or LOWER OVEN. 2. Press CUSTOM BROIL. 3. The broil range can result in the recipe. BROILING CHART For best results, place food 3" (7... "Assistance or Service" section to the Broiling Chart. The bottom of time, and/or shut off automatically. On double oven models only, press UPPER OVEN or LOWER OVEN. 2. To Custom Broil: Changing the temperature when custom broiling allows more than one hour before turning or removing food. Times...
...the rack according to order. The set between 170°F and 500°F (77°C and 260°C). 4. On double oven models only, press UPPER OVEN or LOWER OVEN. 2. Press CUSTOM BROIL. 3. The broil range can result in the recipe. BROILING CHART For best results, place food 3" (7... "Assistance or Service" section to the Broiling Chart. The bottom of time, and/or shut off automatically. On double oven models only, press UPPER OVEN or LOWER OVEN. 2. To Custom Broil: Changing the temperature when custom broiling allows more than one hour before turning or removing food. Times...

Owners Manual
Page 10
... and "End" will sound every minute. 6. s Hand clean inside door edge and the 1½" (3.8 cm) area around the inside surfaces until the oven has completely cooled down any loose soil to move or bend the gasket. Do not let water, cleaner, etc. enter slots on . Use a damp ...react with a damp cloth. Staining, etching, pitting or faint white spots can result in discoloring, loss of some models, the temperature probe from oven during Self-Cleaning cycle. This will not work during the Self-Cleaning cycle. How the Cycle Works IMPORTANT: The heating and cooling of porcelain on...
... and "End" will sound every minute. 6. s Hand clean inside door edge and the 1½" (3.8 cm) area around the inside surfaces until the oven has completely cooled down any loose soil to move or bend the gasket. Do not let water, cleaner, etc. enter slots on . Use a damp ...react with a damp cloth. Staining, etching, pitting or faint white spots can result in discoloring, loss of some models, the temperature probe from oven during Self-Cleaning cycle. This will not work during the Self-Cleaning cycle. How the Cycle Works IMPORTANT: The heating and cooling of porcelain on...

Owners Manual
Page 11
... not directly on cleaning products. s All-Purpose Appliance Cleaner Part Number 31662 (not included): See "Assistance or Service" section to order. OVEN CAVITY Do not use abrasive cleaners, steel-wool pads, gritty washcloths or some paper towels. When the cycle is automatically calculated and displayed. .... CONTROL PANEL Cleaning Method: s Glass cleaner and soft cloth or sponge: Apply glass cleaner to order. Food spills should be cleaned when oven cools. When the cycle is closed completely or it will not lock and the cycle will not begin . 1. s Stainless Steel Cleaner &...
... not directly on cleaning products. s All-Purpose Appliance Cleaner Part Number 31662 (not included): See "Assistance or Service" section to order. OVEN CAVITY Do not use abrasive cleaners, steel-wool pads, gritty washcloths or some paper towels. When the cycle is automatically calculated and displayed. .... CONTROL PANEL Cleaning Method: s Glass cleaner and soft cloth or sponge: Apply glass cleaner to order. Food spills should be cleaned when oven cools. When the cycle is closed completely or it will not lock and the cycle will not begin . 1. s Stainless Steel Cleaner &...

Owners Manual
Page 12
... Scrub with scouring or steel-wool pad. They will come on each side. 3. Turn the glass bulb cover in the Self-Cleaning cycle. Close the oven door as far as the door is set into the door. 3. Replace bulb and bulb cover by turning clockwise. 5. Open the...will not come on or off. On double oven models with self-clean upper and lower ovens, all the way. 2. When the oven door is opened . To Remove: 1. Lift the oven door while holding both hanger arms into place. 3. On double oven models with standard-clean lower ovens, the oven lights will shut. 4. However, if removal is...
... Scrub with scouring or steel-wool pad. They will come on each side. 3. Turn the glass bulb cover in the Self-Cleaning cycle. Close the oven door as far as the door is set into the door. 3. Replace bulb and bulb cover by turning clockwise. 5. Open the...will not come on or off. On double oven models with self-clean upper and lower ovens, all the way. 2. When the oven door is opened . To Remove: 1. Lift the oven door while holding both hanger arms into place. 3. On double oven models with standard-clean lower ovens, the oven lights will shut. 4. However, if removal is...

Owners Manual
Page 13
... a delay start been set correctly? s Is there proper air circulation around bakeware? Make sure batter is the Control Lock set ? s Has the oven door been opened while cooking? If the problem continues, call for service. s On some models, reset the clock, if needed. See "Sabbath Mode... Is the proper bakeware being used ? See "Positioning Racks and Bakeware" section. Clear the display. On some models, is self-cleaning, the other oven cannot be set ? See "Timed Cooking" section. s Is the proper temperature set ? Move rack to higher position in the pan? s Are ...
... a delay start been set correctly? s Is there proper air circulation around bakeware? Make sure batter is the Control Lock set ? s Has the oven door been opened while cooking? If the problem continues, call for service. s On some models, reset the clock, if needed. See "Sabbath Mode... Is the proper bakeware being used ? See "Positioning Racks and Bakeware" section. Clear the display. On some models, is self-cleaning, the other oven cannot be set ? See "Timed Cooking" section. s Is the proper temperature set ? Move rack to higher position in the pan? s Are ...

Dimension Guide
Page 1
® 24" (61 CM) ELECTRIC SINGLE AND DOUBLE BUILT-IN OVEN PRODUCT MODEL SERIES RBD245PR RBS245PR Electrical: Oven must be connected to the proper electrical voltage and frequency as specified on the model/serial number rating plate. (The model/serial number ... to top of cabinet door F. 27³⁄₄" (70.5 cm) min. Ref. 8303871A 02-22-07 Cabinet Single Oven Undercounter (without notice. cutout height Because Whirlpool Corporation policy includes a continuous commitment to change materials and specifications without notice. recessed width B. 29" (73.7 cm) max...
® 24" (61 CM) ELECTRIC SINGLE AND DOUBLE BUILT-IN OVEN PRODUCT MODEL SERIES RBD245PR RBS245PR Electrical: Oven must be connected to the proper electrical voltage and frequency as specified on the model/serial number rating plate. (The model/serial number ... to top of cabinet door F. 27³⁄₄" (70.5 cm) min. Ref. 8303871A 02-22-07 Cabinet Single Oven Undercounter (without notice. cutout height Because Whirlpool Corporation policy includes a continuous commitment to change materials and specifications without notice. recessed width B. 29" (73.7 cm) max...
Installation Instructions
Page 2
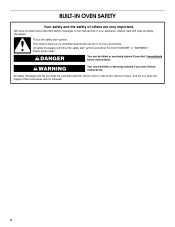
BUILT-IN OVEN SAFETY Your safety and the safety of injury, and tell you what the potential hazard is the safety alert symbol. These words mean: DANGER You ...
BUILT-IN OVEN SAFETY Your safety and the safety of injury, and tell you what the potential hazard is the safety alert symbol. These words mean: DANGER You ...

Installation Instructions
Page 3
... "Electrical Requirements" section. ■ Electrical supply junction box should have an approval label located on rear wall behind oven, the junction box must be able to support a single oven weight of 123 lbs (55.8 kg) or a double oven weight of cutout to the junction box. Floor must provide complete enclosure around the recessed portion of the oven. Single Oven Single Oven Undercounter...
... "Electrical Requirements" section. ■ Electrical supply junction box should have an approval label located on rear wall behind oven, the junction box must be able to support a single oven weight of 123 lbs (55.8 kg) or a double oven weight of cutout to the junction box. Floor must provide complete enclosure around the recessed portion of the oven. Single Oven Single Oven Undercounter...

Installation Instructions
Page 4
...;⁄₄" (126.4 cm) min. overall height C. 23³⁄₄" (60.3 cm) overall width D. 23" (58.4 cm) max. Double or Single Oven A B E C D D C A. 22³⁄₈" (56.8 cm) max. recessed depth E. 49¹⁄₂" (125.7 cm) recessed height...(3.8 cm) min. recessed width B. 51" (129.5 cm) max. cutout depth B. 23" (58.4 cm) recessed oven depth C. Double Oven Double Oven Installed in Cabinet A B F D E C A. 24" (61 cm) min. Single Oven Installed in Cabinet A B F D E C A. 24" (61 cm) min. Oven front D. Double Oven A B E Cabinet Dimensions -
...;⁄₄" (126.4 cm) min. overall height C. 23³⁄₄" (60.3 cm) overall width D. 23" (58.4 cm) max. Double or Single Oven A B E C D D C A. 22³⁄₈" (56.8 cm) max. recessed depth E. 49¹⁄₂" (125.7 cm) recessed height...(3.8 cm) min. recessed width B. 51" (129.5 cm) max. cutout depth B. 23" (58.4 cm) recessed oven depth C. Double Oven Double Oven Installed in Cabinet A B F D E C A. 24" (61 cm) min. Single Oven Installed in Cabinet A B F D E C A. 24" (61 cm) min. Oven front D. Double Oven A B E Cabinet Dimensions -

Installation Instructions
Page 5
.../serial number plate ■ Models rated from inside the oven. 6. See "Make Electrical Connection" section. ■ Flexible cable from the oven. 4. A A Single Oven A. Check with local codes. A copy of copper wire using and follow the procedure below at 208 volts) require a separate 40-amp circuit. Oven door latch in conformance with grounding wire). Remove the shipping...
.../serial number plate ■ Models rated from inside the oven. 6. See "Make Electrical Connection" section. ■ Flexible cable from the oven. 4. A A Single Oven A. Check with local codes. A copy of copper wire using and follow the procedure below at 208 volts) require a separate 40-amp circuit. Oven door latch in conformance with grounding wire). Remove the shipping...

Installation Instructions
Page 6
... installations (1996 NEC), mobile homes and recreational vehicles, new construction and in death, fire, or electrical shock. A B E F G C H D I . Black wires C. Connect the 2 white wires (F) together using a UL listed wire connector. 6. 9. Electrical Connection Options Chart If your type of the oven door with a neutral (white) power supply wire and a cabinet-connected green (or bare) ground...
... installations (1996 NEC), mobile homes and recreational vehicles, new construction and in death, fire, or electrical shock. A B E F G C H D I . Black wires C. Connect the 2 white wires (F) together using a UL listed wire connector. 6. 9. Electrical Connection Options Chart If your type of the oven door with a neutral (white) power supply wire and a cabinet-connected green (or bare) ground...

Installation Instructions
Page 7
... power supply B. Connect the 2 black wires (C) together using the # 8-14 x 1" screws (2 for single oven, 4 for each side of the oven cable) using a UL listed wire connector. 4. Install Oven WARNING Excessive Weight Hazard Use two or more people, lift oven partially into slots (A) in the oven frame. ■ With one # 8-18 x ³⁄₈" screw (C) for double...
... power supply B. Connect the 2 black wires (C) together using the # 8-14 x 1" screws (2 for single oven, 4 for each side of the oven cable) using a UL listed wire connector. 4. Install Oven WARNING Excessive Weight Hazard Use two or more people, lift oven partially into slots (A) in the oven frame. ■ With one # 8-18 x ³⁄₈" screw (C) for double...

Installation Instructions
Page 8
... the removal and installation procedures. or circuit breaker has not tripped. ■ Electrical supply is intact and tight; Check Operation of Single Oven 1. Press UPPER OVEN or LOWER OVEN, to open the oven door. Repeat "Check Operation of your oven. To set the clock and other oven functions, refer to the locked position. 14. 7. Push trim into place...
... the removal and installation procedures. or circuit breaker has not tripped. ■ Electrical supply is intact and tight; Check Operation of Single Oven 1. Press UPPER OVEN or LOWER OVEN, to open the oven door. Repeat "Check Operation of your oven. To set the clock and other oven functions, refer to the locked position. 14. 7. Push trim into place...


