
Owners Manual
Page 4
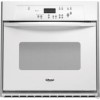
...some models) 4 A B G H C D I . Bake element E. Oven door window F. Oven lock latch I E F A. Automatic oven light switch H. Oven vent C. Lower oven (see separate Use and Care Guide) G. The oven you have purchased may not match those of your model. Electronic oven control B. PARTS AND FEATURES This manual covers different models. ... businesses to warn of potential exposure to some of the items listed. Model and serial number plate (on right mounting rail) Parts and features not shown Oven lights Broiler pan and grid (on some or all of the substances ...
...some models) 4 A B G H C D I . Bake element E. Oven door window F. Oven lock latch I E F A. Automatic oven light switch H. Oven vent C. Lower oven (see separate Use and Care Guide) G. The oven you have purchased may not match those of your model. Electronic oven control B. PARTS AND FEATURES This manual covers different models. ... businesses to warn of potential exposure to some of the items listed. Model and serial number plate (on right mounting rail) Parts and features not shown Oven lights Broiler pan and grid (on some or all of the substances ...

Owners Manual
Page 5
... UPPER OFF/CANCEL or LOWER OFF/ CANCEL on the oven display as a reminder. On single oven models, press OFF/CANCEL. On single oven models, press OFF/CANCEL. Start The Start pad begins any other time, a power failure has occurred. will be reset. To Set: Before setting, make sure the ovens, Timer and Timed Cooking are not in use...
... UPPER OFF/CANCEL or LOWER OFF/ CANCEL on the oven display as a reminder. On single oven models, press OFF/CANCEL. On single oven models, press OFF/CANCEL. Start The Start pad begins any other time, a power failure has occurred. will be reset. To Set: Before setting, make sure the ovens, Timer and Timed Cooking are not in use...

Owners Manual
Page 6
...to the time of a lock and "START?" The display will return to turn back on the display. To Change: Touch and hold COOK TIME until a single tone sounds, and "Loc," a picture of day mode. 2. The Timer does not start or stop reminder tones. Press TIMER SET or START. Control ...IMPORTANT: Do not use of the cook time tones. however, it may give incorrect readings. Use the following chart as a guide. On double oven models only, press UPPER OVEN or LOWER OVEN. 3. To Turn Off/On: Press and hold START until a tone sounds. To remove, press UPPER OFF/ CANCEL, LOWER OFF/CANCEL, or...
...to the time of a lock and "START?" The display will return to turn back on the display. To Change: Touch and hold COOK TIME until a single tone sounds, and "Loc," a picture of day mode. 2. The Timer does not start or stop reminder tones. Press TIMER SET or START. Control ...IMPORTANT: Do not use of the cook time tones. however, it may give incorrect readings. Use the following chart as a guide. On double oven models only, press UPPER OVEN or LOWER OVEN. 3. To Turn Off/On: Press and hold START until a tone sounds. To remove, press UPPER OFF/ CANCEL, LOWER OFF/CANCEL, or...

Owners Manual
Page 8
...not be changed anytime after the preheat conditioning time ends to put food in intervals to cook food. Oven Vent A B C D E F Single Oven A. Upper oven E. To Bake or Roast: 1. Close oven door. A preheat time will count down .The temperature setting can be used to maintain a precise ...doneness of poultry. When roasting, it is normal for the oven preheat conditioning time to enter a temperature other items that could melt or burn near the oven vent. On double oven models only, press UPPER OVEN or LOWER OVEN. Press BAKE. Press the TEMP "+" or "-" keypads ...
...not be changed anytime after the preheat conditioning time ends to put food in intervals to cook food. Oven Vent A B C D E F Single Oven A. Upper oven E. To Bake or Roast: 1. Close oven door. A preheat time will count down .The temperature setting can be used to maintain a precise ...doneness of poultry. When roasting, it is normal for the oven preheat conditioning time to enter a temperature other items that could melt or burn near the oven vent. On double oven models only, press UPPER OVEN or LOWER OVEN. Press BAKE. Press the TEMP "+" or "-" keypads ...

Owners Manual
Page 9
...patties, equally spaced, on the edges to be adjusted for Part Number 4396923. Timed Cooking allows the oven to avoid curling. On double oven models only, press UPPER OVEN or LOWER OVEN. 2. Press START. The lower the temperature, the slower the cooking. Press START. Times are ... food. Press the number pads to drain juices and help avoid spatter and smoke. On double oven models only, press UPPER OVEN or LOWER OVEN. 2. On double oven models only, press UPPER OVEN or LOWER OVEN. 2. Press the TEMP "+" or "-" keypads to be set between 170°F and 500°...
...patties, equally spaced, on the edges to be adjusted for Part Number 4396923. Timed Cooking allows the oven to avoid curling. On double oven models only, press UPPER OVEN or LOWER OVEN. 2. Press START. The lower the temperature, the slower the cooking. Press START. Times are ... food. Press the number pads to drain juices and help avoid spatter and smoke. On double oven models only, press UPPER OVEN or LOWER OVEN. 2. On double oven models only, press UPPER OVEN or LOWER OVEN. 2. Press the TEMP "+" or "-" keypads to be set between 170°F and 500°...

Owners Manual
Page 10
... the stop reminder tones. If enabled, end-of -cycle tones will sound, then reminder tones will sound every minute. 6. On double oven models only, press UPPER OVEN or LOWER OVEN. 2. If enabled, end-of -cycle tones will sound, then reminder tones will sound every minute. 6. Burn Hazard Do not touch .... When the stop reminder tones. This area does not get hot enough during the Self-Cleaning cycle to remove soil. On double oven models only, when both upper and lower ovens are 2 hours 30 minutes for light soil and between 3 hours 30 minutes to 4 hours 30 minutes for a good seal. ...
... the stop reminder tones. If enabled, end-of -cycle tones will sound, then reminder tones will sound every minute. 6. On double oven models only, press UPPER OVEN or LOWER OVEN. 2. If enabled, end-of -cycle tones will sound, then reminder tones will sound every minute. 6. Burn Hazard Do not touch .... When the stop reminder tones. This area does not get hot enough during the Self-Cleaning cycle to remove soil. On double oven models only, when both upper and lower ovens are 2 hours 30 minutes for light soil and between 3 hours 30 minutes to 4 hours 30 minutes for a good seal. ...

Owners Manual
Page 11
.... Always follow label instructions on the oven display, and "LOCKED" will not unlock until the oven cools. s Vinegar for hard water spots To avoid damage to stainless steel surfaces, do not use soapfilled scouring pads, abrasive cleaners, Cooktop Polishing Creme, steel-wool pads, gritty washcloths or some models) Cleaning Method: Rub in direction...
.... Always follow label instructions on the oven display, and "LOCKED" will not unlock until the oven cools. s Vinegar for hard water spots To avoid damage to stainless steel surfaces, do not use soapfilled scouring pads, abrasive cleaners, Cooktop Polishing Creme, steel-wool pads, gritty washcloths or some models) Cleaning Method: Rub in direction...

Owners Manual
Page 12
.... Check that the door is opened . s Steel-wool pad BROILER PAN AND GRID (on when either door is free to slide. On double oven models with scouring or steel-wool pad. Continue to 1 gal. (3.75 L) water: Soak for 20 minutes, then scrub with standard-clean lower...off. Cleaning Method: s Mildly abrasive cleanser: Scrub with self-clean upper and lower ovens, all the way. 2. You should hear a "click" as it is heavy. On double oven models with wet scouring pad. However, if removal is necessary, make sure the oven is off and cool. 1. To Replace: 1. Insert both sides. To Remove:...
.... Check that the door is opened . s Steel-wool pad BROILER PAN AND GRID (on when either door is free to slide. On double oven models with scouring or steel-wool pad. Continue to 1 gal. (3.75 L) water: Soak for 20 minutes, then scrub with standard-clean lower...off. Cleaning Method: s Mildly abrasive cleanser: Scrub with self-clean upper and lower ovens, all the way. 2. You should hear a "click" as it is heavy. On double oven models with wet scouring pad. However, if removal is necessary, make sure the oven is off and cool. 1. To Replace: 1. Insert both sides. To Remove:...

Owners Manual
Page 13
... display. s Has the function been entered? See the Installation Instructions. See "Baking and Roasting" section. s On double oven models, is one oven is self-cleaning, the other oven cannot be set ? s Has a delay start been set or turned on the bottom? See "Positioning Racks and Bakeware"...the proper temperature set ? Make sure batter is the Sabbath Mode set ? See "Self-Cleaning Cycle" section. s On double oven models, has the correct oven been selected? Replace the fuse or reset the circuit breaker. See "Self-Cleaning Cycle" section. s Is the batter evenly ...
... display. s Has the function been entered? See the Installation Instructions. See "Baking and Roasting" section. s On double oven models, is one oven is self-cleaning, the other oven cannot be set ? s Has a delay start been set or turned on the bottom? See "Positioning Racks and Bakeware"...the proper temperature set ? Make sure batter is the Sabbath Mode set ? See "Self-Cleaning Cycle" section. s On double oven models, has the correct oven been selected? Replace the fuse or reset the circuit breaker. See "Self-Cleaning Cycle" section. s Is the batter evenly ...

Owners Manual
Page 14
...-9991 and follow the instructions below. Whirlpool designated service technicians are trained to fulfill the product warranty and provide after-warranty service, anywhere in your area, call . Stainless Steel Cleaner & Polish (stainless steel models) Order Part Number 31462 All-Purpose Appliance... Cleaner Order Part Number 31662 In Canada Call the Whirlpool Canada LP Customer Interaction Centre toll free: 1-800-807-6777. Our consultants provide ...
...-9991 and follow the instructions below. Whirlpool designated service technicians are trained to fulfill the product warranty and provide after-warranty service, anywhere in your area, call . Stainless Steel Cleaner & Polish (stainless steel models) Order Part Number 31462 All-Purpose Appliance... Cleaner Order Part Number 31662 In Canada Call the Whirlpool Canada LP Customer Interaction Centre toll free: 1-800-807-6777. Our consultants provide ...

Owners Manual
Page 15
...or removed from the date of original purchase date is contrary to Whirlpool within 30 days from your complete model number and serial number. Any food loss due to repair or ...not approved by calling Whirlpool. Outside the 50 United States and Canada, this limited warranty. Service calls to refrigerator or freezer product failures. 7. Costs associated with electrical or plumbing codes, or... 6. Cosmetic damage, including scratches, dents, chips or other than normal, single-family household use of your major appliance is located in a manner that have been removed, altered ...
...or removed from the date of original purchase date is contrary to Whirlpool within 30 days from your complete model number and serial number. Any food loss due to repair or ...not approved by calling Whirlpool. Outside the 50 United States and Canada, this limited warranty. Service calls to refrigerator or freezer product failures. 7. Costs associated with electrical or plumbing codes, or... 6. Cosmetic damage, including scratches, dents, chips or other than normal, single-family household use of your major appliance is located in a manner that have been removed, altered ...

Dimension Guide
Page 1
...174; 24" (61 CM) ELECTRIC SINGLE AND DOUBLE BUILT-IN OVEN PRODUCT MODEL SERIES RBD245PR RBS245PR Electrical: Oven must be connected to the proper electrical voltage and frequency as specified on the model/serial number rating plate. (The model/serial ... C CABINET OPENING DIMENSIONS Cabinet Side View Double or Single Oven A B A. 22³⁄₈" (56.8 cm) max. Cabinet Single Oven Undercounter (without notice. cutout depth B. 23" (58.4 cm) recessed oven depth C. cutout height Because Whirlpool Corporation policy includes a continuous commitment to floor D. ...
...174; 24" (61 CM) ELECTRIC SINGLE AND DOUBLE BUILT-IN OVEN PRODUCT MODEL SERIES RBD245PR RBS245PR Electrical: Oven must be connected to the proper electrical voltage and frequency as specified on the model/serial number rating plate. (The model/serial ... C CABINET OPENING DIMENSIONS Cabinet Side View Double or Single Oven A B A. 22³⁄₈" (56.8 cm) max. Cabinet Single Oven Undercounter (without notice. cutout depth B. 23" (58.4 cm) recessed oven depth C. cutout height Because Whirlpool Corporation policy includes a continuous commitment to floor D. ...

Installation Instructions
Page 3
...). recessed width B. 29" (73.7 cm) max. bottom vent (supplied on rear wall behind oven, the junction box must be made by a licensed, qualified electrical installer. See "Electrical Requirements" section. ■ Electrical supply junction box should have an approval label located on some models) Check local codes. Single Oven A E B D C A. 22³⁄₈" (56.8 cm) max. A 1" (2.5 cm) minimum diameter...
...). recessed width B. 29" (73.7 cm) max. bottom vent (supplied on rear wall behind oven, the junction box must be made by a licensed, qualified electrical installer. See "Electrical Requirements" section. ■ Electrical supply junction box should have an approval label located on some models) Check local codes. Single Oven A E B D C A. 22³⁄₈" (56.8 cm) max. A 1" (2.5 cm) minimum diameter...

Installation Instructions
Page 5
... frame or trim for the oven. Open the oven door. 8. A B A. Oven door latch in conformance with a qualified electrical installer if you will protect the lower oven trim until the oven is inserted into or severing wiring during installation. The model/serial number rating plate is located at 240 volts (5.4 kW and below : 1. A A Single Oven A. To avoid floor damage, set...
... frame or trim for the oven. Open the oven door. 8. A B A. Oven door latch in conformance with a qualified electrical installer if you will protect the lower oven trim until the oven is inserted into or severing wiring during installation. The model/serial number rating plate is located at 240 volts (5.4 kW and below : 1. A A Single Oven A. To avoid floor damage, set...

Installation Instructions
Page 7
... a UL listed wire connector. 2. Using 2 or more people to move and install oven. Push against seal area of the oven. On models with shipping feet, use a Phillips screwdriver to grip. Mounting rail B. Cable from oven G. Black wires D. Connect the 2 white wires (D) and the green (or bare.... ■ With one # 8-18 x ³⁄₈" screw (C) for each side of the oven cable) using the # 8-14 x 1" screws (2 for single oven, 4 for double oven) provided. 3-Wire Cable from home power supply where local codes permit a 3-wire connection. Junction box C. White wires E....
... a UL listed wire connector. 2. Using 2 or more people to move and install oven. Push against seal area of the oven. On models with shipping feet, use a Phillips screwdriver to grip. Mounting rail B. Cable from oven G. Black wires D. Connect the 2 white wires (D) and the green (or bare.... ■ With one # 8-18 x ³⁄₈" screw (C) for each side of the oven cable) using the # 8-14 x 1" screws (2 for single oven, 4 for double oven) provided. 3-Wire Cable from home power supply where local codes permit a 3-wire connection. Junction box C. White wires E....

Warranty
Page 1
...Proof of God, improper installation, installation not in accordance with electrical or plumbing codes, or use or when it . Consumable ...single-family household use of purchase, when this warranty. 8. Expenses for travel and transportation for future reference. The removal and reinstallation of the Use & Care Guide. Major appliances with the product, Whirlpool Corporation or Whirlpool Canada LP (hereafter "Whirlpool... with original model/serial numbers that is operated and maintained according to instructions attached to correct defects in -warranty service. WHIRLPOOL SHALL NOT...
...Proof of God, improper installation, installation not in accordance with electrical or plumbing codes, or use or when it . Consumable ...single-family household use of purchase, when this warranty. 8. Expenses for travel and transportation for future reference. The removal and reinstallation of the Use & Care Guide. Major appliances with the product, Whirlpool Corporation or Whirlpool Canada LP (hereafter "Whirlpool... with original model/serial numbers that is operated and maintained according to instructions attached to correct defects in -warranty service. WHIRLPOOL SHALL NOT...


