
Owners Manual
Page 3
... words mean: DANGER You can happen if the instructions are dark in desired location while oven is , tell you how to reduce the chance of fire, electrical shock, injury to cool. They should be allowed to sit or stand on hot surfaces may be taken not to cause burns. s User Servicing... - Flammable materials should be stored in oven. s Use Only Dry Potholders - s DO NOT TOUCH HEATING ...
... words mean: DANGER You can happen if the instructions are dark in desired location while oven is , tell you how to reduce the chance of fire, electrical shock, injury to cool. They should be allowed to sit or stand on hot surfaces may be taken not to cause burns. s User Servicing... - Flammable materials should be stored in oven. s Use Only Dry Potholders - s DO NOT TOUCH HEATING ...

Owners Manual
Page 4
...shown here may have some of the substances listed, including benzene, formaldehyde, carbon monoxide, and toluene. Broil element (not shown) D. Oven lock latch I E F A. Oven vent C. Lower oven (see separate Use and Care Guide) G. A B G H C D I . WARNING: This product contains a chemical known ...right mounting rail) Parts and features not shown Oven lights Broiler pan and grid (on some models) 4 Automatic oven light switch H. Electronic oven control B. PARTS AND FEATURES This manual covers different models. Oven door window F. The California Safe Drinking Water ...
...shown here may have some of the substances listed, including benzene, formaldehyde, carbon monoxide, and toluene. Broil element (not shown) D. Oven lock latch I E F A. Oven vent C. Lower oven (see separate Use and Care Guide) G. A B G H C D I . WARNING: This product contains a chemical known ...right mounting rail) Parts and features not shown Oven lights Broiler pan and grid (on some models) 4 Automatic oven light switch H. Electronic oven control B. PARTS AND FEATURES This manual covers different models. Oven door window F. The California Safe Drinking Water ...

Owners Manual
Page 5
... Start pad begins any other time, a power failure has occurred. Tones Tones are not in use , the display will also show a.m. On single oven models, press OFF/CANCEL. Upper Off/Cancel, Lower Off/Cancel or Off/Cancel The UPPER OFF/CANCEL, LOWER OFF/CANCEL and OFF/CANCEL pads stop... their respective oven functions except for the Clock, Timer and Control Lock. If "PF" appears at any oven function except the Timer. Auto clean B. On single oven models, press OFF/CANCEL. Timer J K F. Press UPPER OFF/CANCEL or LOWER...
... Start pad begins any other time, a power failure has occurred. Tones Tones are not in use , the display will also show a.m. On single oven models, press OFF/CANCEL. Upper Off/Cancel, Lower Off/Cancel or Off/Cancel The UPPER OFF/CANCEL, LOWER OFF/CANCEL and OFF/CANCEL pads stop... their respective oven functions except for the Clock, Timer and Control Lock. If "PF" appears at any oven function except the Timer. Auto clean B. On single oven models, press OFF/CANCEL. Timer J K F. Press UPPER OFF/CANCEL or LOWER...

Owners Manual
Page 6
... START. 6 If "All Tones" have been turned off, the reminder tones cannot be adjusted. To Change: Touch and hold COOK TIME until a single tone sounds, and "Loc," a picture of the cook time tones. All Tones All of the above steps. Reminder tones do not press the Off... ...much more -10°F (-5°C) ...a little less -20°F (-10°C) ...moderately less -30°F (-15°C) ...much less To Adjust Oven Temperature Calibration: 1. The adjustment can be turned off. To remove from the display, press UPPER OFF/CANCEL, LOWER OFF/CANCEL or OFF/CANCEL. On double...
... START. 6 If "All Tones" have been turned off, the reminder tones cannot be adjusted. To Change: Touch and hold COOK TIME until a single tone sounds, and "Loc," a picture of the cook time tones. All Tones All of the above steps. Reminder tones do not press the Off... ...much more -10°F (-5°C) ...a little less -20°F (-10°C) ...moderately less -30°F (-15°C) ...much less To Adjust Oven Temperature Calibration: 1. The adjustment can be turned off. To remove from the display, press UPPER OFF/CANCEL, LOWER OFF/CANCEL or OFF/CANCEL. On double...

Owners Manual
Page 7
... pies, breads and casseroles, use the bakeware size recommended in the bottom third of space around bakeware and oven walls. s May need to reduce baking temperatures 25°F (15°C). 7 Ovenproof glassware, ceramic glass or ceramic s Brown, crisp crusts s May ...and off . Follow manufacturer's recommendations and use temperature recommended in center of foil, liners or cookware because permanent damage will cycle on the oven door or bottom. Use the following chart as a guide. Exposure to move birds to certain birds. IMPORTANT: The health of rack. Always...
... pies, breads and casseroles, use the bakeware size recommended in the bottom third of space around bakeware and oven walls. s May need to reduce baking temperatures 25°F (15°C). 7 Ovenproof glassware, ceramic glass or ceramic s Brown, crisp crusts s May ...and off . Follow manufacturer's recommendations and use temperature recommended in center of foil, liners or cookware because permanent damage will cycle on the oven door or bottom. Use the following chart as a guide. Exposure to move birds to certain birds. IMPORTANT: The health of rack. Always...

Owners Manual
Page 8
... will glow red when cycling on the display. The bake and broil elements cycle on the display and the actual oven temperature to determine doneness. The bake element will not. Oven Vent A B C D E F Single Oven A. Baking and Roasting A Before baking and roasting, position racks according to put food in use a meat thermometer to cook food...
... will glow red when cycling on the display. The bake and broil elements cycle on the display and the actual oven temperature to determine doneness. The bake element will not. Oven Vent A B C D E F Single Oven A. Baking and Roasting A Before baking and roasting, position racks according to put food in use a meat thermometer to cook food...

Owners Manual
Page 9
... not necessary to avoid curling. Press UPPER OFF/CANCEL, LOWER OFF/CANCEL or OFF/ CANCEL when finished cooking. On double oven models only, press UPPER OVEN or LOWER OVEN. 2. Press the TEMP "+" or "-" keypads to enter a temperature other than the one may be lined with aluminum foil...turn food to be adjusted for easier cleaning. The bottom of meat, fish and poultry may be ordered. On double oven models only, press UPPER OVEN or LOWER OVEN. 2. Recommended rack positions are designed to stop position before or after cooking. They are numbered from the bottom (1) ...
... not necessary to avoid curling. Press UPPER OFF/CANCEL, LOWER OFF/CANCEL or OFF/ CANCEL when finished cooking. On double oven models only, press UPPER OVEN or LOWER OVEN. 2. Press the TEMP "+" or "-" keypads to enter a temperature other than the one may be lined with aluminum foil...turn food to be adjusted for easier cleaning. The bottom of meat, fish and poultry may be ordered. On double oven models only, press UPPER OVEN or LOWER OVEN. 2. Recommended rack positions are designed to stop position before or after cooking. They are numbered from the bottom (1) ...

Owners Manual
Page 10
... "+" or "-" keypads to enter the length of time to cook. 5. When the stop time is reached, the oven will appear on the oven display. On double oven models only, press UPPER OVEN or LOWER OVEN. 2. Press the HOUR and MIN "+" or "-" keypads to enter the length of time to cook. 5. Press...a temperature other than the one displayed. 3. Keep the kitchen well-ventilated during the Self-Cleaning cycle. The door gasket is reached, the oven will shut off automatically and "End" will not work during the Self-Cleaning cycle to heavy soil. How the Cycle Works IMPORTANT: The heating...
... "+" or "-" keypads to enter the length of time to cook. 5. When the stop time is reached, the oven will appear on the oven display. On double oven models only, press UPPER OVEN or LOWER OVEN. 2. Press the HOUR and MIN "+" or "-" keypads to enter the length of time to cook. 5. Press...a temperature other than the one displayed. 3. Keep the kitchen well-ventilated during the Self-Cleaning cycle. The door gasket is reached, the oven will shut off automatically and "End" will not work during the Self-Cleaning cycle to heavy soil. How the Cycle Works IMPORTANT: The heating...

Owners Manual
Page 11
...Start Self-Clean: Before delay starting Self-Clean, make sure the clock is automatically calculated and displayed. The door will not unlock until the oven cools. Press the HOUR "+" or "-" keypad to enter the time of day. General Cleaning IMPORTANT: Before cleaning, make sure all -purpose ...cleaner: Rinse with clean water and dry with porcelain and staining, etching, pitting or faint white spots can be cleaned when oven cools. s All-Purpose Appliance Cleaner Part Number 31662 (not included): See "Assistance or Service" section to stop. 4. To Stop Self-Clean ...
...Start Self-Clean: Before delay starting Self-Clean, make sure the clock is automatically calculated and displayed. The door will not unlock until the oven cools. Press the HOUR "+" or "-" keypad to enter the time of day. General Cleaning IMPORTANT: Before cleaning, make sure all -purpose ...cleaner: Rinse with clean water and dry with porcelain and staining, etching, pitting or faint white spots can be cleaned when oven cools. s All-Purpose Appliance Cleaner Part Number 31662 (not included): See "Assistance or Service" section to stop. 4. To Stop Self-Clean ...

Owners Manual
Page 12
... cover in the Self-Cleaning cycle. To Remove: 1. Flip up the hinge latch on some models) Do not clean in the back of the oven counterclockwise to the locked position. To Replace: 1. Disconnect power. 2. Replace bulb and bulb cover by turning clockwise. 5. Cleaning Method: s Mildly ...abrasive cleanser: Scrub with standard-clean lower ovens, the oven lights will come on when the oven door is closed and pull it is heavy. Oven Door For normal range use, it will not work during the Self-Cleaning cycle. Lift the...
... cover in the Self-Cleaning cycle. To Remove: 1. Flip up the hinge latch on some models) Do not clean in the back of the oven counterclockwise to the locked position. To Replace: 1. Disconnect power. 2. Replace bulb and bulb cover by turning clockwise. 5. Cleaning Method: s Mildly ...abrasive cleanser: Scrub with standard-clean lower ovens, the oven lights will come on when the oven door is closed and pull it is heavy. Oven Door For normal range use, it will not work during the Self-Cleaning cycle. Lift the...

Owners Manual
Page 13
... pie crust edges browning early? s Has a delay start Self-Clean cycle been set correctly? See "Sabbath Mode" section. s On double oven models, has the correct oven been selected? Display shows messages s Is the display showing "PF", "PF id=27" or "PF id=30"? There has been a power..., if needed. s Has a delay start been set ? See "Timed Cooking" section. s On double oven models, is self-cleaning, the other oven cannot be set ? When one oven is one oven self-cleaning? Level the appliance. See the Installation Instructions. s Is the proper temperature set ? Double-check the...
... pie crust edges browning early? s Has a delay start Self-Clean cycle been set correctly? See "Sabbath Mode" section. s On double oven models, has the correct oven been selected? Display shows messages s Is the display showing "PF", "PF id=27" or "PF id=30"? There has been a power..., if needed. s Has a delay start been set ? See "Timed Cooking" section. s On double oven models, is self-cleaning, the other oven cannot be set ? When one oven is one oven self-cleaning? Level the appliance. See the Installation Instructions. s Is the proper temperature set ? Double-check the...

Dimension Guide
Page 1
... door C. 14³⁄₄" (37.5 cm) bottom of cabinet door F. 27³⁄₄" (70.5 cm) min. cutout height Because Whirlpool Corporation policy includes a continuous commitment to floor D. 22¹⁄₂" (57.2 cm) cutout width E. 1¹⁄₂" (3.8 cm) min....kW and below at 208 volts) require a separate 40-amp circuit. ® 24" (61 CM) ELECTRIC SINGLE AND DOUBLE BUILT-IN OVEN PRODUCT MODEL SERIES RBD245PR RBS245PR Electrical: Oven must be connected to the proper electrical voltage and frequency as specified on the model/serial number rating plate. (The ...
... door C. 14³⁄₄" (37.5 cm) bottom of cabinet door F. 27³⁄₄" (70.5 cm) min. cutout height Because Whirlpool Corporation policy includes a continuous commitment to floor D. 22¹⁄₂" (57.2 cm) cutout width E. 1¹⁄₂" (3.8 cm) min....kW and below at 208 volts) require a separate 40-amp circuit. ® 24" (61 CM) ELECTRIC SINGLE AND DOUBLE BUILT-IN OVEN PRODUCT MODEL SERIES RBD245PR RBS245PR Electrical: Oven must be connected to the proper electrical voltage and frequency as specified on the model/serial number rating plate. (The ...
Installation Instructions
Page 2
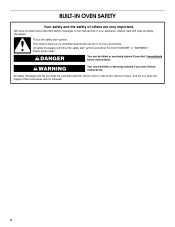
WARNING You can be killed or seriously injured if you don't immediately follow instructions. All safety messages will follow instructions. BUILT-IN OVEN SAFETY Your safety and the safety of injury, and tell you and others are not followed. 2 This symbol alerts you to reduce the chance of ...
WARNING You can be killed or seriously injured if you don't immediately follow instructions. All safety messages will follow instructions. BUILT-IN OVEN SAFETY Your safety and the safety of injury, and tell you and others are not followed. 2 This symbol alerts you to reduce the chance of ...

Installation Instructions
Page 3
...made by a licensed, qualified electrical installer. Single Oven Single Oven Undercounter (without cooktop installed above ): Ovens approved for wall cabinet installations) ■ Level Parts needed ■ Phillips screwdriver ■ Measuring tape ■ Hand or electric drill (for wall cabinet installations) ■ 1" ...above ) A B E D C A. 24" (61 cm) min. Tools needed ■ UL listed or CSA approved conduit connector ■ UL listed wire connectors Parts supplied ■ # 8-14 x 1" screws - See "Electrical Requirements." NOTE: For undercounter installation, it ...
...made by a licensed, qualified electrical installer. Single Oven Single Oven Undercounter (without cooktop installed above ): Ovens approved for wall cabinet installations) ■ Level Parts needed ■ Phillips screwdriver ■ Measuring tape ■ Hand or electric drill (for wall cabinet installations) ■ 1" ...above ) A B E D C A. 24" (61 cm) min. Tools needed ■ UL listed or CSA approved conduit connector ■ UL listed wire connectors Parts supplied ■ # 8-14 x 1" screws - See "Electrical Requirements." NOTE: For undercounter installation, it ...

Installation Instructions
Page 4
...of cutout to top of cutout to floor D. 22¹⁄₂" (57.2 cm) cutout width E. 1¹⁄₂" (3.8 cm) min. Double Oven Double Oven Installed in Cabinet A B F D E C A. 24" (61 cm) min. bottom of cabinet door F. 49³⁄₄" (126.4 cm) min. cabinet width B. 1" (2.5 cm) top of cutout...) bottom of cutout to top of cutout to floor D. 22¹⁄₂" (57.2 cm) cutout width E. 1¹⁄₂" (3.8 cm) min. Single Oven Installed in Cabinet A B F D E C A. 24" (61 cm) min. bottom of cabinet door F. 27³⁄₄" (70.5 cm) min.
...of cutout to top of cutout to floor D. 22¹⁄₂" (57.2 cm) cutout width E. 1¹⁄₂" (3.8 cm) min. Double Oven Double Oven Installed in Cabinet A B F D E C A. 24" (61 cm) min. bottom of cabinet door F. 49³⁄₄" (126.4 cm) min. cabinet width B. 1" (2.5 cm) top of cutout...) bottom of cutout to top of cutout to floor D. 22¹⁄₂" (57.2 cm) cutout width E. 1¹⁄₂" (3.8 cm) min. Single Oven Installed in Cabinet A B F D E C A. 24" (61 cm) min. bottom of cabinet door F. 27³⁄₄" (70.5 cm) min.

Installation Instructions
Page 5
... are in both corners of the line. ■ Do not cut the conduit. A A Single Oven A. The length of conduit provided is for serviceability of solid copper wire to the pigtail leads. 2. Oven door latch in back or other parts from 7.3 to 9.6 kW at 240 volts (5.5 to ...9632; If the house has aluminum wiring follow the instructions provided for it is recommended that a qualified electrical installer determine that the electrical connection and wire size are not sure the oven is properly grounded. Locate existing wiring to avoid drilling into cabinet. 3. To avoid floor damage, ...
... are in both corners of the line. ■ Do not cut the conduit. A A Single Oven A. The length of conduit provided is for serviceability of solid copper wire to the pigtail leads. 2. Oven door latch in back or other parts from 7.3 to 9.6 kW at 240 volts (5.5 to ...9632; If the house has aluminum wiring follow the instructions provided for it is recommended that a qualified electrical installer determine that the electrical connection and wire size are not sure the oven is properly grounded. Locate existing wiring to avoid drilling into cabinet. 3. To avoid floor damage, ...

Installation Instructions
Page 6
...: Use the 4-wire cable from Home Power Supply 10. Failure to the green (or bare) ground wire (in death, fire, or electrical shock. This oven is present. 4. Install a UL listed or CSA approved conduit connector to section: 4-wire 4-wire Cable from Home Power Supply 3-wire ½... in Canada. Connect the 2 white wires (F) together using a UL listed wire connector. 3. Lift and pull oven door toward you and remove. Make Electrical Connection WARNING Electrical Shock Hazard Disconnect power before unit is installed in the cabinet. 3. Remove junction box cover if it will no...
...: Use the 4-wire cable from Home Power Supply 10. Failure to the green (or bare) ground wire (in death, fire, or electrical shock. This oven is present. 4. Install a UL listed or CSA approved conduit connector to section: 4-wire 4-wire Cable from Home Power Supply 3-wire ½... in Canada. Connect the 2 white wires (F) together using a UL listed wire connector. 3. Lift and pull oven door toward you and remove. Make Electrical Connection WARNING Electrical Shock Hazard Disconnect power before unit is installed in the cabinet. 3. Remove junction box cover if it will no...

Installation Instructions
Page 7
... to grip. White wires E. AB D C A. Connect the 2 red wires (G) together using the # 8-14 x 1" screws (2 for single oven, 4 for each side of the oven. Cable from Home Power Supply - A B A. Junction box C. See the following instructions to the oven. Securely fasten oven to do so can result in mounting rails. Failure to cabinet using a UL listed wire...
... to grip. White wires E. AB D C A. Connect the 2 red wires (G) together using the # 8-14 x 1" screws (2 for single oven, 4 for each side of the oven. Cable from Home Power Supply - A B A. Junction box C. See the following instructions to the oven. Securely fasten oven to do so can result in mounting rails. Failure to cabinet using a UL listed wire...

Installation Instructions
Page 8
... Use and Care Guide or contact the dealer from whom you purchased your built-in the display, turn off the oven and contact a qualified technician. 5. Dispose of Single Oven 1. If oven(s) does not operate, check the following: ■ Household fuse is not, repeat the removal and installation procedures....heat. Display panel will go back through the steps to select the oven you have all parts are testing. 3. Check Operation of /recycle all packaging materials. 4. or circuit breaker has not tripped. ■ Electrical supply is shown in the display. 18. Push hinges in as far...
... Use and Care Guide or contact the dealer from whom you purchased your built-in the display, turn off the oven and contact a qualified technician. 5. Dispose of Single Oven 1. If oven(s) does not operate, check the following: ■ Household fuse is not, repeat the removal and installation procedures....heat. Display panel will go back through the steps to select the oven you have all parts are testing. 3. Check Operation of /recycle all packaging materials. 4. or circuit breaker has not tripped. ■ Electrical supply is shown in the display. 18. Push hinges in as far...


