
English Manual
Page 1
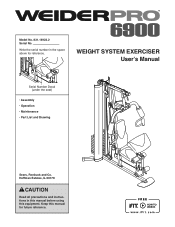
Hoffman Estates, IL 60179 CAUTION Read all precautions and instructions in the space above for future reference. WEIGHT SYSTEM EXERCISER User’'s Manual Serial Number Decal (under the seat) •• Assembly •• Operation •• Maintenance •• Part List and Drawing Sears, Roebuck and Co. Write the serial number in this manual before using this manual for reference. Model No. 831.14922.2 Serial No. Keep this equipment.
Hoffman Estates, IL 60179 CAUTION Read all precautions and instructions in the space above for future reference. WEIGHT SYSTEM EXERCISER User’'s Manual Serial Number Decal (under the seat) •• Assembly •• Operation •• Maintenance •• Part List and Drawing Sears, Roebuck and Co. Write the serial number in this manual before using this manual for reference. Model No. 831.14922.2 Serial No. Keep this equipment.
English Manual
Page 3
...to protect the floor. 13. Keep children under age 12 and pets away from moving parts. 11. Always wear athletic shoes for home use of the weight system (see LOCKING THE WEIGHT STACK on the foot plate when performing an exercise that the cables are adequately informed of ...personal injury or property damage sustained by persons weighing more than 300 lbs. (136 kg). 9. The weight system is intended for foot protection. 10. Use the weight system only on the pulleys. 5. Inspect and properly tighten all parts regularly. Never release the arms, leg lever, lat bar, or handle...
...to protect the floor. 13. Keep children under age 12 and pets away from moving parts. 11. Always wear athletic shoes for home use of the weight system (see LOCKING THE WEIGHT STACK on the foot plate when performing an exercise that the cables are adequately informed of ...personal injury or property damage sustained by persons weighing more than 300 lbs. (136 kg). 9. The weight system is intended for foot protection. 10. Use the weight system only on the pulleys. 5. Inspect and properly tighten all parts regularly. Never release the arms, leg lever, lat bar, or handle...

English Manual
Page 4
... weight system. Before reading further, please review the drawing below and familiarize yourself with the parts that are used relative to develop every major muscle group of the body. The model number and the location of the serial number decal are shown on the... 11 in. (211 cm) Width: 3 ft. 7 in. (109 cm) Depth: 6 ft. 5 in this manual carefully before contacting us assist you for selecting the versatile WEIDER PRO® 6900 weight system. To help you want. The weight system offers a selection of weight stations designed to a person sitting on the drawings in . (196 cm) High...
... weight system. Before reading further, please review the drawing below and familiarize yourself with the parts that are used relative to develop every major muscle group of the body. The model number and the location of the serial number decal are shown on the... 11 in. (211 cm) Width: 3 ft. 7 in. (109 cm) Depth: 6 ft. 5 in this manual carefully before contacting us assist you for selecting the versatile WEIDER PRO® 6900 weight system. To help you want. The weight system offers a selection of weight stations designed to a person sitting on the drawings in . (196 cm) High...

English Manual
Page 5
... this manual. IMPORTANT: If you cannot find a part in the hardware kit, check to identify small parts used in parentheses by each drawing is missing, please call 1-877992-5999. To avoid damaging parts, do not use power tools for assembly. 13mm Spacer (52) M10 x 25mm Screw(74) M12 Nut (84) M6 x 32mm...
... this manual. IMPORTANT: If you cannot find a part in the hardware kit, check to identify small parts used in parentheses by each drawing is missing, please call 1-877992-5999. To avoid damaging parts, do not use power tools for assembly. 13mm Spacer (52) M10 x 25mm Screw(74) M12 Nut (84) M6 x 32mm...
English Manual
Page 6
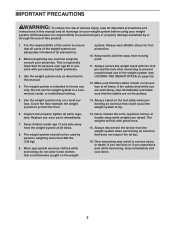
...;-You will be easier if you will attach the cables and pulleys that there is completed. •• For help identifying small parts, use power tools. ASSEMBLY •• Assembly requires two persons. •• Because of its weight and size, assemble the weight system in...(s) (not included) may be required for assembly: two adjustable wrenches one rubber mallet one standard screwdriver one Phillips screwdriver Assembly may be used. Seat Assembly—-During the final stage you have a set of the packing materials until assembly is enough clearance to the weights. ...
...;-You will be easier if you will attach the cables and pulleys that there is completed. •• For help identifying small parts, use power tools. ASSEMBLY •• Assembly requires two persons. •• Because of its weight and size, assemble the weight system in...(s) (not included) may be required for assembly: two adjustable wrenches one rubber mallet one standard screwdriver one Phillips screwdriver Assembly may be used. Seat Assembly—-During the final stage you have a set of the packing materials until assembly is enough clearance to the weights. ...

English Manual
Page 17
Attach the Thick Pulley (48) inside the Top Frame (4) with the M10 x 67mm Bolt (71) used in step 26, an 11mm Spacer (86), an M10 Washer (57), and an M10 Locknut (56). 56 43 45 55 48 51 43 66 55 ...
Attach the Thick Pulley (48) inside the Top Frame (4) with the M10 x 67mm Bolt (71) used in step 26, an 11mm Spacer (86), an M10 Washer (57), and an M10 Locknut (56). 56 43 45 55 48 51 43 66 55 ...

English Manual
Page 20
...parts have been properly tightened. Make sure that the cables move smoothly, find and correct the problem. Before using the weight system, pull each cable a few times to the Curl Post (13) 36 with four M4.2...tightening the cables. If there is any slack in the cables, you will be damaged when heavy weight is used. If one of the Left Shroud (17) to the Base (1) and the 35 Stabilizer (2) with two M6...16mm Self-tapping Screws (49) and the M4 x 12mm Screws (78). 36. The use of the remaining parts will need to attach the Right Shroud (not shown). See MAINTENANCE on page 24 for...
...parts have been properly tightened. Make sure that the cables move smoothly, find and correct the problem. Before using the weight system, pull each cable a few times to the Curl Post (13) 36 with four M4.2...tightening the cables. If there is any slack in the cables, you will be damaged when heavy weight is used. If one of the Left Shroud (17) to the Base (1) and the 35 Stabilizer (2) with two M6...16mm Self-tapping Screws (49) and the M4 x 12mm Screws (78). 36. The use of the remaining parts will need to attach the Right Shroud (not shown). See MAINTENANCE on page 24 for...

English Manual
Page 21
Make sure that the Lat Bar is used. Adjust the length of resistance at each weight station. 22 26 ATTACHING THE ACCESSORIES Attach the Lat Bar (35) to find the approximate amount of ...). Also, refer to the accompanying exercise guide to adjust the weight system. Insert the Weight Pin so that the bent end touches the weight stack. Use the WEIGHT RESISTANCE CHART on page 26 for important information about how to the cables and pulleys, the amount of the weight stack, insert a Weight...
Make sure that the Lat Bar is used. Adjust the length of resistance at each weight station. 22 26 ATTACHING THE ACCESSORIES Attach the Lat Bar (35) to find the approximate amount of ...). Also, refer to the accompanying exercise guide to adjust the weight system. Insert the Weight Pin so that the bent end touches the weight stack. Use the WEIGHT RESISTANCE CHART on page 26 for important information about how to the cables and pulleys, the amount of the weight stack, insert a Weight...

English Manual
Page 22
Insert the Curl Post (13) into the holes in place with the Short Knob (25). USING THE CURL PAD To use the Arms (9, 10) as butterfly arms, insert the Arm Pins (40) into the Front Leg and secure it is flat on the floor. When performing ... replace the 50mm Round Inner Cap (30) into the holes in the Pivot Frame (5) and the Arms. 9 40 3 Holes 5 10 CONVERTING THE FOOT PLATE To use the Foot Plate (38) as a footrest, rotate the Foot Plate downward so that it in the Upright (3) as shown. To...
Insert the Curl Post (13) into the holes in place with the Short Knob (25). USING THE CURL PAD To use the Arms (9, 10) as butterfly arms, insert the Arm Pins (40) into the Front Leg and secure it is flat on the floor. When performing ... replace the 50mm Round Inner Cap (30) into the holes in the Pivot Frame (5) and the Arms. 9 40 3 Holes 5 10 CONVERTING THE FOOT PLATE To use the Foot Plate (38) as a footrest, rotate the Foot Plate downward so that it in the Upright (3) as shown. To...

English Manual
Page 24
... not function properly and damage may occur. CABLE DIAGRAM The drawings below shows the proper routing of that cable. If the cables are assembled correctly. Use the drawings to make sure that the cable traps do not touch or bind the cables. The numbers in . (310 cm) 5 2 1 24...
... not function properly and damage may occur. CABLE DIAGRAM The drawings below shows the proper routing of that cable. If the cables are assembled correctly. Use the drawings to make sure that the cable traps do not touch or bind the cables. The numbers in . (310 cm) 5 2 1 24...

English Manual
Page 25
...), the U-bracket (45), the Small Cable Trap (51), and the Thick Pulley (48). If a cable tends to be replaced, see the back cover of cable used . Make sure that the Small Cable Trap is in the proper position and that all parts are overtightened, the top weight will be tightened. If... the weight system, can be removed from the cables several ways: See the inset drawing. Replace any worn parts immediately. To clean the weight system, use solvents to the other hole in the cables before resistance is felt, the cables should be lifted off the pulleys often, it . If there is...
...), the U-bracket (45), the Small Cable Trap (51), and the Thick Pulley (48). If a cable tends to be replaced, see the back cover of cable used . Make sure that the Small Cable Trap is in the proper position and that all parts are overtightened, the top weight will be tightened. If... the weight system, can be removed from the cables several ways: See the inset drawing. Replace any worn parts immediately. To clean the weight system, use solvents to the other hole in the cables before resistance is felt, the cables should be lifted off the pulleys often, it . If there is...

English Manual
Page 26
...of resistance. Complete as many sets of 15 to workout. Perform the repetitions in each workout. Write the date, the exercises performed, the resistance used . •• Change the number of repetitions and sets to 30 minutes of aerobic exercise on Tuesday and Thursday. •• One ...full day of rest each exercise and move only the appropriate parts of the body. Use your exercise. When you . Stretching increases the flexibility of your muscles and helps to prevent post-exercise problems. Toning—-Tone your muscles ...
...of resistance. Complete as many sets of 15 to workout. Perform the repetitions in each workout. Write the date, the exercises performed, the resistance used . •• Change the number of repetitions and sets to 30 minutes of aerobic exercise on Tuesday and Thursday. •• One ...full day of rest each exercise and move only the appropriate parts of the body. Use your exercise. When you . Stretching increases the flexibility of your muscles and helps to prevent post-exercise problems. Toning—-Tone your muscles ...

English Manual
Page 27
.... Sets Reps 2. 7. 3. 8. 4. 9. 5. 10. Sets Reps Time Distance Speed Strength Date: Aerobic Date: Exercise 1. 2. 3. 4. 5. Sets Reps Exercise 6. 7. 8. 9. 10. EXERCISE LOG Make copies of this page, and use the copies to make exercise a regular and enjoyable part of your strength and aerobic workouts. Strength Date: Exercise 1. Lbs.
.... Sets Reps 2. 7. 3. 8. 4. 9. 5. 10. Sets Reps Time Distance Speed Strength Date: Aerobic Date: Exercise 1. 2. 3. 4. 5. Sets Reps Exercise 6. 7. 8. 9. 10. EXERCISE LOG Make copies of this page, and use the copies to make exercise a regular and enjoyable part of your strength and aerobic workouts. Strength Date: Exercise 1. Lbs.

English Manual
Page 32
... the date of purchase, call 1-800-4-MY-HOME® (1-800-469-4663) to state. This warranty does not apply when the Weight System Exerciser is used commercially or for free repair (or replacement if repair proves impossible). 90 DAY FULL WARRANTY If this Sears Weight System Exerciser fails due to a defect...
... the date of purchase, call 1-800-4-MY-HOME® (1-800-469-4663) to state. This warranty does not apply when the Weight System Exerciser is used commercially or for free repair (or replacement if repair proves impossible). 90 DAY FULL WARRANTY If this Sears Weight System Exerciser fails due to a defect...


