DVR 508 Camera Manual
Page 1
Windows and the Windows logo are the property of Microsoft Corporation. All rights reserved. DVR 508 Digital Video Camcorder User‟s Manual © 2010 Sakar International, Inc. All other trademarks are registered trademarks of their respective companies.
Windows and the Windows logo are the property of Microsoft Corporation. All rights reserved. DVR 508 Digital Video Camcorder User‟s Manual © 2010 Sakar International, Inc. All other trademarks are registered trademarks of their respective companies.
DVR 508 Camera Manual
Page 2
Table of Contents Introduction ...2 Key Features...2 What your digital video camcorder includes 3 Computer System Requirements for Windows XP 4 Computer System Requirement for Windows Vista / Windows 7 4 Computer System Requirements for Macintosh 5 A Quick Look at ... Capture Settings options 23 Audio Mode...30 Playback mode ...31 Camcorder Setup Mode 45 Connecting the Camcorder to a TV 51 Install the Vivitar Experience Image Manager Software 52 Connect your camcorder to the computer 56 Get photos and videos from your camcorder to your computer 56 Get started! ...58 Transfer media from...
Table of Contents Introduction ...2 Key Features...2 What your digital video camcorder includes 3 Computer System Requirements for Windows XP 4 Computer System Requirement for Windows Vista / Windows 7 4 Computer System Requirements for Macintosh 5 A Quick Look at ... Capture Settings options 23 Audio Mode...30 Playback mode ...31 Camcorder Setup Mode 45 Connecting the Camcorder to a TV 51 Install the Vivitar Experience Image Manager Software 52 Connect your camcorder to the computer 56 Get photos and videos from your camcorder to your computer 56 Get started! ...58 Transfer media from...
DVR 508 Camera Manual
Page 3
Please read this manual carefully FIRST in order to use the camcorder normally. In addition, an SD compatible memoy card of up to 16GB needs to be inserted in order to get the most out of your ...; 5 digital camera resolutions - 5M(2592X1944); 3M(2048X1536); 2M(1600X1200); 1M(1280X960); Key Features 5 modes - Everything you for purchasing the DVR 508 Digital Video Camcorder. VGA(640X480) 2 Transfer media from my camcorder to my computer manually (Using Macintosh) ...59 Sakar Warranty Card 60 Technical Support 62 Technical Specifications 62 Frequently Asked Questions 63...
Please read this manual carefully FIRST in order to use the camcorder normally. In addition, an SD compatible memoy card of up to 16GB needs to be inserted in order to get the most out of your ...; 5 digital camera resolutions - 5M(2592X1944); 3M(2048X1536); 2M(1600X1200); 1M(1280X960); Key Features 5 modes - Everything you for purchasing the DVR 508 Digital Video Camcorder. VGA(640X480) 2 Transfer media from my camcorder to my computer manually (Using Macintosh) ...59 Sakar Warranty Card 60 Technical Support 62 Technical Specifications 62 Frequently Asked Questions 63...

DVR 508 Camera Manual
Page 4
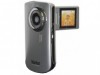
...16GB Built-in Microphone Delete, rotate, protect, crop and print photos directly on and from your camcorder Vivitar Experience Image Manager software for uploading and managing photos and videos to or from the most popular photo sharing and social ...network websites Get photos and videos from your camera, manage and organize your digital video camcorder includes Digital Video Camcorder Vivitar Experience Image Manager software Installation CD Quick Start Guide USB cable TV Out cable ...
...16GB Built-in Microphone Delete, rotate, protect, crop and print photos directly on and from your camcorder Vivitar Experience Image Manager software for uploading and managing photos and videos to or from the most popular photo sharing and social ...network websites Get photos and videos from your camera, manage and organize your digital video camcorder includes Digital Video Camcorder Vivitar Experience Image Manager software Installation CD Quick Start Guide USB cable TV Out cable ...

DVR 508 Camera Manual
Page 8
... camera‟s batteries. Insert the batteries according to 2.2V, a "Battery Low" message will appear on the inside of the camcorder. 2. Replace and close the battery cover. Insert the batteries into the camcorder: 1. When battery voltage drops to the polarities (+ and -) indicated on the LCD and the camera will turn off automatically. Inserting...
... camera‟s batteries. Insert the batteries according to 2.2V, a "Battery Low" message will appear on the inside of the camcorder. 2. Replace and close the battery cover. Insert the batteries into the camcorder: 1. When battery voltage drops to the polarities (+ and -) indicated on the LCD and the camera will turn off automatically. Inserting...

DVR 508 Camera Manual
Page 9
...sound. Note: Media sitting on the memory card is not lost when your camcorder before transferring them to be inserted into your DV camcorder in the direction shown. 3. Press the memory card until you capture with the camcorder. 8 Inserting an SD Memory Card An SD/SDHC compatible memory card of the... camcorder. 2. The memory card when properly inserted will sit flush with your camcorder‟s power runs low or on the bottom of up to 16GB...
...sound. Note: Media sitting on the memory card is not lost when your camcorder before transferring them to be inserted into your DV camcorder in the direction shown. 3. Press the memory card until you capture with the camcorder. 8 Inserting an SD Memory Card An SD/SDHC compatible memory card of the... camcorder. 2. The memory card when properly inserted will sit flush with your camcorder‟s power runs low or on the bottom of up to 16GB...

DVR 508 Camera Manual
Page 10
... from water and other liquids. Moisture creates the danger of electric shock. 9 Never use the video camcorder with the camcorder (see the Setup section further on in the manual for instruction on the SD Memory Card including protected data. Do not remove the SD ...memory Card during formatting as this video camcorder in any way. Note: After you read and understand the safety precautions described below: Do not try to open the case of the video...
... from water and other liquids. Moisture creates the danger of electric shock. 9 Never use the video camcorder with the camcorder (see the Setup section further on in the manual for instruction on the SD Memory Card including protected data. Do not remove the SD ...memory Card during formatting as this video camcorder in any way. Note: After you read and understand the safety precautions described below: Do not try to open the case of the video...

DVR 508 Camera Manual
Page 11
... to flip open the LCD Screen. The LCD monitor will light up indicating that your DVR camcorder off. The DVR camcorder will switch off . The Power button is situated on your DVR. Power off Press the Power button to install the Vivitar Experience Image Manager software. Use only the recommended power accessories. To power on...
... to flip open the LCD Screen. The LCD monitor will light up indicating that your DVR camcorder off. The DVR camcorder will switch off . The Power button is situated on your DVR. Power off Press the Power button to install the Vivitar Experience Image Manager software. Use only the recommended power accessories. To power on...

DVR 508 Camera Manual
Page 12
...first time after purchasing it, be sure to choose a language and set the date & time before using the video camcorder for the language interface of the camcorder to change to close the menu and exit the Setup function. Press the Right button on the LCD screen. The...the Language submenu. 6. Press the MENU button to the language you desire. 7. Setting the Language When using the video camcorder. 1. Change the camcorder`s mode There are four modes in this DVR camcorder. 1. Turn the Power on the OK dial and select the Language option. 5. When there is insufficient battery power, ...
...first time after purchasing it, be sure to choose a language and set the date & time before using the video camcorder for the language interface of the camcorder to change to close the menu and exit the Setup function. Press the Right button on the LCD screen. The...the Language submenu. 6. Press the MENU button to the language you desire. 7. Setting the Language When using the video camcorder. 1. Change the camcorder`s mode There are four modes in this DVR camcorder. 1. Turn the Power on the OK dial and select the Language option. 5. When there is insufficient battery power, ...

DVR 508 Camera Manual
Page 13
... A compatible SD card of the LCD screen. Audio mode For recording audio files. Capturing Videos In order to capture videos (with audio) using your camcorder you need to capture and save videos. To change the mode. 4. The video default capture mode appears on the top left of the LCD. 12... On turning on your DVR, press the MODE button on your camcorder the first mode Video mode appears and is changed. 2. Press the MODE button on the bottom left corner of the LCD screen...
... A compatible SD card of the LCD screen. Audio mode For recording audio files. Capturing Videos In order to capture videos (with audio) using your camcorder you need to capture and save videos. To change the mode. 4. The video default capture mode appears on the top left of the LCD. 12... On turning on your DVR, press the MODE button on your camcorder the first mode Video mode appears and is changed. 2. Press the MODE button on the bottom left corner of the LCD screen...

DVR 508 Camera Manual
Page 14
Aim the camcorder at that resolution and memory appears on the LCD screen when you attempt to digitally zoom into and back out of the LCD. 2. When the ... recording. 8. Once they are poor, press the LED / Right button. 13 1. The recorded file will appear on the top right on the top of the camcorder to resume recording. 6. You can view the AVI files in the middle and again to start shooting. 4. Press the T (Zoom In) or W (Zoom Out) buttons...
Aim the camcorder at that resolution and memory appears on the LCD screen when you attempt to digitally zoom into and back out of the LCD. 2. When the ... recording. 8. Once they are poor, press the LED / Right button. 13 1. The recorded file will appear on the top right on the top of the camcorder to resume recording. 6. You can view the AVI files in the middle and again to start shooting. 4. Press the T (Zoom In) or W (Zoom Out) buttons...

DVR 508 Camera Manual
Page 15
... for you to choose from: [HD] 1280x720, [D1] 720x480, [VGA] 640x480, [QVGA] 320x240 pixels The higher the resolution selected the better the quality of the camcorder to offer better lighting. You can magnify your subject up more memory. Press the T button on the bottom right corner of the... camcorder to Zoom back out. 3. Press the W button to Zoom In into the object. 2. To turn off the LED light, press the LED / Right button again. ...
... for you to choose from: [HD] 1280x720, [D1] 720x480, [VGA] 640x480, [QVGA] 320x240 pixels The higher the resolution selected the better the quality of the camcorder to offer better lighting. You can magnify your subject up more memory. Press the T button on the bottom right corner of the... camcorder to Zoom back out. 3. Press the W button to Zoom In into the object. 2. To turn off the LED light, press the LED / Right button again. ...
DVR 508 Camera Manual
Page 19
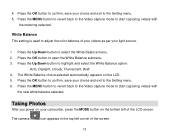
... start capturing videos with the new white balance selected. Press the MENU button to revert back to the Video capture mode to confirm, save your camcorder, press the MODE button on the bottom left corner of the LCD screen. Taking Photos After you power on the LCD. 5. 4. Press the OK button...
... start capturing videos with the new white balance selected. Press the MENU button to revert back to the Video capture mode to confirm, save your camcorder, press the MODE button on the bottom left corner of the LCD screen. Taking Photos After you power on the LCD. 5. 4. Press the OK button...

DVR 508 Camera Manual
Page 20
... your shot. 1. Either download the photos to your computer using the Vivitar Experience Image Manager software as described below in the section "Transfer photos and videos to digitally zoom into and back out of the camcorder. 2. Press the T (Zoom In) or W (Zoom Out) buttons located on the top of the object. 3. A capture...
... your shot. 1. Either download the photos to your computer using the Vivitar Experience Image Manager software as described below in the section "Transfer photos and videos to digitally zoom into and back out of the camcorder. 2. Press the T (Zoom In) or W (Zoom Out) buttons located on the top of the object. 3. A capture...

DVR 508 Camera Manual
Page 21
.... Digital Zoom function You can include yourself in a photo by using the digital zoom. 1. Press the W button to Zoom In into the object. 2. Place the camcorder on a tripod or on the front of the LCD screen. Two LED white lamp lights will light up to 4 times using this feature to delay... Shutter button. LED Lamp When light conditions are 2 methods to activate the Self-Timer. 20 Press the T button on the bottom right corner of the camcorder to offer better lighting. To turn off the LED light, press the LED / Right button again. The digital zoom digit icon appears on the top...
.... Digital Zoom function You can include yourself in a photo by using the digital zoom. 1. Press the W button to Zoom In into the object. 2. Place the camcorder on a tripod or on the front of the LCD screen. Two LED white lamp lights will light up to 4 times using this feature to delay... Shutter button. LED Lamp When light conditions are 2 methods to activate the Self-Timer. 20 Press the T button on the bottom right corner of the camcorder to offer better lighting. To turn off the LED light, press the LED / Right button again. The digital zoom digit icon appears on the top...

DVR 508 Camera Manual
Page 22
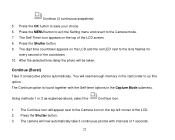
...: 2 Seconds, 10 Seconds, Continue (3 continuous snapshots) 4. Method 1: 1. Method 2: 1. In the camera mode, press the Left button. 2. The Self-Timer icon on the front of the camcorder next to the lens flashes for every second of the LCD will be taken. Press the OK button to select the Capture Mode menu option...
...: 2 Seconds, 10 Seconds, Continue (3 continuous snapshots) 4. Method 1: 1. Method 2: 1. In the camera mode, press the Left button. 2. The Self-Timer icon on the front of the camcorder next to the lens flashes for every second of the LCD will be taken. Press the OK button to select the Capture Mode menu option...
DVR 508 Camera Manual
Page 23
... will need enough memory in the Capture Mode submenu. The Continue icon will now automatically take 3 continuous photos with the Self-timer options in the camcorder to the Camera icon on the top of the LCD. 2. The Self-Timer icon appears on the top left corner of the LCD screen. 8. Continue...
... will need enough memory in the Capture Mode submenu. The Continue icon will now automatically take 3 continuous photos with the Self-timer options in the camcorder to the Camera icon on the top of the LCD. 2. The Self-Timer icon appears on the top left corner of the LCD screen. 8. Continue...
DVR 508 Camera Manual
Page 30
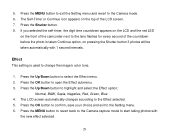
... be taken automatically with the new effect selected. 29 Press the Shutter button. 8. Effect This setting is taken Continue option, on the front of the camcorder next to change the image‟s color tone. 1. The LCD screen automatically changes according to start taking photos with 1 second intervals. Press the MENU button...
... be taken automatically with the new effect selected. 29 Press the Shutter button. 8. Effect This setting is taken Continue option, on the front of the camcorder next to change the image‟s color tone. 1. The LCD screen automatically changes according to start taking photos with 1 second intervals. Press the MENU button...

DVR 508 Camera Manual
Page 31
Audio Mode You can record audio clips with the audio icon appearing on the top left corner of the LCD screen until the Audio screen appears. The Audio screen will appear with your camcorder. After you power on your audio clips depends on the bottom left after capturing videos and taking photos. Insert an SD card to expand the memory capacity of the camcorder to enjoy many more hours of time to record your camcorder, press the MODE button on how much memory is left of the screen. 30 The amount of recording.
Audio Mode You can record audio clips with the audio icon appearing on the top left corner of the LCD screen until the Audio screen appears. The Audio screen will appear with your camcorder. After you power on your audio clips depends on the bottom left after capturing videos and taking photos. Insert an SD card to expand the memory capacity of the camcorder to enjoy many more hours of time to record your camcorder, press the MODE button on how much memory is left of the screen. 30 The amount of recording.

DVR 508 Camera Manual
Page 32
...to being recording. 2. mode button on the center left corner of the LCD. 4. After you wish to select the image you power on your camcorder, press the playback LCD panel. The lapsed time for recording the audio clip appears in WAV format. Playback mode You can playback the videos, photos... and audio files in the bottom left of the The Playback screen will appear with the Jpeg icon appearing in your camcorder or attach the TV-out cable to watch them on your TV screen. A Photo file appears with the Playback icon appearing on the ...
...to being recording. 2. mode button on the center left corner of the LCD. 4. After you wish to select the image you power on your camcorder, press the playback LCD panel. The lapsed time for recording the audio clip appears in WAV format. Playback mode You can playback the videos, photos... and audio files in the bottom left of the The Playback screen will appear with the Jpeg icon appearing in your camcorder or attach the TV-out cable to watch them on your TV screen. A Photo file appears with the Playback icon appearing on the ...


