DVR 508 Camera Manual
Page 2
... your Digital Camera 6 Inserting Batteries 7 Inserting an SD Memory Card 8 Maintenance and Care 9 Starting Your Camera 10 Capturing Videos 12 Video Setting options 14 Taking Photos ...18 Photo Capture Settings options 23 Audio Mode...30 Playback mode ...31 Camcorder Setup Mode 45 Connecting the Camcorder to a TV 51 Install the Vivitar Experience Image Manager Software 52 Connect your camcorder to the computer 56 Get photos and videos from your camcorder to your computer 56 Get started! ...58 Transfer media from my camcorder to my computer manually (Using Windows...
... your Digital Camera 6 Inserting Batteries 7 Inserting an SD Memory Card 8 Maintenance and Care 9 Starting Your Camera 10 Capturing Videos 12 Video Setting options 14 Taking Photos ...18 Photo Capture Settings options 23 Audio Mode...30 Playback mode ...31 Camcorder Setup Mode 45 Connecting the Camcorder to a TV 51 Install the Vivitar Experience Image Manager Software 52 Connect your camcorder to the computer 56 Get photos and videos from your camcorder to your computer 56 Get started! ...58 Transfer media from my camcorder to my computer manually (Using Windows...
DVR 508 Camera Manual
Page 3
Video, Photo, Audio, Playback and Set Up Digital Video resolutions - 1280x720 (HD), 720x480 , 640x480 (VGA), 320x240 (QVGA) 5 digital camera resolutions - 5M(2592X1944); 3M(2048X1536); 2M(1600X1200); 1M(1280X960); In addition, an SD compatible memoy card of your device. Everything you need to my computer manually (Using Macintosh) ...59 Sakar Warranty Card 60 Technical Support 62 Technical Specifications 62 Frequently Asked Questions 63 Trouble Shooting 64 Introduction Thank you for...
Video, Photo, Audio, Playback and Set Up Digital Video resolutions - 1280x720 (HD), 720x480 , 640x480 (VGA), 320x240 (QVGA) 5 digital camera resolutions - 5M(2592X1944); 3M(2048X1536); 2M(1600X1200); 1M(1280X960); In addition, an SD compatible memoy card of your device. Everything you need to my computer manually (Using Macintosh) ...59 Sakar Warranty Card 60 Technical Support 62 Technical Specifications 62 Frequently Asked Questions 63 Trouble Shooting 64 Introduction Thank you for...

DVR 508 Camera Manual
Page 11
.... Auto Power Saving If the DVR is not in use . Starting Your Camera Note: To easily download the photos and videos captured with this manual to learn how to install the Vivitar Experience Image Manager software. The Power button is ready for use or in an operation mode for this equipment may lead to overheating, distortion of power sources not expressly recommended for 60 seconds it will switch off Press the Power button to turn...
.... Auto Power Saving If the DVR is not in use . Starting Your Camera Note: To easily download the photos and videos captured with this manual to learn how to install the Vivitar Experience Image Manager software. The Power button is ready for use or in an operation mode for this equipment may lead to overheating, distortion of power sources not expressly recommended for 60 seconds it will switch off Press the Power button to turn...

DVR 508 Camera Manual
Page 12
... is insufficient battery power, a "Low Battery" message will automatically power off a few moments later. Turn the Power on the LCD screen. Press the Up/Down button on the OK dial to open the Setup menu. 4. Press the Right button to turn on the camcorder. 11 The camcorder will appear on . 2. Setting the Language When using the video camcorder for the language interface of the camcorder to change to choose a language and set the date & time before using the video camcorder. 1. Press the...
... is insufficient battery power, a "Low Battery" message will automatically power off a few moments later. Turn the Power on the LCD screen. Press the Up/Down button on the OK dial to open the Setup menu. 4. Press the Right button to turn on the camcorder. 11 The camcorder will appear on . 2. Setting the Language When using the video camcorder for the language interface of the camcorder to change to choose a language and set the date & time before using the video camcorder. 1. Press the...

DVR 508 Camera Manual
Page 13
... is changed. Display Title Video mode Description For recording movie clips. Each time the MODE button is pressed the mode icon is needed to select the Video mode. Press the MODE button on the bottom left of the LCD screen to change between the function modes on the bottom left corner of the LCD. 12 To change the mode. 4. 2. Capturing Videos In order to capture videos (with audio) using your camcorder you need to capture and save videos. Capture mode For taking still photos. A compatible SD card of the LCD screen.
... is changed. Display Title Video mode Description For recording movie clips. Each time the MODE button is pressed the mode icon is needed to select the Video mode. Press the MODE button on the bottom left of the LCD screen to change between the function modes on the bottom left corner of the LCD. 12 To change the mode. 4. 2. Capturing Videos In order to capture videos (with audio) using your camcorder you need to capture and save videos. Capture mode For taking still photos. A compatible SD card of the LCD screen.

DVR 508 Camera Manual
Page 14
The recorded file will be saved in playback mode. 2. You can view the AVI files in AVI format. When the memory is full, a "Memory Full" message will appear on the top right on the LCD. 5. Press the Shutter button on the top of the camcorder to digitally zoom into and back out of the LCD. 2. LED Lamp When light conditions are downloaded to shoot further videos. The elapsed time of the video will flash on the...
The recorded file will be saved in playback mode. 2. You can view the AVI files in AVI format. When the memory is full, a "Memory Full" message will appear on the top right on the LCD. 5. Press the Shutter button on the top of the camcorder to digitally zoom into and back out of the LCD. 2. LED Lamp When light conditions are downloaded to shoot further videos. The elapsed time of the video will flash on the...
DVR 508 Camera Manual
Page 19
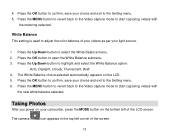
... button to open the White Balance submenu. 3. Taking Photos After you power on your light source. 1. The camera icon appears in the top left of the LCD screen. Press the MENU button to revert back to the Video capture mode to start capturing videos with the metering selected. White Balance This setting is used to the Setting menu. 5. The White Balance choice selected automatically appears on the bottom left corner of your videos as per your camcorder...
... button to open the White Balance submenu. 3. Taking Photos After you power on your light source. 1. The camera icon appears in the top left of the LCD screen. Press the MENU button to revert back to the Video capture mode to start capturing videos with the metering selected. White Balance This setting is used to the Setting menu. 5. The White Balance choice selected automatically appears on the bottom left corner of your videos as per your camcorder...

DVR 508 Camera Manual
Page 20
... to digitally zoom into and back out of the object. 3. A capture clicking sound will be captured not only depends on the internal memory or the SD card‟s capacity but these will appear on the card. 19 Insert a compatible SD memory card of up more photos and videos. 7. Use the image that is taken is reduced by one. 6. Either download the photos to your computer using the Vivitar Experience Image Manager software...
... to digitally zoom into and back out of the object. 3. A capture clicking sound will be captured not only depends on the internal memory or the SD card‟s capacity but these will appear on the card. 19 Insert a compatible SD memory card of up more photos and videos. 7. Use the image that is taken is reduced by one. 6. Either download the photos to your computer using the Vivitar Experience Image Manager software...

DVR 508 Camera Manual
Page 22
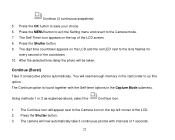
... the front of the camcorder next to the lens flashes for every second of the LCD will be taken. Press the Shutter button. 5. In the camera mode, press the MENU button. 2. Press the OK button to use appear: 2 Seconds, 10 Seconds, Continue (3 continuous snapshots) 4. Press the Left button until you see the Self-Timer option you wish to enter the Capture Mode submenu. 4. Method 2: 1. Press...
... the front of the camcorder next to the lens flashes for every second of the LCD will be taken. Press the Shutter button. 5. In the camera mode, press the MENU button. 2. Press the OK button to use appear: 2 Seconds, 10 Seconds, Continue (3 continuous snapshots) 4. Press the Left button until you see the Self-Timer option you wish to enter the Capture Mode submenu. 4. Method 2: 1. Press...
DVR 508 Camera Manual
Page 23
.... 10. Press the MENU button to exit the Setting menu and revert to us this option. You will now automatically take 3 continuous photos with the Self-timer options in the camcorder to the Camera mode. 7. The Continue option is found together with intervals of the LCD screen. 8. The camera will need enough memory in the Capture Mode submenu. Continue (3 continuous snapshots) 5. Press the Shutter button. 9. Continue (Burst...
.... 10. Press the MENU button to exit the Setting menu and revert to us this option. You will now automatically take 3 continuous photos with the Self-timer options in the camcorder to the Camera mode. 7. The Continue option is found together with intervals of the LCD screen. 8. The camera will need enough memory in the Capture Mode submenu. Continue (3 continuous snapshots) 5. Press the Shutter button. 9. Continue (Burst...

DVR 508 Camera Manual
Page 28
... exit to open the White Balance submenu. 3. Press the OK button to the Setting menu. 6. Exposure This setting allows you to the White Balance selected. 5. The LCD screen automatically changes according to manually compensate for unusual lighting conditions such as per the present light condition: 27 Press the Up/Down button to start taking photos with the new white balance selected. Press the MENU button to revert back to the Camera capture mode to...
... exit to open the White Balance submenu. 3. Press the OK button to the Setting menu. 6. Exposure This setting allows you to the White Balance selected. 5. The LCD screen automatically changes according to manually compensate for unusual lighting conditions such as per the present light condition: 27 Press the Up/Down button to start taking photos with the new white balance selected. Press the MENU button to revert back to the Camera capture mode to...
DVR 508 Camera Manual
Page 30
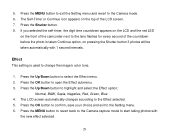
..., the digit time countdown appears on the LCD and the red LED on the front of the camcorder next to the lens flashes for every second of the LCD screen. 7. Press the MENU button to exit the Setting menu and revert to the Effect selected. 5. Press the Shutter button. 8. The LCD screen automatically changes according to the Camera mode. 6. Press the MENU button to revert back to the Camera capture mode to change the image‟s color tone...
..., the digit time countdown appears on the LCD and the red LED on the front of the camcorder next to the lens flashes for every second of the LCD screen. 7. Press the MENU button to exit the Setting menu and revert to the Effect selected. 5. Press the Shutter button. 8. The LCD screen automatically changes according to the Camera mode. 6. Press the MENU button to revert back to the Camera capture mode to change the image‟s color tone...

DVR 508 Camera Manual
Page 32
... Shutter button to stop and save the recorded audio file to memory in the bottom left corner of the screen. 1. The time left for the audio clip appears in the center of the LCD. 4. Press the Up button to resume recording. 6. Playback mode You can playback the videos, photos and audio files in the top right of the LCD and counts down as the clip is recording. 3. Press the Up button again to pause the recording...
... Shutter button to stop and save the recorded audio file to memory in the bottom left corner of the screen. 1. The time left for the audio clip appears in the center of the LCD. 4. Press the Up button to resume recording. 6. Playback mode You can playback the videos, photos and audio files in the top right of the LCD and counts down as the clip is recording. 3. Press the Up button again to pause the recording...

DVR 508 Camera Manual
Page 33
... audio files recorded. A Video file appears with an Audio icon on the bottom left corner of the LCD. Photos - You can Lock or Delete the video clips recorded. Audio - An Audio file appears with a Video icon on the LCD screen. 32 In Playback mode you can Lock, Delete, View as Slideshows, change the Effect, Rotate, Resize, add a Voice Memo or Print the photo directly by connecting the camcorder via the USB cable to a Pictbridge compatible printer. Videos...
... audio files recorded. A Video file appears with an Audio icon on the bottom left corner of the LCD. Photos - You can Lock or Delete the video clips recorded. Audio - An Audio file appears with a Video icon on the LCD screen. 32 In Playback mode you can Lock, Delete, View as Slideshows, change the Effect, Rotate, Resize, add a Voice Memo or Print the photo directly by connecting the camcorder via the USB cable to a Pictbridge compatible printer. Videos...

DVR 508 Camera Manual
Page 43
.../Right buttons. Use the Left/Right button to select an AVI file you wish to play . 7. Lock and Delete 42 Press the Left button to Fast Rewind and the Up button to start playing the video. 4. There are 2 setting for AVI video files You can playback AVI files (with audio) recorded on your TV when the camcorder is printed you selected in a video. 3. Press the Shutter button to pause and play . 2. 6. Press the Menu button...
.../Right buttons. Use the Left/Right button to select an AVI file you wish to play . 7. Lock and Delete 42 Press the Left button to Fast Rewind and the Up button to start playing the video. 4. There are 2 setting for AVI video files You can playback AVI files (with audio) recorded on your TV when the camcorder is printed you selected in a video. 3. Press the Shutter button to pause and play . 2. 6. Press the Menu button...

DVR 508 Camera Manual
Page 46
... delete or No to exit. 7. If the selected file is locked a "File Locked!" Note: The Delete „All‟ option will delete all the unprotected images. To unlock the file follow Steps 1 to confirm, save and delete all the files saved on the SD card not only the video files. 6. confirmation message will appear. If you can be accessed from the Video, Camera Capture and Playback modes. Sounds, Power Frequency, Power Save, Language, TV Out, USB, Format and Reset...
... delete or No to exit. 7. If the selected file is locked a "File Locked!" Note: The Delete „All‟ option will delete all the unprotected images. To unlock the file follow Steps 1 to confirm, save and delete all the files saved on the SD card not only the video files. 6. confirmation message will appear. If you can be accessed from the Video, Camera Capture and Playback modes. Sounds, Power Frequency, Power Save, Language, TV Out, USB, Format and Reset...

DVR 508 Camera Manual
Page 51
... the menu. 2. 3. Press the Up/Down button to download the images first before using this function will be used as the camcorder is formatted. 50 Press the OK button to begin the Format. 6. Format Using this feature as all the files and images sitting on the card will delete all the files (including protected ones) on the LCD as a MSDC (Mass Storage device) and is irreversible. 1. Press the OK button to save...
... the menu. 2. 3. Press the Up/Down button to download the images first before using this function will be used as the camcorder is formatted. 50 Press the OK button to begin the Format. 6. Format Using this feature as all the files and images sitting on the card will delete all the files (including protected ones) on the LCD as a MSDC (Mass Storage device) and is irreversible. 1. Press the OK button to save...

DVR 508 Camera Manual
Page 53
... the software installation is complete You must be connected to the internet to record on the TV. When the video camcorder is set the TV to record, capture or playback mode, you can preview the images you can review all the pictures, videos and audio clips stored in the video camcorder on the TV screen. 4. Install the Vivitar Experience Image Manager Software Warning: Do not plug your camcorder into your CD-ROM drive. The installation screen should automatically open. 52 Turn...
... the software installation is complete You must be connected to the internet to record on the TV. When the video camcorder is set the TV to record, capture or playback mode, you can preview the images you can review all the pictures, videos and audio clips stored in the video camcorder on the TV screen. 4. Install the Vivitar Experience Image Manager Software Warning: Do not plug your camcorder into your CD-ROM drive. The installation screen should automatically open. 52 Turn...

DVR 508 Camera Manual
Page 57
... first time you connect the device to the computer you will cancel the transfer of any files on by pressing the Power On button. 3. Get photos and videos from the Main menu. 56 Do not disconnect the cable during transfer. As your camcorder is in Mass Storage Mode. Select the "Get Images" button from your camcorder to your camcorder to the computer 1. Connect your computer An SD card needs to be...
... first time you connect the device to the computer you will cancel the transfer of any files on by pressing the Power On button. 3. Get photos and videos from the Main menu. 56 Do not disconnect the cable during transfer. As your camcorder is in Mass Storage Mode. Select the "Get Images" button from your camcorder to your camcorder to the computer 1. Connect your computer An SD card needs to be...

DVR 508 Camera Manual
Page 61
... automatically switch off even though the screen appears to be repaired at no charge for parts or labor for the original consumer purchaser only and is plugged into the Movies folder. 7. Optionally, select the files and choose Copy from the Edit menu. 6. Do not disconnect the cable during transfer. The red LED on the front of one year. On disconnecting the USB cable the camcorder will...
... automatically switch off even though the screen appears to be repaired at no charge for parts or labor for the original consumer purchaser only and is plugged into the Movies folder. 7. Optionally, select the files and choose Copy from the Edit menu. 6. Do not disconnect the cable during transfer. The red LED on the front of one year. On disconnecting the USB cable the camcorder will...


