
User Manual
Page 2
..., DATA, NETWORK SYSTEMS OR REMOVABLE STORAGE MEDIA ARISING OUT OF OR RESULTING FROM THE USE OF THE PRODUCT, EVEN IF ADVISED OF THE POSSIBILITY THEREOF. WHEN COPYING OR TRANSFERRING YOUR DATA, PLEASE BE SURE TO CONFIRM WHETHER THE DATA HAS BEEN SUCCESSFULLY COPIED OR TRANSFERRED. Model: Satellite Pro® A200/A205 Series Recordable and/or ReWritable Drive(s) and Associated Software Warranty...
..., DATA, NETWORK SYSTEMS OR REMOVABLE STORAGE MEDIA ARISING OUT OF OR RESULTING FROM THE USE OF THE PRODUCT, EVEN IF ADVISED OF THE POSSIBILITY THEREOF. WHEN COPYING OR TRANSFERRING YOUR DATA, PLEASE BE SURE TO CONFIRM WHETHER THE DATA HAS BEEN SUCCESSFULLY COPIED OR TRANSFERRED. Model: Satellite Pro® A200/A205 Series Recordable and/or ReWritable Drive(s) and Associated Software Warranty...
User Manual
Page 5
...number for which charges exceed local or long-distance transmission charges.) In order to program this information into your modem from its present line, please call the telephone company and let them to make any message unless such message clearly contains in a margin at (949) 859-4273. If these changes might affect your service or the operation... equipment, operations or procedures. Disconnection If you should ever decide to permanently disconnect your fax transmission, refer to the fax software instructions installed on the first page of Toshiba, or the Toshiba Support Centre within...
...number for which charges exceed local or long-distance transmission charges.) In order to program this information into your modem from its present line, please call the telephone company and let them to make any message unless such message clearly contains in a margin at (949) 859-4273. If these changes might affect your service or the operation... equipment, operations or procedures. Disconnection If you should ever decide to permanently disconnect your fax transmission, refer to the fax software instructions installed on the first page of Toshiba, or the Toshiba Support Centre within...
User Manual
Page 27
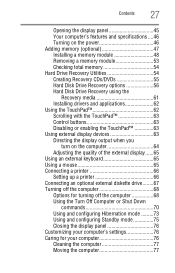
... Removing a memory module 53 Checking total memory 54 Hard Drive Recovery Utilities 54 Creating Recovery CDs/DVDs 55 Hard Disk Drive Recovery options 56 Hard Disk Drive Recovery using the Recovery media 61 Installing drivers and applications 62 Using the TouchPad 62 Scrolling with the TouchPad 63 Control buttons 63 Disabling or enabling the TouchPad 63 Using external display devices 63 Directing the display output when you turn on the computer 64 Adjusting the quality of the external display......65 Using an external keyboard 65 Using a mouse 65 Connecting a printer 66 Setting...
... Removing a memory module 53 Checking total memory 54 Hard Drive Recovery Utilities 54 Creating Recovery CDs/DVDs 55 Hard Disk Drive Recovery options 56 Hard Disk Drive Recovery using the Recovery media 61 Installing drivers and applications 62 Using the TouchPad 62 Scrolling with the TouchPad 63 Control buttons 63 Disabling or enabling the TouchPad 63 Using external display devices 63 Directing the display output when you turn on the computer 64 Adjusting the quality of the external display......65 Using an external keyboard 65 Using a mouse 65 Connecting a printer 66 Setting...
User Manual
Page 48
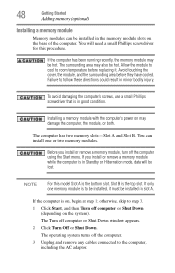
... cables connected to be installed, it . You can be installed in minor bodily injury. If you install or remove a memory module, turn off computer or Shut Down window appears. 2 Click Turn Off or Shut Down. Slot B is in Standby or Hibernation mode, data will need a small Phillips screwdriver for this model Slot A is on the system). If only one or two memory modules. 48 Getting Started Adding memory (optional) Installing a memory module Memory modules can install one memory module...
... cables connected to be installed, it . You can be installed in minor bodily injury. If you install or remove a memory module, turn off computer or Shut Down window appears. 2 Click Turn Off or Shut Down. Slot B is in Standby or Hibernation mode, data will need a small Phillips screwdriver for this model Slot A is on the system). If only one or two memory modules. 48 Getting Started Adding memory (optional) Installing a memory module Memory modules can install one memory module...
User Manual
Page 52
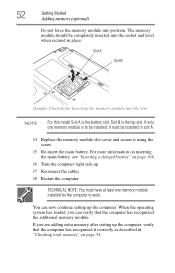
... memory module is to work. Slot A Slot B (Sample Illustration) Inserting the memory module into the slot NOTE For this model Slot A is the top slot. For more information on inserting the main battery, see "Inserting a charged battery" on page 54. The memory module should be installed in slot A. 14 Replace the memory module slot cover and secure it correctly as described in place. When the operating system has loaded, you are adding extra memory after setting...
... memory module is to work. Slot A Slot B (Sample Illustration) Inserting the memory module into the slot NOTE For this model Slot A is the top slot. For more information on inserting the main battery, see "Inserting a charged battery" on page 54. The memory module should be installed in slot A. 14 Replace the memory module slot cover and secure it correctly as described in place. When the operating system has loaded, you are adding extra memory after setting...
User Manual
Page 53
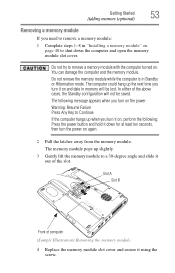
... open the memory module slot cover. Slot A Slot B Front of computer (Sample Illustration) Removing the memory module 4 Replace the memory module slot cover and secure it on again. 2 Pull the latches away from the memory module. Getting Started Adding memory (optional) 53 Removing a memory module If you need to remove a memory module: 1 Complete steps 1-8 in "Installing a memory module" on page 48 to remove a memory module with the computer turned on. The memory module pops up the next time you turn it on, perform the following: Press the power button...
... open the memory module slot cover. Slot A Slot B Front of computer (Sample Illustration) Removing the memory module 4 Replace the memory module slot cover and secure it on again. 2 Pull the latches away from the memory module. Getting Started Adding memory (optional) 53 Removing a memory module If you need to remove a memory module: 1 Complete steps 1-8 in "Installing a memory module" on page 48 to remove a memory module with the computer turned on. The memory module pops up the next time you turn it on, perform the following: Press the power button...
User Manual
Page 54
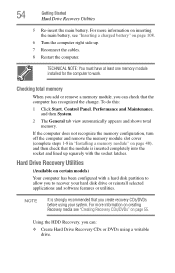
... you create recovery CDs/DVDs before using a writable drive. If the computer does not recognize the memory configuration, turn off the computer and remove the memory module slot cover (complete steps 1-8 in "Installing a memory module" on certain models) Your computer has been configured with the socket latches. 54 Getting Started Hard Drive Recovery Utilities 5 Re-insert the main battery. TECHNICAL NOTE: You must have at least one memory module installed for the computer to recover your system. Hard Drive Recovery Utilities (Available...
... you create recovery CDs/DVDs before using a writable drive. If the computer does not recognize the memory configuration, turn off the computer and remove the memory module slot cover (complete steps 1-8 in "Installing a memory module" on certain models) Your computer has been configured with the socket latches. 54 Getting Started Hard Drive Recovery Utilities 5 Re-insert the main battery. TECHNICAL NOTE: You must have at least one memory module installed for the computer to recover your system. Hard Drive Recovery Utilities (Available...

User Manual
Page 63
... a mouse or trackball. The primary button usually corresponds to scroll as you would with a built-in the preferred direction. Getting Started Using external display devices 63 NOTE Because the TouchPad is enabled by either double-tapping the TouchPad or clicking the control buttons. This feature can also connect an external monitor or projector via the RGB (monitor) port. To scroll vertically, run your cursor, you can be disabled or changed in...
... a mouse or trackball. The primary button usually corresponds to scroll as you would with a built-in the preferred direction. Getting Started Using external display devices 63 NOTE Because the TouchPad is enabled by either double-tapping the TouchPad or clicking the control buttons. This feature can also connect an external monitor or projector via the RGB (monitor) port. To scroll vertically, run your cursor, you can be disabled or changed in...

User Manual
Page 64
...: 1 Connect the monitor's video cable to the RGB (monitor) port on the side of the computer. 2 Connect the device's power cable to a live electrical outlet. 3 Turn on . This hot key cycles through the settings in the following order (only the first option is to use the internal display only, the external device only, or both simultaneously. Directing the display output when you turn on the computer Once you have an external monitor attached): ❖ LCD-Internal display only...
...: 1 Connect the monitor's video cable to the RGB (monitor) port on the side of the computer. 2 Connect the device's power cable to a live electrical outlet. 3 Turn on . This hot key cycles through the settings in the following order (only the first option is to use the internal display only, the external device only, or both simultaneously. Directing the display output when you turn on the computer Once you have an external monitor attached): ❖ LCD-Internal display only...
User Manual
Page 141
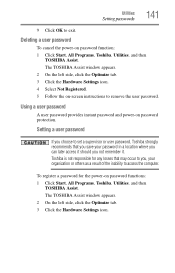
... a result of the inability to remove the user password. Utilities Setting passwords 141 9 Click OK to set a supervisor or user password, Toshiba strongly recommends that may occur to you, your password in a location where you can later access it should you not remember it. Toshiba is not responsible for the power-on password function: 1 Click Start, All Programs, Toshiba, Utilities, and then TOSHIBA Assist. Using a user password A user password provides instant password and power-on -screen instructions to access the computer.
... a result of the inability to remove the user password. Utilities Setting passwords 141 9 Click OK to set a supervisor or user password, Toshiba strongly recommends that may occur to you, your password in a location where you can later access it should you not remember it. Toshiba is not responsible for the power-on password function: 1 Click Start, All Programs, Toshiba, Utilities, and then TOSHIBA Assist. Using a user password A user password provides instant password and power-on -screen instructions to access the computer.
User Manual
Page 142
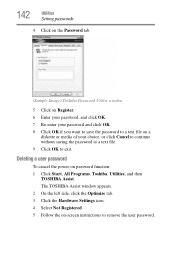
... side, click the Optimize tab. 3 Click the Hardware Settings icon. 4 Select Not Registered. 5 Follow the on password function: 1 Click Start, All Programs, Toshiba, Utilities, and then TOSHIBA Assist. Deleting a user password To cancel the power-on -screen instructions to exit. 142 Utilities Setting passwords 4 Click on the Password tab. (Sample Image) Toshiba Password Utility window 5 Click on Register. 6 Enter your password, and click OK. 7 Re-enter your password and click OK. 8 Click OK if you...
... side, click the Optimize tab. 3 Click the Hardware Settings icon. 4 Select Not Registered. 5 Follow the on password function: 1 Click Start, All Programs, Toshiba, Utilities, and then TOSHIBA Assist. Deleting a user password To cancel the power-on -screen instructions to exit. 142 Utilities Setting passwords 4 Click on the Password tab. (Sample Image) Toshiba Password Utility window 5 Click on Register. 6 Enter your password, and click OK. 7 Re-enter your password and click OK. 8 Click OK if you...
User Manual
Page 158
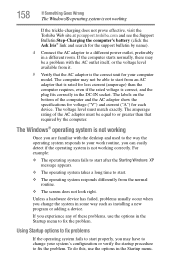
.... To do this, use the options in the Startup menu to a different power outlet, preferably in some way such as installing a new program or adding a device. If the computer starts normally, there may not be a problem with the desktop and used to the way the operating system responds to your system's configuration or verify the startup procedure to start . ❖ The operating system responds differently from...
.... To do this, use the options in the Startup menu to a different power outlet, preferably in some way such as installing a new program or adding a device. If the computer starts normally, there may not be a problem with the desktop and used to the way the operating system responds to your system's configuration or verify the startup procedure to start . ❖ The operating system responds differently from...

User Manual
Page 166
... using is not set for an external monitor. The computer will restart and recognize the device. If you press the keys on . Using the computer's TouchPad, click Start, then either Shut Down or Turn off , make sure the software you to any key, type the password and press Enter. Display Auto Off may have registered a password, press any of keyboard. Press any key. 166 If Something Goes Wrong Resolving a hardware conflict Keyboard problems...
... using is not set for an external monitor. The computer will restart and recognize the device. If you press the keys on . Using the computer's TouchPad, click Start, then either Shut Down or Turn off , make sure the software you to any key, type the password and press Enter. Display Auto Off may have registered a password, press any of keyboard. Press any key. 166 If Something Goes Wrong Resolving a hardware conflict Keyboard problems...
User Manual
Page 175
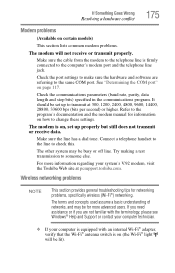
... and concepts used assume a basic understanding of networks, and may be set up to make sure the hardware and software are not familiar with an internal Wi-Fi® adapter, verify that the Wi-Fi® antenna switch is on (the Wi-Fi® light will not receive or transmit properly. The modem is firmly connected to change these settings. Make sure the cable from...
... and concepts used assume a basic understanding of networks, and may be set up to make sure the hardware and software are not familiar with an internal Wi-Fi® adapter, verify that the Wi-Fi® antenna switch is on (the Wi-Fi® light will not receive or transmit properly. The modem is firmly connected to change these settings. Make sure the cable from...
User Manual
Page 177
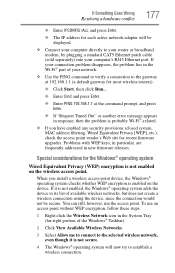
... a connection to the gateway at 192.168.1.1 (a default gateway for the Windows® operating system Wired Equivalent Privacy (WEP) encryption is not enabled, the Windows® operating system adds the device to its list of available wireless networks, but does not create a wireless connection using the device, since the connection would not be displayed. ❖ Connect your computer's RJ45 Ethernet port. Problems with WEP keys, in particular, are frequently addressed in new firmware releases...
... a connection to the gateway at 192.168.1.1 (a default gateway for the Windows® operating system Wired Equivalent Privacy (WEP) encryption is not enabled, the Windows® operating system adds the device to its list of available wireless networks, but does not create a wireless connection using the device, since the connection would not be displayed. ❖ Connect your computer's RJ45 Ethernet port. Problems with WEP keys, in particular, are frequently addressed in new firmware releases...

User Manual
Page 225
... Fn key can set system options or control system parameters, such as the battery save mode. (2) A key or combination of keys that you use to perform a task instead of using a pointing device such as a hard disk) into the processor to add or remove devices from a storage device (such as a mouse. Interlaced monitors take two passes to help improve processing speed. LAN (local area network) - liquid crystal display (LCD) - A type of display that polarizes the light...
... Fn key can set system options or control system parameters, such as the battery save mode. (2) A key or combination of keys that you use to perform a task instead of using a pointing device such as a hard disk) into the processor to add or remove devices from a storage device (such as a mouse. Interlaced monitors take two passes to help improve processing speed. LAN (local area network) - liquid crystal display (LCD) - A type of display that polarizes the light...
User Manual
Page 232
... a power source 42 connection set up 120 control buttons 63 Ctrl keys 82 D desktop creating new icon 115 major features 115 desktop exploration 114 desktop icons 115 Device Manager 162 checking properties 163 disabling a device 162 devices keyboard 65 mouse 65 Disk Defragmenter 169 disk drive corrupted/damaged data files 169 missing files/trouble accessing a disk 168 running slow 169 diskette drive cannot insert a diskette 169 cannot read a diskette 170 connecting 67 external, connecting 67 display...
... a power source 42 connection set up 120 control buttons 63 Ctrl keys 82 D desktop creating new icon 115 major features 115 desktop exploration 114 desktop icons 115 Device Manager 162 checking properties 163 disabling a device 162 devices keyboard 65 mouse 65 Disk Defragmenter 169 disk drive corrupted/damaged data files 169 missing files/trouble accessing a disk 168 running slow 169 diskette drive cannot insert a diskette 169 cannot read a diskette 170 connecting 67 external, connecting 67 display...

User Manual
Page 234
... J jack RJ-11 119 K keyboard character keys 81 function keys 82 hot keys 195 not working 156 overlay keys 83 troubleshooting 166 using 81 Windows® special keys 82 keyboard, external 65 keyboard, full-size 81 L lock computer, using 77 M main battery removing 107 memory adding 47, 48 problem solving 163 removing memory module slot cover 49 memory module inserting 50 installation 48 removing 53 memory module slot 49 microphone 124 modem connecting to telephone line 118 determining COM port 117 problem solving 175 resetting port to default settings 117 upgrading 117 monitor 63 connecting...
... J jack RJ-11 119 K keyboard character keys 81 function keys 82 hot keys 195 not working 156 overlay keys 83 troubleshooting 166 using 81 Windows® special keys 82 keyboard, external 65 keyboard, full-size 81 L lock computer, using 77 M main battery removing 107 memory adding 47, 48 problem solving 163 removing memory module slot cover 49 memory module inserting 50 installation 48 removing 53 memory module slot 49 microphone 124 modem connecting to telephone line 118 determining COM port 117 problem solving 175 resetting port to default settings 117 upgrading 117 monitor 63 connecting...
User Manual
Page 235
... disabling a device 162 disk drive is slow 169 display is blank 166 ExpressCard™ 171 checklist 172 error occurs 173 hot swapping fails 173 not recognized 173 slot appears dead 172 external display not working 168 external monitor 167 faulty memory 163 hardware conflict 160, 161 high-pitched noise 171 illegal operation 155 Internet bookmarked site not found 160 Internet connection is slow 159 keyboard not responding 156 missing files/trouble accessing a disk...
... disabling a device 162 disk drive is slow 169 display is blank 166 ExpressCard™ 171 checklist 172 error occurs 173 hot swapping fails 173 not recognized 173 slot appears dead 172 external display not working 168 external monitor 167 faulty memory 163 hardware conflict 160, 161 high-pitched noise 171 illegal operation 155 Internet bookmarked site not found 160 Internet connection is slow 159 keyboard not responding 156 missing files/trouble accessing a disk...

User Manual
Page 236
... 116 T Taskbar 116 telephone line connecting to modem 118 television adjusting display 65 Toshiba registering computer 41 worldwide offices 187 TOSHIBA Assist 131 TOSHIBA Hardware Setup 149 Toshiba online resources 96 traveling tips 113 troubleshooting DVD player general problems 178 external keyboard 166 keyboard 166 keypad overlay 166 optical drive 170 turning on the computer 46 turning on the power 46 U user password, disabling 141, 142 user password, setting 140, 141 using a file extension 88 Utilities 130 utilities
... 116 T Taskbar 116 telephone line connecting to modem 118 television adjusting display 65 Toshiba registering computer 41 worldwide offices 187 TOSHIBA Assist 131 TOSHIBA Hardware Setup 149 Toshiba online resources 96 traveling tips 113 troubleshooting DVD player general problems 178 external keyboard 166 keyboard 166 keypad overlay 166 optical drive 170 turning on the computer 46 turning on the power 46 U user password, disabling 141, 142 user password, setting 140, 141 using a file extension 88 Utilities 130 utilities


