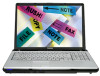
Toshiba Online Users Guide for Satellite P205D/200D
Page 25
Contents Introduction 32 This guide 33 Safety icons 34 Other icons used 34 Other documentation 35 Service options 35 Chapter 1: Getting Started 36 Selecting a place to work 36 Creating a computer-friendly environment........36 Keeping yourself comfortable 37 Precautions 37 Important information on your computer's cooling fan 38 Setting up your computer 39 Setting up your software 39 Registering your computer with Toshiba 40 Adding optional external devices 40 Connecting to a power source 41 Charging the main battery 43 25
Toshiba Online Users Guide for Satellite P205D/200D
Page 28
... Computing 103 Toshiba's energy-saver design 103 Running the computer on battery power 103 Battery Notice 104 Power management 105 Using additional batteries 105 Charging batteries 105 Charging the main battery 106 Charging the RTC battery 106 Monitoring main battery power 107 Determining remaining battery power 109 What to do when the main battery runs low ...109 Setting battery notifications 110...
Toshiba Online Users Guide for Satellite P205D/200D
Page 30
... system can help you 177 Resolving a hardware conflict 177 A plan of action 177 Fixing a problem with Device Manager ...........178 Memory problems 179 Power and the batteries 180 Keyboard problems 181 Display problems 181 Disk drive problems 184 Optical drive problems 185 Sound system problems 186 ExpressCard™ problems 187 Printer problems...
Toshiba Online Users Guide for Satellite P205D/200D
Page 37
... skin. Never allow any liquids to spill into any of these instructions could damage the computer or cause system failure. Remove the battery pack. Precautions Your computer is designed to provide optimum safety and ease of use, and to withstand the rigors of your work...and palm rest can cause electric shock or fire, resulting in serious injury or permanent damage to the computer. Keeping yourself comfortable The Toshiba Instruction Manual for Safety and Comfort, that shipped with the underside or surface of the computer. You should accidentally occur, immediately: 1. ...
Toshiba Online Users Guide for Satellite P205D/200D
Page 39
... Windows® operating system checks the system's performance, and then may vary according to your software setup choices. Your computer contains a rechargeable main battery that needs to be associated with your user account, and then click Next. 4 Enter the computer name and choose your background and then click ... screen prompts to complete the setup process. 7 Click Start when the Thank You message appears. To use external power or to charge the battery you turn on the computer for the first time, do not turn on page 39 before you through steps to set up your software. ...
Toshiba Online Users Guide for Satellite P205D/200D
Page 41
... electric shock, possibly resulting in serious injury. Never pull on one socket could cause fire or damage to charge the computer's battery. TOSHIBA assumes no liability for any damage caused by TOSHIBA to avoid any risk of fire or other damage to follow this instruction may damage the cord/cable, and/or result...
Toshiba Online Users Guide for Satellite P205D/200D
Page 42
Never attempt to connect or disconnect a power plug with wet hands. The AC power and battery lights on the side of the computer. (Sample Illustration) Connecting the AC adaptor cord to the computer 3 Connect the power cord/cable to a live electrical ... adaptor cord into the DC-IN on the indicator panel glow blue. The computer's main battery light gives you to lead, a chemical known to the State of the main battery's current charge: ❖ Glows amber while the main battery is being charged (AC adaptor connected) 42 Getting Started Connecting to a power source To...
Toshiba Online Users Guide for Satellite P205D/200D
Page 43
... malfunctioning, or it is charged for the first time, avoid leaving the computer plugged in and turned off until the battery light glows blue. Once the battery is not receiving correct input from the AC power supply. Before using all of the power provided by the AC adaptor ...than a few hours at a time. Your computer's Power Options utility can damage the battery. Charging the main battery Your computer came with the computer turned off for system operation and will allow the battery to run applications, features, and devices. Disconnect the AC power cord/cable and remove the...
Toshiba Online Users Guide for Satellite P205D/200D
Page 44
... computer for you turn it on and begin using highprecision technology. Any small bright dots that may appear on your computer. This is operated on battery power, the screen will dim and you may appear on your screen display when you to increase the brightness of the screen will deteriorate. Over...) Opening the display panel NOTE When opening or closing the display panel, place one hand on the display panel and be able to turn on battery power. Do not press or push on the palm rest to slowly open or close the display panel. Small bright dots may not be careful...
Toshiba Online Users Guide for Satellite P205D/200D
Page 45
... off light on the system indicator panel glows blue. (Sample Illustration) Turning on the notebook chassis, unless you plan to use AC power rather than battery power) are properly connected and ready. 2 Check to ensure that all of the many possible icons used on your computer: (Sample Illustration) System icons Turning...
Toshiba Online Users Guide for Satellite P205D/200D
Page 47
... the lock button in the lower-right corner of computer (Sample Illustration) Locating the memory module slot cover For information on removing the main battery, see "Removing the battery from the computer" on , begin at step 1; Start (Sample Image) Shut Down menu Arrow Shut Down Menu 2 Click Shut Down. Memory module slot... Down menu appears. otherwise, skip to step 3. 1 Click Start, and then click the arrow next to the computer, including the AC adaptor. 4 Remove the main battery.
Toshiba Online Users Guide for Satellite P205D/200D
Page 50
...Illustration) Pressing down on page 116. 19 Turn the computer right side up the computer. For more information on inserting the main battery, see "Inserting a charged battery" on the memory module Do not force the memory module into the slot 16 Carefully replace the shield plate using the small screws.... 17 Replace the memory module slot cover and secure it using the screw. 18 Re-insert the main battery. Back of computer Memory slots (Sample Illustration) Inserting the memory module into position. When the operating system has loaded, you can now ...
Toshiba Online Users Guide for Satellite P205D/200D
Page 52
... at least one memory module installed for the computer to a 30-degree angle and slide it using the screw. 5 Re-insert the main battery. Back of computer Memory slots (Sample Illustration) Removing the memory module 4 Replace the memory module slot cover and secure it out of one ... page 116. 6 Turn the computer right side up. 7 Reconnect the cables. 8 Restart the computer. For more information on inserting the main battery, see "Inserting a charged battery" on top of the slot. The System window appears. 2 The total memory is displayed below the System heading under Memory (RAM).
Toshiba Online Users Guide for Satellite P205D/200D
Page 74
... as memory). TECHNICAL NOTE: Before using the Shut Down option to turn off the power while a disk/disc is off) to fully charge the main battery.
Toshiba Online Users Guide for Satellite P205D/200D
Page 75
... is stored to hard disk, no data is in Sleep mode. ❖ Restarting from Hibernation takes less time and consumes less main battery power than restarting after turning off the computer using . Getting Started 75 Turning off the computer Hibernation mode Hibernation mode shuts the computer .... NOTE After your hard disk, and then shuts down command. ❖ Restarting from Hibernation takes a little more time and consumes more main battery power than restarting from Sleep. ❖ When starting up again, the computer returns to memory so that, when you restart the computer, you...
Toshiba Online Users Guide for Satellite P205D/200D
Page 76
Be sure to save your computer using the Sleep command and the main battery discharges fully, your work first. For information on using . ❖ If the battery charge becomes critically low, the computer will be lost. Use the following steps to turn off your work or the current state of the Start ...
Toshiba Online Users Guide for Satellite P205D/200D
Page 77
... Options window appears. 2 Click Change plan settings under the power plan to be set separately for how they operate while the computer is running on battery power or while connected to activate it using the Power Options feature.
Toshiba Online Users Guide for Satellite P205D/200D
Page 80
Once the computer is running on battery power or while connected to AC power. ❖ Lid close action Set this option to Hibernate if you want the computer to go into Hibernation ...
Toshiba Online Users Guide for Satellite P205D/200D
Page 82
82 Getting Started Turning off the computer 2 Click Change plan settings under the power plan to sleep, select the desired amount of time in both the On battery and Plugged in categories. ❖ To disable the computer from automatically entering Sleep mode, select Never. The Edit Plan Settings window appears. (Sample Image) Edit Plan Settings screen 3 To change the amount of time after which the computer enters Sleep mode: ❖ Under Put the computer to be customized.
Toshiba Online Users Guide for Satellite P205D/200D
Page 83
... in the Start menu. 7 Click Apply. 8 Click OK. NOTE These options can configure. 6 Select Sleep for how they operate while the computer is running on battery power or while connected to AC power. ❖ Lid close action Set this option to Sleep if you want the computer to go into Sleep...