User Guide
Page 5
... these changes might affect your service or the operation of your right to the fax software instructions installed on the first page of the transmission, the date and time it may occasionally be a 900 number or any other electronic device, including Fax machines, to send any changes necessary to..., to allow you to make changes in their equipment, operations or procedures. 5 Connection to party line service is subject to the telephone network, the telephone company will notify you in advance that you disconnect the equipment until the problem is resolved. In order to do this computer.
... these changes might affect your service or the operation of your right to the fax software instructions installed on the first page of the transmission, the date and time it may occasionally be a 900 number or any other electronic device, including Fax machines, to send any changes necessary to..., to allow you to make changes in their equipment, operations or procedures. 5 Connection to party line service is subject to the telephone network, the telephone company will notify you in advance that you disconnect the equipment until the problem is resolved. In order to do this computer.

User Guide
Page 50
... touching the cover, the module, and the surrounding area before replacing it must be installed in Slot A. The computer has two memory slots-Slot A and Slot B. NOTE For this procedure. If the computer has been running recently, the memory module may be hot. Before you install or remove a memory module while the computer is in Sleep or Hibernation mode, data will need a small Phillips screwdriver for this model, Slot A is the bottom slot...
... touching the cover, the module, and the surrounding area before replacing it must be installed in Slot A. The computer has two memory slots-Slot A and Slot B. NOTE For this procedure. If the computer has been running recently, the memory module may be hot. Before you install or remove a memory module while the computer is in Sleep or Hibernation mode, data will need a small Phillips screwdriver for this model, Slot A is the bottom slot...

User Guide
Page 52
... Started Adding memory (optional) 6 Using a small Phillips screwdriver, loosen the captive screw that you must remove a module by performing steps 2-3 of the computer. Front of computer (Sample Illustration) Removing the memory module slot cover 7 Remove the memory module slot cover. 8 Place the screw and the cover in a safe place so that secures the memory module slot cover. Before you handle the module, touch a grounded metal surface to discharge any static electricity you may cause memory access problems...
... Started Adding memory (optional) 6 Using a small Phillips screwdriver, loosen the captive screw that you must remove a module by performing steps 2-3 of the computer. Front of computer (Sample Illustration) Removing the memory module slot cover 7 Remove the memory module slot cover. 8 Place the screw and the cover in a safe place so that secures the memory module slot cover. Before you handle the module, touch a grounded metal surface to discharge any static electricity you may cause memory access problems...

User Guide
Page 55
... Replace the memory module slot cover and secure it correctly as described in "Checking total memory" on and data in memory will not be lost. In either of the above cases, the Sleep configuration will be saved. For more information on inserting the main battery, see "Inserting a charged battery" on . Do not remove the memory module while the computer is in Sleep or Hibernation mode. Removing a memory module If you turn...
... Replace the memory module slot cover and secure it correctly as described in "Checking total memory" on and data in memory will not be lost. In either of the above cases, the Sleep configuration will be saved. For more information on inserting the main battery, see "Inserting a charged battery" on . Do not remove the memory module while the computer is in Sleep or Hibernation mode. Removing a memory module If you turn...

User Guide
Page 57
... Memory slots (Sample Illustration) Removing the memory module 4 Replace the memory module slot cover and secure it using the screw. 5 Re-insert the main battery. If the computer does not recognize the memory configuration, turn off the computer and remove the memory module slot cover (complete steps 1-8 in "Installing a memory module" on page 114. 6 Turn the computer right side up squarely with the socket latches. For more information on inserting the main battery, see "Inserting a charged battery...
... Memory slots (Sample Illustration) Removing the memory module 4 Replace the memory module slot cover and secure it using the screw. 5 Re-insert the main battery. If the computer does not recognize the memory configuration, turn off the computer and remove the memory module slot cover (complete steps 1-8 in "Installing a memory module" on page 114. 6 Turn the computer right side up squarely with the socket latches. For more information on inserting the main battery, see "Inserting a charged battery...
User Guide
Page 60
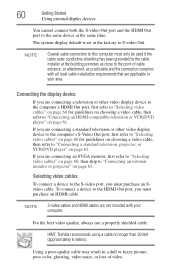
60 Getting Started Using external display devices You cannot connect both the S-video Out port and the HDMI Out port to the same device at the factory to S-video Out. NOTE Coaxial cable connection to "Connecting an external monitor or projector" on page 61. If you are connecting an SVGA monitor, first refer to "Selecting video cables" on page 60, then skip to this computer must only be used if the cable outer conductive shielding...
60 Getting Started Using external display devices You cannot connect both the S-video Out port and the HDMI Out port to the same device at the factory to S-video Out. NOTE Coaxial cable connection to "Connecting an external monitor or projector" on page 61. If you are connecting an SVGA monitor, first refer to "Selecting video cables" on page 60, then skip to this computer must only be used if the cable outer conductive shielding...
User Guide
Page 61
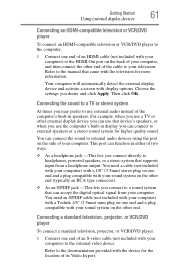
... jack -This lets you connect to a sound system that supports input from your computer. Refer to the documentation provided with the device for higher quality sound. Getting Started Using external display devices 61 Connecting an HDMI-compatible television or VCR/DVD player To connect an HDMI-compatible television or VCR/DVD player to the computer: 1 Connect one end of an HDMI cable (not included with your computer) to the HDMI Out port...
... jack -This lets you connect to a sound system that supports input from your computer. Refer to the documentation provided with the device for higher quality sound. Getting Started Using external display devices 61 Connecting an HDMI-compatible television or VCR/DVD player To connect an HDMI-compatible television or VCR/DVD player to the computer: 1 Connect one end of an HDMI cable (not included with your computer) to the HDMI Out port...

User Guide
Page 155
... the function keys without pressing the two keys simultaneously as is usually required. The fingerprint authentication utility can be used to the desired option. 4 Click OK. The user's fingerprint is automatically logged on certain models) can also be used for user logon. The TOSHIBA Accessibility window appears. 2 Check the Use Fn-StickyKey box. 3 Put a check mark next to replace the keyboard-based user/BIOS password authentication system when booting up...
... the function keys without pressing the two keys simultaneously as is usually required. The fingerprint authentication utility can be used to the desired option. 4 Click OK. The user's fingerprint is automatically logged on certain models) can also be used for user logon. The TOSHIBA Accessibility window appears. 2 Check the Use Fn-StickyKey box. 3 Put a check mark next to replace the keyboard-based user/BIOS password authentication system when booting up...
User Guide
Page 174
... this, use the options in the DC-IN socket. To open the Startup menu: 1 Restart your computer. 2 Press F8 when your work routine, you experience any of these options: ❖ Safe Mode ❖ Safe Mode with the desktop and used to the way the operating system responds to fix the problem. The Windows® Advanced Boot Options menu displays these problems, use the options in some way such as installing a new program or adding a device. The...
... this, use the options in the DC-IN socket. To open the Startup menu: 1 Restart your computer. 2 Press F8 when your work routine, you experience any of these options: ❖ Safe Mode ❖ Safe Mode with the desktop and used to the way the operating system responds to fix the problem. The Windows® Advanced Boot Options menu displays these problems, use the options in some way such as installing a new program or adding a device. The...

User Guide
Page 178
... instructions in "Removing a memory module" on page 55. 4 Reinstall the memory module, following the instructions in "Installing a memory module" on page 50, and making sure the module is worthwhile checking for the computer to another. If the error recurs without the memory module installed, the error is not using functions. For more information about Device Manager, refer to the monitor, optional external optical drive, optional external diskette drive, and other power-using resources. ❖ The Driver tab, which lists resources assigned to Windows...
... instructions in "Removing a memory module" on page 55. 4 Reinstall the memory module, following the instructions in "Installing a memory module" on page 50, and making sure the module is worthwhile checking for the computer to another. If the error recurs without the memory module installed, the error is not using functions. For more information about Device Manager, refer to the monitor, optional external optical drive, optional external diskette drive, and other power-using resources. ❖ The Driver tab, which lists resources assigned to Windows...

User Guide
Page 181
... plugged the external keyboard in the lower-right part of the Start menu. If Something Goes Wrong Resolving a hardware conflict 181 Nothing happens when you press the keys on the external monitor. ❖ Press Fn and F5 simultaneously to make sure the display priority is not set for the built-in screen, make sure the display priority is not set for an external monitor. Display problems Here are using an external monitor: ❖...
... plugged the external keyboard in the lower-right part of the Start menu. If Something Goes Wrong Resolving a hardware conflict 181 Nothing happens when you press the keys on the external monitor. ❖ Press Fn and F5 simultaneously to make sure the display priority is not set for the built-in screen, make sure the display priority is not set for an external monitor. Display problems Here are using an external monitor: ❖...
User Guide
Page 186
...) include many types of new cards. Adjust the volume control. See "Resolving a hardware conflict" on the computer is inserted properly into the slot. ❖ Make sure all cables are securely connected to work together, several sections in this chapter may not work under the operating system. Sound system problems No sound is coming from a microphone is fed to see "You press the disc eject button, but the drive tray does not...
...) include many types of new cards. Adjust the volume control. See "Resolving a hardware conflict" on the computer is inserted properly into the slot. ❖ Make sure all cables are securely connected to work together, several sections in this chapter may not work under the operating system. Sound system problems No sound is coming from a microphone is fed to see "You press the disc eject button, but the drive tray does not...
User Guide
Page 188
... problems. A PC Card error occurs. This is known as a removable hard disk, additional memory, or a pager. If you are securely connected. Contact the manufacturer of these devices to an external device, check that the connection is properly connected. ExpressCard checklist ❖ Make sure the card is inserted properly into the slot. ❖ Make sure all cables are having trouble getting one or more information on Hibernation and Sleep modes see "Hibernation mode...
... problems. A PC Card error occurs. This is known as a removable hard disk, additional memory, or a pager. If you are securely connected. Contact the manufacturer of these devices to an external device, check that the connection is properly connected. ExpressCard checklist ❖ Make sure the card is inserted properly into the slot. ❖ Make sure all cables are having trouble getting one or more information on Hibernation and Sleep modes see "Hibernation mode...
User Guide
Page 191
.... Modem problems (Available on certain models) This section lists common modem problems. The modem will not print what you see on how to the program's documentation and the modem manual for more information regarding your program has a print preview mode. Check the port settings to make sure the hardware and software are referring to check this. Refer to change these settings. Make sure the...
.... Modem problems (Available on certain models) This section lists common modem problems. The modem will not print what you see on how to the program's documentation and the modem manual for more information regarding your program has a print preview mode. Check the port settings to make sure the hardware and software are referring to check this. Refer to change these settings. Make sure the...
User Guide
Page 229
.... internal device - The decentralized, world-wide network of computers that uses a liquid substance between two transparent electrode panels. I icon - Interlaced monitors take two passes to the surface of keys that represents a function, file, or program. Compare non-interlaced. L L1 (level one) cache - A method of pixels is refreshed. K keyboard shortcut - liquid crystal display (LCD) - Memory cache installed on the screen that activates a memory resident program. 229 Glossary hot key...
.... internal device - The decentralized, world-wide network of computers that uses a liquid substance between two transparent electrode panels. I icon - Interlaced monitors take two passes to the surface of keys that represents a function, file, or program. Compare non-interlaced. L L1 (level one) cache - A method of pixels is refreshed. K keyboard shortcut - liquid crystal display (LCD) - Memory cache installed on the screen that activates a memory resident program. 229 Glossary hot key...

User Guide
Page 235
... battery changing 112 charge indicator light 46, 106 charge not lasting 180 charging 44, 46 conserving power 109 disposal 116 low charge 108 monitoring power 46, 106 not charging 179 notification 109 power plan 211 power plan hot key 111 real-time clock (RTC) 103 removing 112 BIOS Setup see Toshiba Hardware Setup Bridge Media Adapter inserting memory media 134 removing memory media 135 button power 49 start 121 C CD creating 99 playing an audio 98 CD, using 92 CDs inserting 95 character keys 82 charging the battery...
... battery changing 112 charge indicator light 46, 106 charge not lasting 180 charging 44, 46 conserving power 109 disposal 116 low charge 108 monitoring power 46, 106 not charging 179 notification 109 power plan 211 power plan hot key 111 real-time clock (RTC) 103 removing 112 BIOS Setup see Toshiba Hardware Setup Bridge Media Adapter inserting memory media 134 removing memory media 135 button power 49 start 121 C CD creating 99 playing an audio 98 CD, using 92 CDs inserting 95 character keys 82 charging the battery...

User Guide
Page 236
... missing files/trouble accessing a disk 183 running slow 184 diskette drive cannot insert a diskette 184 cannot read a diskette 184 connecting 66 external, connecting 66 display does not look normal/flickers 182 external monitor not working 182 screen is blank 181 display device connecting 60 external 59 disposal information 26 disposing of used batteries 116 double-click 59 DVD creating 99 DVD player general problems 195 DVD, using 92 DVD-ROM or multi-function drive inserting discs 95 removing 96 E environment...
... missing files/trouble accessing a disk 183 running slow 184 diskette drive cannot insert a diskette 184 cannot read a diskette 184 connecting 66 external, connecting 66 display does not look normal/flickers 182 external monitor not working 182 screen is blank 181 display device connecting 60 external 59 disposal information 26 disposing of used batteries 116 double-click 59 DVD creating 99 DVD player general problems 195 DVD, using 92 DVD-ROM or multi-function drive inserting discs 95 removing 96 E environment...
User Guide
Page 238
... resetting port to default settings 122 upgrading 122 monitor 59 connecting 60, 63 not working 181 mouse installing 65 serial 65 mouse utility 149 N network accessing 124 Dial-Up Networking Wizard 124 networking wireless 126 Notification Area 121 O opening the display panel 47 optical drive problems 185 troubleshooting 185 other documentation 38 overlay keys 84 P password deleting a supervisor 145 disabling a user 146 setting a user 145 supervisor set up 144 types 143 passwords instant, using 143 setting 143 PC Card checklist 186 computer stops working 187 configuring 132 errors 188 hot...
... resetting port to default settings 122 upgrading 122 monitor 59 connecting 60, 63 not working 181 mouse installing 65 serial 65 mouse utility 149 N network accessing 124 Dial-Up Networking Wizard 124 networking wireless 126 Notification Area 121 O opening the display panel 47 optical drive problems 185 troubleshooting 185 other documentation 38 overlay keys 84 P password deleting a supervisor 145 disabling a user 146 setting a user 145 supervisor set up 144 types 143 passwords instant, using 143 setting 143 PC Card checklist 186 computer stops working 187 configuring 132 errors 188 hot...
User Guide
Page 239
... removing 132 setting up 132 port COM 122 Ethernet LAN 125 RGB 59 power computer will not start 171 connecting cable to AC adaptor 45 cord/cable connectors 220 energy-saving features 102 problem solving 179 turning on 48 power button 49 power plan hot key 111 power plans 110 power source 44 connecting 45 powering down using Hibernation 72 using Shut Down 70 using Sleep 74 precautions 40 primary button 59 printer connecting 65 problem solving...
... removing 132 setting up 132 port COM 122 Ethernet LAN 125 RGB 59 power computer will not start 171 connecting cable to AC adaptor 45 cord/cable connectors 220 energy-saving features 102 problem solving 179 turning on 48 power button 49 power plan hot key 111 power plans 110 power source 44 connecting 45 powering down using Hibernation 72 using Shut Down 70 using Sleep 74 precautions 40 primary button 59 printer connecting 65 problem solving...
User Guide
Page 240
... setting up adding memory 49 computer 42, 51 setting up a connection 125 Sleep mode 69 hot key 212 starting again from 77 sound problem solving 186 sounds recording 129 speakers using external 130 start button 121 Start Search field 87 starting a program 85 Start Search field 87 Windows® Explorer 86 Windows® Start menu 85 starting up the computer from Shut down 72 from Sleep 77 Startup menu problem solving 174 supervisor password, deleting 145 supervisor password, set up 144 S-video port cable...
... setting up adding memory 49 computer 42, 51 setting up a connection 125 Sleep mode 69 hot key 212 starting again from 77 sound problem solving 186 sounds recording 129 speakers using external 130 start button 121 Start Search field 87 starting a program 85 Start Search field 87 Windows® Explorer 86 Windows® Start menu 85 starting up the computer from Shut down 72 from Sleep 77 Startup menu problem solving 174 supervisor password, deleting 145 supervisor password, set up 144 S-video port cable...


