Online User's Guide for Satellite A300/A305
Page 28
... 50 Installing a memory module 51 Removing a memory module 56 Checking total memory 58 Hard Drive Recovery Utilities 59 Creating Recovery CDs/DVDs 59 Hard Disk Drive Recovery options 60 Hard Disk Drive Recovery using the Recovery media 65 Installing drivers and applications 66 Using the TouchPad 66 Scrolling with the TouchPad 67 Control buttons... Using the Shut Down command 76 Using and configuring Hibernation mode .........78 Using and configuring Sleep mode 80 Closing the display panel 83 Customizing your computer's settings 83 Caring for your computer 83 Cleaning the computer...
... 50 Installing a memory module 51 Removing a memory module 56 Checking total memory 58 Hard Drive Recovery Utilities 59 Creating Recovery CDs/DVDs 59 Hard Disk Drive Recovery options 60 Hard Disk Drive Recovery using the Recovery media 65 Installing drivers and applications 66 Using the TouchPad 66 Scrolling with the TouchPad 67 Control buttons... Using the Shut Down command 76 Using and configuring Hibernation mode .........78 Using and configuring Sleep mode 80 Closing the display panel 83 Customizing your computer's settings 83 Caring for your computer 83 Cleaning the computer...
Online User's Guide for Satellite A300/A305
Page 59
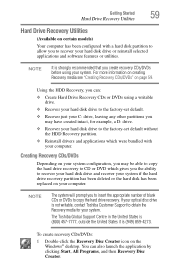
... intact, for your system. Getting Started 59 Hard Drive Recovery Utilities Hard Drive Recovery Utilities (Available on your computer. You can : ❖ Create Hard Drive Recovery CDs or DVDs using your hard disk drive or reinstall selected applications and software features or utilities. The Toshiba Global Support Centre in the United States is (800) 457...
... intact, for your system. Getting Started 59 Hard Drive Recovery Utilities Hard Drive Recovery Utilities (Available on your computer. You can : ❖ Create Hard Drive Recovery CDs or DVDs using your hard disk drive or reinstall selected applications and software features or utilities. The Toshiba Global Support Centre in the United States is (800) 457...
Online User's Guide for Satellite A300/A305
Page 60
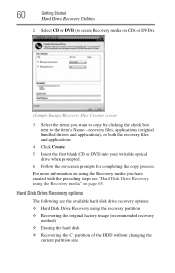
... Create. 5 Insert the first blank CD or DVD into your writable optical drive when prompted. 6 Follow the on page 65. 60 Getting Started Hard Drive Recovery Utilities 2 Select CD or DVD (to create Recovery media on CDs or DVDs). (Sample Image) Recovery Disc Creator screen 3 Select the items... you have created with the preceding steps see "Hard Disk Drive Recovery using the Recovery media" on -screen prompts for ...
... Create. 5 Insert the first blank CD or DVD into your writable optical drive when prompted. 6 Follow the on page 65. 60 Getting Started Hard Drive Recovery Utilities 2 Select CD or DVD (to create Recovery media on CDs or DVDs). (Sample Image) Recovery Disc Creator screen 3 Select the items... you have created with the preceding steps see "Hard Disk Drive Recovery using the Recovery media" on -screen prompts for ...
Online User's Guide for Satellite A300/A305
Page 65
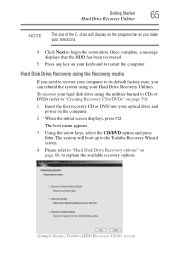
...5 Press any key on your keyboard to "Creating Recovery CDs/DVDs" on page 59): 1 Insert the first recovery CD or DVD into your selections. 4 Click Next to begin the restoration. The boot menu appears. 3 Using the arrow keys, select the CD/DVD option and press Enter. The system will display...and power on the computer. 2 When the initial screen displays, press F12. Getting Started 65 Hard Drive Recovery Utilities NOTE The size of the C: drive will boot up to the Toshiba Recovery Wizard screen. 4 Please refer to "Hard Disk Drive Recovery options" on page 60, to explain the available...
...5 Press any key on your keyboard to "Creating Recovery CDs/DVDs" on page 59): 1 Insert the first recovery CD or DVD into your selections. 4 Click Next to begin the restoration. The boot menu appears. 3 Using the arrow keys, select the CD/DVD option and press Enter. The system will display...and power on the computer. 2 When the initial screen displays, press F12. Getting Started 65 Hard Drive Recovery Utilities NOTE The size of the C: drive will boot up to the Toshiba Recovery Wizard screen. 4 Please refer to "Hard Disk Drive Recovery options" on page 60, to explain the available...


