
Operating Instructions
Page 5
...the cooling fan is still running . (For dealers) Caution The unit is desirable to consult with a Sony dealer. Precautions 5 For installation, be near these will damage the cabinet. • Avoid touching the lens. Never pull the cord itself has been turned off the power with the I / 1 key on ... carrying the unit. • When you replace the lamp. On cleaning • To keep the cabinet looking new, periodically clean it by qualified Sony personnel before operating it further. • Unplug the unit from the wall outlet while the fan is still running . • Do not disconnect...
...the cooling fan is still running . (For dealers) Caution The unit is desirable to consult with a Sony dealer. Precautions 5 For installation, be near these will damage the cabinet. • Avoid touching the lens. Never pull the cord itself has been turned off the power with the I / 1 key on ... carrying the unit. • When you replace the lamp. On cleaning • To keep the cabinet looking new, periodically clean it by qualified Sony personnel before operating it further. • Unplug the unit from the wall outlet while the fan is still running . • Do not disconnect...

Operating Instructions
Page 7
... Commander to cut off the picture. Near a heat or smoke sensor magnifications. Note on the screen When using the unit at an altitude of the lens Do not place any object just in the Setup menu. Do not block the ventilation holes Avoid using as reducing the reliability of the... lens that may cause malfunction. Dust preventing the air passing through the filter may cause a malfunction of the unit. Use the PIC MUTING key on the ...
... Commander to cut off the picture. Near a heat or smoke sensor magnifications. Note on the screen When using the unit at an altitude of the lens Do not place any object just in the Setup menu. Do not block the ventilation holes Avoid using as reducing the reliability of the... lens that may cause malfunction. Dust preventing the air passing through the filter may cause a malfunction of the unit. Use the PIC MUTING key on the ...

Operating Instructions
Page 8
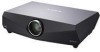
...projector. * The optional lens VPLL-1008 can read the Operating Instructions stored on the CD-ROM. Also, optional lenses are supplied with the newgeneration LCD... VPL-FX40: Three 0.79-inch XGA panels...on the CD-ROM) Projector Station for Air Shot ...lens shift function The projector is also provided. On Macintosh system, you have to change the size of this projector.... Installation Manual for Dealers (on the CD-ROM) This manual describes the information for mounting the optional lenses on the projector and installing the projector...available for the projector, depending on your...
...projector. * The optional lens VPLL-1008 can read the Operating Instructions stored on the CD-ROM. Also, optional lenses are supplied with the newgeneration LCD... VPL-FX40: Three 0.79-inch XGA panels...on the CD-ROM) Projector Station for Air Shot ...lens shift function The projector is also provided. On Macintosh system, you have to change the size of this projector.... Installation Manual for Dealers (on the CD-ROM) This manual describes the information for mounting the optional lenses on the projector and installing the projector...available for the projector, depending on your...

Operating Instructions
Page 9
...trademark of Adobe Systems Incorporated. • Windows is located at front and rear) You can install the projector by means of a breaker or other countries. • VGA, SVGA, XGA and SXGA are registered trademarks of the screen. You can change the lamp or clean the air filter ... to the "Operating Instructions for Network." * The optional lenses available for VPL-FE40 and VPL-FX40 equipped with one Remote Commander when you use two or more projectors in one room. Center positioned lens The projector is available for rear projection. Direct Power On/Power Off function The AC...
...trademark of Adobe Systems Incorporated. • Windows is located at front and rear) You can install the projector by means of a breaker or other countries. • VGA, SVGA, XGA and SXGA are registered trademarks of the screen. You can change the lamp or clean the air filter ... to the "Operating Instructions for Network." * The optional lenses available for VPL-FE40 and VPL-FX40 equipped with one Remote Commander when you use two or more projectors in one room. Center positioned lens The projector is available for rear projection. Direct Power On/Power Off function The AC...

Operating Instructions
Page 10
...; Air Shot is a trademark of Sony corporation. • "BrightEra" is not supplied with the VPLFE40L/FX40L. 10 Location and Function of Controls d Lamp cover e Lens Remove the lens cap before projection. Unless otherwise specified in notes, the VPL-FE40 described in this manual refers to both the VPL-FX40 and VPL-FX40L. Location and Function of Controls Top...
...; Air Shot is a trademark of Sony corporation. • "BrightEra" is not supplied with the VPLFE40L/FX40L. 10 Location and Function of Controls d Lamp cover e Lens Remove the lens cap before projection. Unless otherwise specified in notes, the VPL-FE40 described in this manual refers to both the VPL-FX40 and VPL-FX40L. Location and Function of Controls Top...

Operating Instructions
Page 12
... the ?/1 key. Connector Panel 12 3 4 5 67 8 90 a VIDEO IN (Video input) Connects to move it downward. Also, flashes in green when the projector is ready to move the picture upward. c SHIFT key Enters the H/V shift adjustment mode. Press the v key to external video equipment . e FOCUS key Enters the...or b key to enter the settings of a computer using the arrow keys. The ZOOM and FOCUS keys cannot be used when you attach the optional lens VPLL-1008 to operate. Flashes in standby mode. When you press the key the input signal switches. i ENTER/v/V/b/B (Arrow) keys Used to reduce...
... the ?/1 key. Connector Panel 12 3 4 5 67 8 90 a VIDEO IN (Video input) Connects to move it downward. Also, flashes in green when the projector is ready to move the picture upward. c SHIFT key Enters the H/V shift adjustment mode. Press the v key to external video equipment . e FOCUS key Enters the...or b key to enter the settings of a computer using the arrow keys. The ZOOM and FOCUS keys cannot be used when you attach the optional lens VPLL-1008 to operate. Flashes in standby mode. When you press the key the input signal switches. i ENTER/v/V/b/B (Arrow) keys Used to reduce...

Operating Instructions
Page 16
...the CD-ROM. 16 Installing the Projector For details on installation, See "Installation Manual for Dealers". For details on installation, ceiling installation or when you use an optional lens, be a slight difference between the screen and the center of the lens Unit: m (feet) Screen ...refer to the operating instructions of "Installation Manual for Dealers" on the size of installing the standard lens supplied with VPL-FE40/ VPL-FX40. B Projecting the Picture Installing the Projector The following table as a guide. Screen Distance between the actual value and the design value shown...
...the CD-ROM. 16 Installing the Projector For details on installation, See "Installation Manual for Dealers". For details on installation, ceiling installation or when you use an optional lens, be a slight difference between the screen and the center of the lens Unit: m (feet) Screen ...refer to the operating instructions of "Installation Manual for Dealers" on the size of installing the standard lens supplied with VPL-FE40/ VPL-FX40. B Projecting the Picture Installing the Projector The following table as a guide. Screen Distance between the actual value and the design value shown...

Operating Instructions
Page 20
... connected to display Computer, etc. Notes • If "Auto Input Search" is set to the projector by pressing certain keys (e.g., / , LCD VGA / , etc.), or by pressing one LCD type, you want to the projector varies depending on page 34. • The Smart APA feature is projected clearly. Depending on the ... Computer/VCR, etc. You can select directly the input signal you may have to switch the computer to output to "On," the projector searches for the input signal from the connected equipment and displays the input channel where the input signals are found. connected to the...
... connected to display Computer, etc. Notes • If "Auto Input Search" is set to the projector by pressing certain keys (e.g., / , LCD VGA / , etc.), or by pressing one LCD type, you want to the projector varies depending on page 34. • The Smart APA feature is projected clearly. Depending on the ... Computer/VCR, etc. You can select directly the input signal you may have to switch the computer to output to "On," the projector searches for the input signal from the connected equipment and displays the input channel where the input signals are found. connected to the...

Operating Instructions
Page 34
...signals is automatically selected by pressing INPUT key. Displays the test pattern. The Function Menu The Function menu is used when adjusting the lens with "Focus," "Zoom," and "Shift," or correcting the screen proportions with "V Keystone." Detects the input signal and displays the ... signal has been adjusted by pressing the APA key on the Remote Commander. "Input-E" is pressed. Selects the background color of the projector. Setting items Smart APA Auto Input Search Test Pattern Background Functions Initial setting The APA (Auto Pixel Alignment) automatically On adjusts "Phase...
...signals is automatically selected by pressing INPUT key. Displays the test pattern. The Function Menu The Function menu is used when adjusting the lens with "Focus," "Zoom," and "Shift," or correcting the screen proportions with "V Keystone." Detects the input signal and displays the ... signal has been adjusted by pressing the APA key on the Remote Commander. "Input-E" is pressed. Selects the background color of the projector. Setting items Smart APA Auto Input Search Test Pattern Background Functions Initial setting The APA (Auto Pixel Alignment) automatically On adjusts "Phase...

Operating Instructions
Page 36
... is longer than the top ( ): Sets a lower value (- direction) When the top of the lens such as "Focus," "Zoom," On and "Shift," by mistake. The brightness of the projector. Front & Rear 36 The Installation Menu After you make this adjustment, it is recommended that you can... adjust the projection lens using "Focus," "Zoom," and "Shift." Use this item to "Off" to avoid...
... is longer than the top ( ): Sets a lower value (- direction) When the top of the lens such as "Focus," "Zoom," On and "Shift," by mistake. The brightness of the projector. Front & Rear 36 The Installation Menu After you make this adjustment, it is recommended that you can... adjust the projection lens using "Focus," "Zoom," and "Shift." Use this item to "Off" to avoid...

Operating Instructions
Page 37
...or picture distortion may occur with the ID MODE key set to "1." When you use Blanking, set to "All," you can control the projector with the Remote Commander with V Keystone adjustment. • When both Blanking and V Keystone are using a circuit breaker to turn off the... items Functions Initial setting ID Mode Assigns an ID number (1 to 3) to the projector when you All want control two or more projectors individually with < / , key. Illumination Selects whether the SONY logo on the Blanking adjustment screen with the lens shift feature, the aspect ratio of the 0 screen.
...or picture distortion may occur with the ID MODE key set to "1." When you use Blanking, set to "All," you can control the projector with the Remote Commander with V Keystone adjustment. • When both Blanking and V Keystone are using a circuit breaker to turn off the... items Functions Initial setting ID Mode Assigns an ID number (1 to 3) to the projector when you All want control two or more projectors individually with < / , key. Illumination Selects whether the SONY logo on the Blanking adjustment screen with the lens shift feature, the aspect ratio of the 0 screen.

Operating Instructions
Page 44
...incorrect. • The picture has not been adjusted properly. "Phase" in the Setup menu is set to the wrong color system. key on the lens. c Set "Status" in the Screen menu properly (see page 32). around the image. c Adjust "Shift" in the Setup menu to the input... is incorrect. Symptom Cause and Remedy "Please check Input-C Signal Sel." c Replace the lamp with a new one (see page 33). c Leave the projector for about two hours with the VOLUME +/- The image extends beyond The APA key has been pressed even though there are wrong. c Adjust "Phase" in...
...incorrect. • The picture has not been adjusted properly. "Phase" in the Setup menu is set to the wrong color system. key on the lens. c Set "Status" in the Screen menu properly (see page 32). around the image. c Adjust "Shift" in the Setup menu to the input... is incorrect. Symptom Cause and Remedy "Please check Input-C Signal Sel." c Replace the lamp with a new one (see page 33). c Leave the projector for about two hours with the VOLUME +/- The image extends beyond The APA key has been pressed even though there are wrong. c Adjust "Phase" in...
Operating Instructions
Page 47
...a video recorded in NTSC on the floor.) When an SXGA+ (VPL-FE40)/ XGA (VPL-FX40) signal is not supplied with the VPL-FE40L/FX40L. Specifications Optical characteristics Projection system 3 LCD panels, 1 lens, 3 primary color shutter system LCD panel VPL-FE40: 0.79-inch SXGA+ panel, 4,410,000 pixels (1400 ...Lens 1.3 times zoom lens (powered) f 30.6 to 39.7 mm/F1.66 to 92 Hz (Maximum input signal resolution: UXGA 1600 × 1200 fV: 60 Hz) 1) Set the resolution and the frequency of the signal of the connected computer within the range of acceptable preset signals of the projector...
...a video recorded in NTSC on the floor.) When an SXGA+ (VPL-FE40)/ XGA (VPL-FX40) signal is not supplied with the VPL-FE40L/FX40L. Specifications Optical characteristics Projection system 3 LCD panels, 1 lens, 3 primary color shutter system LCD panel VPL-FE40: 0.79-inch SXGA+ panel, 4,410,000 pixels (1400 ...Lens 1.3 times zoom lens (powered) f 30.6 to 39.7 mm/F1.66 to 92 Hz (Maximum input signal resolution: UXGA 1600 × 1200 fV: 60 Hz) 1) Set the resolution and the frequency of the signal of the connected computer within the range of acceptable preset signals of the projector...

Operating Instructions
Page 48
FE40/FX40) Approx. 9.0 kg (19 lb 13 oz) (VPL- Optional accessories Projector Lamp LMP-F270 (for replacement) Projector Suspension Support PSS-610 Presentation Tool RM-PJPK1 Projection Lense Fixed short focus lens VPLL-1008 (for rear projection (Optical Axis Angle: 0 degree)) ... +140°F) Storage humidity 10% to 90% Supplied accessories Remote Commander (1) Size AA (R6) batteries (2) Lens cap (1) (VPL-FE40/FX40) Lens hole cover (1) (VPL-FE40L/ FX40L) AC power cord (1) CD-ROM (Operating Instructions, Application Software) (1) Quick Reference Manual (1) Safety Regulations (1) ...
FE40/FX40) Approx. 9.0 kg (19 lb 13 oz) (VPL- Optional accessories Projector Lamp LMP-F270 (for replacement) Projector Suspension Support PSS-610 Presentation Tool RM-PJPK1 Projection Lense Fixed short focus lens VPLL-1008 (for rear projection (Optical Axis Angle: 0 degree)) ... +140°F) Storage humidity 10% to 90% Supplied accessories Remote Commander (1) Size AA (R6) batteries (2) Lens cap (1) (VPL-FE40/FX40) Lens hole cover (1) (VPL-FE40L/ FX40L) AC power cord (1) CD-ROM (Operating Instructions, Application Software) (1) Quick Reference Manual (1) Safety Regulations (1) ...

Operating Instructions
Page 49
... 3250 mm 300 inches: 4910 mm Maximum external dimensions 130 × 130 × 242 mm (W × H × D) Weight 1500 g Middle focus zoom lens VPLL-Z1024 F = 2.0 - 2.3 f = 37.8 to 54.3 mm Powered focus/zoom Projection screen size 40 to 600-inches Projection distance 100 inches: 4840 to ...87 × 177 mm (W × H × D) Weight 1140 g Some of the items may not be available in some areas. For details, please consult your nearest Sony dealer. Pin assignment INPUT A/B RGB connector (HD D-sub 15-pin, female) 1 R/R-Y 9 Power supply input for DDC 2 G/Y 10 GND 3 B/B-Y 11 GND 4 GND...
... 3250 mm 300 inches: 4910 mm Maximum external dimensions 130 × 130 × 242 mm (W × H × D) Weight 1500 g Middle focus zoom lens VPLL-Z1024 F = 2.0 - 2.3 f = 37.8 to 54.3 mm Powered focus/zoom Projection screen size 40 to 600-inches Projection distance 100 inches: 4840 to ...87 × 177 mm (W × H × D) Weight 1140 g Some of the items may not be available in some areas. For details, please consult your nearest Sony dealer. Pin assignment INPUT A/B RGB connector (HD D-sub 15-pin, female) 1 R/R-Y 9 Power supply input for DDC 2 G/Y 10 GND 3 B/B-Y 11 GND 4 GND...

Operating Instructions
Page 53
26 (1 1/16) Dimensions Front 29.5 (1 3/16) 532 (21) 497 (19 5/8) 116 (4 5/8) (5/16) 7.6 71 (2 7/8) 13 (17/32) (4) 10 0 145 (5 3/4) 87.5 (3 1/2) 47.5 (1 7/8) 24.5 (31/32) Top 133 (5 1/4) 65.4 65.4 (2 5/8) (2 5/8) 133 (5 1/4) Center of the lens 500 (19 3/4) 27.5(1 1/8) Others 40 (1 5/8) 352 (13 7/8) 532 (21) Unit: mm (inches) Dimensions 53
26 (1 1/16) Dimensions Front 29.5 (1 3/16) 532 (21) 497 (19 5/8) 116 (4 5/8) (5/16) 7.6 71 (2 7/8) 13 (17/32) (4) 10 0 145 (5 3/4) 87.5 (3 1/2) 47.5 (1 7/8) 24.5 (31/32) Top 133 (5 1/4) 65.4 65.4 (2 5/8) (2 5/8) 133 (5 1/4) Center of the lens 500 (19 3/4) 27.5(1 1/8) Others 40 (1 5/8) 352 (13 7/8) 532 (21) Unit: mm (inches) Dimensions 53

Operating Instructions
Page 56
... 33 Installation 16 Installation examples unsuitable conditions 7 unsuitable installation 6 L Lamp Mode 36 Lamp replacement 40 Lamp Timer 38 Language 32 selecting the menu language 22 Lens 10 Location and function of controls connector panel 12 control panel 11 rear/side/bottom 10 Remote Commander 14 top/front/side 10 M Menu clearing...
... 33 Installation 16 Installation examples unsuitable conditions 7 unsuitable installation 6 L Lamp Mode 36 Lamp replacement 40 Lamp Timer 38 Language 32 selecting the menu language 22 Lens 10 Location and function of controls connector panel 12 control panel 11 rear/side/bottom 10 Remote Commander 14 top/front/side 10 M Menu clearing...

