VAIO User Guide
Page 8
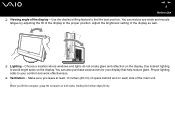
... purchase accessories for your comfort and work effectiveness. ❑ Ventilation - Choose a location where windows and lights do not create glare and reflection on both sides, holding the bottom edges firmly. Make sure you lift the computer, grasp the computer on the display. nN 8 Before Use ❑ Viewing angle of the display as well...
... purchase accessories for your comfort and work effectiveness. ❑ Ventilation - Choose a location where windows and lights do not create glare and reflection on both sides, holding the bottom edges firmly. Make sure you lift the computer, grasp the computer on the display. nN 8 Before Use ❑ Viewing angle of the display as well...
VAIO User Guide
Page 17
To shut down your computer properly, as described below. The power indicator light turns off automatically. nN 17 Getting Started Shutting Down Your Computer Safely To avoid losing unsaved data, be sure to your computer. 2 Click Start and then Turn Off Computer. The Turn off computer window appears. 3 Click Turn Off. 4 Respond to any peripherals connected to shut down your computer 1 Turn off any prompts warning you to save documents or to consider other users and wait for your computer to turn off .
To shut down your computer properly, as described below. The power indicator light turns off automatically. nN 17 Getting Started Shutting Down Your Computer Safely To avoid losing unsaved data, be sure to your computer. 2 Click Start and then Turn Off Computer. The Turn off computer window appears. 3 Click Turn Off. 4 Respond to any peripherals connected to shut down your computer 1 Turn off any prompts warning you to save documents or to consider other users and wait for your computer to turn off .
VAIO User Guide
Page 19
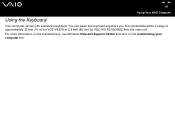
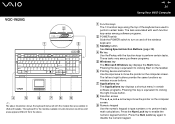
nN 19 Using Your VAIO Computer Using the Keyboard Your computer comes with a wireless keyboard. For more information on the standard keys, see Windows Help and Support Center and click on the Customizing your computer link. You can place the keyboard anywhere you find comfortable within a range of approximately 32 feet (10 m) for VGC-V620G or 2.5 feet (80 cm) for VGC-V617G/V600MG from the main unit.
nN 19 Using Your VAIO Computer Using the Keyboard Your computer comes with a wireless keyboard. For more information on the standard keys, see Windows Help and Support Center and click on the Customizing your computer link. You can place the keyboard anywhere you find comfortable within a range of approximately 32 feet (10 m) for VGC-V620G or 2.5 feet (80 cm) for VGC-V617G/V600MG from the main unit.
VAIO User Guide
Page 20
...pointer on the taskbar. F Pointing device and buttons Use the input area to clicking Start on the computer screen. VGC-V620G ✍ The above . D Fn key Use the Fn key with the function keys to ...v, B, and b arrow keys move the pointer on and off the wireless keyboard. nN 20 Using Your VAIO Computer A Function keys The 12 function keys along the top of the keyboard are available in Latin American countries and... each function key varies among software programs. E Windows key The Microsoft Windows key displays the Start menu. The keyboard for the models available in USA and Canada....
...pointer on the taskbar. F Pointing device and buttons Use the input area to clicking Start on the computer screen. VGC-V620G ✍ The above . D Fn key Use the Fn key with the function keys to ...v, B, and b arrow keys move the pointer on and off the wireless keyboard. nN 20 Using Your VAIO Computer A Function keys The 12 function keys along the top of the keyboard are available in Latin American countries and... each function key varies among software programs. E Windows key The Microsoft Windows key displays the Start menu. The keyboard for the models available in USA and Canada....
VAIO User Guide
Page 22
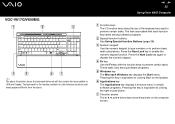
... D Fn key Use the Fn key with the function keys to enable the numeric keypad function. VGC-V617G/V600MG ✍ The above . Press the Num Lock key to perform certain tasks. Pressing this key... certain software programs. Pressing this key is equivalent to perform certain tasks. nN 22 Using Your VAIO Computer A Function keys The 12 function keys along the top of the keyboard are available in Latin American...with each function key varies among software programs. E Windows key The Microsoft Windows key displays the Start menu. Press the Num Lock key again to disable the numeric...
... D Fn key Use the Fn key with the function keys to enable the numeric keypad function. VGC-V617G/V600MG ✍ The above . Press the Num Lock key to perform certain tasks. Pressing this key... certain software programs. Pressing this key is equivalent to perform certain tasks. nN 22 Using Your VAIO Computer A Function keys The 12 function keys along the top of the keyboard are available in Latin American...with each function key varies among software programs. E Windows key The Microsoft Windows key displays the Start menu. Press the Num Lock key again to disable the numeric...
VAIO User Guide
Page 30
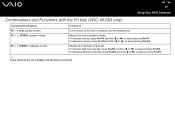
nN 30 Using Your VAIO Computer Combinations and Functions with the Fn Key (VGC-V620G only) Combinations/Feature Functions Fn + % (F2): speaker switch Turns on and off the built-in speaker volume. To increase volume, press Fn+F4 and then M or ,, or keep pressing Fn+F4. To decrease volume, press Fn+F3 and then m or Fn + 2 (F3/F4): speaker volume Adjusts the built-in speakers and the headphones.
nN 30 Using Your VAIO Computer Combinations and Functions with the Fn Key (VGC-V620G only) Combinations/Feature Functions Fn + % (F2): speaker switch Turns on and off the built-in speaker volume. To increase volume, press Fn+F4 and then M or ,, or keep pressing Fn+F4. To decrease volume, press Fn+F3 and then m or Fn + 2 (F3/F4): speaker volume Adjusts the built-in speakers and the headphones.
VAIO User Guide
Page 37
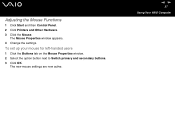
To set up your mouse for left-handed users 1 Click the Buttons tab on the Mouse Properties window. 2 Select the option button next to Switch primary and secondary buttons. 3 Click OK. The Mouse Properties window appears. 4 Change the settings. nN 37 Using Your VAIO Computer Adjusting the Mouse Functions 1 Click Start and then Control Panel. 2 Click Printers and Other Hardware. 3 Click the Mouse. The new mouse settings are now active.
To set up your mouse for left-handed users 1 Click the Buttons tab on the Mouse Properties window. 2 Select the option button next to Switch primary and secondary buttons. 3 Click OK. The Mouse Properties window appears. 4 Change the settings. nN 37 Using Your VAIO Computer Adjusting the Mouse Functions 1 Click Start and then Control Panel. 2 Click Printers and Other Hardware. 3 Click the Mouse. The new mouse settings are now active.
VAIO User Guide
Page 44
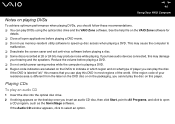
...indicators are labeled on the DVDs to indicate in most regions of the world. If the Audio CD window appears, click to speed up disc access when playing a DVD. nN 44 Using Your VAIO Computer Notes on playing DVDs To achieve optimum performance when playing DVDs, you should follow these recommendations. ❑...DVD disc or on the packaging, you cannot play an audio CD 1 Insert the disc into the optical disc drive. 2 If nothing appears on the desktop once you insert an audio CD disc, then click Start, point to All Programs, and click to open applications before playing a DVD movie. ❑...
...indicators are labeled on the DVDs to indicate in most regions of the world. If the Audio CD window appears, click to speed up disc access when playing a DVD. nN 44 Using Your VAIO Computer Notes on playing DVDs To achieve optimum performance when playing DVDs, you should follow these recommendations. ❑...DVD disc or on the packaging, you cannot play an audio CD 1 Insert the disc into the optical disc drive. 2 If nothing appears on the desktop once you insert an audio CD disc, then click Start, point to All Programs, and click to open applications before playing a DVD movie. ❑...
VAIO User Guide
Page 45
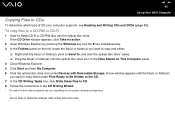
... and DVDs (page 42). Do not strike or shake the computer while writing data onto a disc. nN 45 Using Your VAIO Computer Copying Files to CD. 8 Follow the instructions in the Files Stored on This Computer panel. 4 Close Windows Explorer. 5 Click Start and then My Computer. 6 Click the optical disc drive icon under Files Ready to...
... and DVDs (page 42). Do not strike or shake the computer while writing data onto a disc. nN 45 Using Your VAIO Computer Copying Files to CD. 8 Follow the instructions in the Files Stored on This Computer panel. 4 Close Windows Explorer. 5 Click Start and then My Computer. 6 Click the optical disc drive icon under Files Ready to...
VAIO User Guide
Page 57
... not need to shut down your computer before your computer enters Hibernate mode. Restart your system to correct the problem. Do not force a PC Card into the slot. If you have difficulty inserting a PC Card, check that you are inserting the PC Card in the System Properties window, remove the software driver and... not function properly if you use . mark appears on use the most recent software driver provided by the PC Card manufacturer. nN 57 Using Your VAIO Computer ✍ Some devices may find that a device connected to your system is not recognized.
... not need to shut down your computer before your computer enters Hibernate mode. Restart your system to correct the problem. Do not force a PC Card into the slot. If you have difficulty inserting a PC Card, check that you are inserting the PC Card in the System Properties window, remove the software driver and... not function properly if you use . mark appears on use the most recent software driver provided by the PC Card manufacturer. nN 57 Using Your VAIO Computer ✍ Some devices may find that a device connected to your system is not recognized.
VAIO User Guide
Page 58
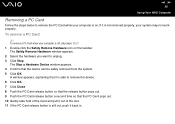
nN 58 Using Your VAIO Computer Removing a PC Card Follow the steps below to remove the PC Card while your computer is off, skip steps 1 to 7. 1 Double-click the Safely Remove Hardware icon on . The Safely Remove Hardware window appears. 2 Select the hardware you want to remove the device. 6 Click OK. 7 Click Close. 8 ... Push the PC Card release button a second time so that the device can be safely removed from the system. 5 Click OK. The Stop a Hardware Device window appears. 4 Confirm that the PC Card pops out. 10 Gently take hold of the Card and pull it out of the slot. 11 If the...
nN 58 Using Your VAIO Computer Removing a PC Card Follow the steps below to remove the PC Card while your computer is off, skip steps 1 to 7. 1 Double-click the Safely Remove Hardware icon on . The Safely Remove Hardware window appears. 2 Select the hardware you want to remove the device. 6 Click OK. 7 Click Close. 8 ... Push the PC Card release button a second time so that the device can be safely removed from the system. 5 Click OK. The Stop a Hardware Device window appears. 4 Confirm that the PC Card pops out. 10 Gently take hold of the Card and pull it out of the slot. 11 If the...

VAIO User Guide
Page 62
nN 62 Using Your VAIO Computer To insert a Memory Stick media using the Memory Stick media slot 1 Hold the Memory Stick media with the arrow facing toward the front of your computer). The Memory Stick media is automatically detected by your system and appears in your My Computer window as a local drive, under the appropriate letter (depending on the configuration of the arrow. 2 Carefully slide the Memory Stick media into the Memory Stick media slot in the direction of your computer and insert it into the slot until it clicks in place.
nN 62 Using Your VAIO Computer To insert a Memory Stick media using the Memory Stick media slot 1 Hold the Memory Stick media with the arrow facing toward the front of your computer). The Memory Stick media is automatically detected by your system and appears in your My Computer window as a local drive, under the appropriate letter (depending on the configuration of the arrow. 2 Carefully slide the Memory Stick media into the Memory Stick media slot in the direction of your computer and insert it into the slot until it clicks in place.
VAIO User Guide
Page 64
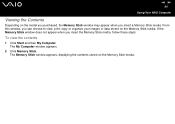
The My Computer window appears. 2 Click Memory Stick. The Memory Stick window appears, displaying the contents stored on the model you purchased, the Memory Stick window may appear when you insert a Memory Stick media. If the Memory Stick window does not appear when you can choose to view, print, copy or organize your images or data stored on the Memory Stick media. From this window, you insert the Memory Stick media, follow these steps: To view the contents 1 Click Start and then My Computer. nN 64 Using Your VAIO Computer Viewing the Contents Depending on the Memory Stick media.
The My Computer window appears. 2 Click Memory Stick. The Memory Stick window appears, displaying the contents stored on the model you purchased, the Memory Stick window may appear when you insert a Memory Stick media. If the Memory Stick window does not appear when you can choose to view, print, copy or organize your images or data stored on the Memory Stick media. From this window, you insert the Memory Stick media, follow these steps: To view the contents 1 Click Start and then My Computer. nN 64 Using Your VAIO Computer Viewing the Contents Depending on the Memory Stick media.

VAIO User Guide
Page 65
..., see the Memory Stick Formatter help file. ! Formatting Memory Stick media erases all data previously saved to it . The Memory Stick Formatter window appears. 2 Click Start Format, and follow the on-screen instructions. 3 After formatting, click Exit. Before you reformat Memory Stick media, ...confirm that is provided with the media. nN 65 Using Your VAIO Computer Formatting a Memory Stick Media Memory Stick media is formatted for immediate use the Memory Stick Formatter software that the media does not contain...
..., see the Memory Stick Formatter help file. ! Formatting Memory Stick media erases all data previously saved to it . The Memory Stick Formatter window appears. 2 Click Start Format, and follow the on-screen instructions. 3 After formatting, click Exit. Before you reformat Memory Stick media, ...confirm that is provided with the media. nN 65 Using Your VAIO Computer Formatting a Memory Stick Media Memory Stick media is formatted for immediate use the Memory Stick Formatter software that the media does not contain...
VAIO User Guide
Page 67
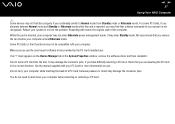
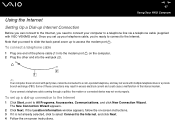
.... If you connect a telephone cable coming through a splitter, the modem or connected device may not work with VGC-V600MG only). nN 67 Using Your VAIO Computer Using the Internet Setting Up a Dial-up Internet Connection Before you can connect to the Internet, you need to...computer to All Programs, Accessories, Communications, and click New Connection Wizard. Note that you set up a dial-up connection to the Internet 1 Click Start, point to a telephone line via a telephone cable (supplied with multiple telephone lines or a private branch exchange (PBX). If the Location Information window...
.... If you connect a telephone cable coming through a splitter, the modem or connected device may not work with VGC-V600MG only). nN 67 Using Your VAIO Computer Using the Internet Setting Up a Dial-up Internet Connection Before you can connect to the Internet, you need to...computer to All Programs, Accessories, Communications, and click New Connection Wizard. Note that you set up a dial-up connection to the Internet 1 Click Start, point to a telephone line via a telephone cable (supplied with multiple telephone lines or a private branch exchange (PBX). If the Location Information window...
VAIO User Guide
Page 69
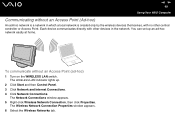
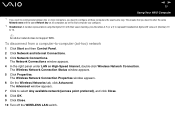
nN 69 Using Your VAIO Computer Communicating without an Access Point (ad-hoc) 1 Turn on the WIRELESS LAN switch. Each device communicates directly with no other devices in which a local network ... controller or Access Point. You can set up . 2 Click Start and then Control Panel. 3 Click Network and Internet Connections. 4 Click Network Connections. The Network Connections window appears. 5 Right-click Wireless Network Connection, then click Properties. The Wireless Network Connection Properties...
nN 69 Using Your VAIO Computer Communicating without an Access Point (ad-hoc) 1 Turn on the WIRELESS LAN switch. Each device communicates directly with no other devices in which a local network ... controller or Access Point. You can set up . 2 Click Start and then Control Panel. 3 Click Network and Internet Connections. 4 Click Network Connections. The Network Connections window appears. 5 Right-click Wireless Network Connection, then click Properties. The Wireless Network Connection Properties...
VAIO User Guide
Page 70
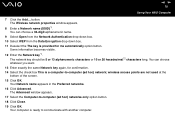
... Network key*1. wireless access points are not used at the bottom of the screen. 15 Click OK. The Advanced window appears. 17 Select the Computer-to -computer (ad hoc) network; nN 70 Using Your VAIO Computer 7 Click the Add... Your Network name appears in the Preferred networks. 16 Click Advanced. button. The Wireless network properties...
... Network key*1. wireless access points are not used at the bottom of the screen. 15 Click OK. The Advanced window appears. 17 Select the Computer-to -computer (ad hoc) network; nN 70 Using Your VAIO Computer 7 Click the Add... Your Network name appears in the Preferred networks. 16 Click Advanced. button. The Wireless network properties...
VAIO User Guide
Page 71
... way. The Wireless Network Connection Status window appears. 5 Click Properties. The Advanced window appears. 7 Click to -computer (ad-hoc) network 1 Click Start and then Control Panel. 2 Click Network and Internet Connections. 3 Click Network Connections. nN 71 Using Your VAIO Computer *1 If you want to communicate between two or more computers, you configure. *2 Hexadecimal: A number representation using...
... way. The Wireless Network Connection Status window appears. 5 Click Properties. The Advanced window appears. 7 Click to -computer (ad-hoc) network 1 Click Start and then Control Panel. 2 Click Network and Internet Connections. 3 Click Network Connections. nN 71 Using Your VAIO Computer *1 If you want to communicate between two or more computers, you configure. *2 Hexadecimal: A number representation using...
VAIO User Guide
Page 83
... saving mode (Standby or Hibernate) may cause the computer to malfunction. A message appears stating it is now safe to unplug. 4 Click Stop. Disconnecting the drive when the computer is selected, and click OK. The Safely Remove Hardware window appears. 3 Select the floppy disk drive you can... disconnect a USB floppy disk drive when the computer is on the taskbar. To disconnect a USB floppy disk drive...
... saving mode (Standby or Hibernate) may cause the computer to malfunction. A message appears stating it is now safe to unplug. 4 Click Stop. Disconnecting the drive when the computer is selected, and click OK. The Safely Remove Hardware window appears. 3 Select the floppy disk drive you can... disconnect a USB floppy disk drive when the computer is on the taskbar. To disconnect a USB floppy disk drive...

VAIO User Guide
Page 84
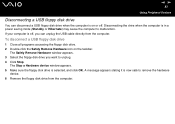
... compatible with your version of a USB printer cable (2) into an AC outlet (1). 2 Choose the USB port (3) you prefer to use. 3 Plug one end of Windows to your computer to access the USB ports on the bottom panel. To connect a printer using the USB port 1 Plug the printer power cord into the USB... port and the other end to your printer. nN 84 Using Peripheral Devices Connecting a Printer Using the USB Port You can connect a Windows-compatible printer to your computer. ✍ You need to slide the back panel cover up to print documents.
... compatible with your version of a USB printer cable (2) into an AC outlet (1). 2 Choose the USB port (3) you prefer to use. 3 Plug one end of Windows to your computer to access the USB ports on the bottom panel. To connect a printer using the USB port 1 Plug the printer power cord into the USB... port and the other end to your printer. nN 84 Using Peripheral Devices Connecting a Printer Using the USB Port You can connect a Windows-compatible printer to your computer. ✍ You need to slide the back panel cover up to print documents.


