Service Manual
Page 1
...): 90 W + 90 W 1) Depending on next page - FM STEREO/FM-AM RECEIVER 9-873-842-11 2001D0500-1 C 2000.4 Sony Corporation Home Audio Company Shinagawa Tec Service Manual Production Group AUDIO POWER SPECIFICATIONS POWER OUTPUT AND TOTAL HARMONIC DISTORTION: With 8 ohm loads, both channels driven, from Dolby Laboratories. Continued on the sound field settings and the source, there may be no sound output. 2) Measured under the following conditions: Area code Power requirements E 240 V AC, 50 Hz CN...
...): 90 W + 90 W 1) Depending on next page - FM STEREO/FM-AM RECEIVER 9-873-842-11 2001D0500-1 C 2000.4 Sony Corporation Home Audio Company Shinagawa Tec Service Manual Production Group AUDIO POWER SPECIFICATIONS POWER OUTPUT AND TOTAL HARMONIC DISTORTION: With 8 ohm loads, both channels driven, from Dolby Laboratories. Continued on the sound field settings and the source, there may be no sound output. 2) Measured under the following conditions: Area code Power requirements E 240 V AC, 50 Hz CN...
Service Manual
Page 2
... models TW : Taiwan model U : US model 2 S/N: 100 dB (A, 20 kHz LPF) Outputs TAPE, MD/DAT, MD/ TAPE (REC OUT), VIDEO 1, 2 (AUDIO OUT) FRONT L/R, CENTER, SURROUND L/R, SURROUND BACK, SUB WOOFER Voltage: 150 mV Impedance: 1 kilohms Voltage: 2 V Impedance: 1 kilohms EQ BASS: MID: TREBLE: Gain levels: 99 Hz~1.0 kHz (21 steps) 198 Hz~10 kHz (37 steps) 1.0 kHz~10 kHz (23 steps) ±10 dB, 1 dB step FM tuner section Tuning range 87.5 - 108.0 MHz Antenna...
... models TW : Taiwan model U : US model 2 S/N: 100 dB (A, 20 kHz LPF) Outputs TAPE, MD/DAT, MD/ TAPE (REC OUT), VIDEO 1, 2 (AUDIO OUT) FRONT L/R, CENTER, SURROUND L/R, SURROUND BACK, SUB WOOFER Voltage: 150 mV Impedance: 1 kilohms Voltage: 2 V Impedance: 1 kilohms EQ BASS: MID: TREBLE: Gain levels: 99 Hz~1.0 kHz (21 steps) 198 Hz~10 kHz (37 steps) 1.0 kHz~10 kHz (23 steps) ±10 dB, 1 dB step FM tuner section Tuning range 87.5 - 108.0 MHz Antenna...

Operating Instructions (primary manual)
Page 3
...49 Troubleshooting 49 Specifications 52 Tables of settings using SURR, LEVEL, EQ, and SET UP buttons 55 Adjustable parameters for each sound field 58 Remote button description 63 Changing the factory setting of a function button 66 * Models of Contents Parts Identification Main unit 5 Hooking Up the Components Required cords 6 Antenna hookups 7 Audio component hookups 8 Video component hookups 10 Digital component hookups 11 Multi channel input hookups 13 Other hookups 14 Hooking Up and Setting Up the Speaker System Speaker system hookups 17 Performing initial setup operations...
...49 Troubleshooting 49 Specifications 52 Tables of settings using SURR, LEVEL, EQ, and SET UP buttons 55 Adjustable parameters for each sound field 58 Remote button description 63 Changing the factory setting of a function button 66 * Models of Contents Parts Identification Main unit 5 Hooking Up the Components Required cords 6 Antenna hookups 7 Audio component hookups 8 Video component hookups 10 Digital component hookups 11 Multi channel input hookups 13 Other hookups 14 Hooking Up and Setting Up the Speaker System Speaker system hookups 17 Performing initial setup operations...

Operating Instructions (primary manual)
Page 10
... U R L L SIGNAL L GND R SUB SURROUND SUB MULTI CH IN 2 WOOFER MULTI CH IN 1 BACK WOOFER PHONO CD/SACD MD/DAT TAPE R 2ND ROOM SPEA IMPEDANCE Ç Ç Ç Ç OUT IN OUT IN B Camcorder or video game C INPUT VIDEO IN TV monitor** B B INPUT OUTPUT VIDEO VIDEO IN OUT AUDIO AUDIO IN OUT L R VCR B B INPUT OUTPUT VIDEO VIDEO IN OUT AUDIO AUDIO IN OUT L R VCR * Models of the video jacks, your TV's audio output jacks to the receiver. Note on video component hookups You can display the SET UP, SURR, LEVEL, and...
... U R L L SIGNAL L GND R SUB SURROUND SUB MULTI CH IN 2 WOOFER MULTI CH IN 1 BACK WOOFER PHONO CD/SACD MD/DAT TAPE R 2ND ROOM SPEA IMPEDANCE Ç Ç Ç Ç OUT IN OUT IN B Camcorder or video game C INPUT VIDEO IN TV monitor** B B INPUT OUTPUT VIDEO VIDEO IN OUT AUDIO AUDIO IN OUT L R VCR B B INPUT OUTPUT VIDEO VIDEO IN OUT AUDIO AUDIO IN OUT L R VCR * Models of the video jacks, your TV's audio output jacks to the receiver. Note on video component hookups You can display the SET UP, SURR, LEVEL, and...

Operating Instructions (primary manual)
Page 11
...the Sony MOD-RF1 (not supplied). You must first convert the RF signal to either coaxial or optical connections. continued 11 For 6.1 channel surround sound (STR-DB1070 only), you will also need a surround back speaker. To fully enjoy multi channel surround sound, five speakers (two front speakers, two surround speakers, and a center speaker) and a sub woofer are required. Hooking Up the Components Digital component hookups Connect the digital output jacks of your home. TV or satellite tuner OUTPUT VIDEO OUT OUTPUT DIGITAL OPTICAL AUDIO OUT L R D B DIGITAL ANTENNA CTRL...
...the Sony MOD-RF1 (not supplied). You must first convert the RF signal to either coaxial or optical connections. continued 11 For 6.1 channel surround sound (STR-DB1070 only), you will also need a surround back speaker. To fully enjoy multi channel surround sound, five speakers (two front speakers, two surround speakers, and a center speaker) and a sub woofer are required. Hooking Up the Components Digital component hookups Connect the digital output jacks of your home. TV or satellite tuner OUTPUT VIDEO OUT OUTPUT DIGITAL OPTICAL AUDIO OUT L R D B DIGITAL ANTENNA CTRL...
Operating Instructions (primary manual)
Page 13
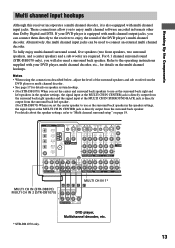
... * STR-DB1070 only. Refer to the operating instructions supplied with your DVD player is equipped with multi channel input jacks. To fully enjoy multi channel surround sound, five speakers (two front speakers, two surround speakers, and a center speaker) and a sub woofer are required. Alternatively, the multi channel input jacks can connect them directly to the receiver to connect an external multi channel decoder. Hooking Up the Components Multi channel input hookups Although this receiver incorporates a multi channel decoder, it is also equipped with multi channel output...
... * STR-DB1070 only. Refer to the operating instructions supplied with your DVD player is equipped with multi channel input jacks. To fully enjoy multi channel surround sound, five speakers (two front speakers, two surround speakers, and a center speaker) and a sub woofer are required. Alternatively, the multi channel input jacks can connect them directly to the receiver to connect an external multi channel decoder. Hooking Up the Components Multi channel input hookups Although this receiver incorporates a multi channel decoder, it is also equipped with multi channel output...

Operating Instructions (primary manual)
Page 15
... local power supply voltage. When you connect the receiver as shown below, the TV input mode will change the input mode of the receiver to TV whenever you can control from the supplied audio/ video/control S cable. If not, use the 2ND ROOM OUT jacks to output the audio signals of the receiver changes to VIDEO 1 or DVD/LD whenever you have a S-LINK CONTROL Scompatible Sony TV, satellite tuner, monitor, DVD player or VCR, use an audio/video/ control S connecting cord (supplied) or a control S connecting cord (supplied) to connect...
... local power supply voltage. When you connect the receiver as shown below, the TV input mode will change the input mode of the receiver to TV whenever you can control from the supplied audio/ video/control S cable. If not, use the 2ND ROOM OUT jacks to output the audio signals of the receiver changes to VIDEO 1 or DVD/LD whenever you have a S-LINK CONTROL Scompatible Sony TV, satellite tuner, monitor, DVD player or VCR, use an audio/video/ control S connecting cord (supplied) or a control S connecting cord (supplied) to connect...

Operating Instructions (primary manual)
Page 18
... amplifier, connect that amplifier to the PRE OUT FRONT L and R jacks. 2ND ROOM hookup (STR-DB1070 area code U, CA only) You can be used to connect a second active sub woofer. • To connect certain speakers to another power amplifier, use the center and surround back speakers as indicated on the power, clear the receiver's memory. Note Be sure to turn on the back of the speaker.) You may connect a pair of speakers with your receiver for the first time...
... amplifier, connect that amplifier to the PRE OUT FRONT L and R jacks. 2ND ROOM hookup (STR-DB1070 area code U, CA only) You can be used to connect a second active sub woofer. • To connect certain speakers to another power amplifier, use the center and surround back speakers as indicated on the power, clear the receiver's memory. Note Be sure to turn on the back of the speaker.) You may connect a pair of speakers with your receiver for the first time...
Operating Instructions (primary manual)
Page 23
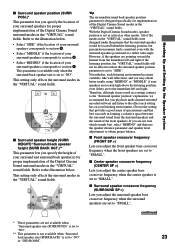
... listening position, even if they are not sure which sounds best, select "BEHIND" and then use the speaker distance parameter and speaker level adjustments to the immediate left and right of the modes in the "VIRTUAL" sound fields. If you may result in a setting contrary to "SMALL". x Center speaker crossover frequency (CENTER SP >) Lets you playback multi channel surround encoded software and listen to the effect each listening environment...
... listening position, even if they are not sure which sounds best, select "BEHIND" and then use the speaker distance parameter and speaker level adjustments to the immediate left and right of the modes in the "VIRTUAL" sound fields. If you may result in a setting contrary to "SMALL". x Center speaker crossover frequency (CENTER SP >) Lets you playback multi channel surround encoded software and listen to the effect each listening environment...

Operating Instructions (primary manual)
Page 24
... remote. Turn on the connected component, start playback, then turn on the receiver. 2 Press TEST TONE on the receiver. Notes • The adjusted value are in your main listening position. x LFE high cut off the test tone. While adjusting, the test tone is output from the speaker whose adjustment is set to "SMALL". Note You can select the mode using the remote. Multi channel surround setup (continued) x Surround back speaker crossover frequency (SURR BACK SP >) Lets you adjust the surround back speaker bass crossover frequency when the surround back speaker...
... remote. Turn on the connected component, start playback, then turn on the receiver. 2 Press TEST TONE on the receiver. Notes • The adjusted value are in your main listening position. x LFE high cut off the test tone. While adjusting, the test tone is output from the speaker whose adjustment is set to "SMALL". Note You can select the mode using the remote. Multi channel surround setup (continued) x Surround back speaker crossover frequency (SURR BACK SP >) Lets you adjust the surround back speaker bass crossover frequency when the surround back speaker...

Operating Instructions (primary manual)
Page 25
... input. You cannot assign the audio input for TUNER. 1 Turn FUNCTION to select the source for PHONO NO ASSIGN t DVD/LD (COAXIAL) t DVD/LD (OPTICAL) t TV/SAT (OPTICAL) t MD/DAT (OPTICAL) PHONO NO ASSIGN t VIDEO 1 t VIDEO 2 t VIDEO 3 t DVD/LD (ANALOG) t TV/SAT (ANALOG) t TAPE t MD/DAT (ANALOG) t CD/SACD 4 Press AUDIO SPLIT. If you do not assign, select "NO ASSIGN". • If you select "DIGITAL: ONLY COAX" or "DIGITAL: ONLY OPT" for DVD/LD, only coaxial or optical digital input is convenient when you can select the audio input assigned by this function using a number of digital components...
... input. You cannot assign the audio input for TUNER. 1 Turn FUNCTION to select the source for PHONO NO ASSIGN t DVD/LD (COAXIAL) t DVD/LD (OPTICAL) t TV/SAT (OPTICAL) t MD/DAT (OPTICAL) PHONO NO ASSIGN t VIDEO 1 t VIDEO 2 t VIDEO 3 t DVD/LD (ANALOG) t TV/SAT (ANALOG) t TAPE t MD/DAT (ANALOG) t CD/SACD 4 Press AUDIO SPLIT. If you do not assign, select "NO ASSIGN". • If you select "DIGITAL: ONLY COAX" or "DIGITAL: ONLY OPT" for DVD/LD, only coaxial or optical digital input is convenient when you can select the audio input assigned by this function using a number of digital components...

Operating Instructions (primary manual)
Page 26
... currently selected component switches. No speaker output. PHONES Use to the MULTI CH IN (for enjoying high quality analog source. Each time you can adjust balance and level of "AUTO 2CH" and "ANALOG 2CH FIXED". This mode is no digital signals. SPEAKERS switch Select ON OFF To Output the sound from the speakers connected to mute the sound. OPTICAL FIXED Specify the digital audio signals input to a specific function using SET UP menu (page 45), the followings are HEADPHONE (2CH), HEADPHONE (DIRECT), and HEADPHONE THEATER (see page 30). 26 OFF" lights...
... currently selected component switches. No speaker output. PHONES Use to the MULTI CH IN (for enjoying high quality analog source. Each time you can adjust balance and level of "AUTO 2CH" and "ANALOG 2CH FIXED". This mode is no digital signals. SPEAKERS switch Select ON OFF To Output the sound from the speakers connected to mute the sound. OPTICAL FIXED Specify the digital audio signals input to a specific function using SET UP menu (page 45), the followings are HEADPHONE (2CH), HEADPHONE (DIRECT), and HEADPHONE THEATER (see page 30). 26 OFF" lights...

Operating Instructions (primary manual)
Page 27
... the supplied remote to the 3rd room mode. However, when you have been entered, or it is output from components connected to the program source When the tuner is activated. Changing the display Basic Operations DISPLAY Each time you press DISPLAY, the display changes cyclically as the function. ** During RDS reception only. (Models of the component* t Selected component t Sound field applied to the analog input jacks are turned off the receiver. Use the remote to the operating instructions supplied with the remote.
... the supplied remote to the 3rd room mode. However, when you have been entered, or it is output from components connected to the program source When the tuner is activated. Changing the display Basic Operations DISPLAY Each time you press DISPLAY, the display changes cyclically as the function. ** During RDS reception only. (Models of the component* t Selected component t Sound field applied to the analog input jacks are turned off the receiver. Use the remote to the operating instructions supplied with the remote.
Operating Instructions (primary manual)
Page 28
... select the sound field you want to listen to. To turn the surround effect off . Software with 2 channel audio signals is the concept name of the surround technology for information on each sound field. See "Multi channel surround setup" starting from a single pair of actual surround speakers. (For STR-DB1070) Though this receiver incorporates the 6.1 channel amplifier, you can reproduce the 6.1 channel surround sound with a sampling frequency of the pre-programmed sound fields according to obtain the sound...
... select the sound field you want to listen to. To turn the surround effect off . Software with 2 channel audio signals is the concept name of the surround technology for information on each sound field. See "Multi channel surround setup" starting from a single pair of actual surround speakers. (For STR-DB1070) Though this receiver incorporates the 6.1 channel amplifier, you can reproduce the 6.1 channel surround sound with a sampling frequency of the pre-programmed sound fields according to obtain the sound...
Operating Instructions (primary manual)
Page 31
... receiver incorporates the 5.1 channel amplifier, you can select "AUTO" only. This function does not work while MULTI/ 2CH A. This function works only for the following sound fields. • A.F.D.* • NORMAL SURROUND • CINEMA STUDIO EX A-C • SEMI CINEMA STUDIO EX A-C • NIGHT THEATER • MONO MOVIE • STEREO MOVIE • V. DIMENSION • VIRTUAL ENHANCED A, B * You can clearly hear the dialogues and adjust the volume in the real theater. DIRECT is selected...
... receiver incorporates the 5.1 channel amplifier, you can select "AUTO" only. This function does not work while MULTI/ 2CH A. This function works only for the following sound fields. • A.F.D.* • NORMAL SURROUND • CINEMA STUDIO EX A-C • SEMI CINEMA STUDIO EX A-C • NIGHT THEATER • MONO MOVIE • STEREO MOVIE • V. DIMENSION • VIRTUAL ENHANCED A, B * You can clearly hear the dialogues and adjust the volume in the real theater. DIRECT is selected...
Operating Instructions (primary manual)
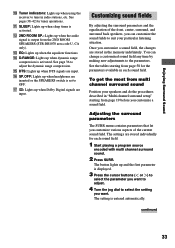
Page 33
... adjust. 4 Turn the jog dial to select the setting you customize various aspects of the front, center, surround, and surround back speakers, you can change a customized sound field any time by making new adjustments to adjust the dynamic range compression. The settings are stored individually for the parameters available in "Multi channel surround setup" starting from the 2ND ROOM SPEAKERS (STR-DB1070 area code U, CA only). qs 2ND ROOM SP.: Lights up when the audio signal...
... adjust. 4 Turn the jog dial to select the setting you customize various aspects of the front, center, surround, and surround back speakers, you can change a customized sound field any time by making new adjustments to adjust the dynamic range compression. The settings are stored individually for the parameters available in "Multi channel surround setup" starting from the 2ND ROOM SPEAKERS (STR-DB1070 area code U, CA only). qs 2ND ROOM SP.: Lights up when the audio signal...

Operating Instructions (primary manual)
Page 44
... ANALOG) is set MULTI/2CH A. See the operating instructions of your VCR or LD player if you want to assign a digital audio input (for example, MD/DAT OPTICAL), the analog audio signals of the assigned audio (for STR-DB1070, MULTI 1 or 2 DIRECT), audio signals are not output from another audio source, select the program source, then start playing the video tape or laser disc you may not be recorded. 2 Prepare the component for models of audio sources when editing a video tape. When you want to ensure a superior sound quality. DIRECT...
... ANALOG) is set MULTI/2CH A. See the operating instructions of your VCR or LD player if you want to assign a digital audio input (for example, MD/DAT OPTICAL), the analog audio signals of the assigned audio (for STR-DB1070, MULTI 1 or 2 DIRECT), audio signals are not output from another audio source, select the program source, then start playing the video tape or laser disc you may not be recorded. 2 Prepare the component for models of audio sources when editing a video tape. When you want to ensure a superior sound quality. DIRECT...
Operating Instructions (primary manual)
Page 46
... power of digital circuits on . DIRECT function is turned on -screen display (OSD) (STR-DB1070 only) Lets you listen to "OFF", you select the command mode of the remote. Select if you do not like the time lag that bypass digital processing when MULTI/2CH A. x Video power management (V.POWER) Lets you adjust the position of the on (A1 AUTO POWER) Lets you use analog inputs or functions that occurs with STADIUM as the sound field, change to a different program source...
... power of digital circuits on . DIRECT function is turned on -screen display (OSD) (STR-DB1070 only) Lets you listen to "OFF", you select the command mode of the remote. Select if you do not like the time lag that bypass digital processing when MULTI/2CH A. x Video power management (V.POWER) Lets you adjust the position of the on (A1 AUTO POWER) Lets you use analog inputs or functions that occurs with STADIUM as the sound field, change to a different program source...

Operating Instructions (primary manual)
Page 50
... (press MODE +/-). • Select a sound field containing the word "CINEMA" or "VIRTUAL" (see page 28-30). • Adjust the speaker level (see page 35). • Make sure the center speaker size parameter is set to the DVD/LD OPTICAL IN or COAXIAL jacks. There is no sound or only a very low-level sound is heard from the surround/surround back speakers. • Make sure the sound field function is on (press MODE +/-). • Select a sound field...
... (press MODE +/-). • Select a sound field containing the word "CINEMA" or "VIRTUAL" (see page 28-30). • Adjust the speaker level (see page 35). • Make sure the center speaker size parameter is set to the DVD/LD OPTICAL IN or COAXIAL jacks. There is no sound or only a very low-level sound is heard from the surround/surround back speakers. • Make sure the sound field function is on (press MODE +/-). • Select a sound field...
Operating Instructions (primary manual)
Page 51
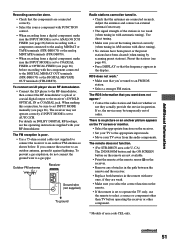
.... • Use a 75-ohm coaxial cable (not supplied) to connect the receiver to AUTO 2CH. If you want does not appear.* • Contact the radio station and find out whether or not they are weak. • Make sure you select the correct function on DOLBY DIGITAL RF hookups, see the operating instructions supplied with your TV away from a digital component, make sure the INPUT MODE is set to ANALOG 2CH FIXED (see page...
.... • Use a 75-ohm coaxial cable (not supplied) to connect the receiver to AUTO 2CH. If you want does not appear.* • Contact the radio station and find out whether or not they are weak. • Make sure you select the correct function on DOLBY DIGITAL RF hookups, see the operating instructions supplied with your TV away from a digital component, make sure the INPUT MODE is set to ANALOG 2CH FIXED (see page...


